The languages shown on this page are determined by your Markets configuration. If you don’t see any locales listed, you’ll need to set up additional markets first. See Settings → Markets for more details.
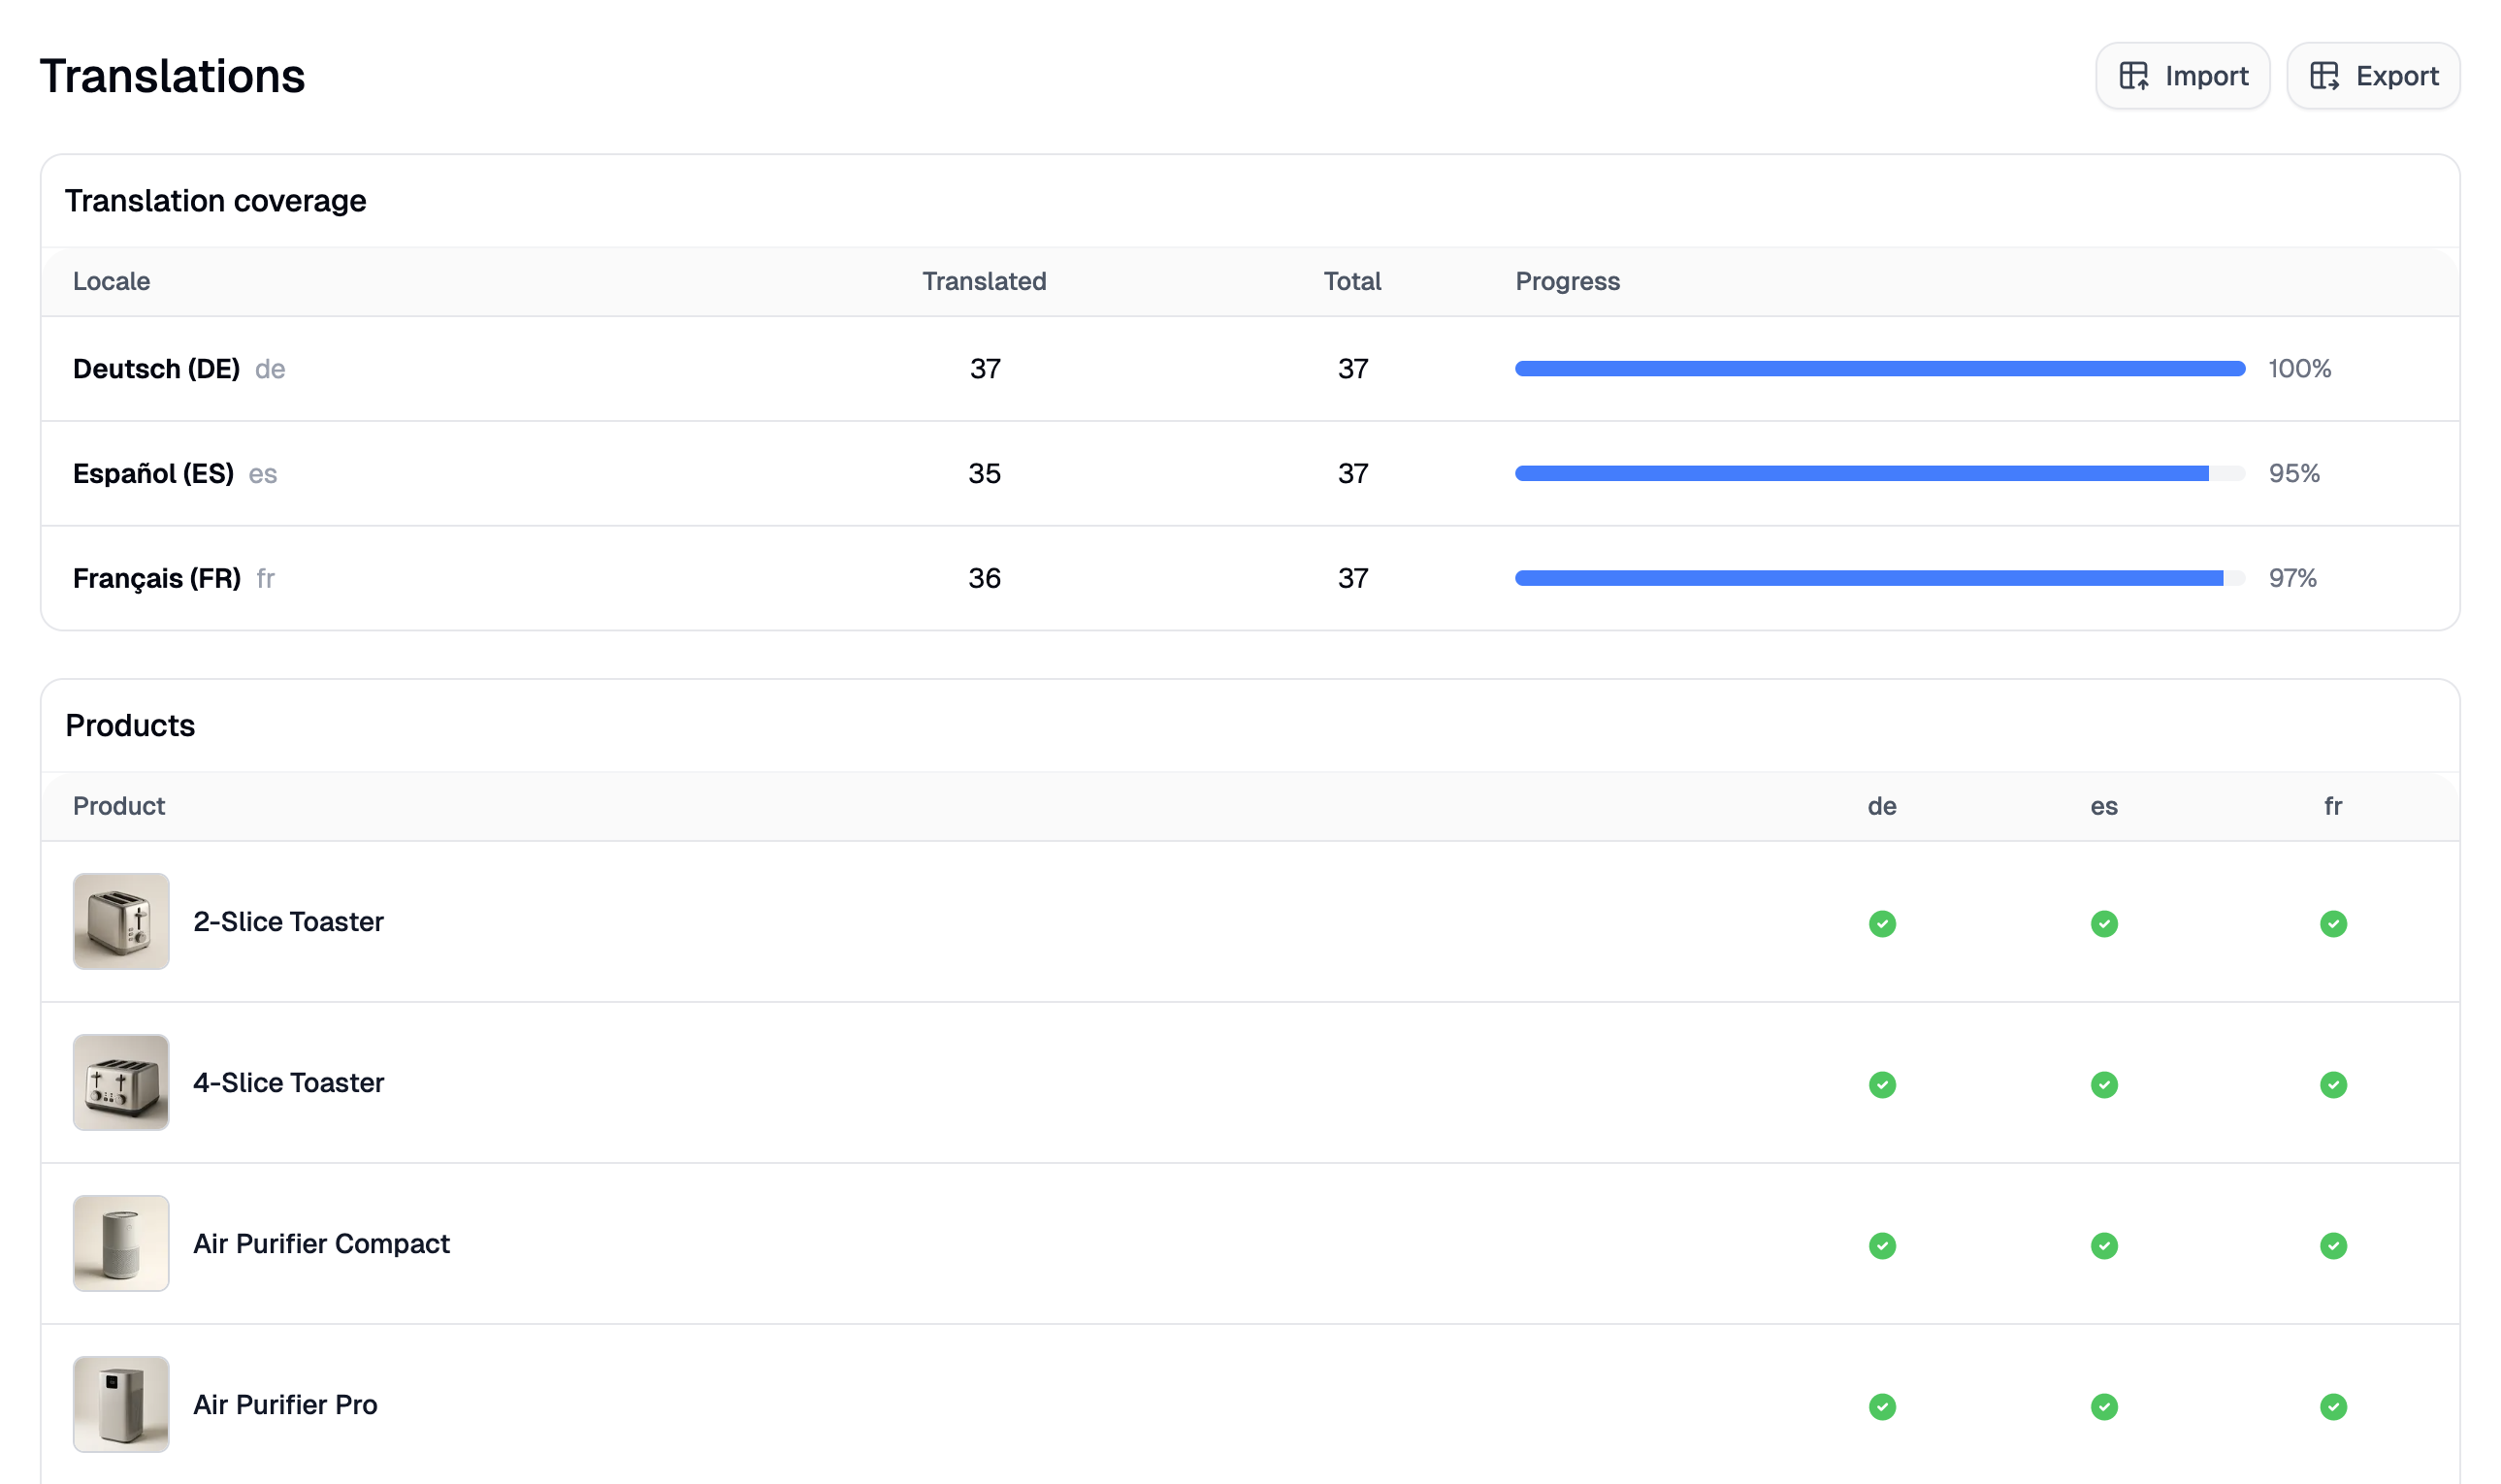
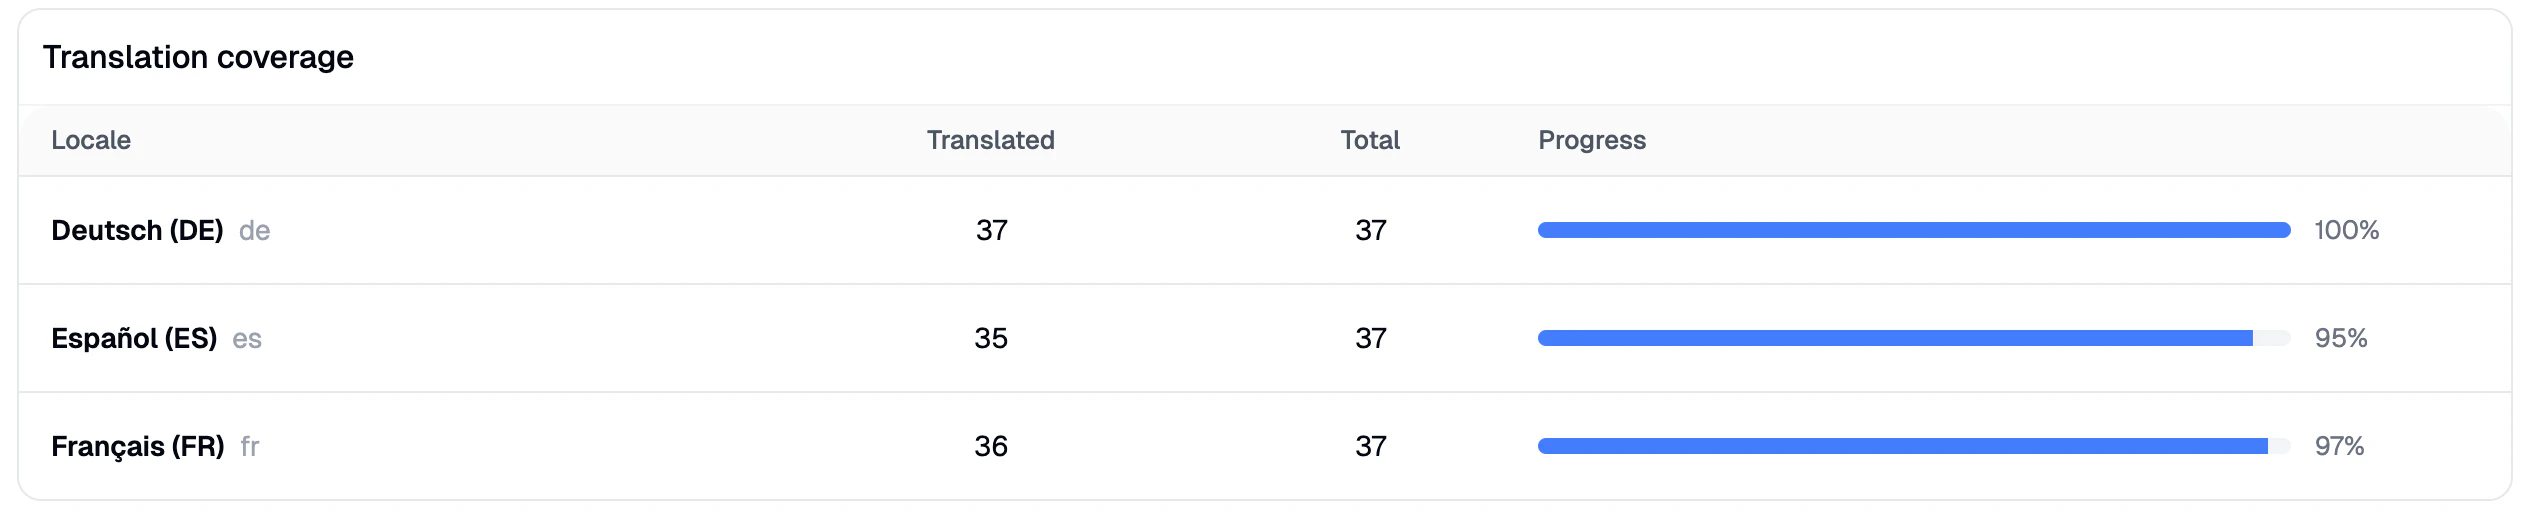
Translation Coverage
At the top of the page, you’ll see a coverage summary table with one row per locale your store supports (excluding your default language). Each row shows:- Locale - The language code (e.g.,
fr,de,es) - Translated - How many products have a translation for that locale
- Total - The total number of products in your catalog
- Coverage - The percentage translated, shown as both a number and a visual progress bar
Product Translation Status
Below the coverage table, you’ll see a paginated list of all your products. Each product has a column for every configured locale, showing either a checkmark (✓) if a translation exists or a dash (—) if it’s missing.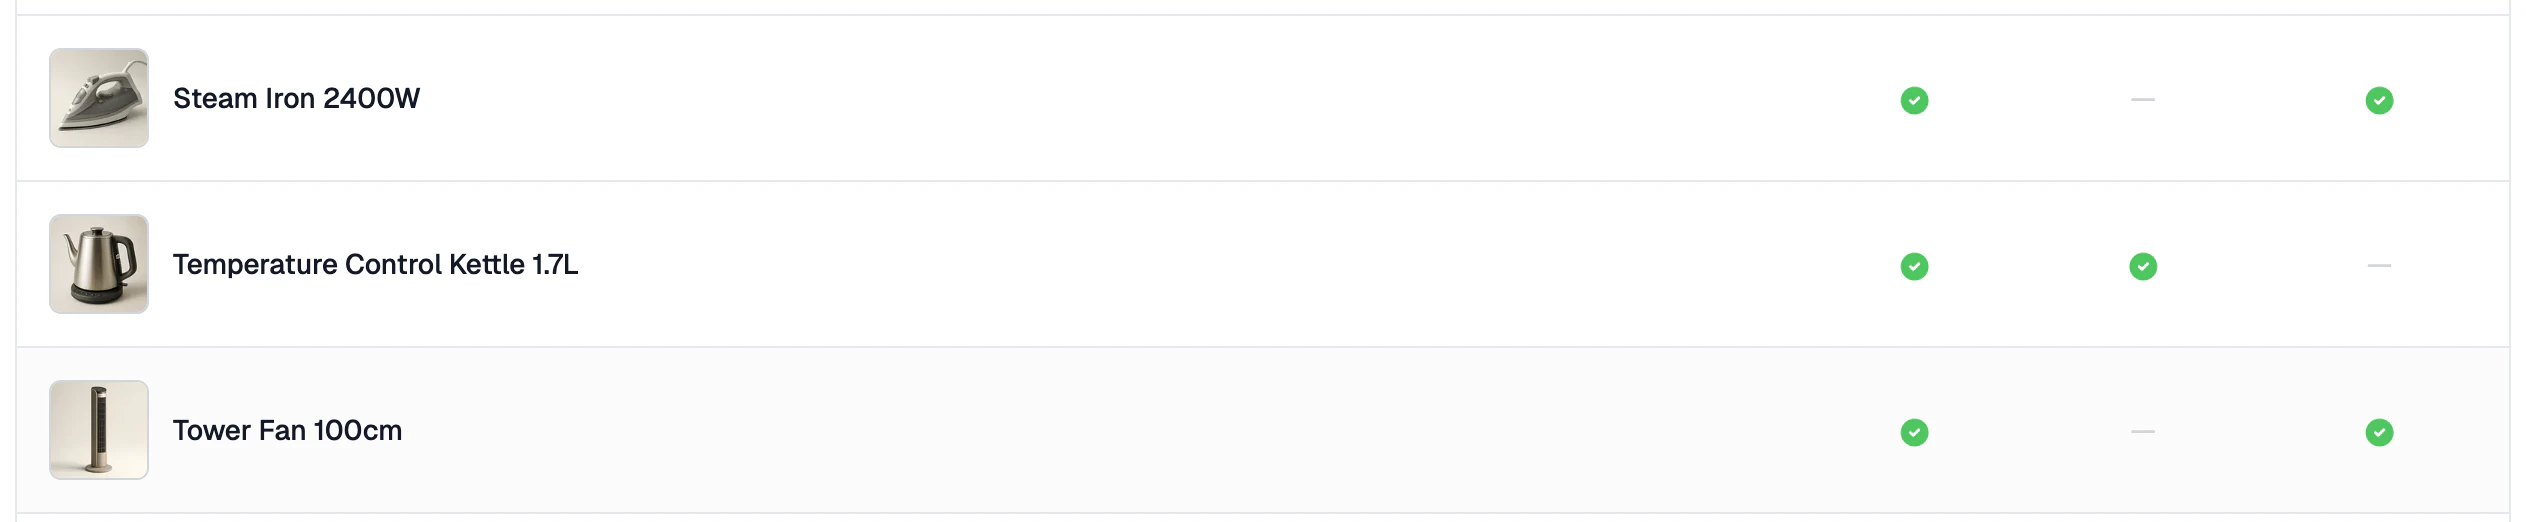
Bulk Export Translations
If you prefer to manage translations in a spreadsheet, you can export your entire translation dataset as a CSV file. Click Export in the top-right corner of the page.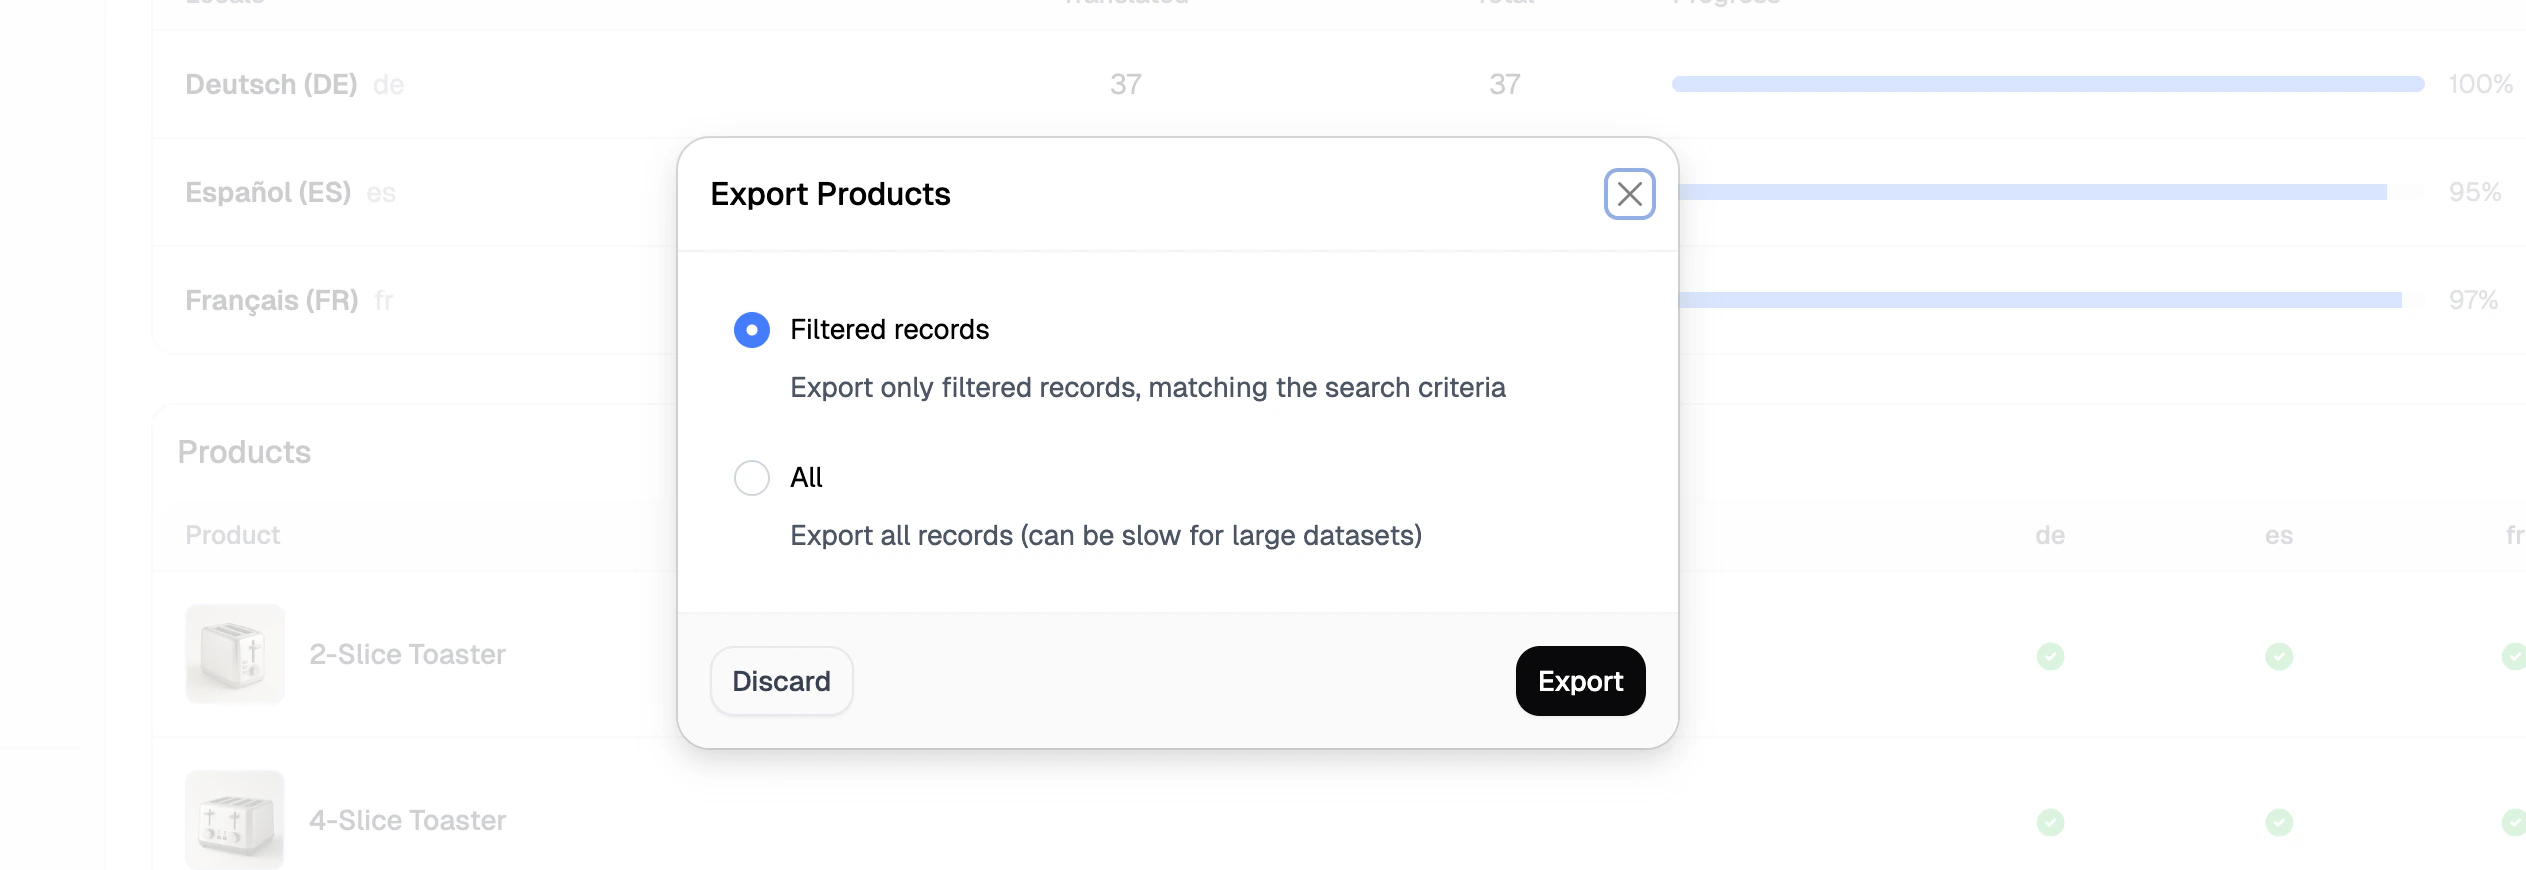
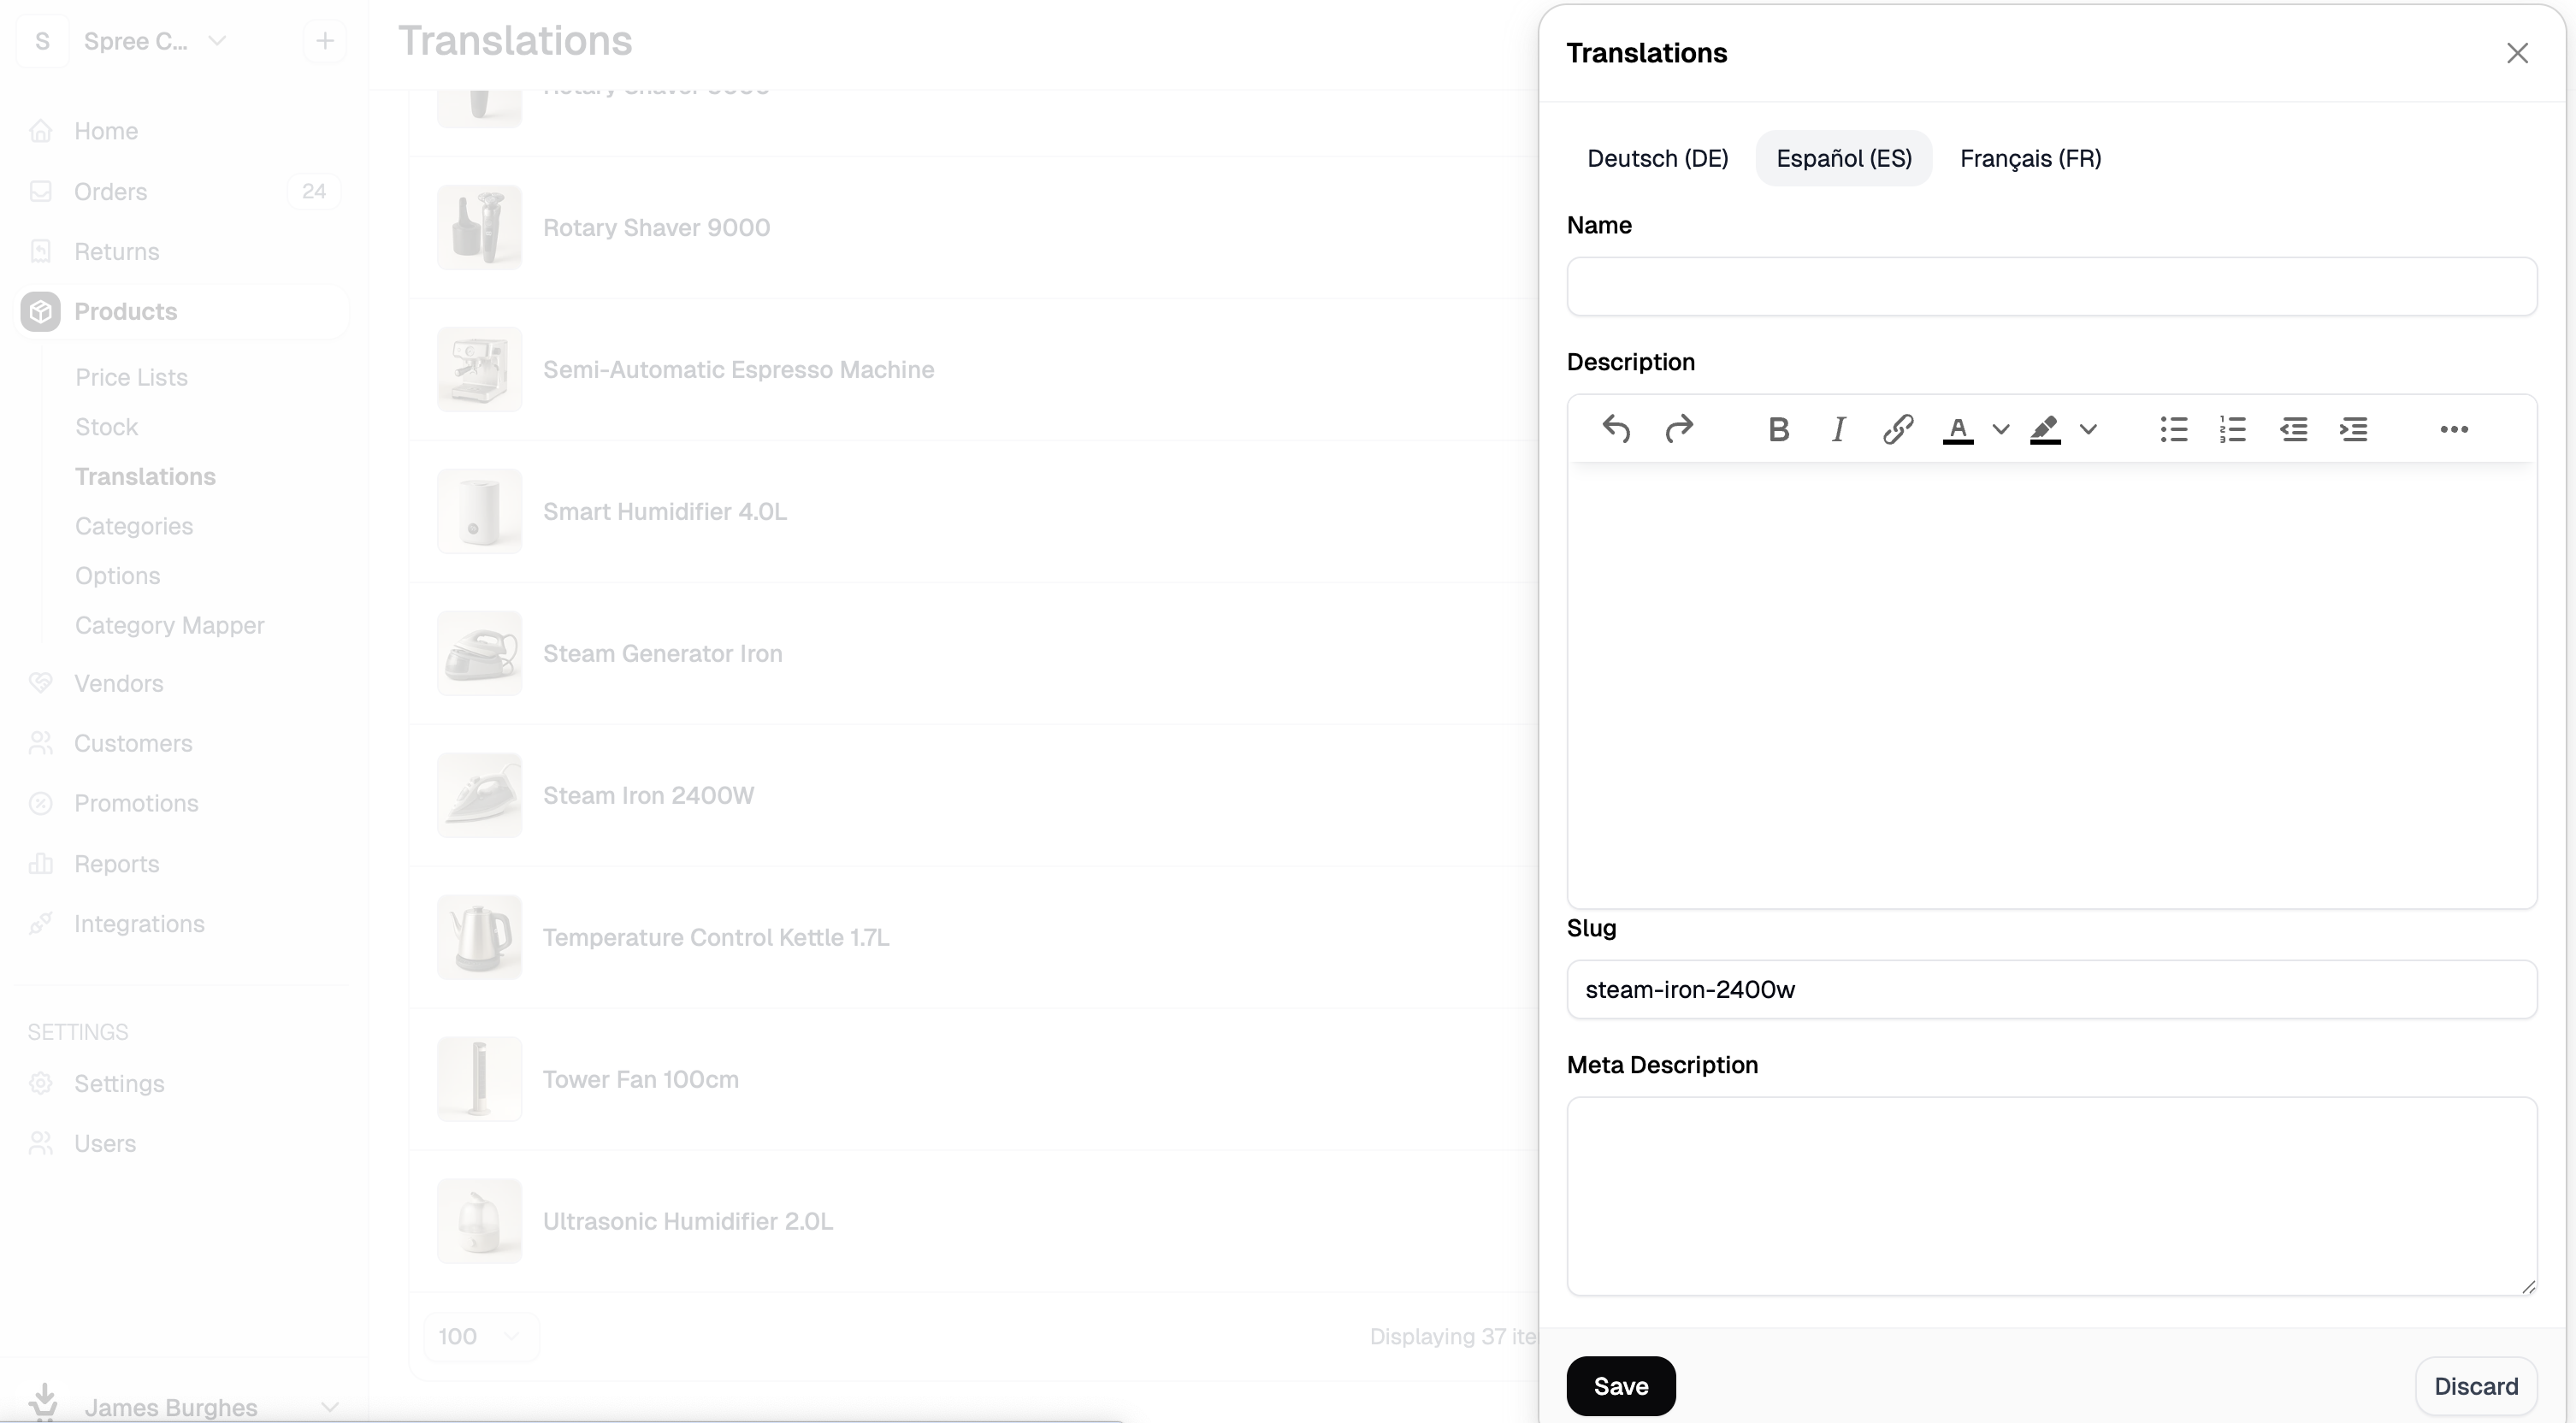
Bulk Import Translations
Once you’ve updated your translations in the exported file (or built a new file from scratch), you can import them back in bulk. Click Import in the top-right corner of the page. This opens the import side panel.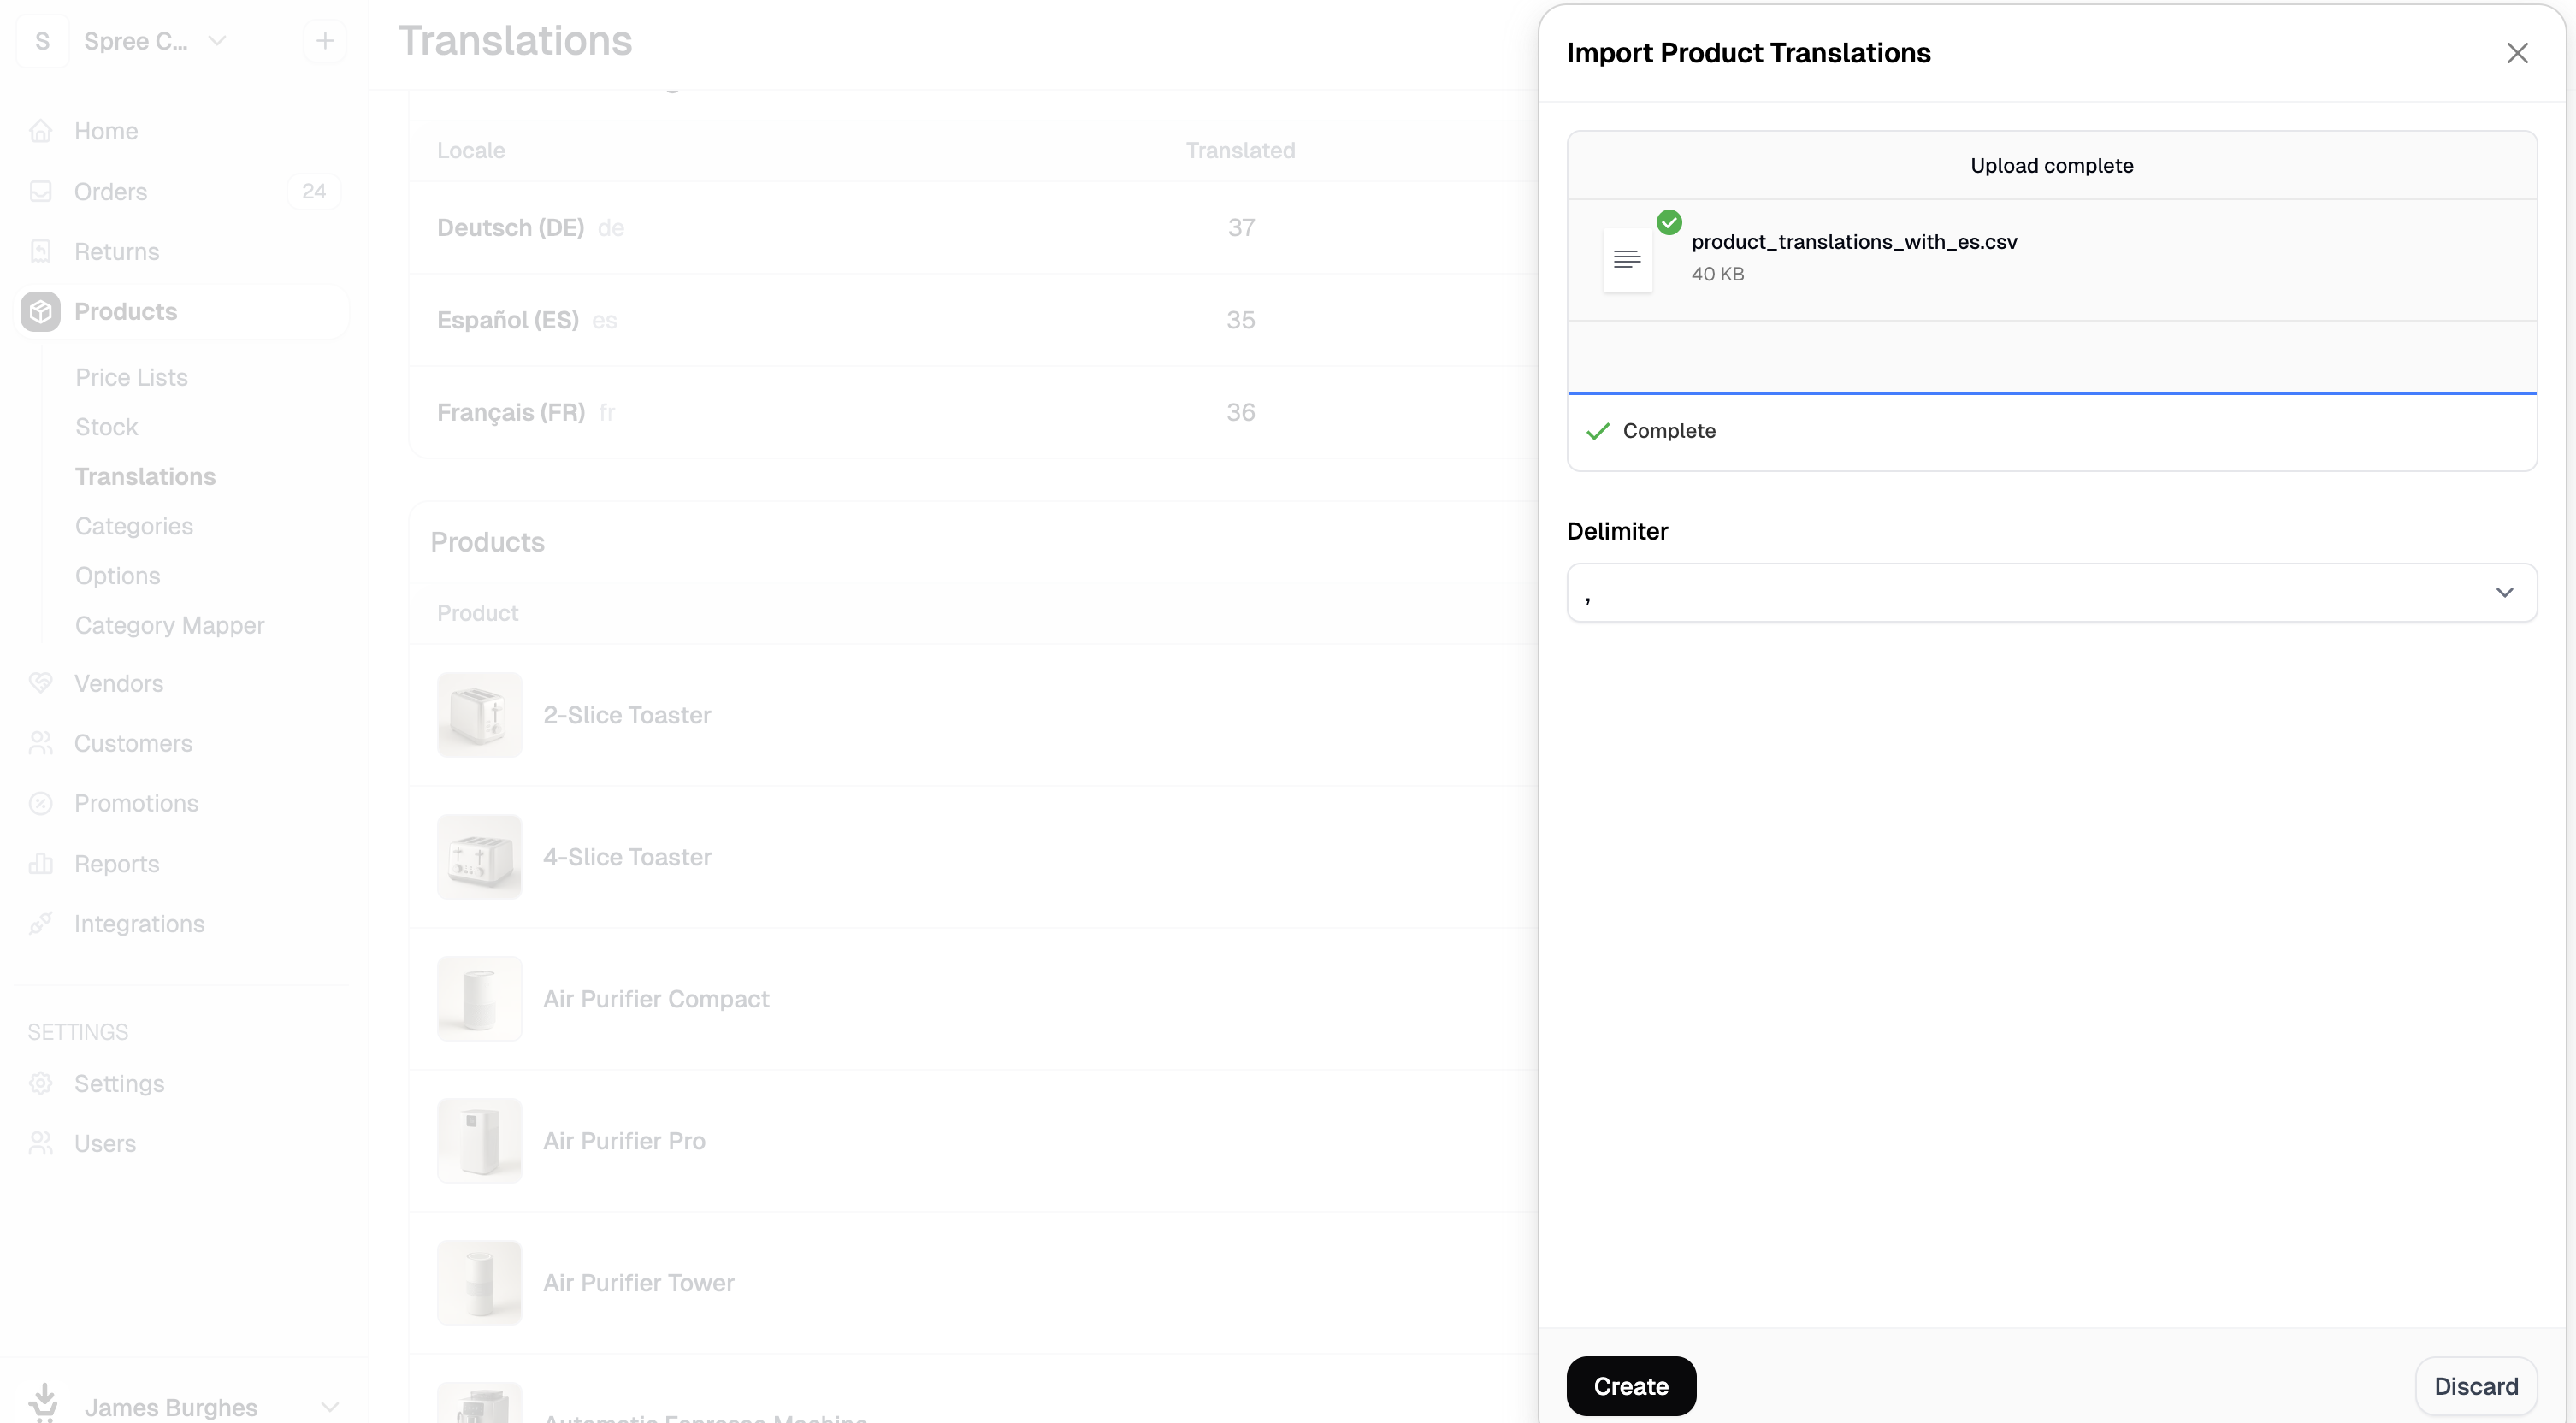
- Drag and drop your CSV file into the upload area, or click browse files to select it from your computer.
- Select the correct delimiter used in your file (comma, pipe, semicolon, or tab).
- Click Create to proceed to the field mapping step.
- Review the field mapping and adjust any columns that weren’t matched automatically, then click Continue to submit.
The translation import uses the same importer infrastructure as the product importer. If you’re familiar with importing products, the process will feel very similar.
Next Steps
- Settings → Markets — Configure which languages and locales your store supports
- Import Products — Learn how to bulk import product data
- Export Products — Learn how to export your product catalog