Zones Overview
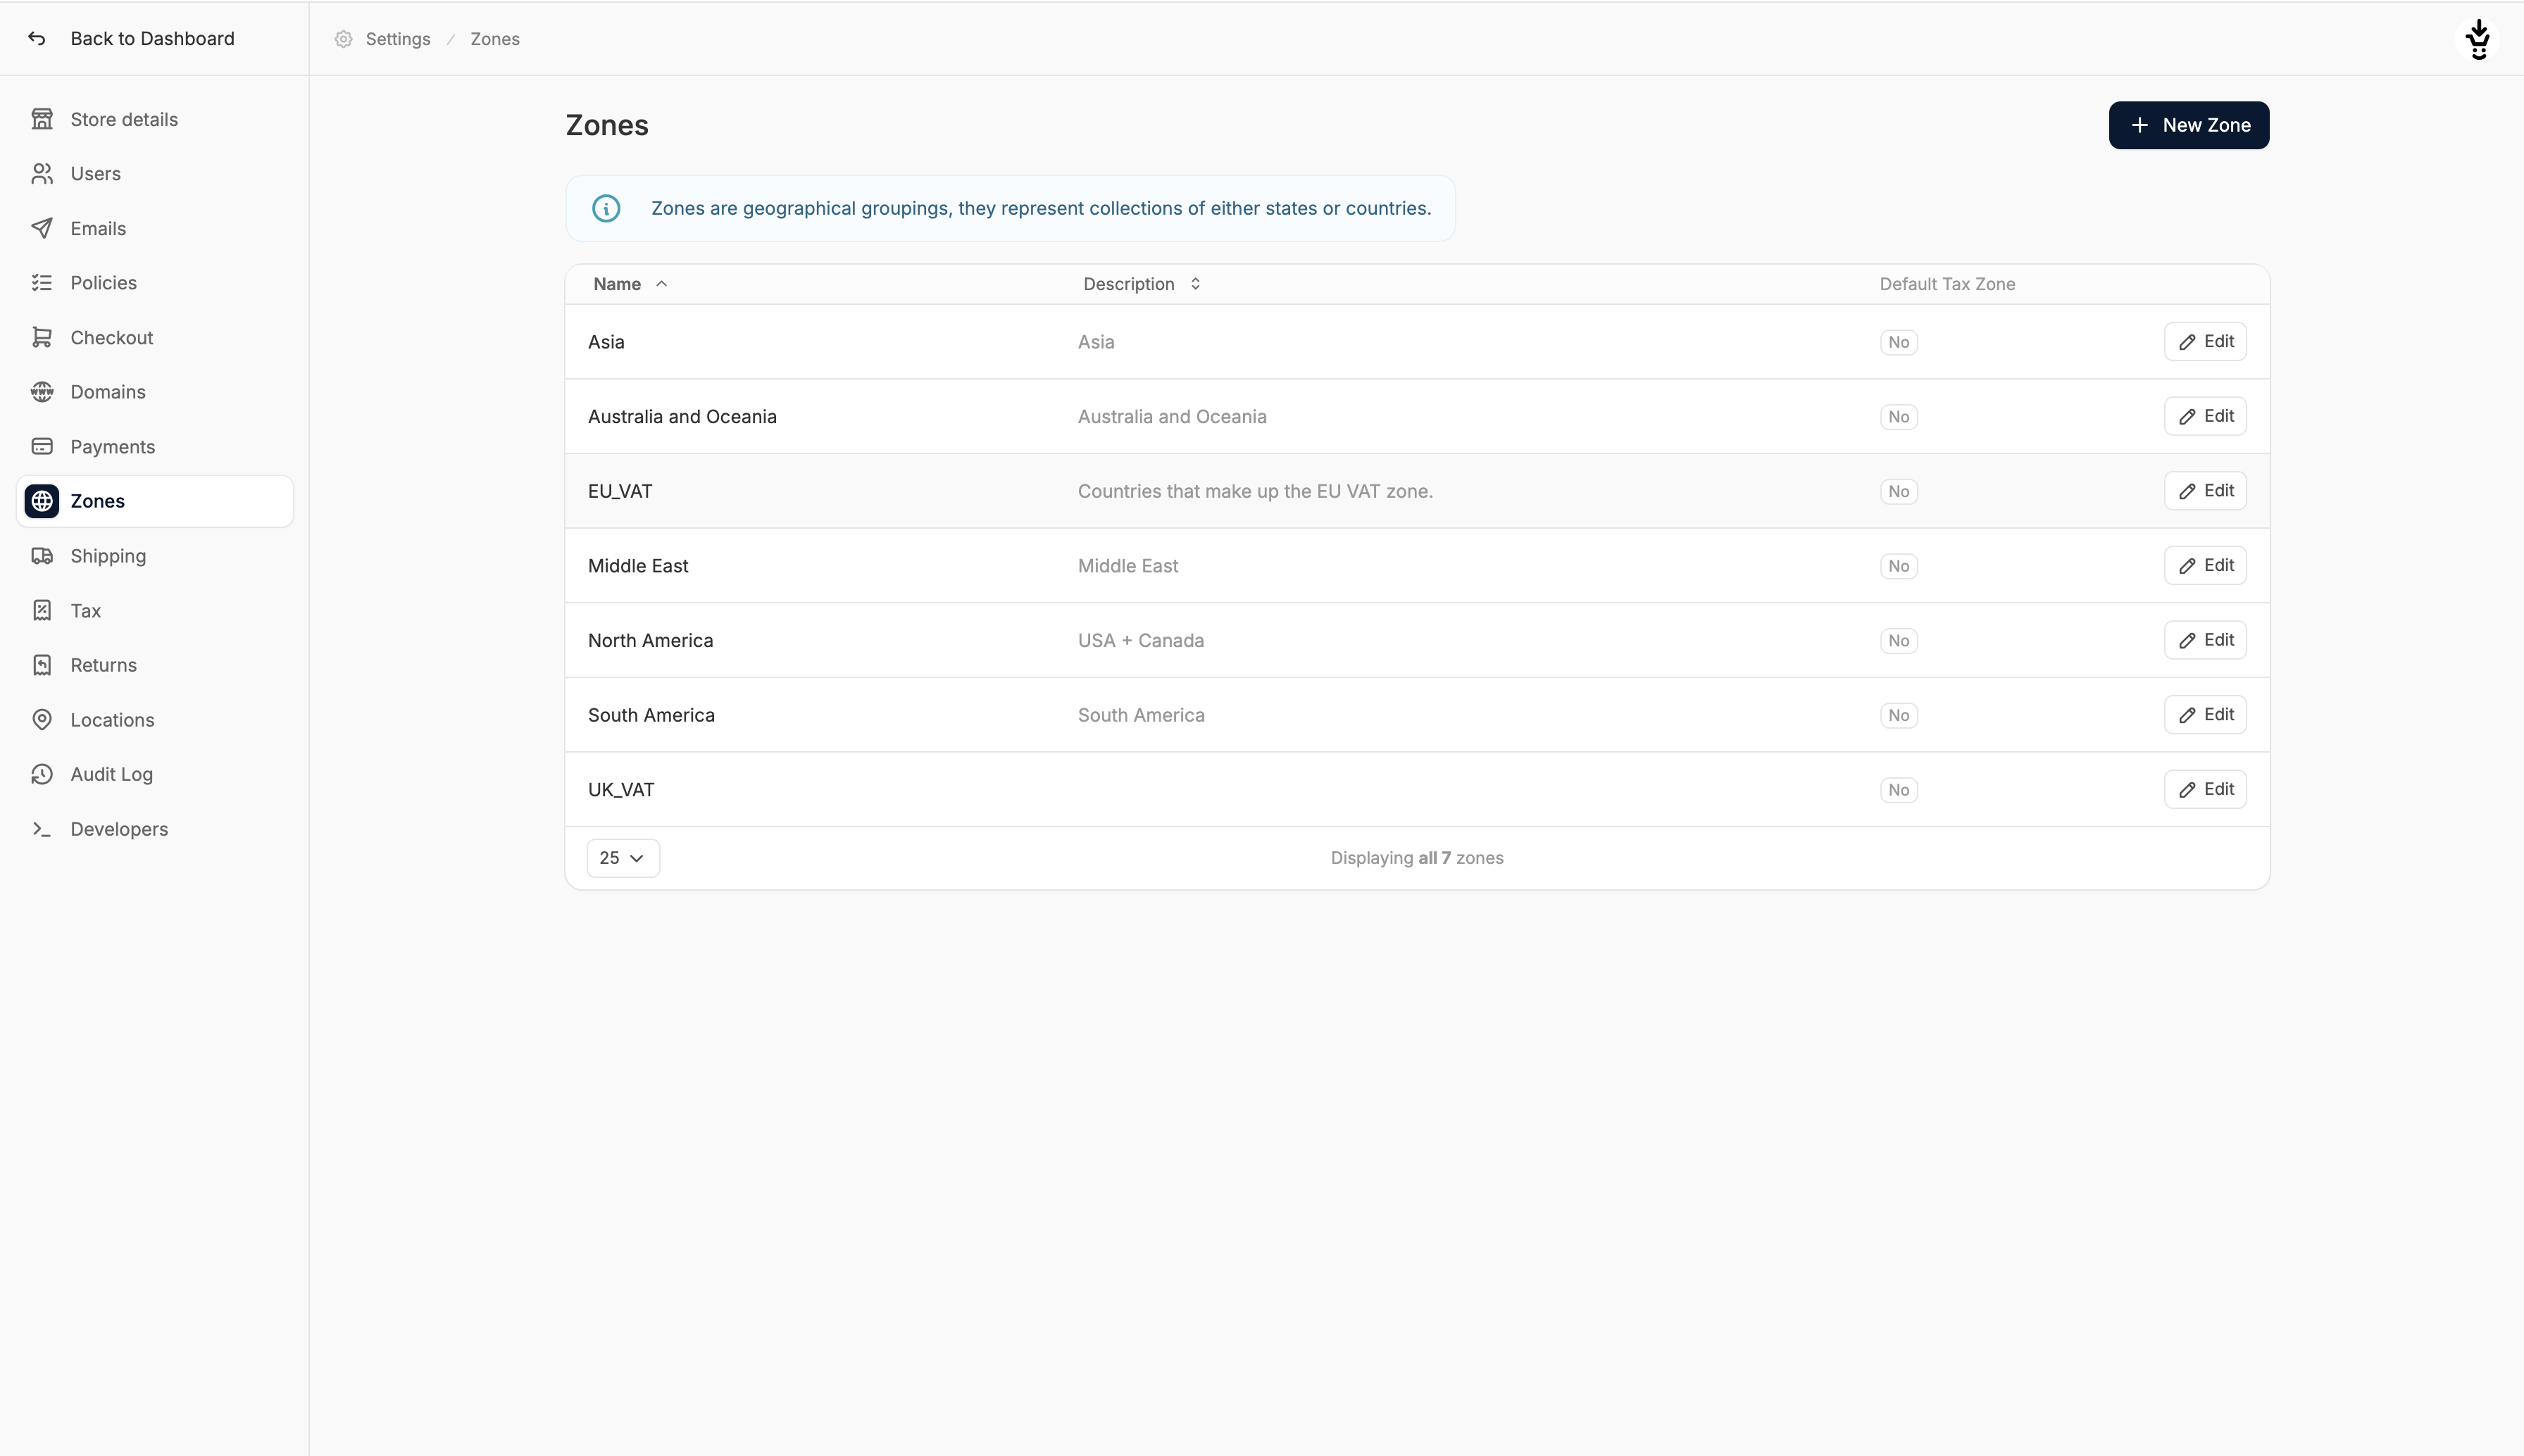
- Name (e.g., “Asia”, “US States”, etc.)
- Description (e.g., Countries that make up the EU VAT zone)
- Default Tax Zone (Yes/No)
- Add a new zone
- Edit existing zones
Add a New Zone
To add a new zone, click ‘New Zone’ in the top right corner, and you’ll be directed to a zone creation form.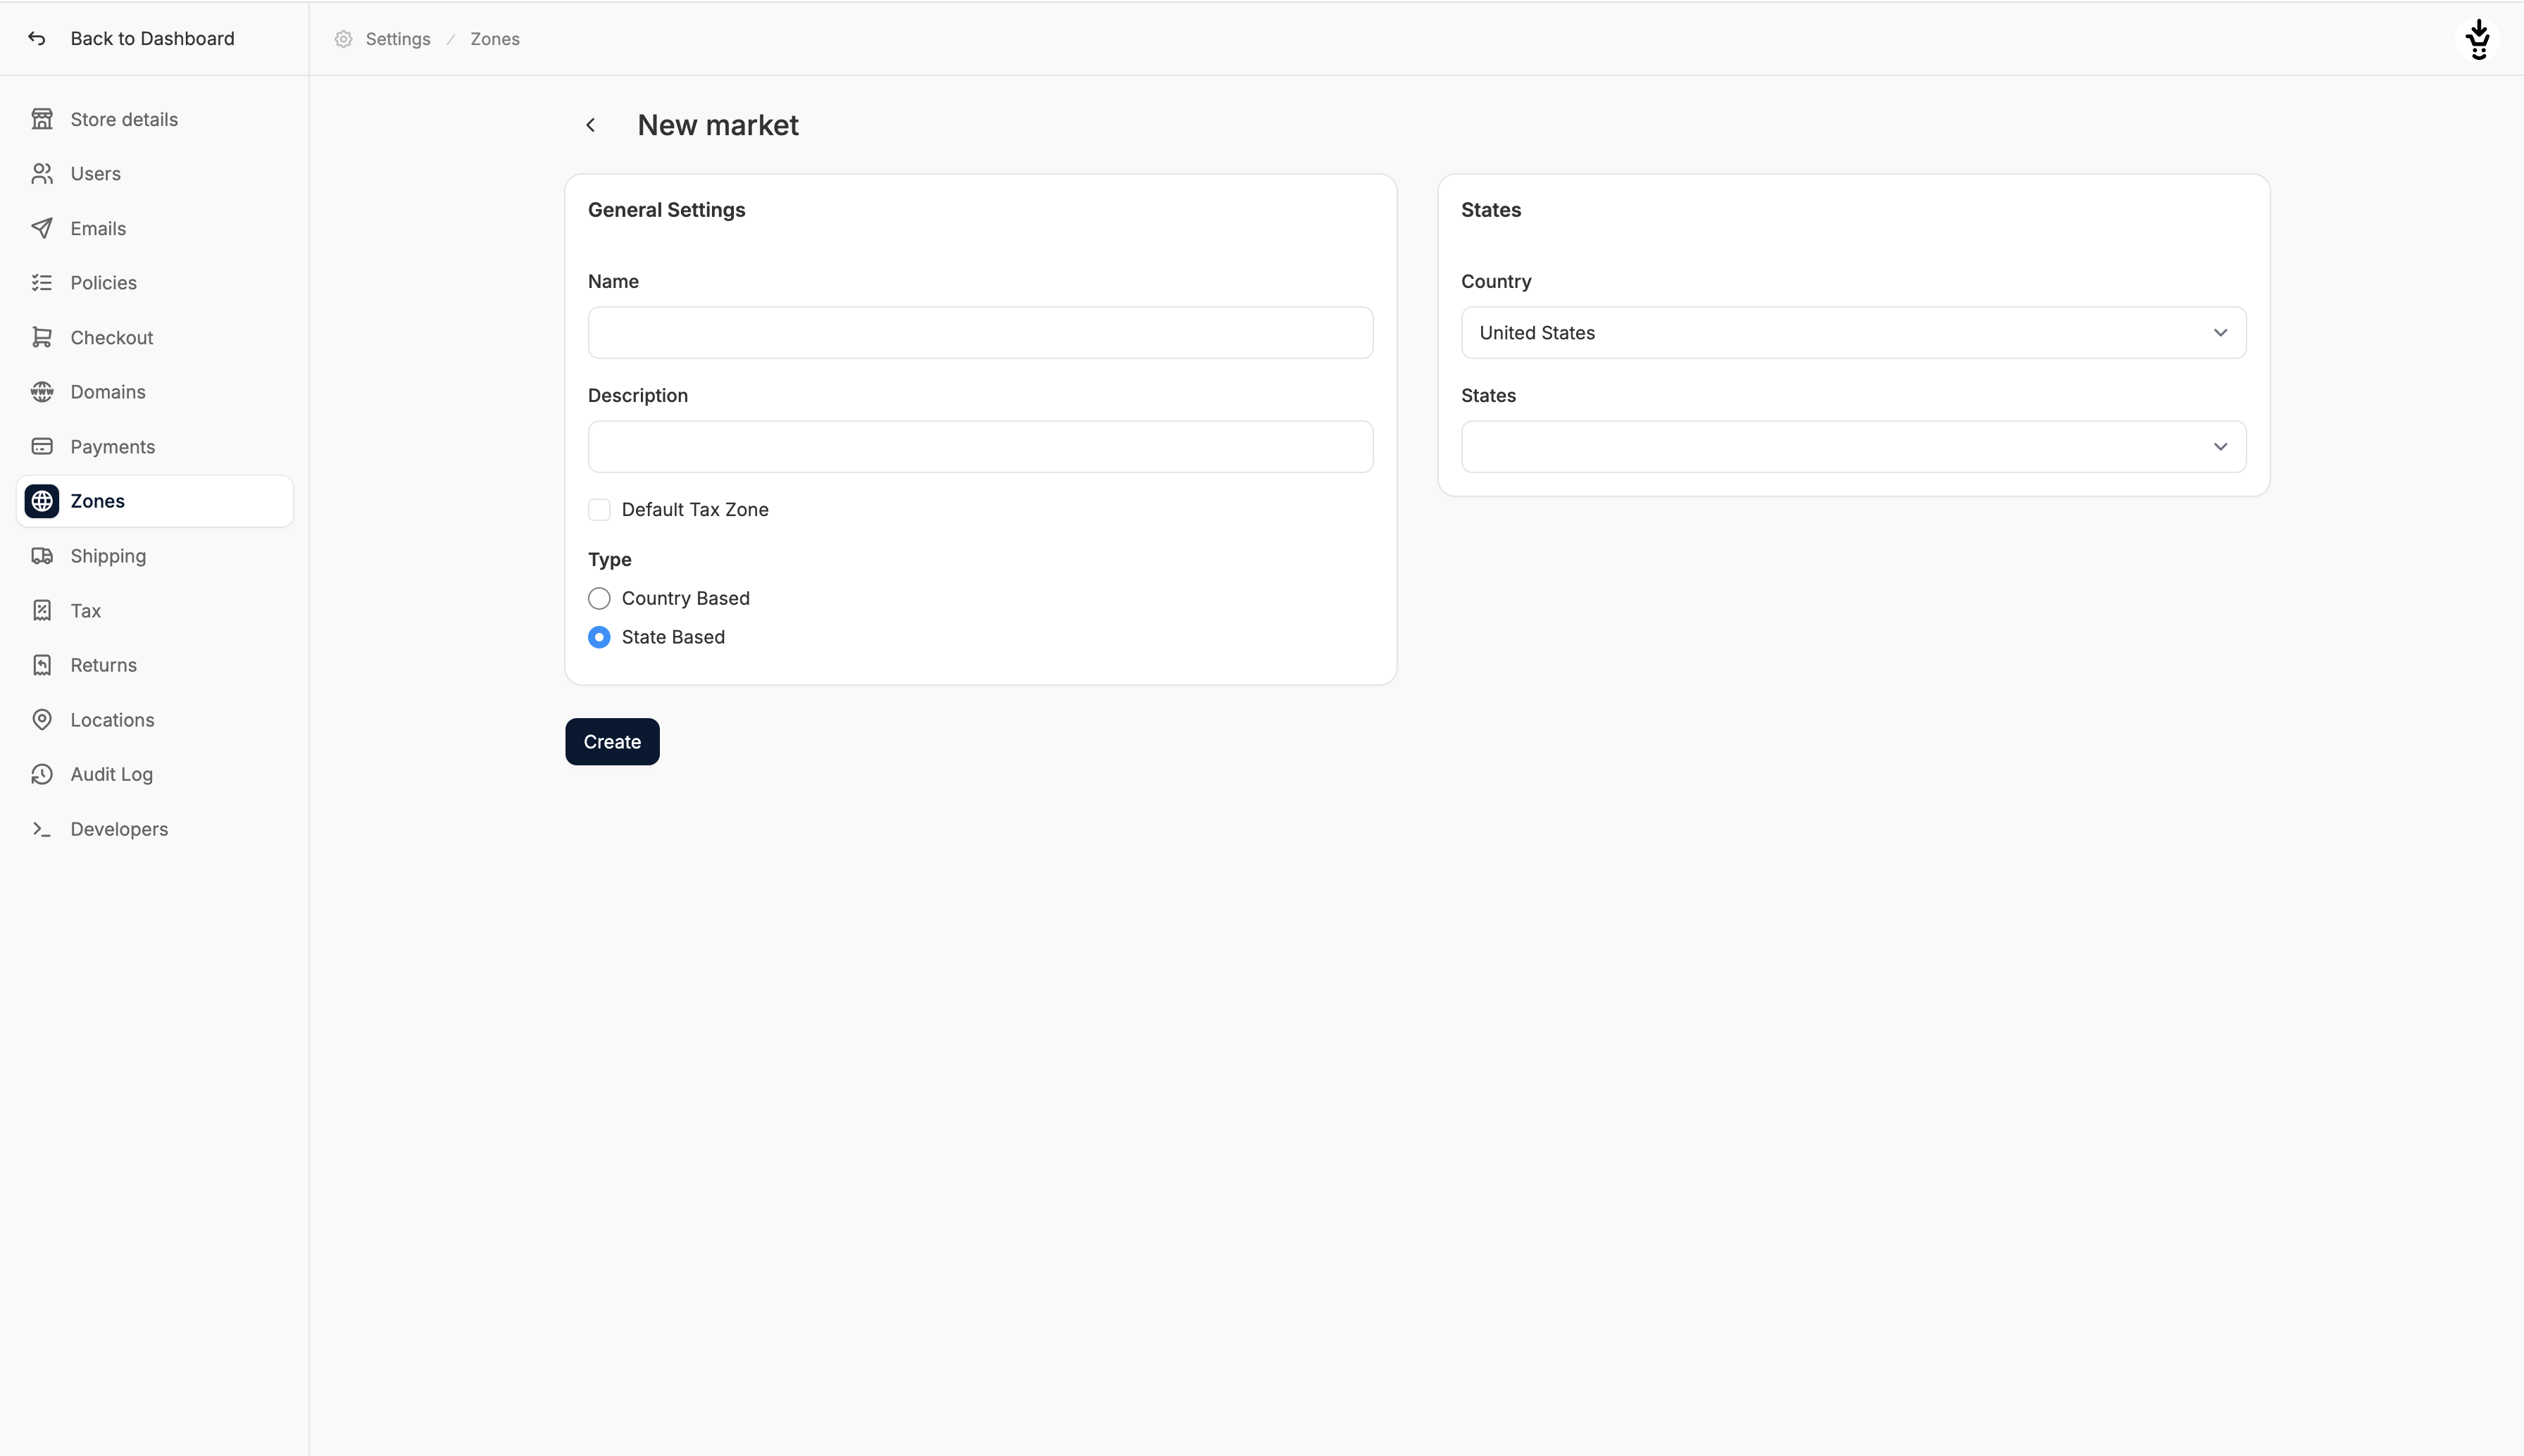
General Settings
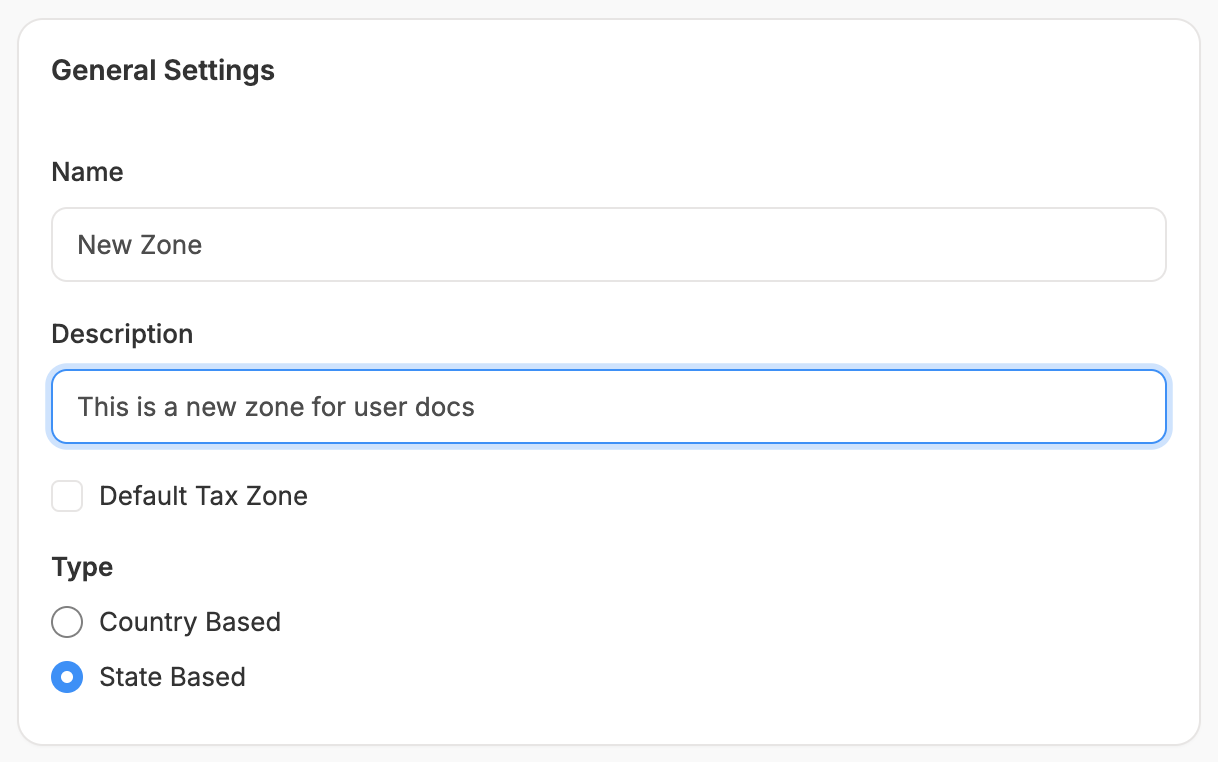
- Name: Internal name of the zone (e.g., “US States”, “Europe”, “Asia”)
- Description: Optional, used for internal clarification
- Default Tax Zone: Toggle if this should be the fallback zone for tax rules
- Type: Choose between Country-based or State-based
Location Selection
This section differs based on the chosen Type:Country-Based
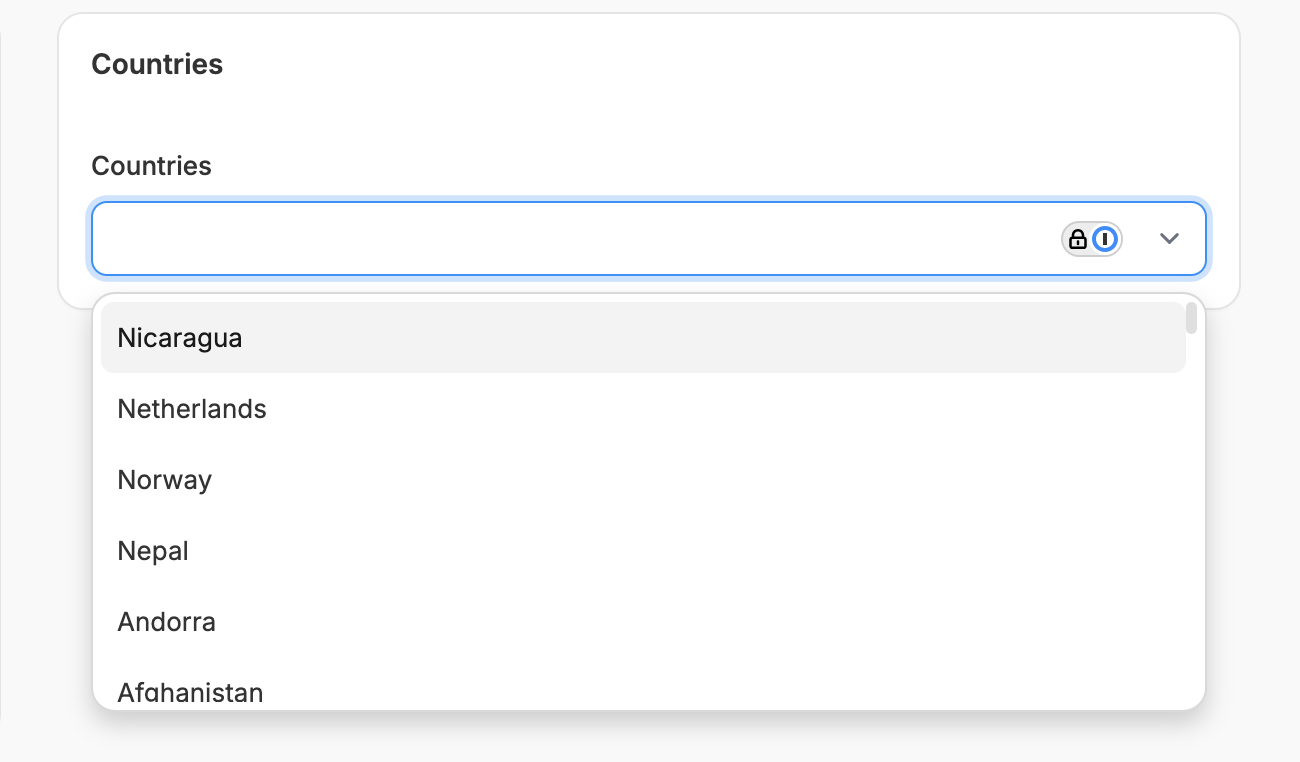
- United States
- Japan
- Poland
- etc.
State-Based
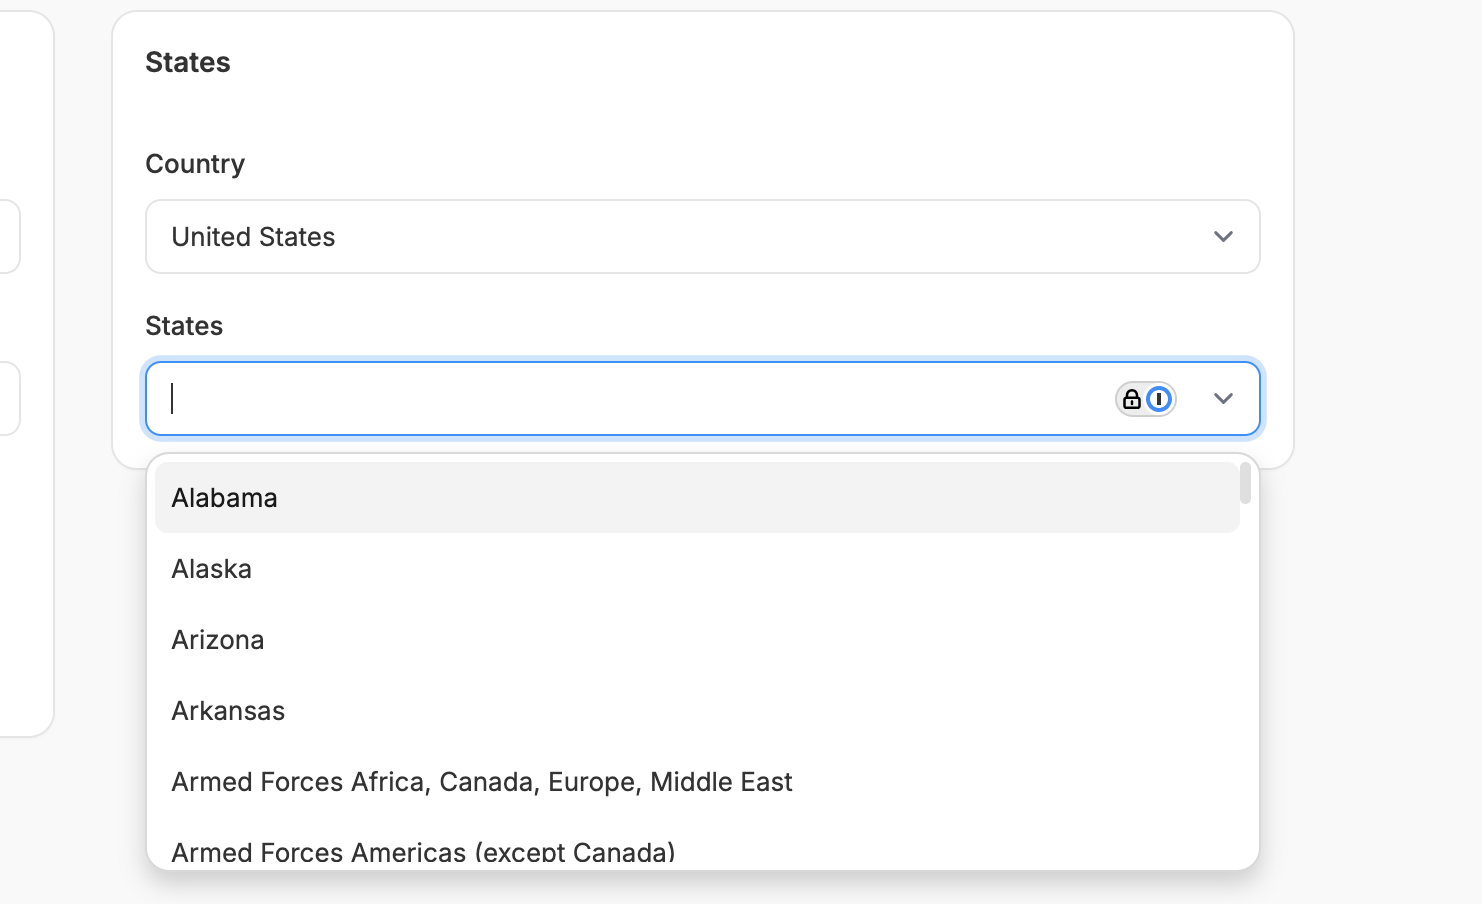
- California
- Texas
- New York
- Armed Forces (Africa, Americas, Pacific)
- etc.
You can add multiple states or countries to each zone depending on your needs.
Edit a Zone
To edit a zone, simply click on the zone’s row in the Zones overview.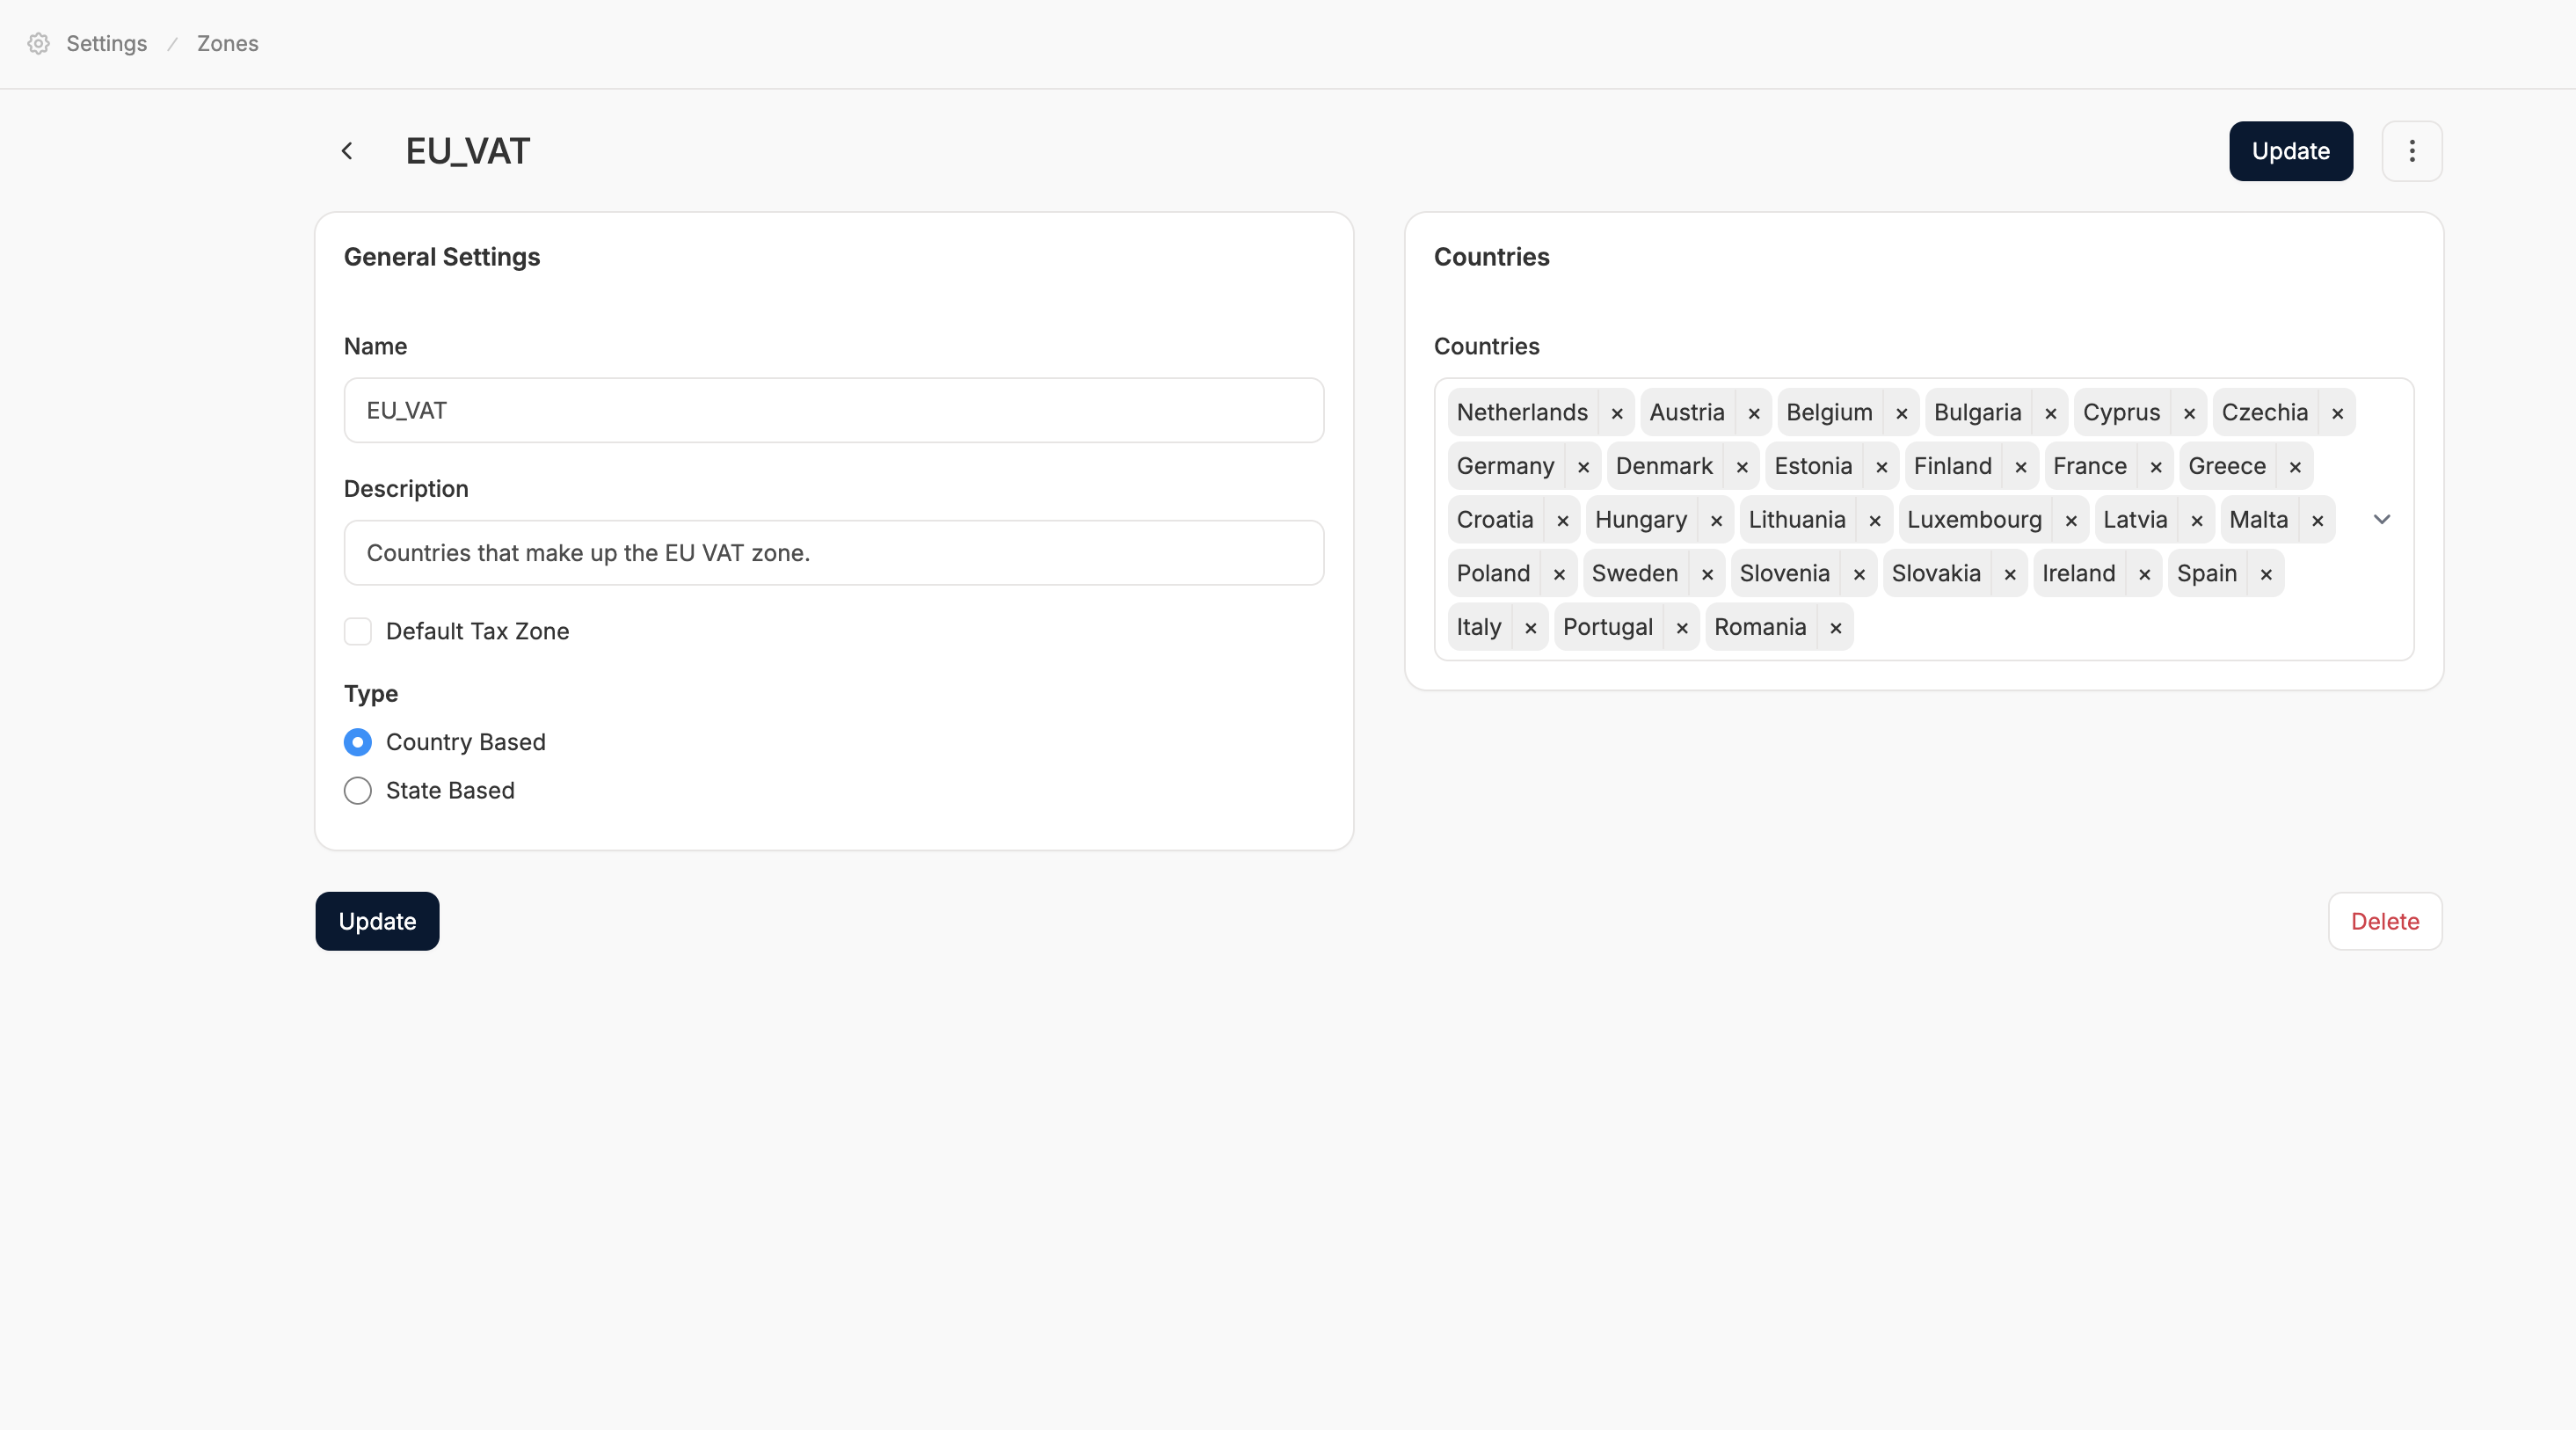
- Update the name and description
- Change the type (Warning: switching types will reset the current selections, this is irreversible)
- Add/remove Countries or States
- Toggle default tax zone as needed
Delete a Zone
To delete a zone, simply navigate to the editor for the zone you wish to delete, and click the ‘Delete’ button on the lower righthand side.Saving Changes
After making any updates (besides after deleting a zone), make sure to click Create or Update at the bottom of the page to save your zone settings, otherwise any changes you’ve made will not be saved.Pro Tips
- Use state-based zones when you need tax/shipping rules for specific U.S. states.
- Use country-based zones for international markets or VAT jurisdictions.
- Only one zone can be the Default Tax Zone.