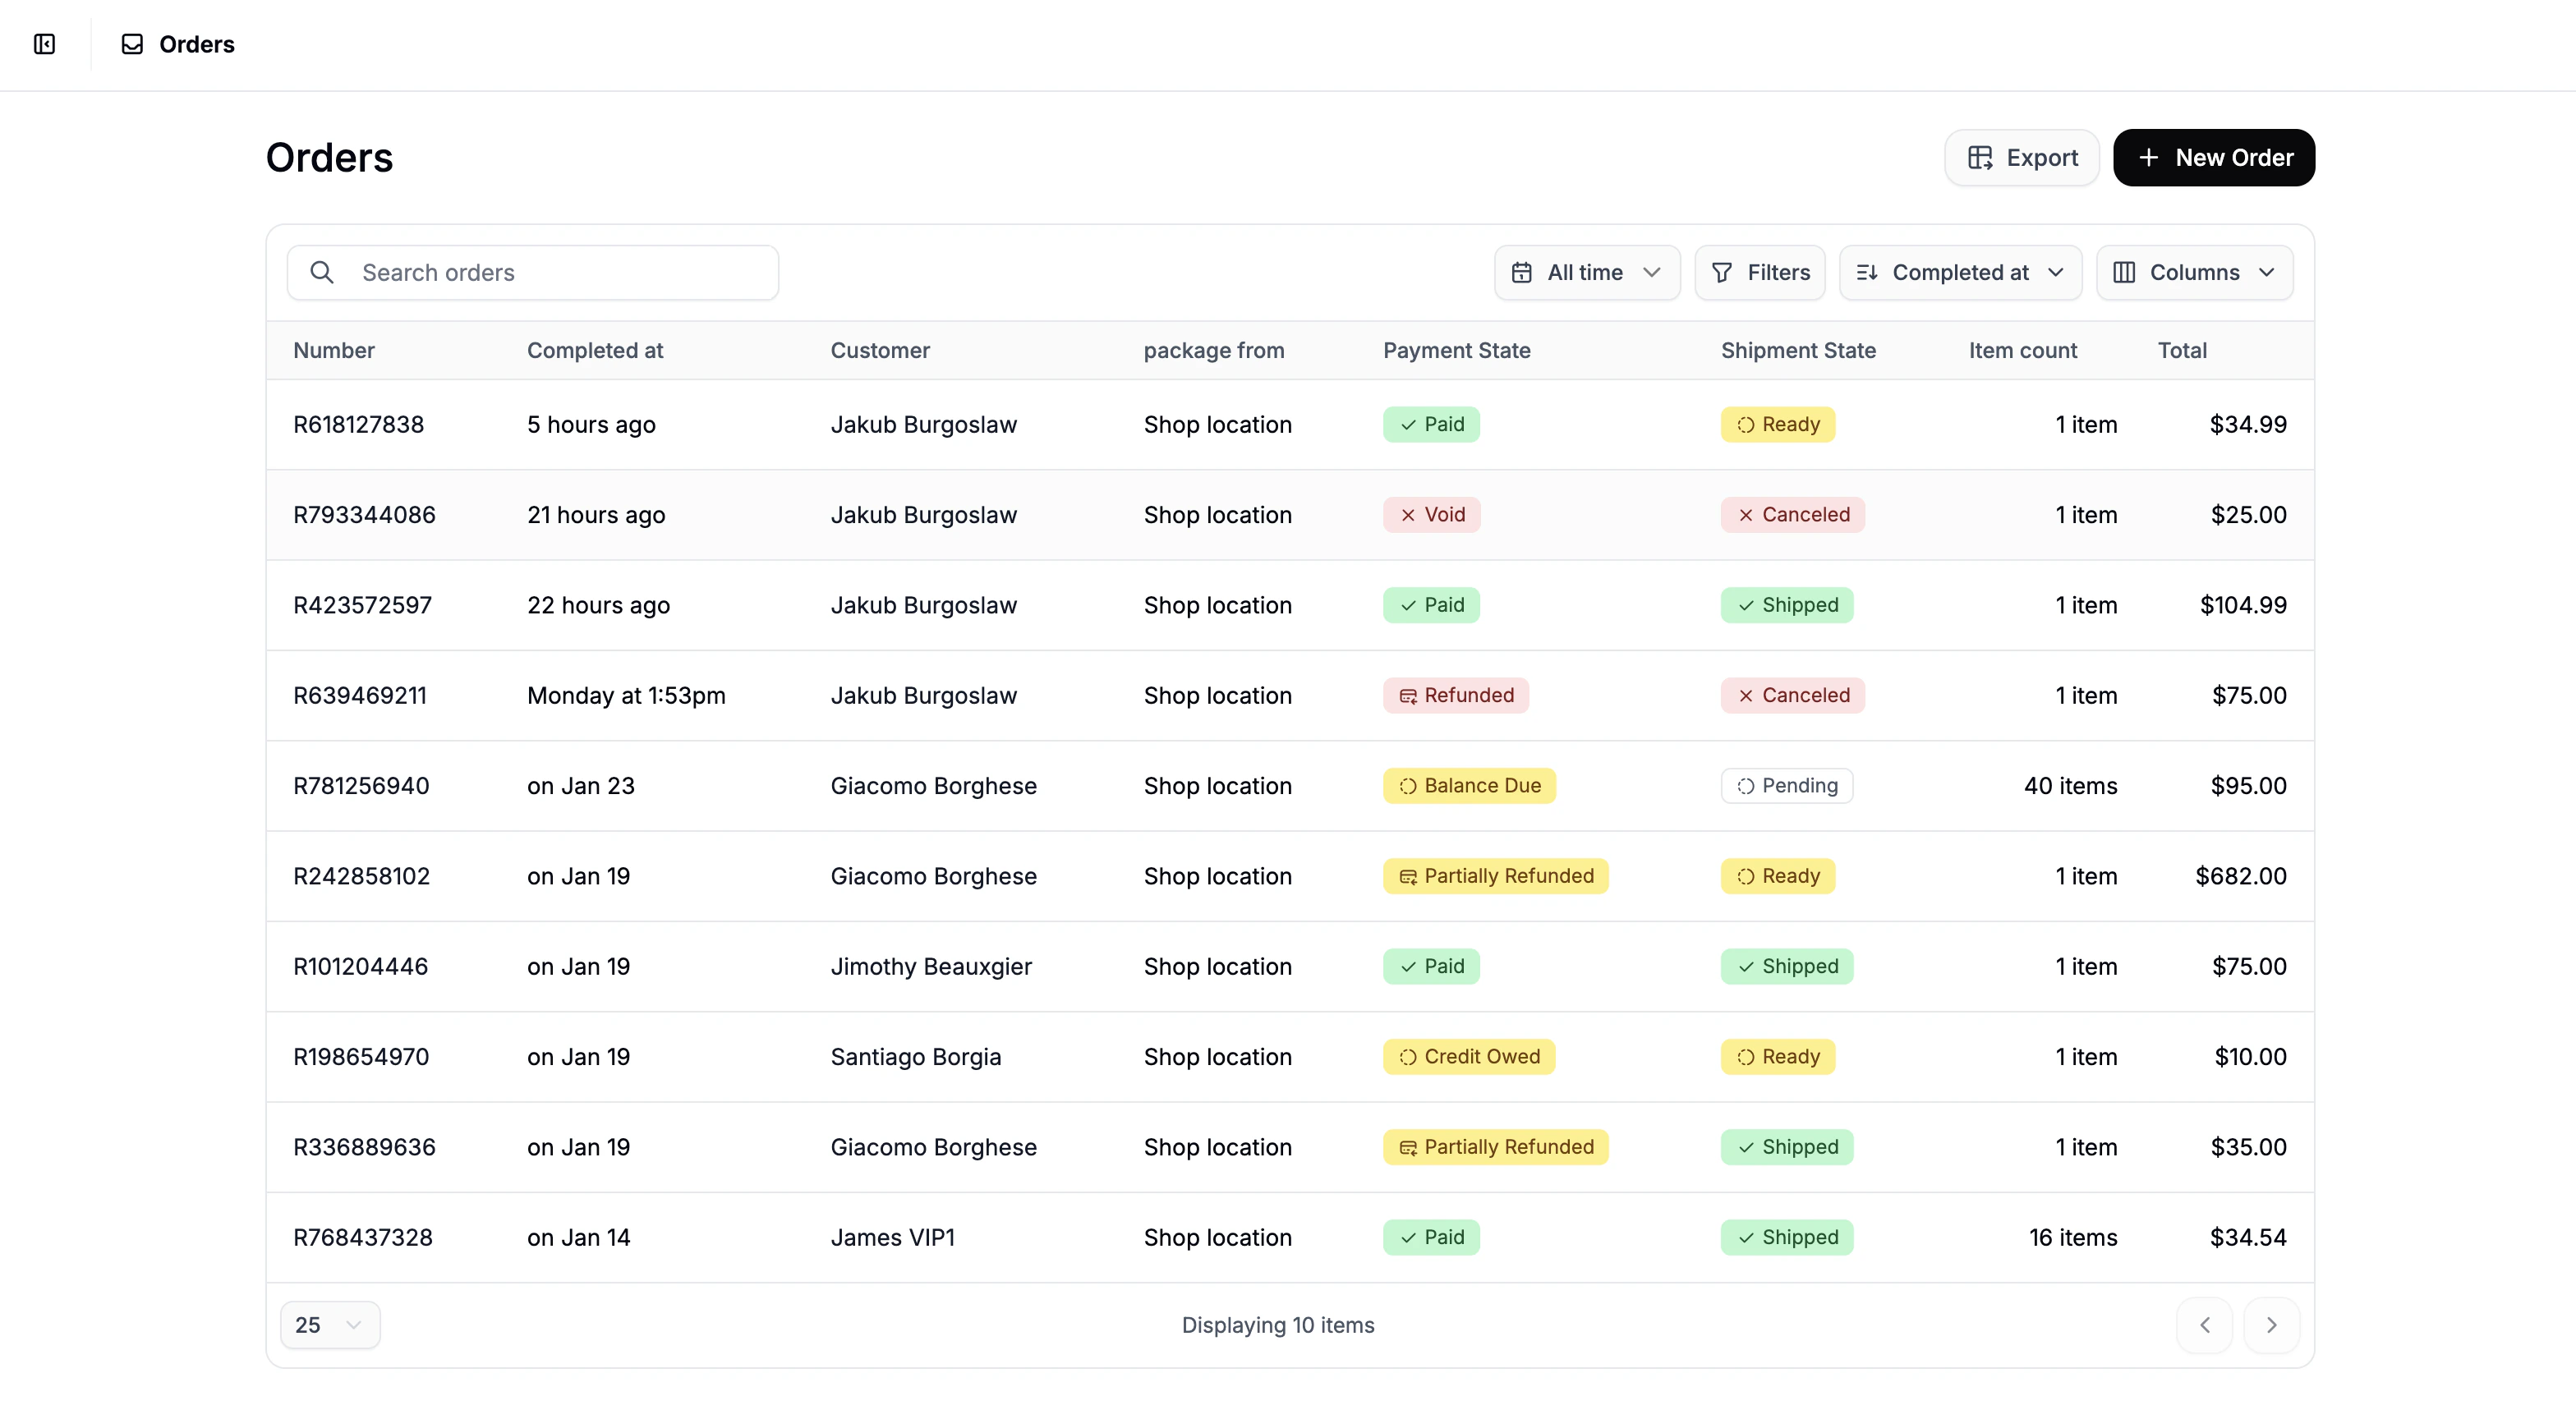
Depending on your business model, creating orders manually may be a common workflow - whether it’s to handle customer service scenarios, B2B orders, or backend sales operations. Follow this step by step guided flow that lets you build the order step by step.
1. Start a New Order
Navigate to the Orders tab in the admin dashboard and click New Order in the top-right corner.
 You’ll be redirected to a short order setup form where you must:
- Select Currency - choose the appropriate currency for the order
- Choose a Customer
- Select an existing customer
- OR enter a new customer’s email to create a customer record on the fly
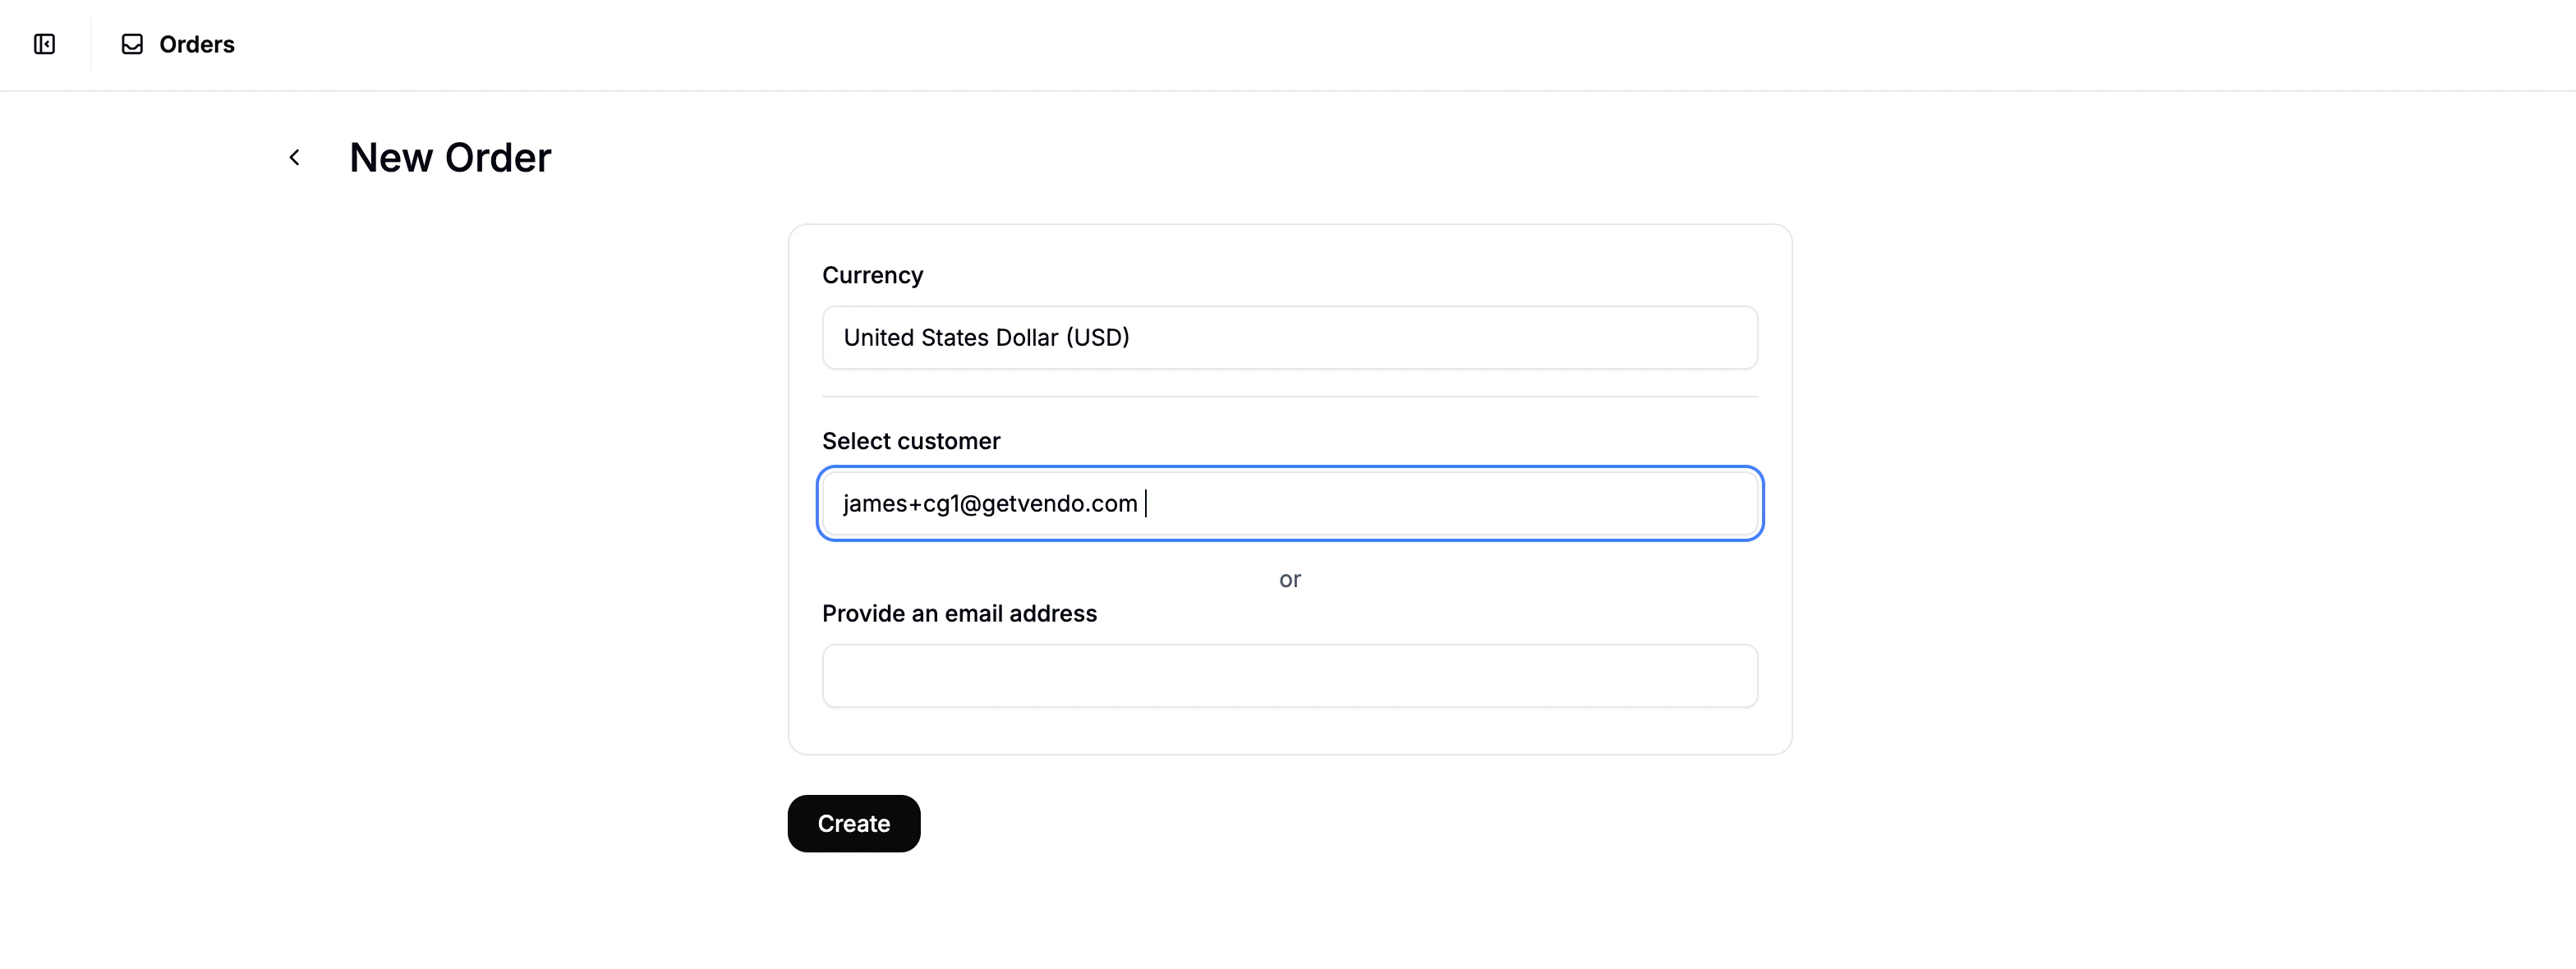 Once these details are filled in, click Create to continue.
2. Add Line Items
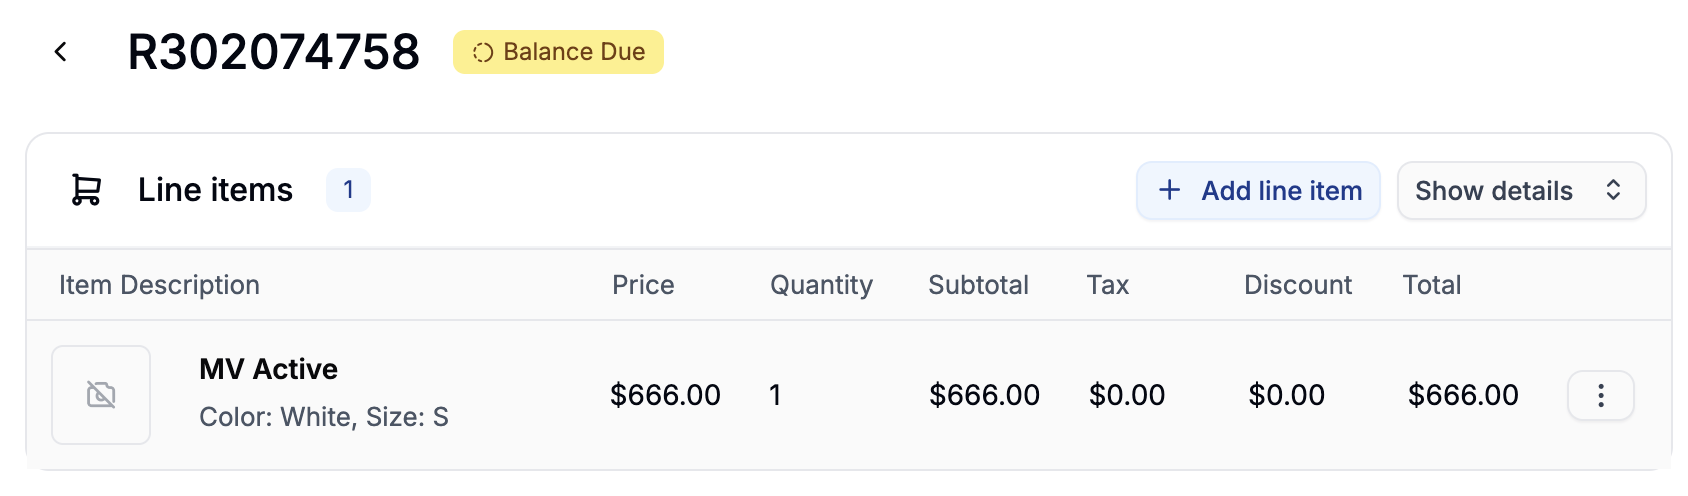 You’ll now land on the order editor, with the order in draft status.
Begin by clicking Add Line Item at the top of the page to add items to the order.
You’ll now land on the order editor, with the order in draft status.
Begin by clicking Add Line Item at the top of the page to add items to the order.
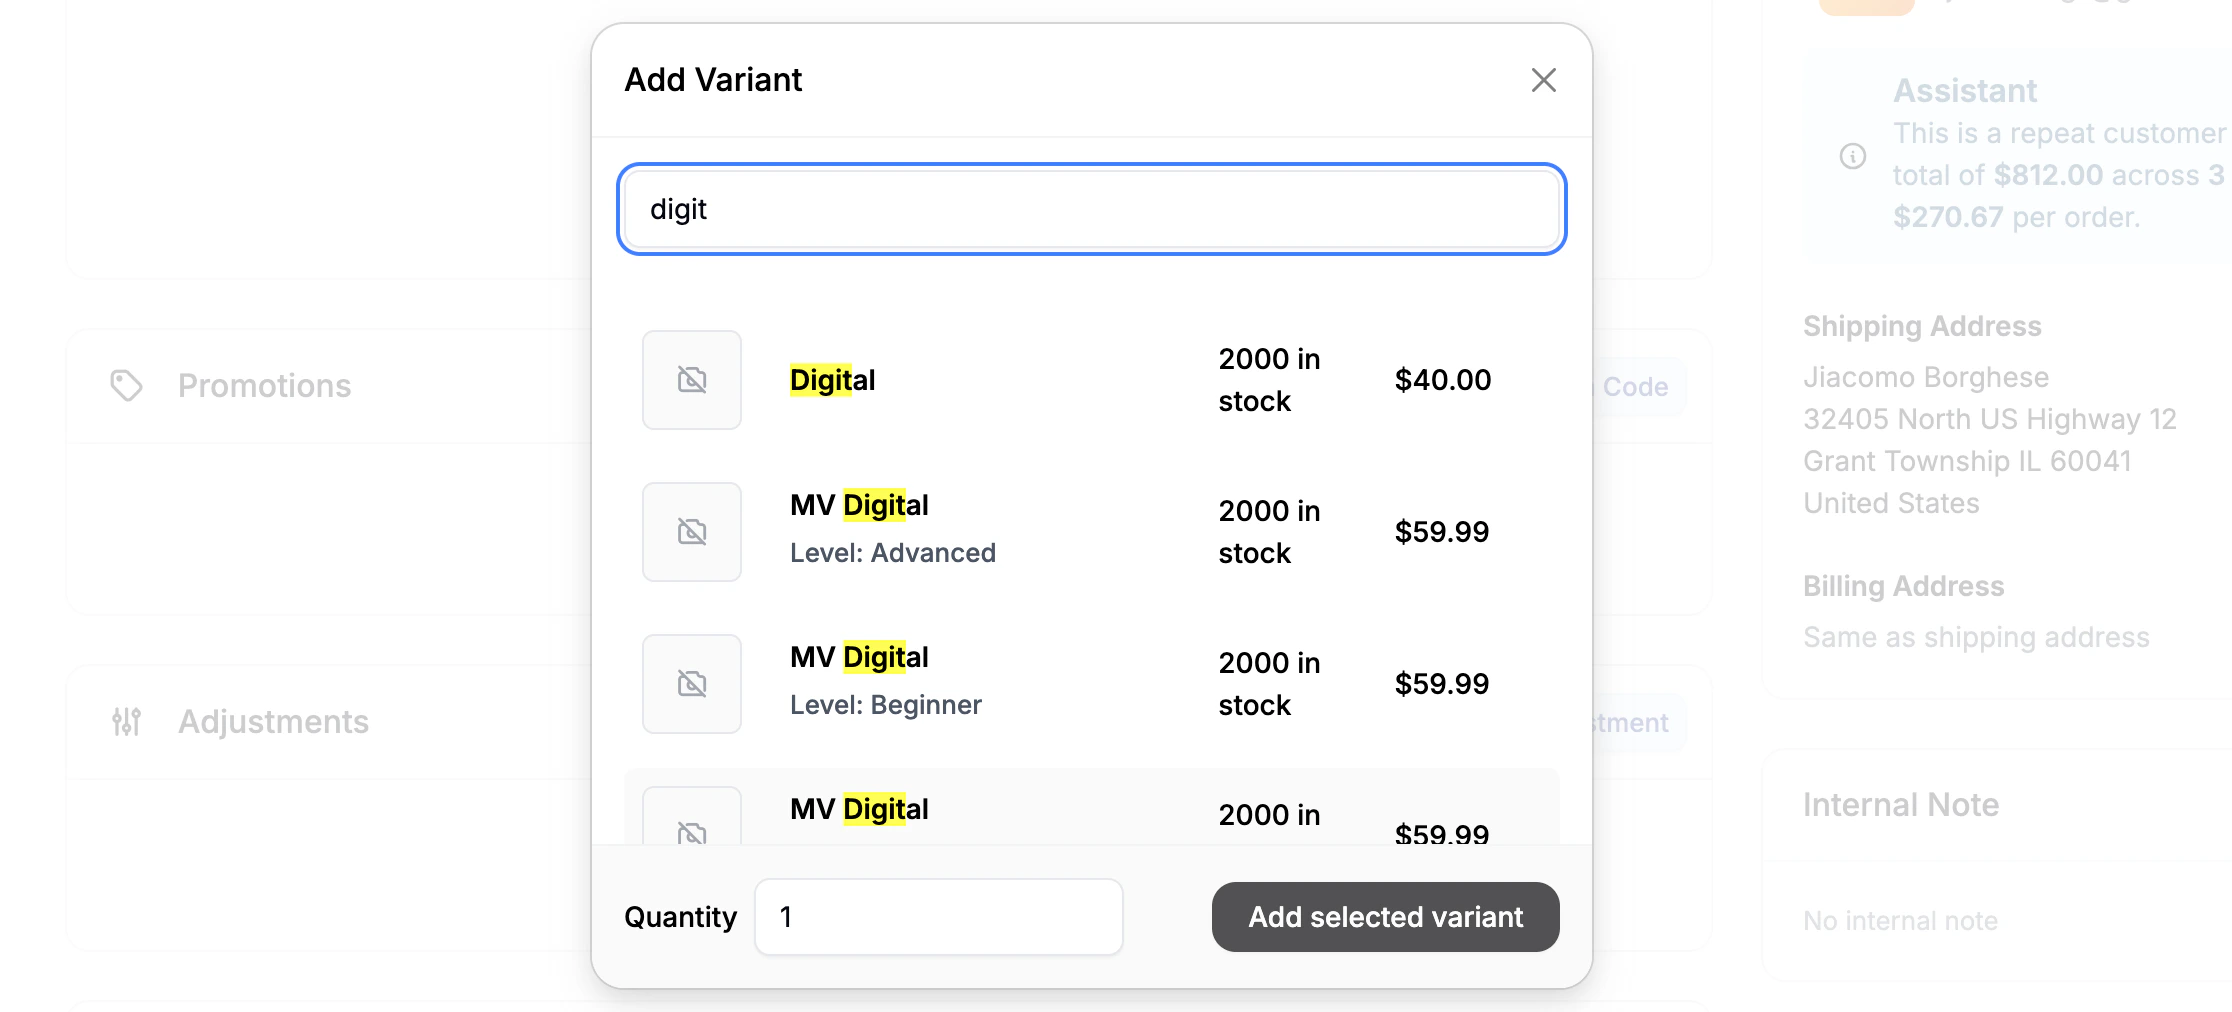 Search and select the desired product variant and click Add Selected Variant to add it to the order
You can only add one product variant at a time. Repeat the step for multiple items.
3. Shipping & Billing Address Logic
After you add the first line item, Spree handles customer addresses based on whether it’s a new or existing customer:
Existing Customer
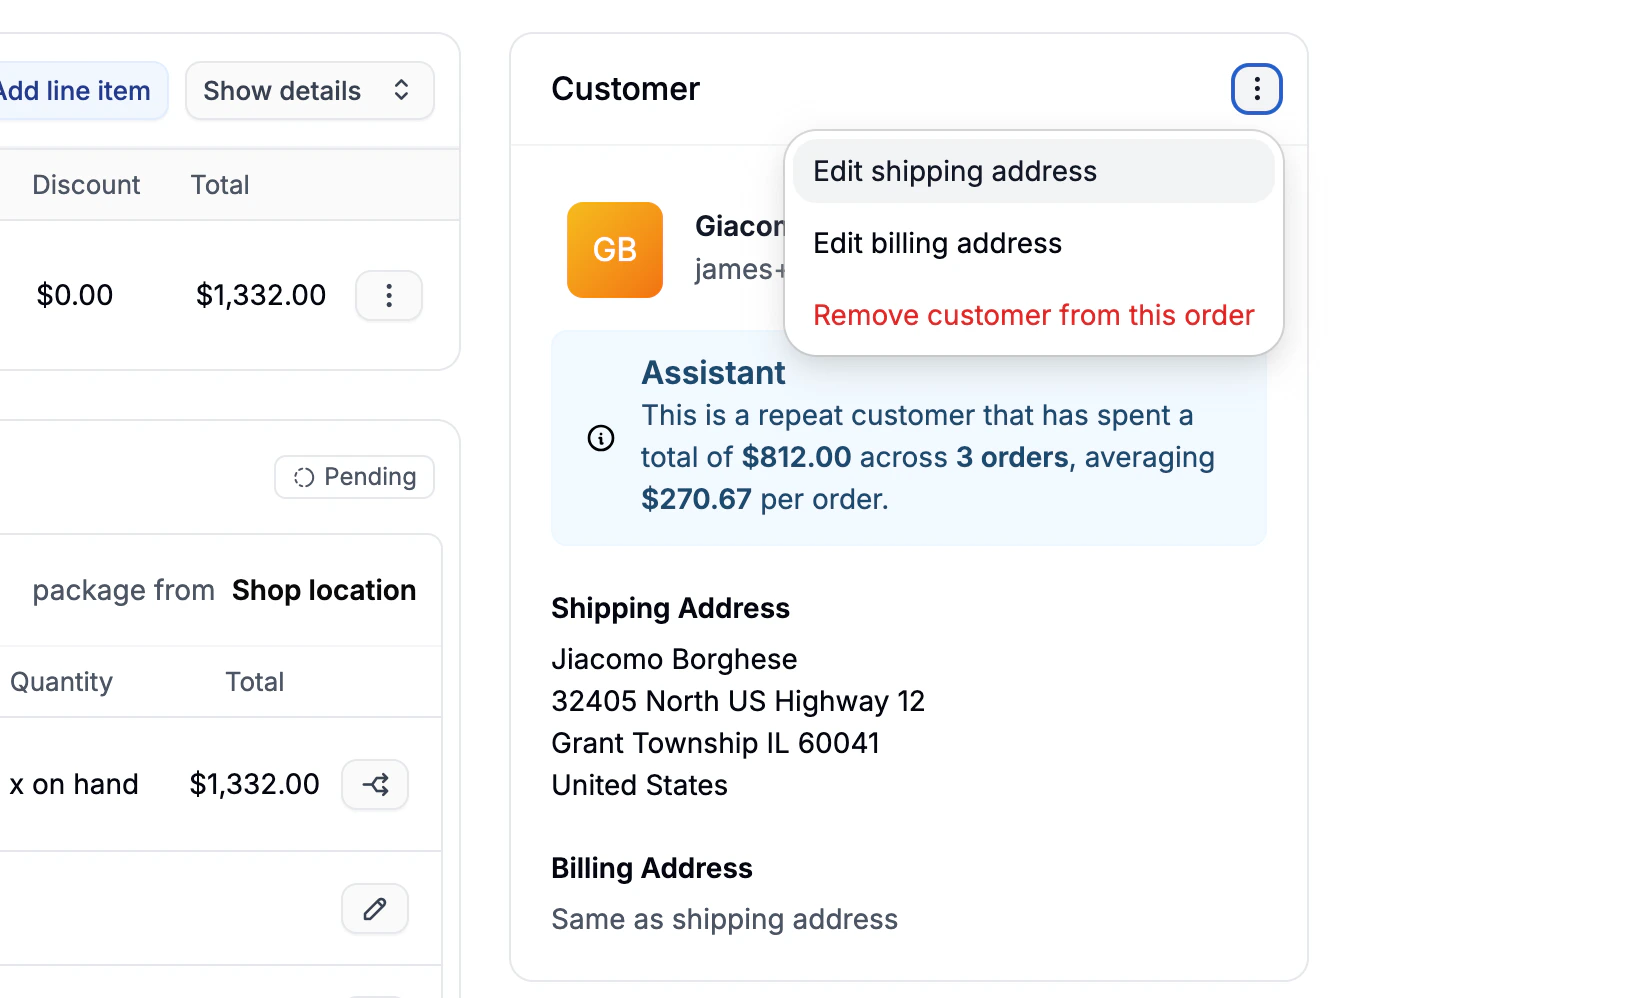 The customers default shipping and billing addresses are automatically used, but you can edit them via the three-dot menu in the Customer section.
New Customer
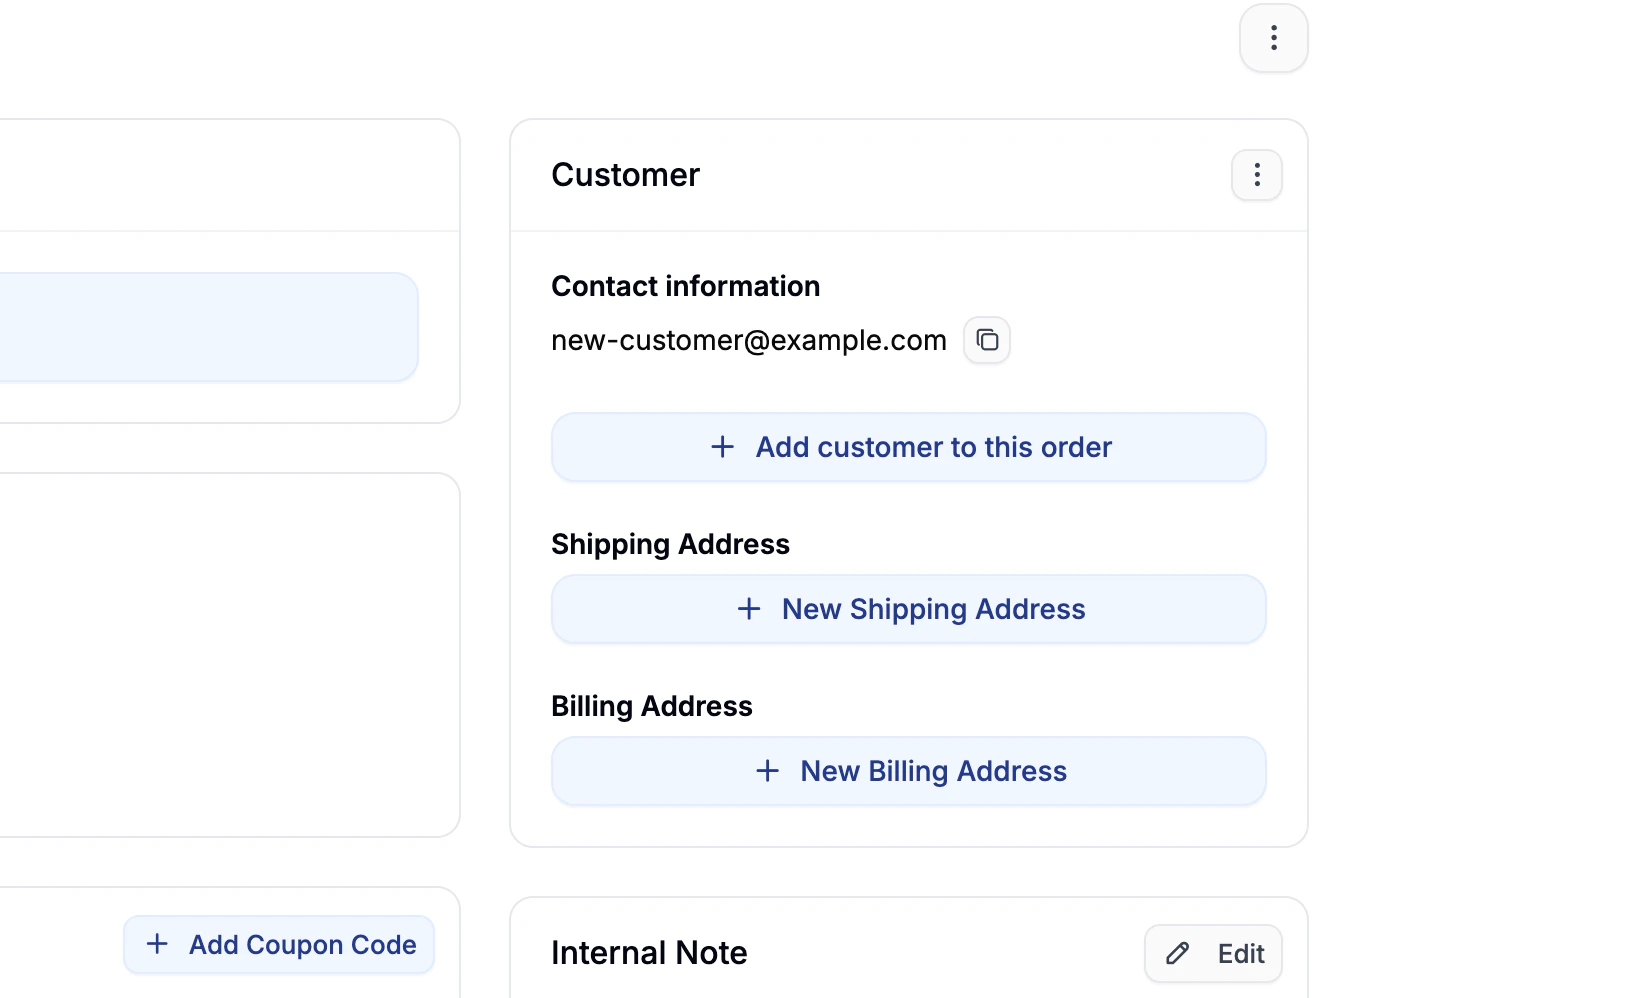 You must manually add a shipping and billing address:
- Locate the Customer section
- Click + New Shipping Address and fill in the form
- Click + New Billing Address (or select “Same as Shipping”)
4. Add a Shipping Method
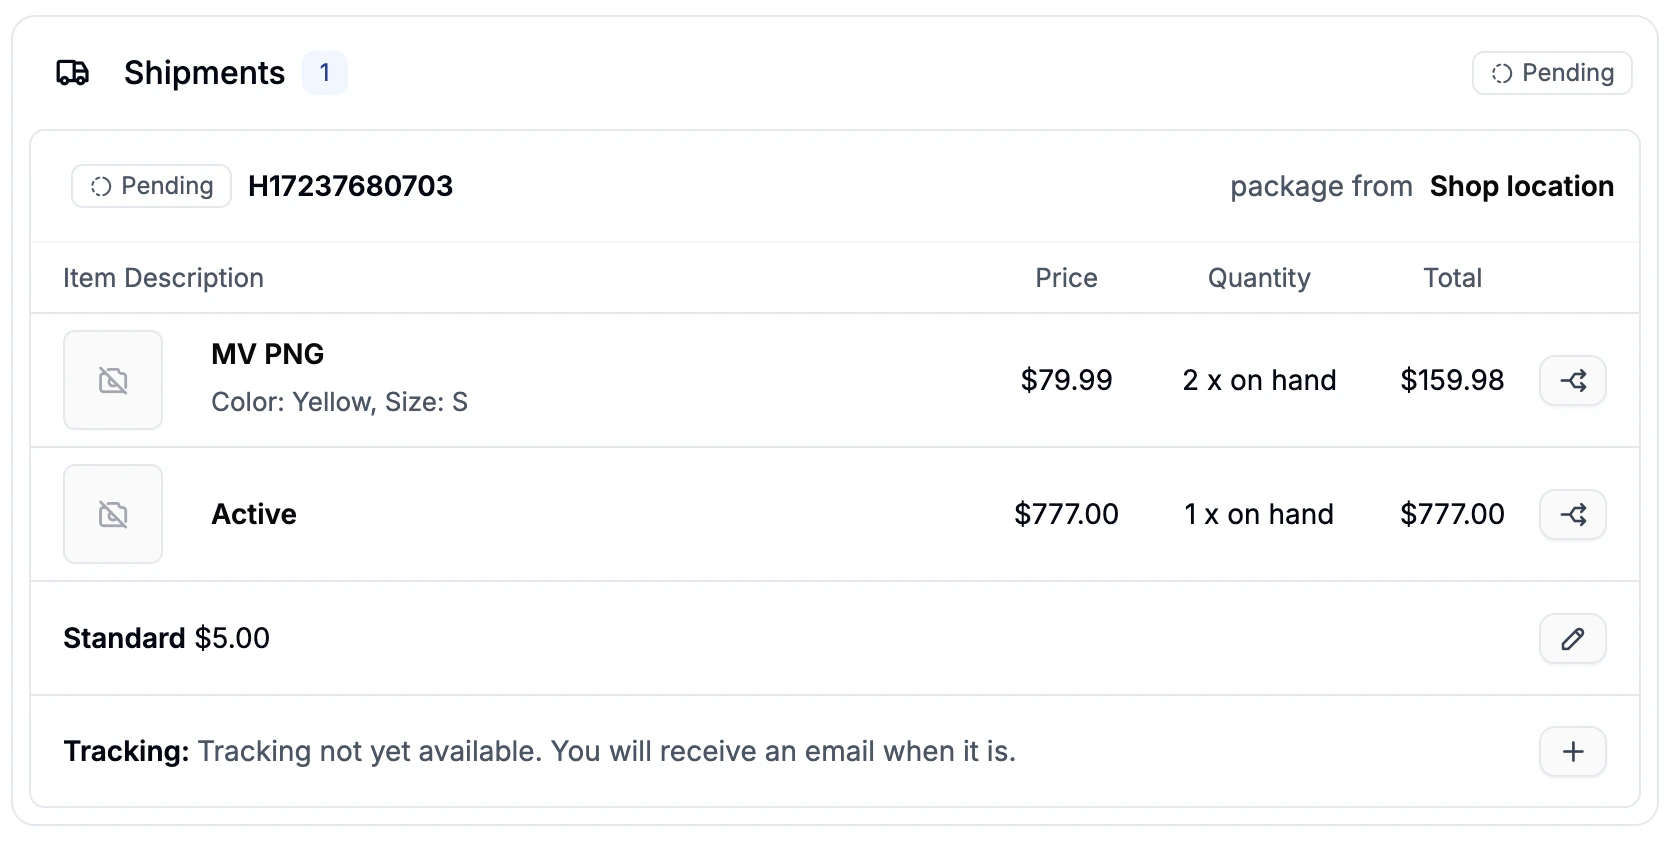 Once a line item is added, a shipment will appear in the Shipment section, with a default shipping method selected.
To change it:
Once a line item is added, a shipment will appear in the Shipment section, with a default shipping method selected.
To change it:
- Click the pencil (edit) icon next to the shipping method
- Select the desired method from the dropdown
- Click Save
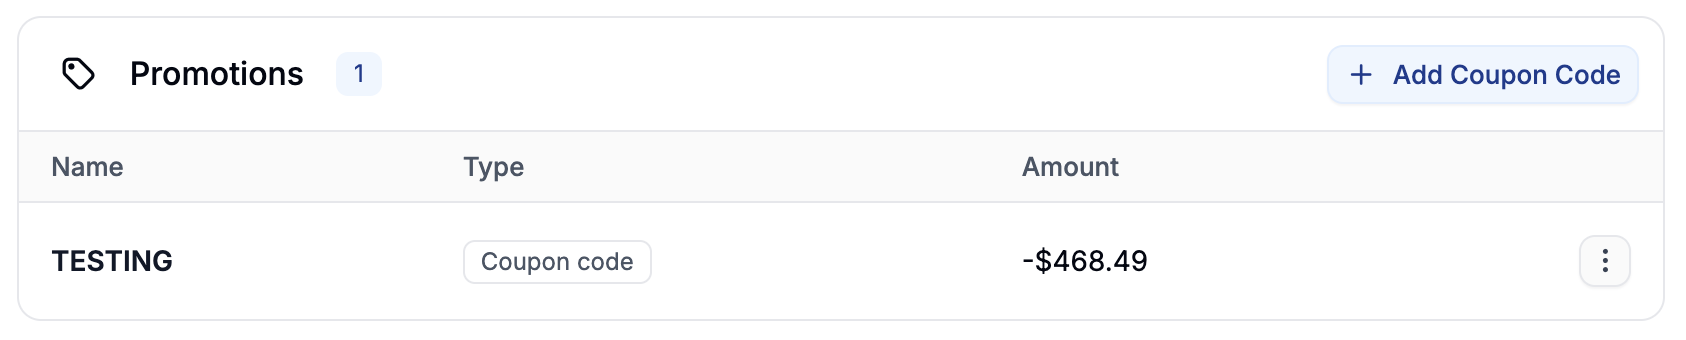 Admins can manually apply valid Promotion Codes to the order. To do so:
- Scroll to the Promotions section
- Click + Add Promotion Code
- Enter the coupon code and apply it
If valid, any applicable discounts will be reflected in the order total.
6. Add Order Adjustments
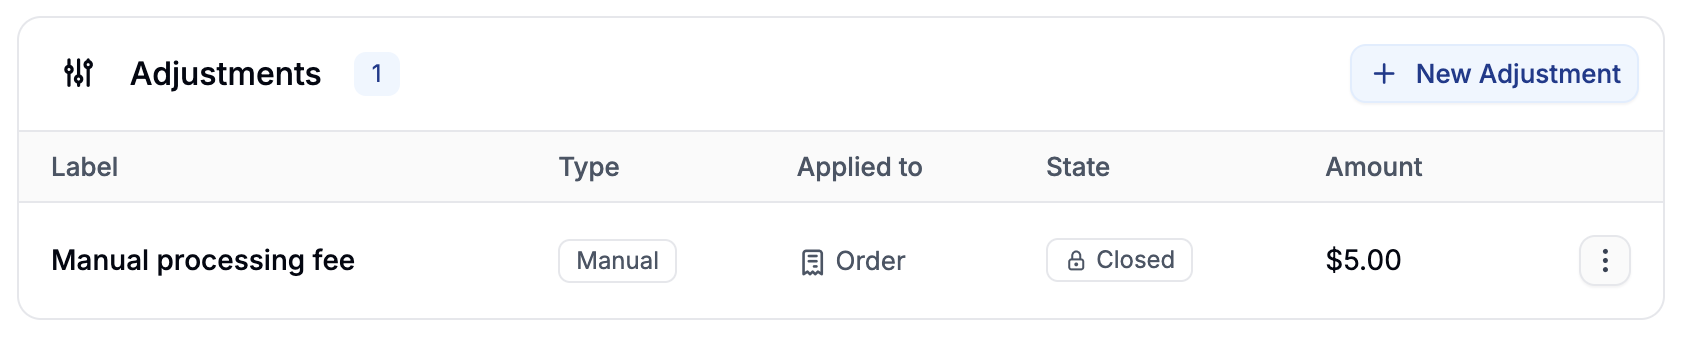 To manually adjust the order total (e.g., for discounts, fees, or custom credits):
- Scroll to the Adjustments section
- Click + New Adjustment
- Enter a Label and set an Amount:
- Positive amount = charge
- Negative amount = credit
- Click Create
Adjustments will be reflected in the cost summary.
7. Add a Payment
 There are three options for applying payment to the order:
Create a Manual Payment
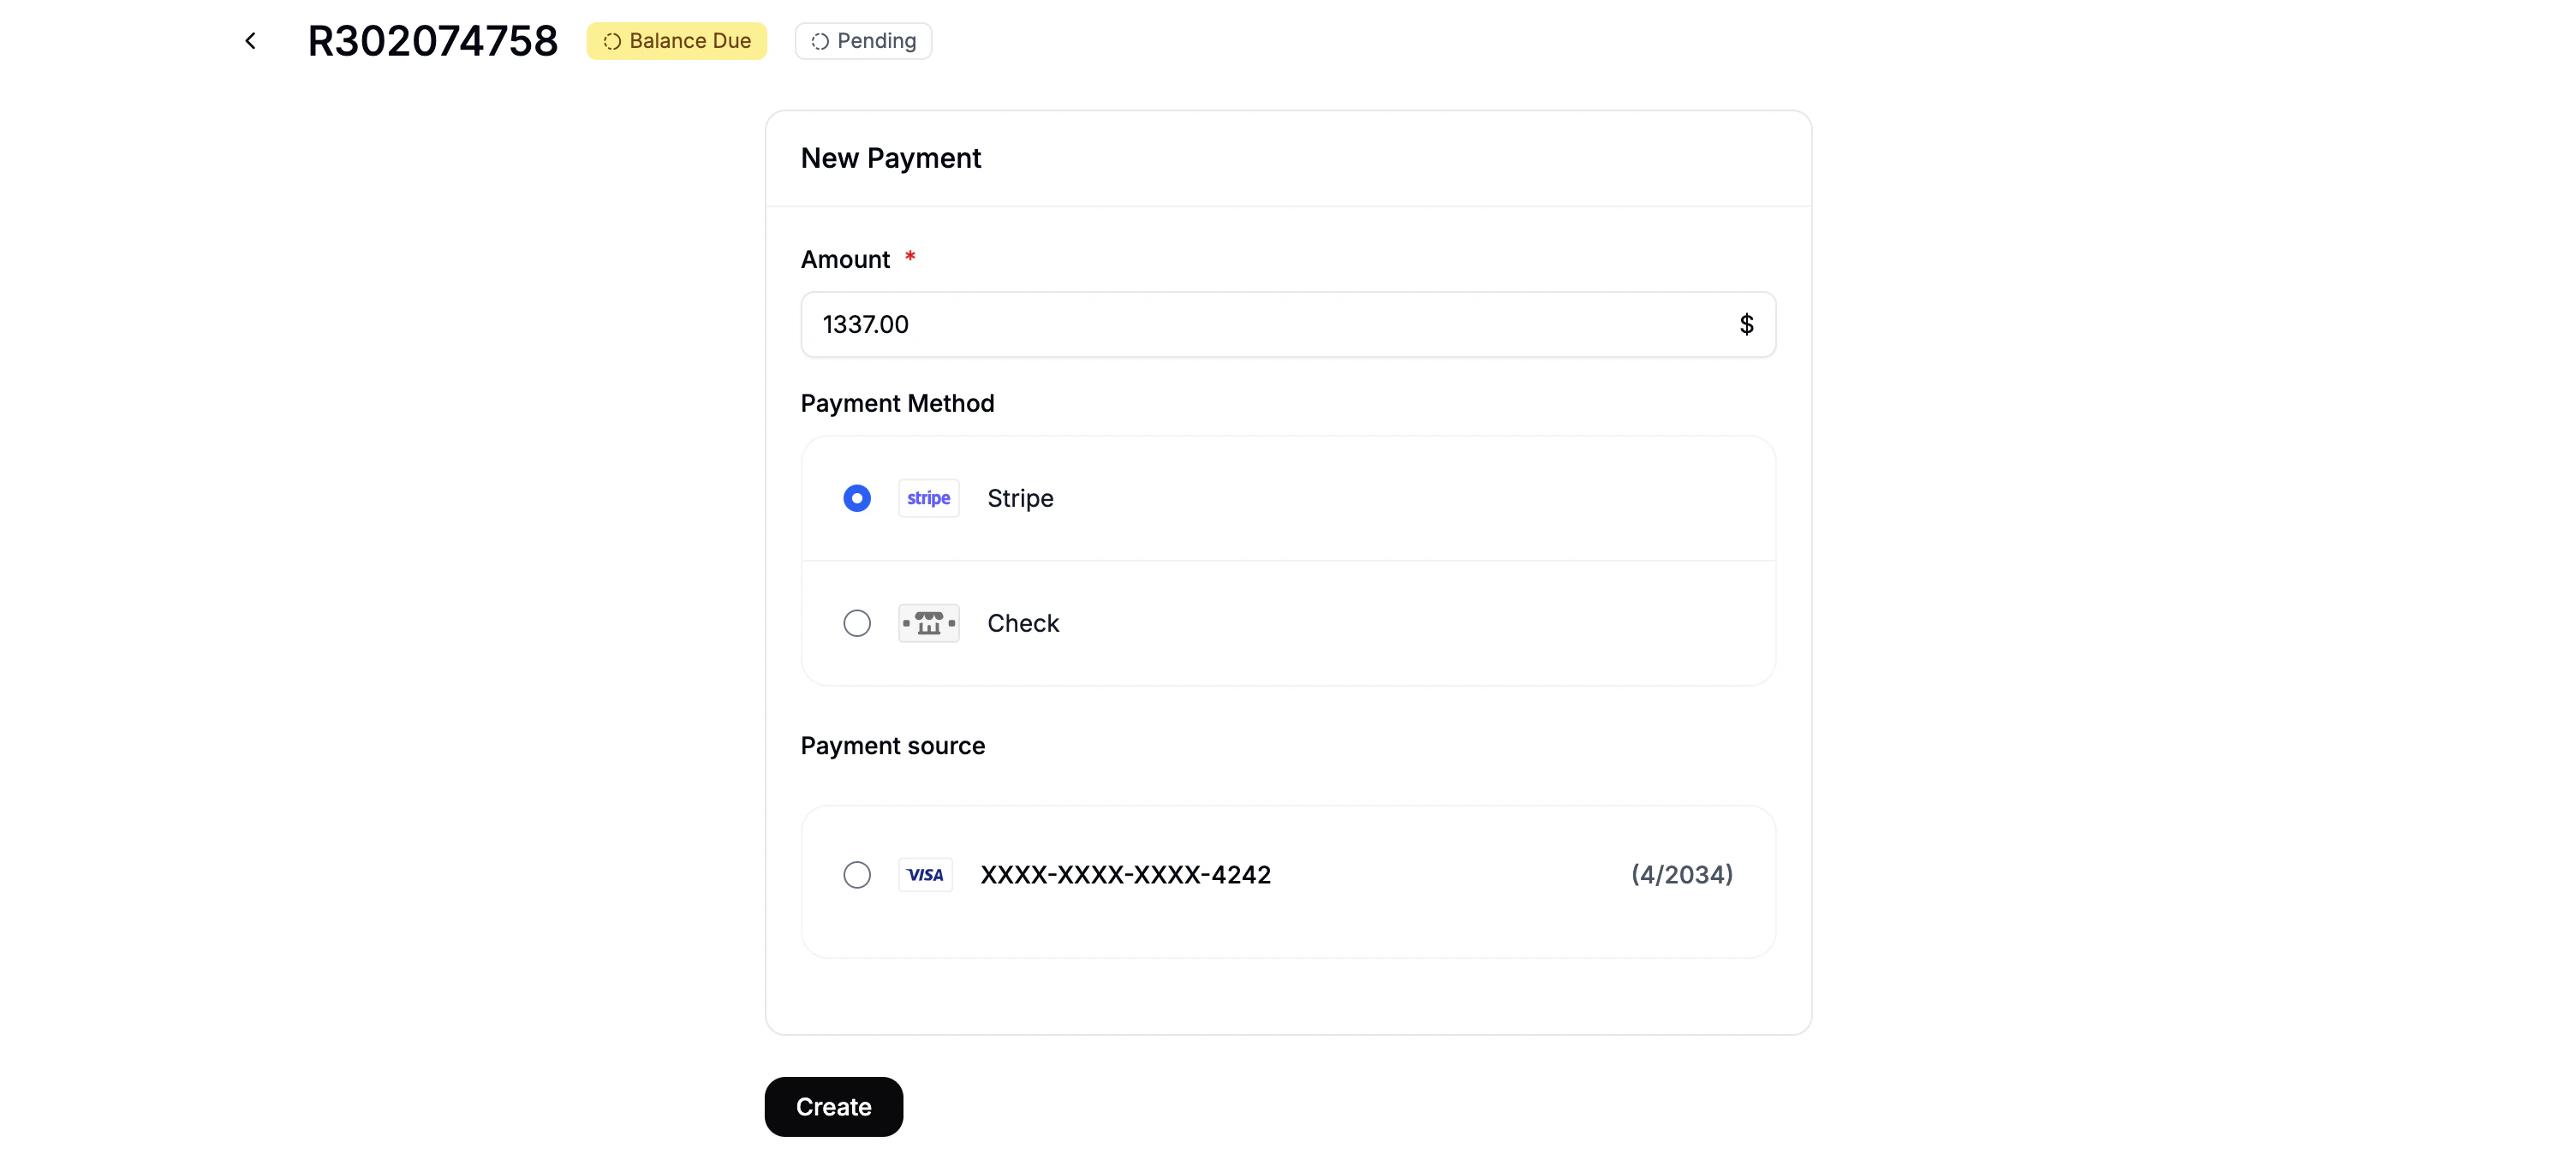 Click + New Payment Method and fill in:
- Amount - defaults to order total
- Payment Method - e.g., Stripe, bank transfer, etc.
- Payment Source - saved card (if available)
Click Create to add the payment.
If the customer has no saved card, you won’t be able to use some methods.
8. Fulfill the Order
Once all items, payments, promos, and adjustments are in place, you can proceed to ship the order once you have received payment from the customer. For details on fulfillment, see Processing Orders.