Vendor onboarding is a feature available only in Spree Enterprise Edition.
This guide is intended for vendors, but may also be useful for marketplace owners should they wish to understand the onboarding process more clearly.
Accept Invitation
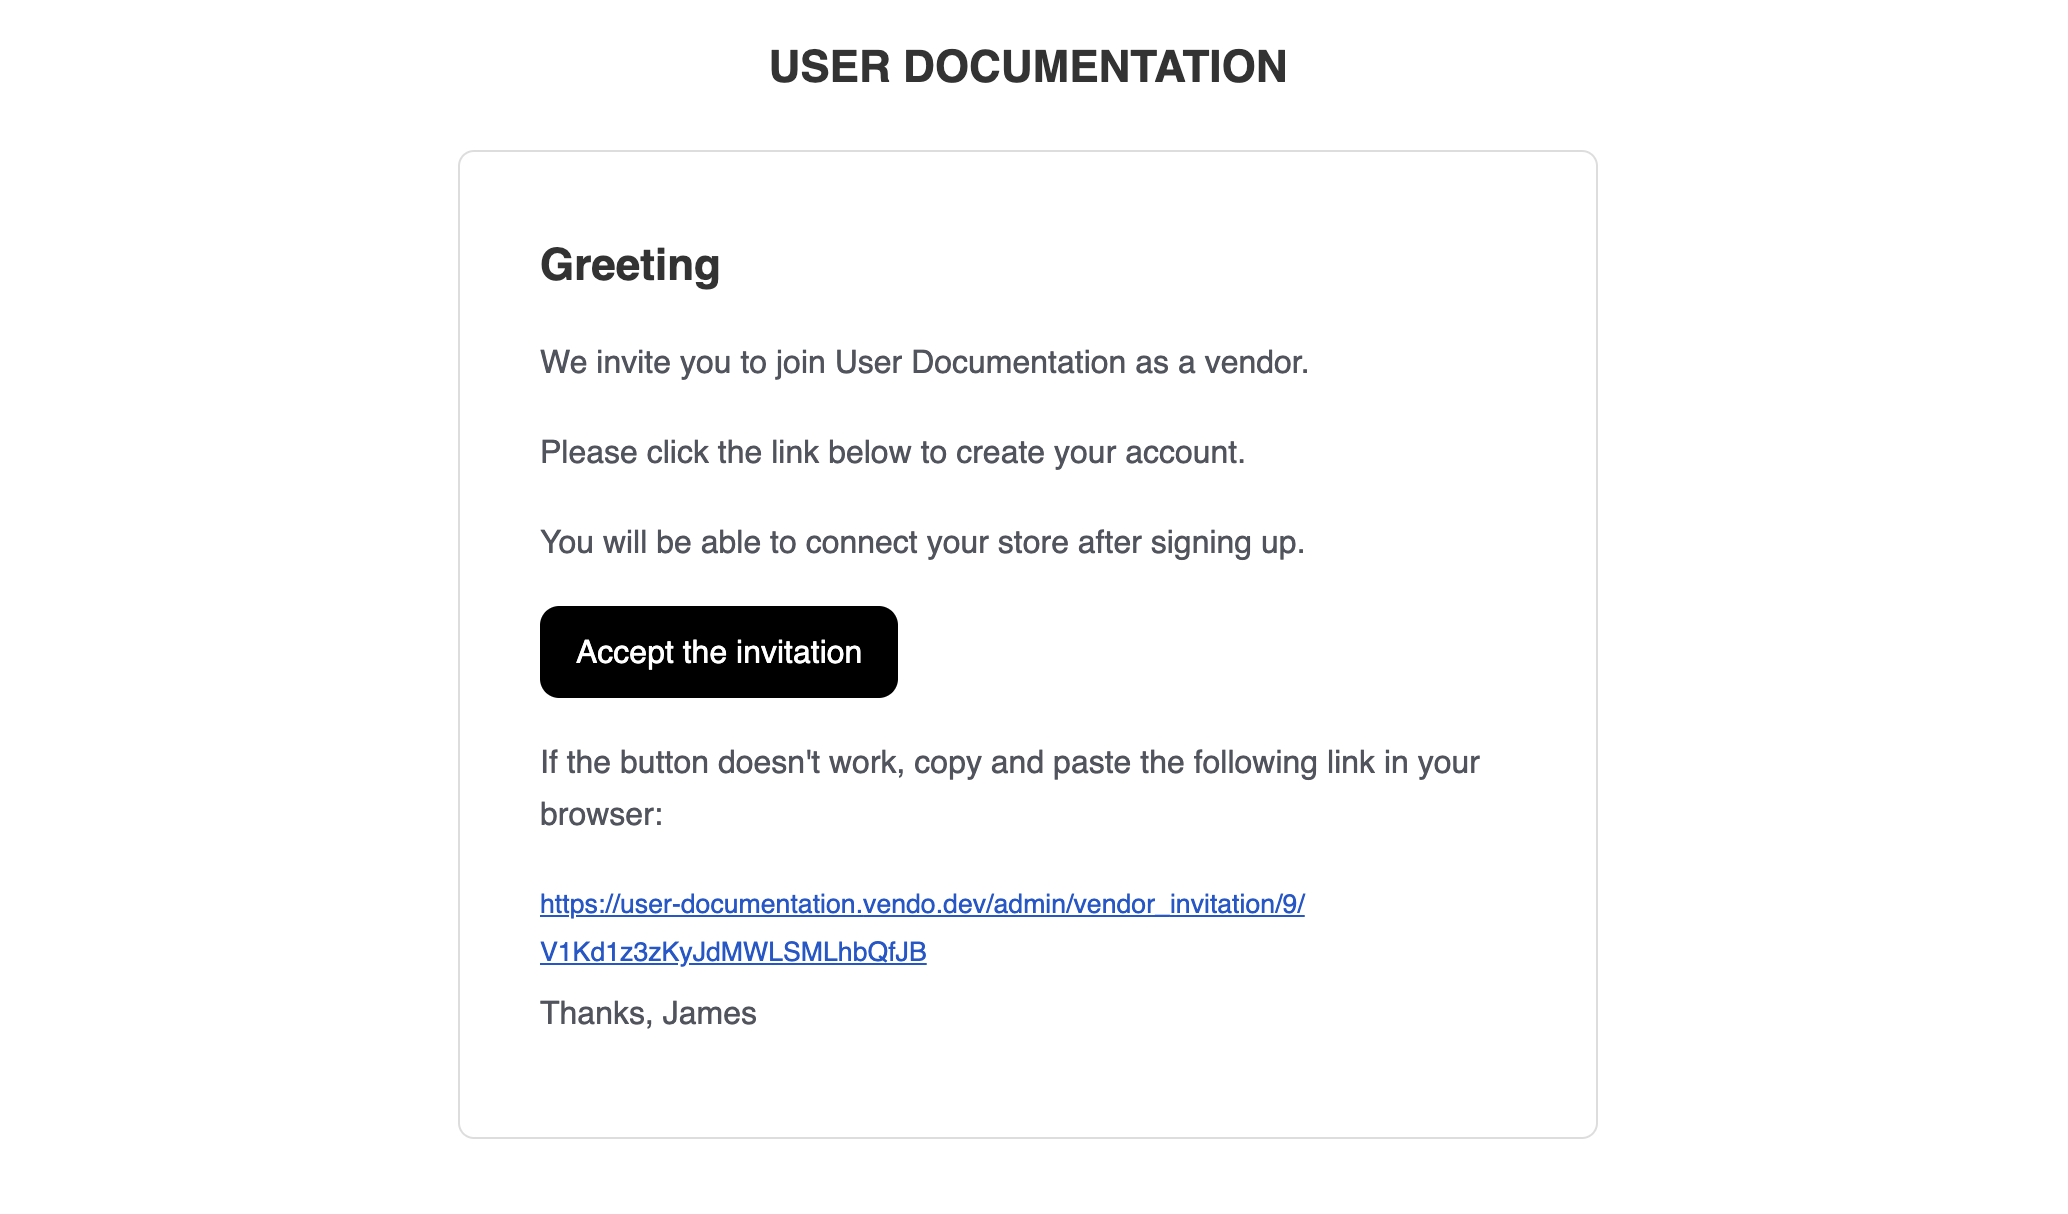 First things first, you should have been sent an email invitation or provided with an invitation link to join the marketplace.
Simply click on the link and you’ll be directed to the next step.
First things first, you should have been sent an email invitation or provided with an invitation link to join the marketplace.
Simply click on the link and you’ll be directed to the next step.
The above screenshot is the default email template. The actual email and content may be quite different.
Create an Account
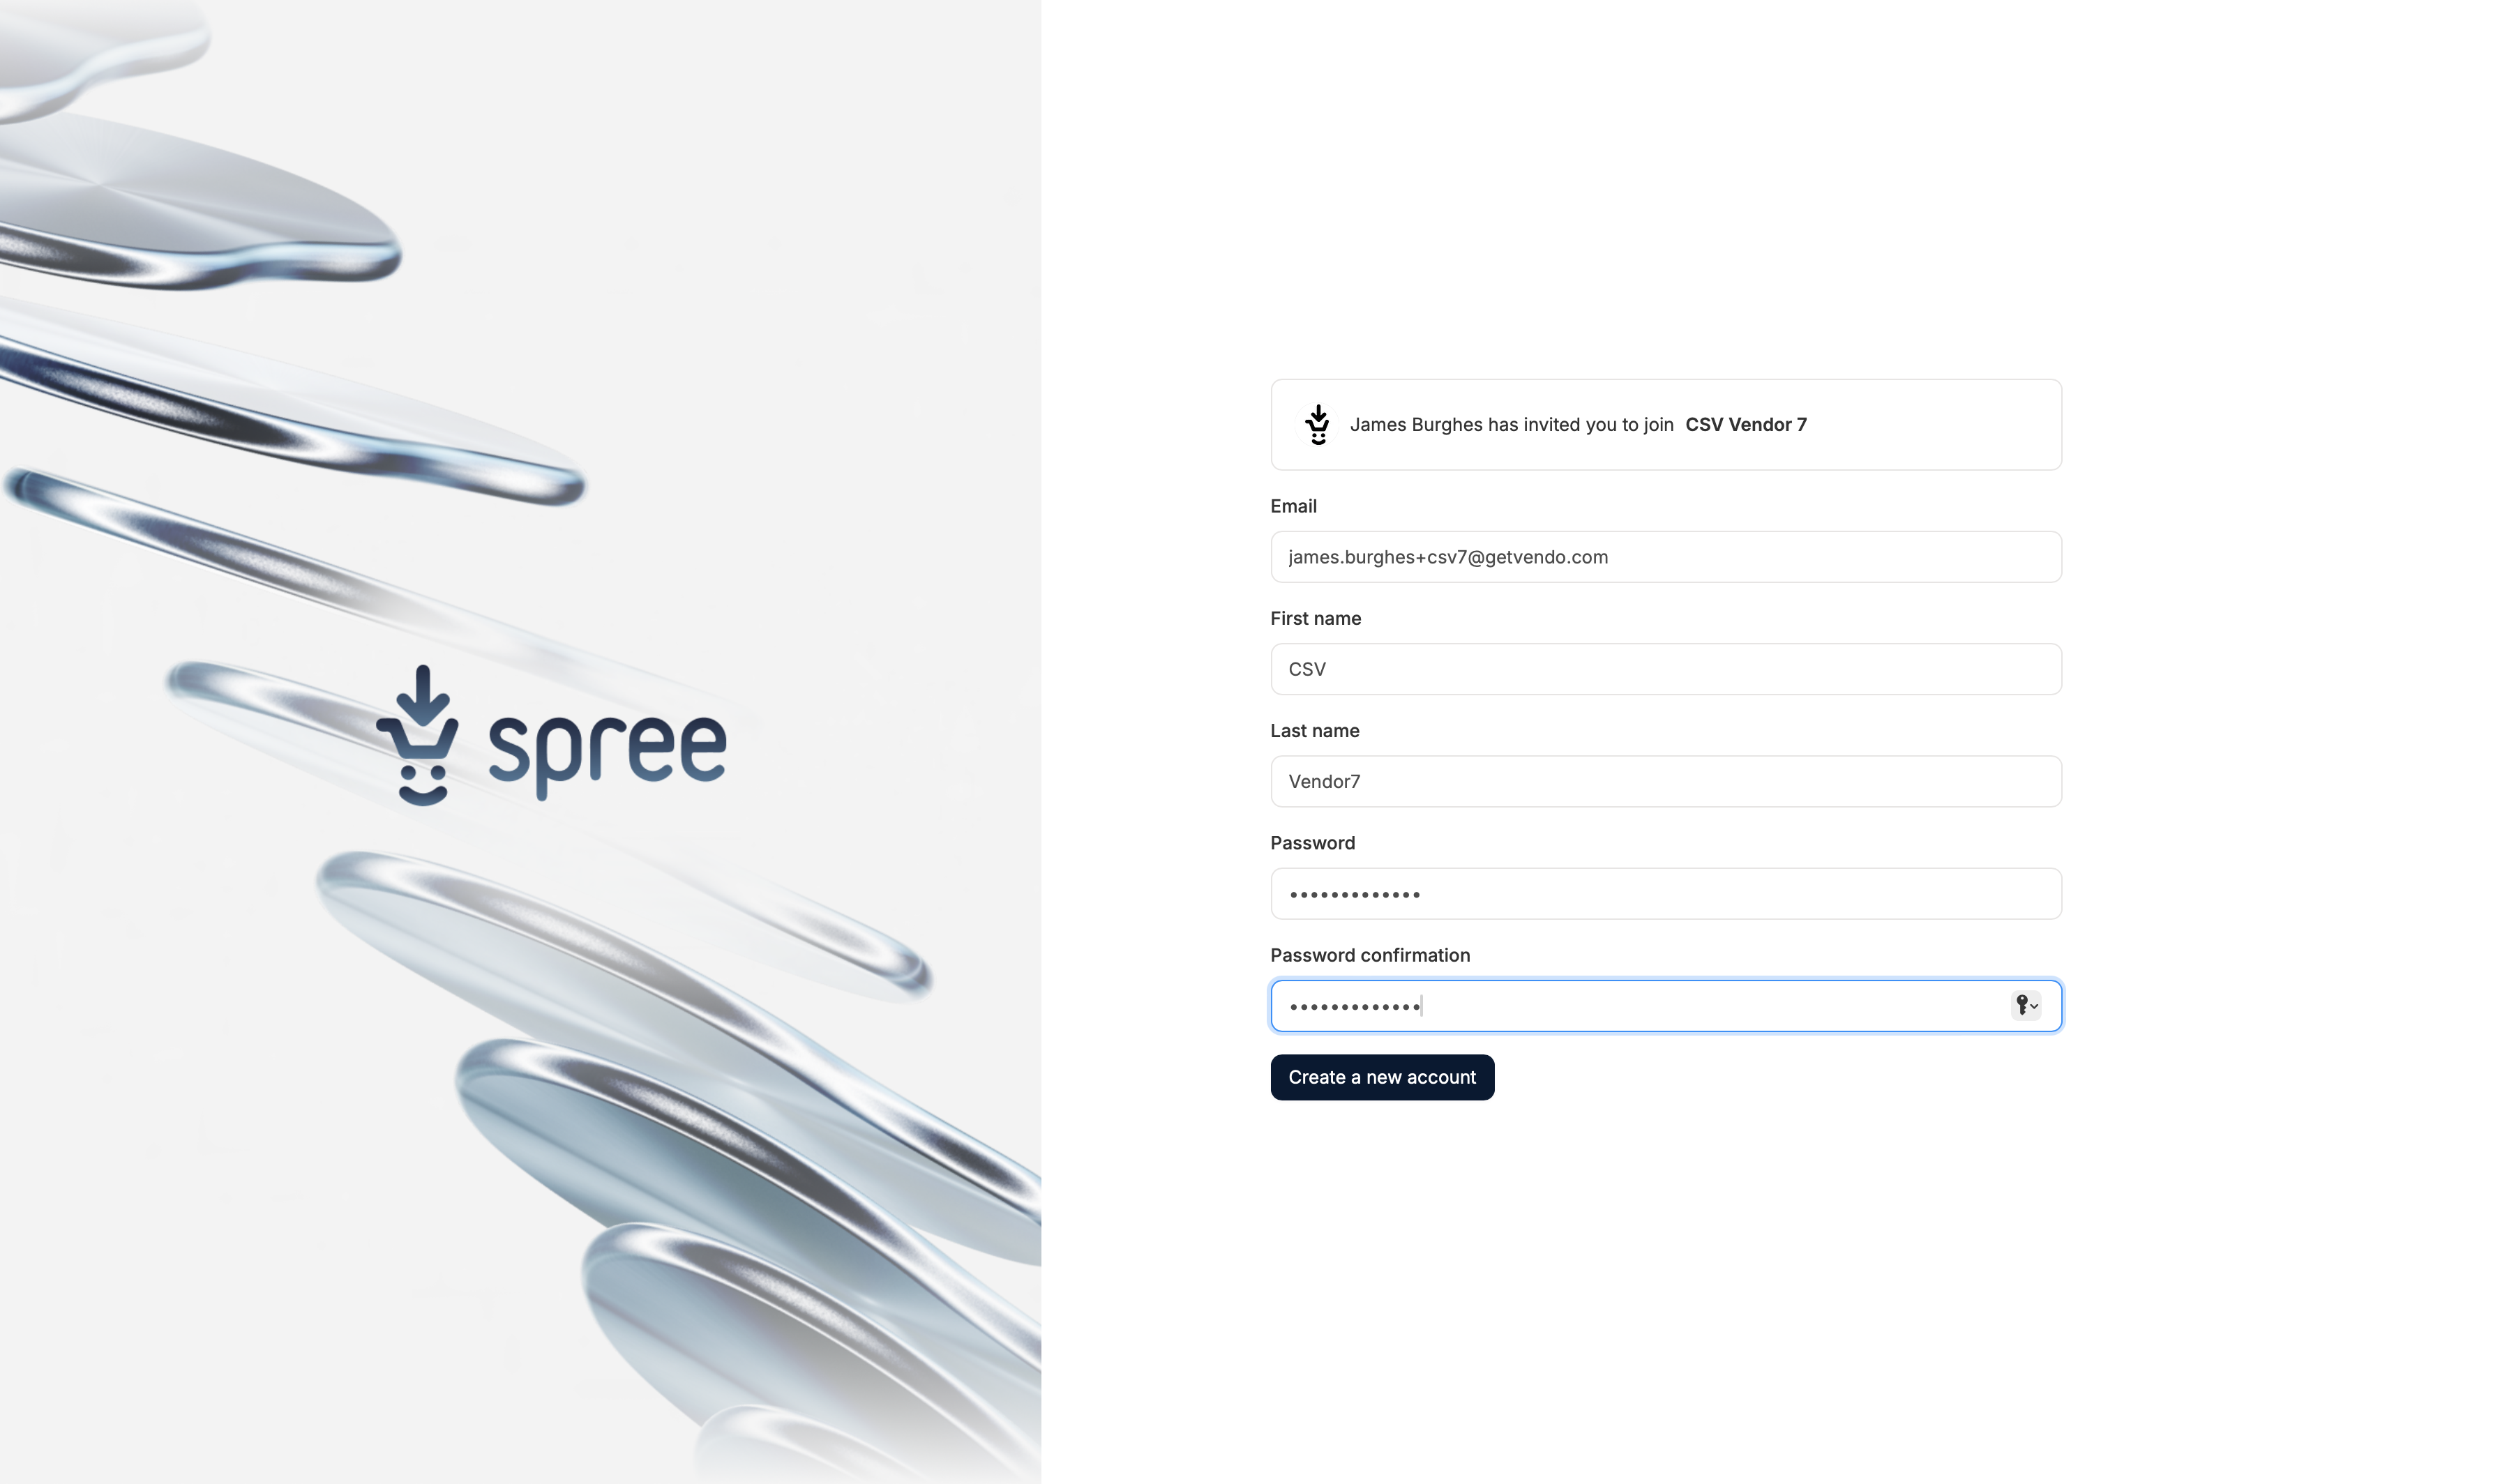 Next, you’ll need to set up a vendor account with the marketplace. Fill in all fields and click ‘Create Account’ to continue.
The above screenshot shows the default sign up page. The design, content, and commercial terms may differ.
Vendor Dashboard
Once you’ve created your account, you’ll be redirected to your vendor dashboard.
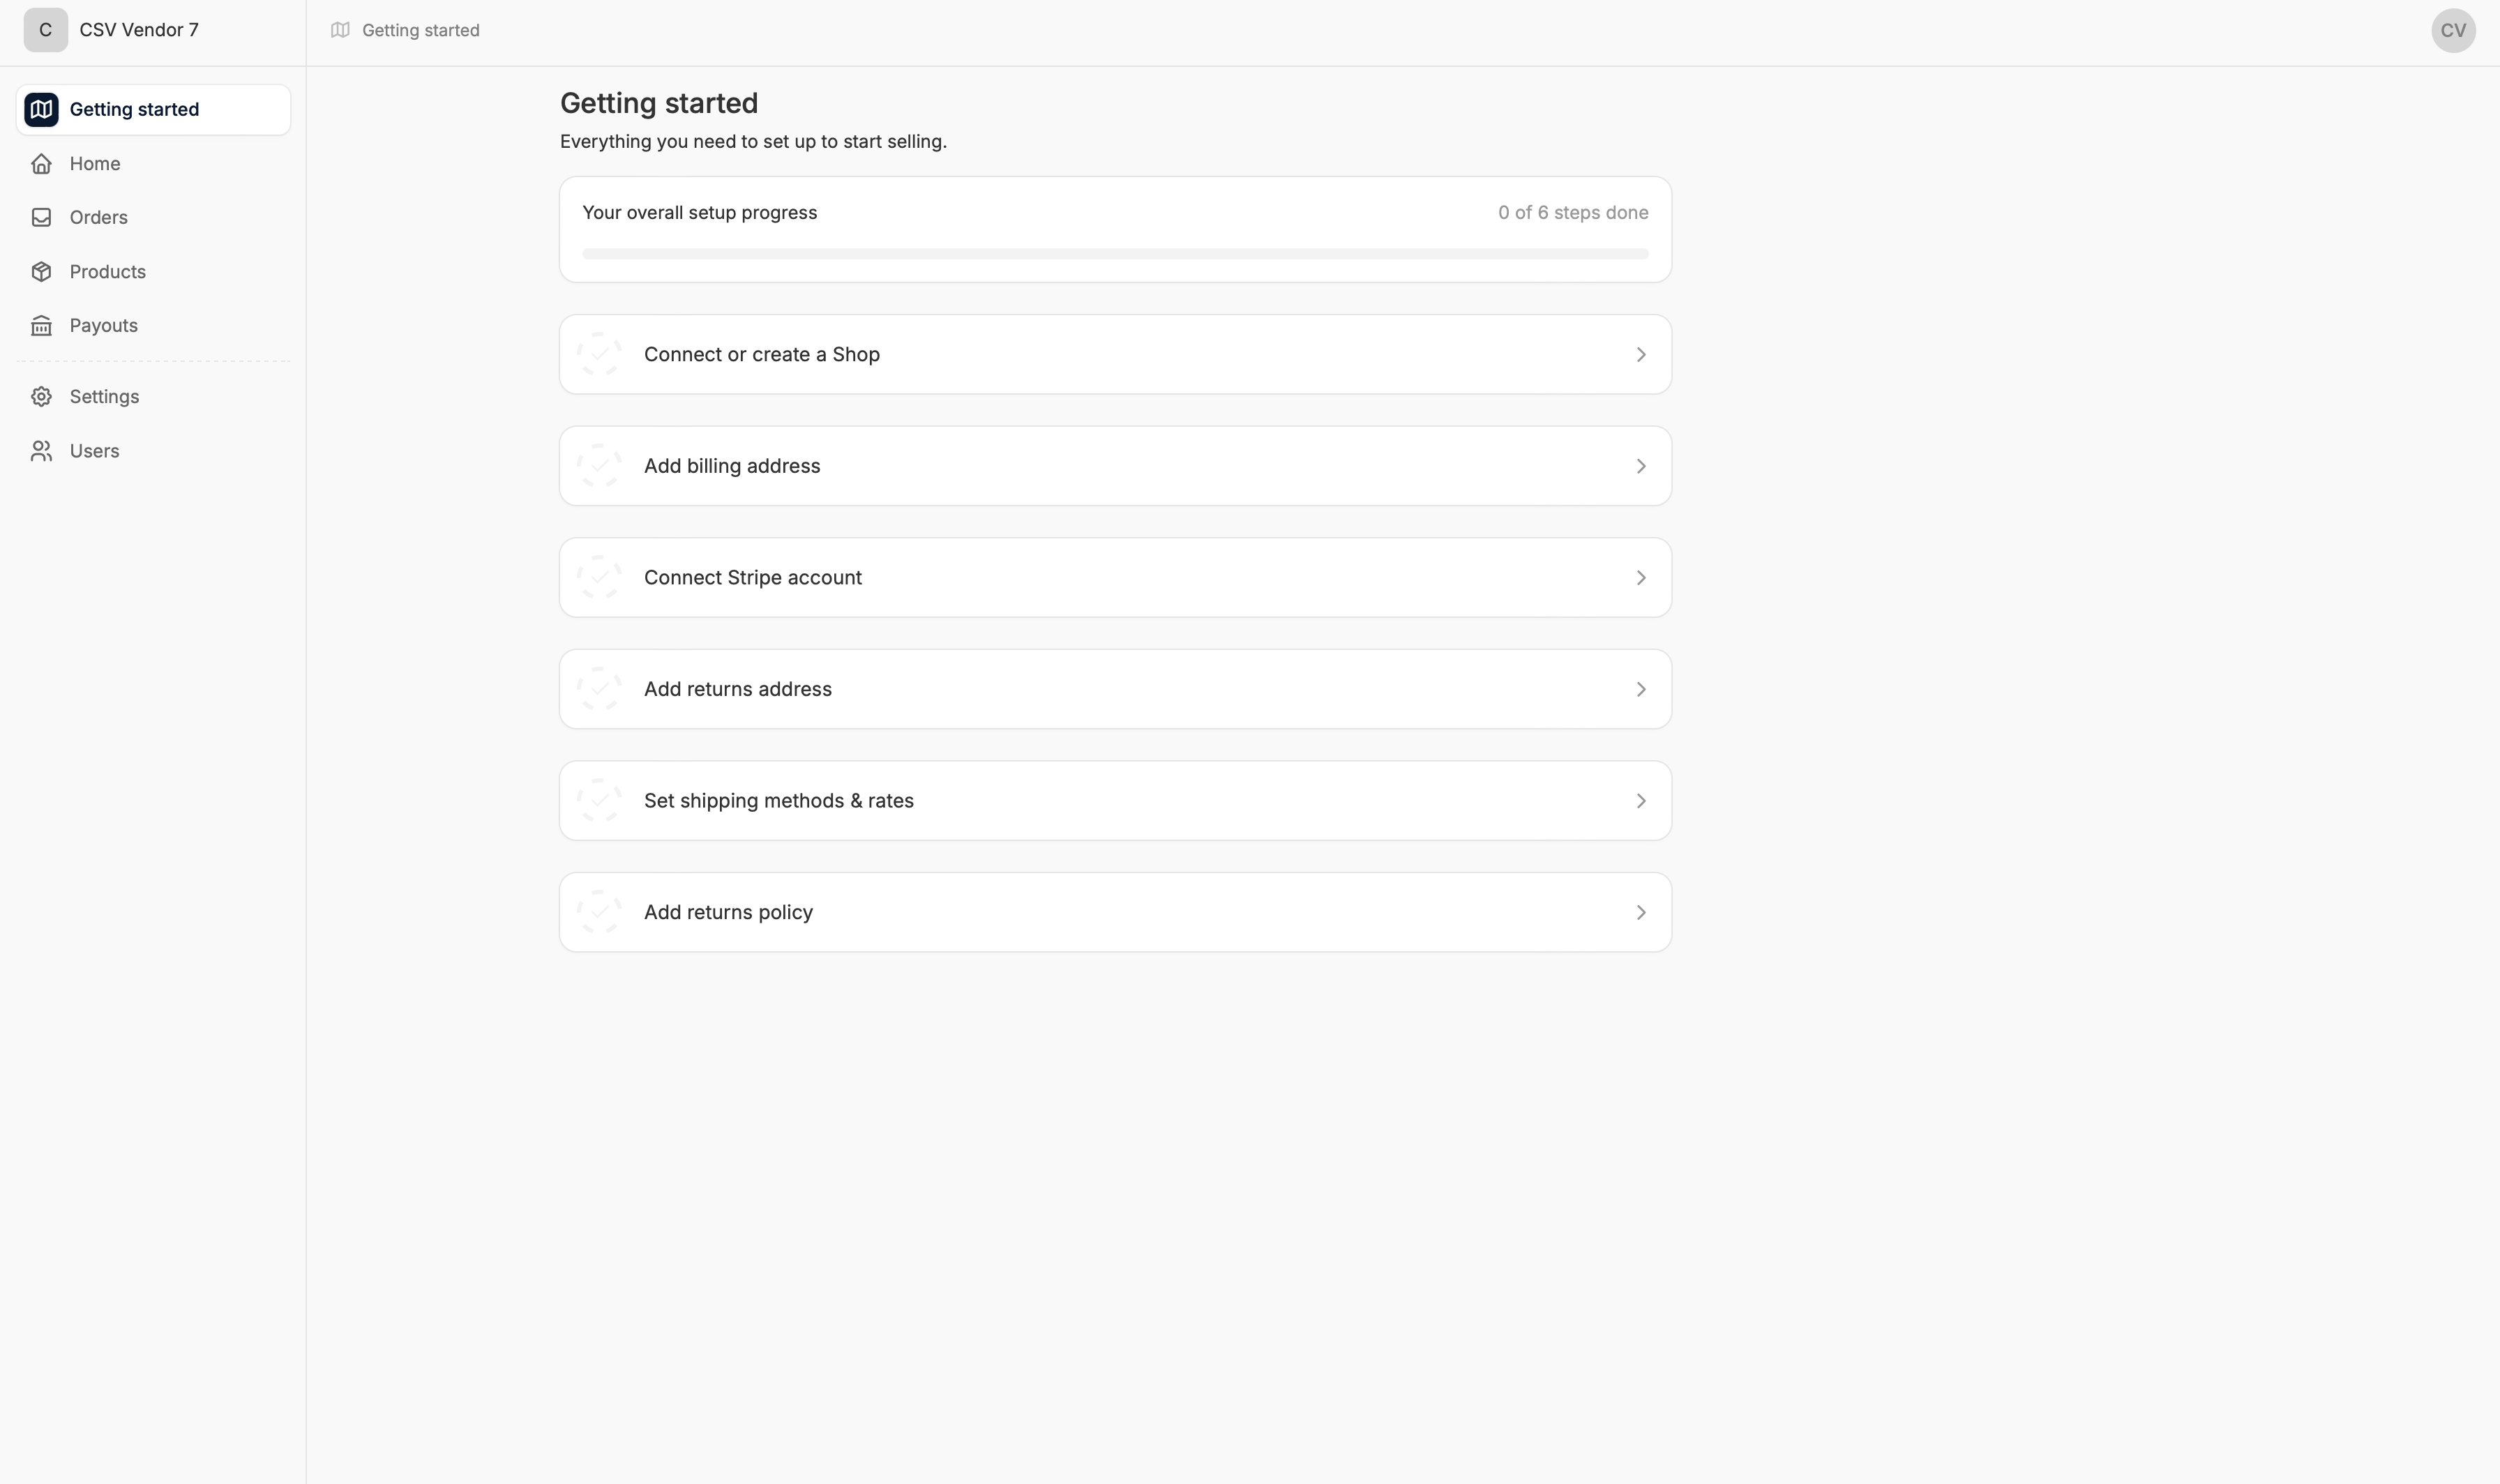 In the ‘Getting Started’ tab, you’ll see six onboarding tasks that need to be completed before you can start selling on the marketplace. Clicking on the tasks will reveal the actions that need to be taken. Let’s look at each task in more detail.
There are six tasks by default, but the marketplace you’re joining may have more or less depending on its business model.
Connect or Create a Shop
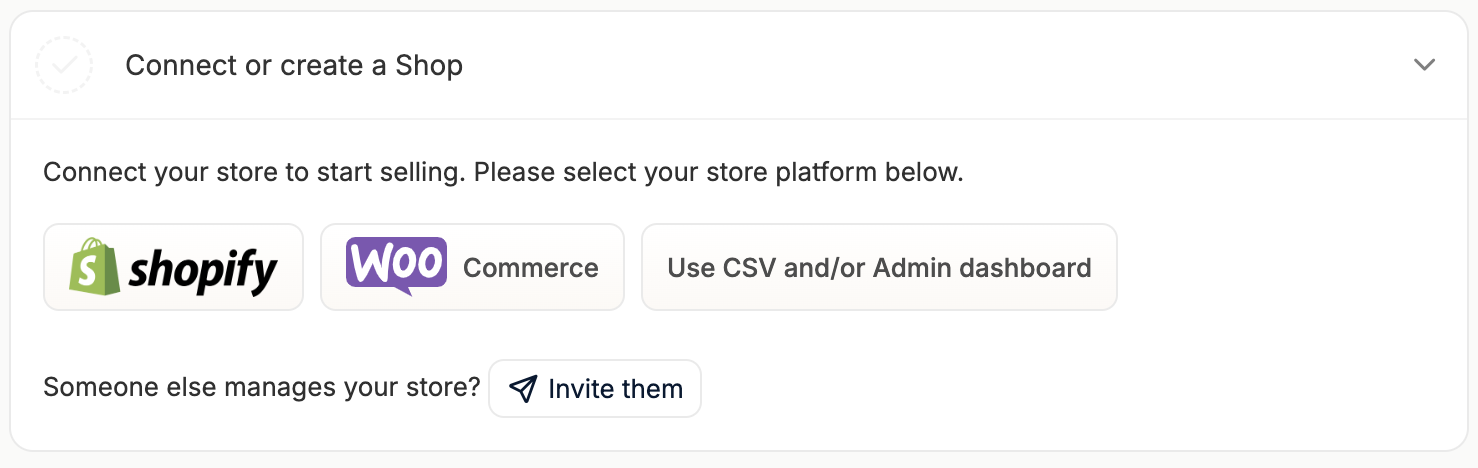 The first task, and arguably the most important, is to connect or create a shop.
Right now there are three self-service options available for use (Shopify, WooCommerce, and CSV/admin dashboard) but more will be available in the future.
The first task, and arguably the most important, is to connect or create a shop.
Right now there are three self-service options available for use (Shopify, WooCommerce, and CSV/admin dashboard) but more will be available in the future.
Custom integrations can be developed to sync products and inventory if the vendor’s store is not running on any of the available platforms. Please reach out to us if you require integration support.
Shopify
If you are running a Shopify store, you’ll be glad to know that onboarding is completely automated.
To connect your store to the marketplace, click the ‘Shopify’ button.
Doing so will redirect you to the Shopify app store with a prompt to install the marketplace’s app.
Click ‘Install’ and you’ll be redirected to your Shopify dashboard with another prompt to install the app.
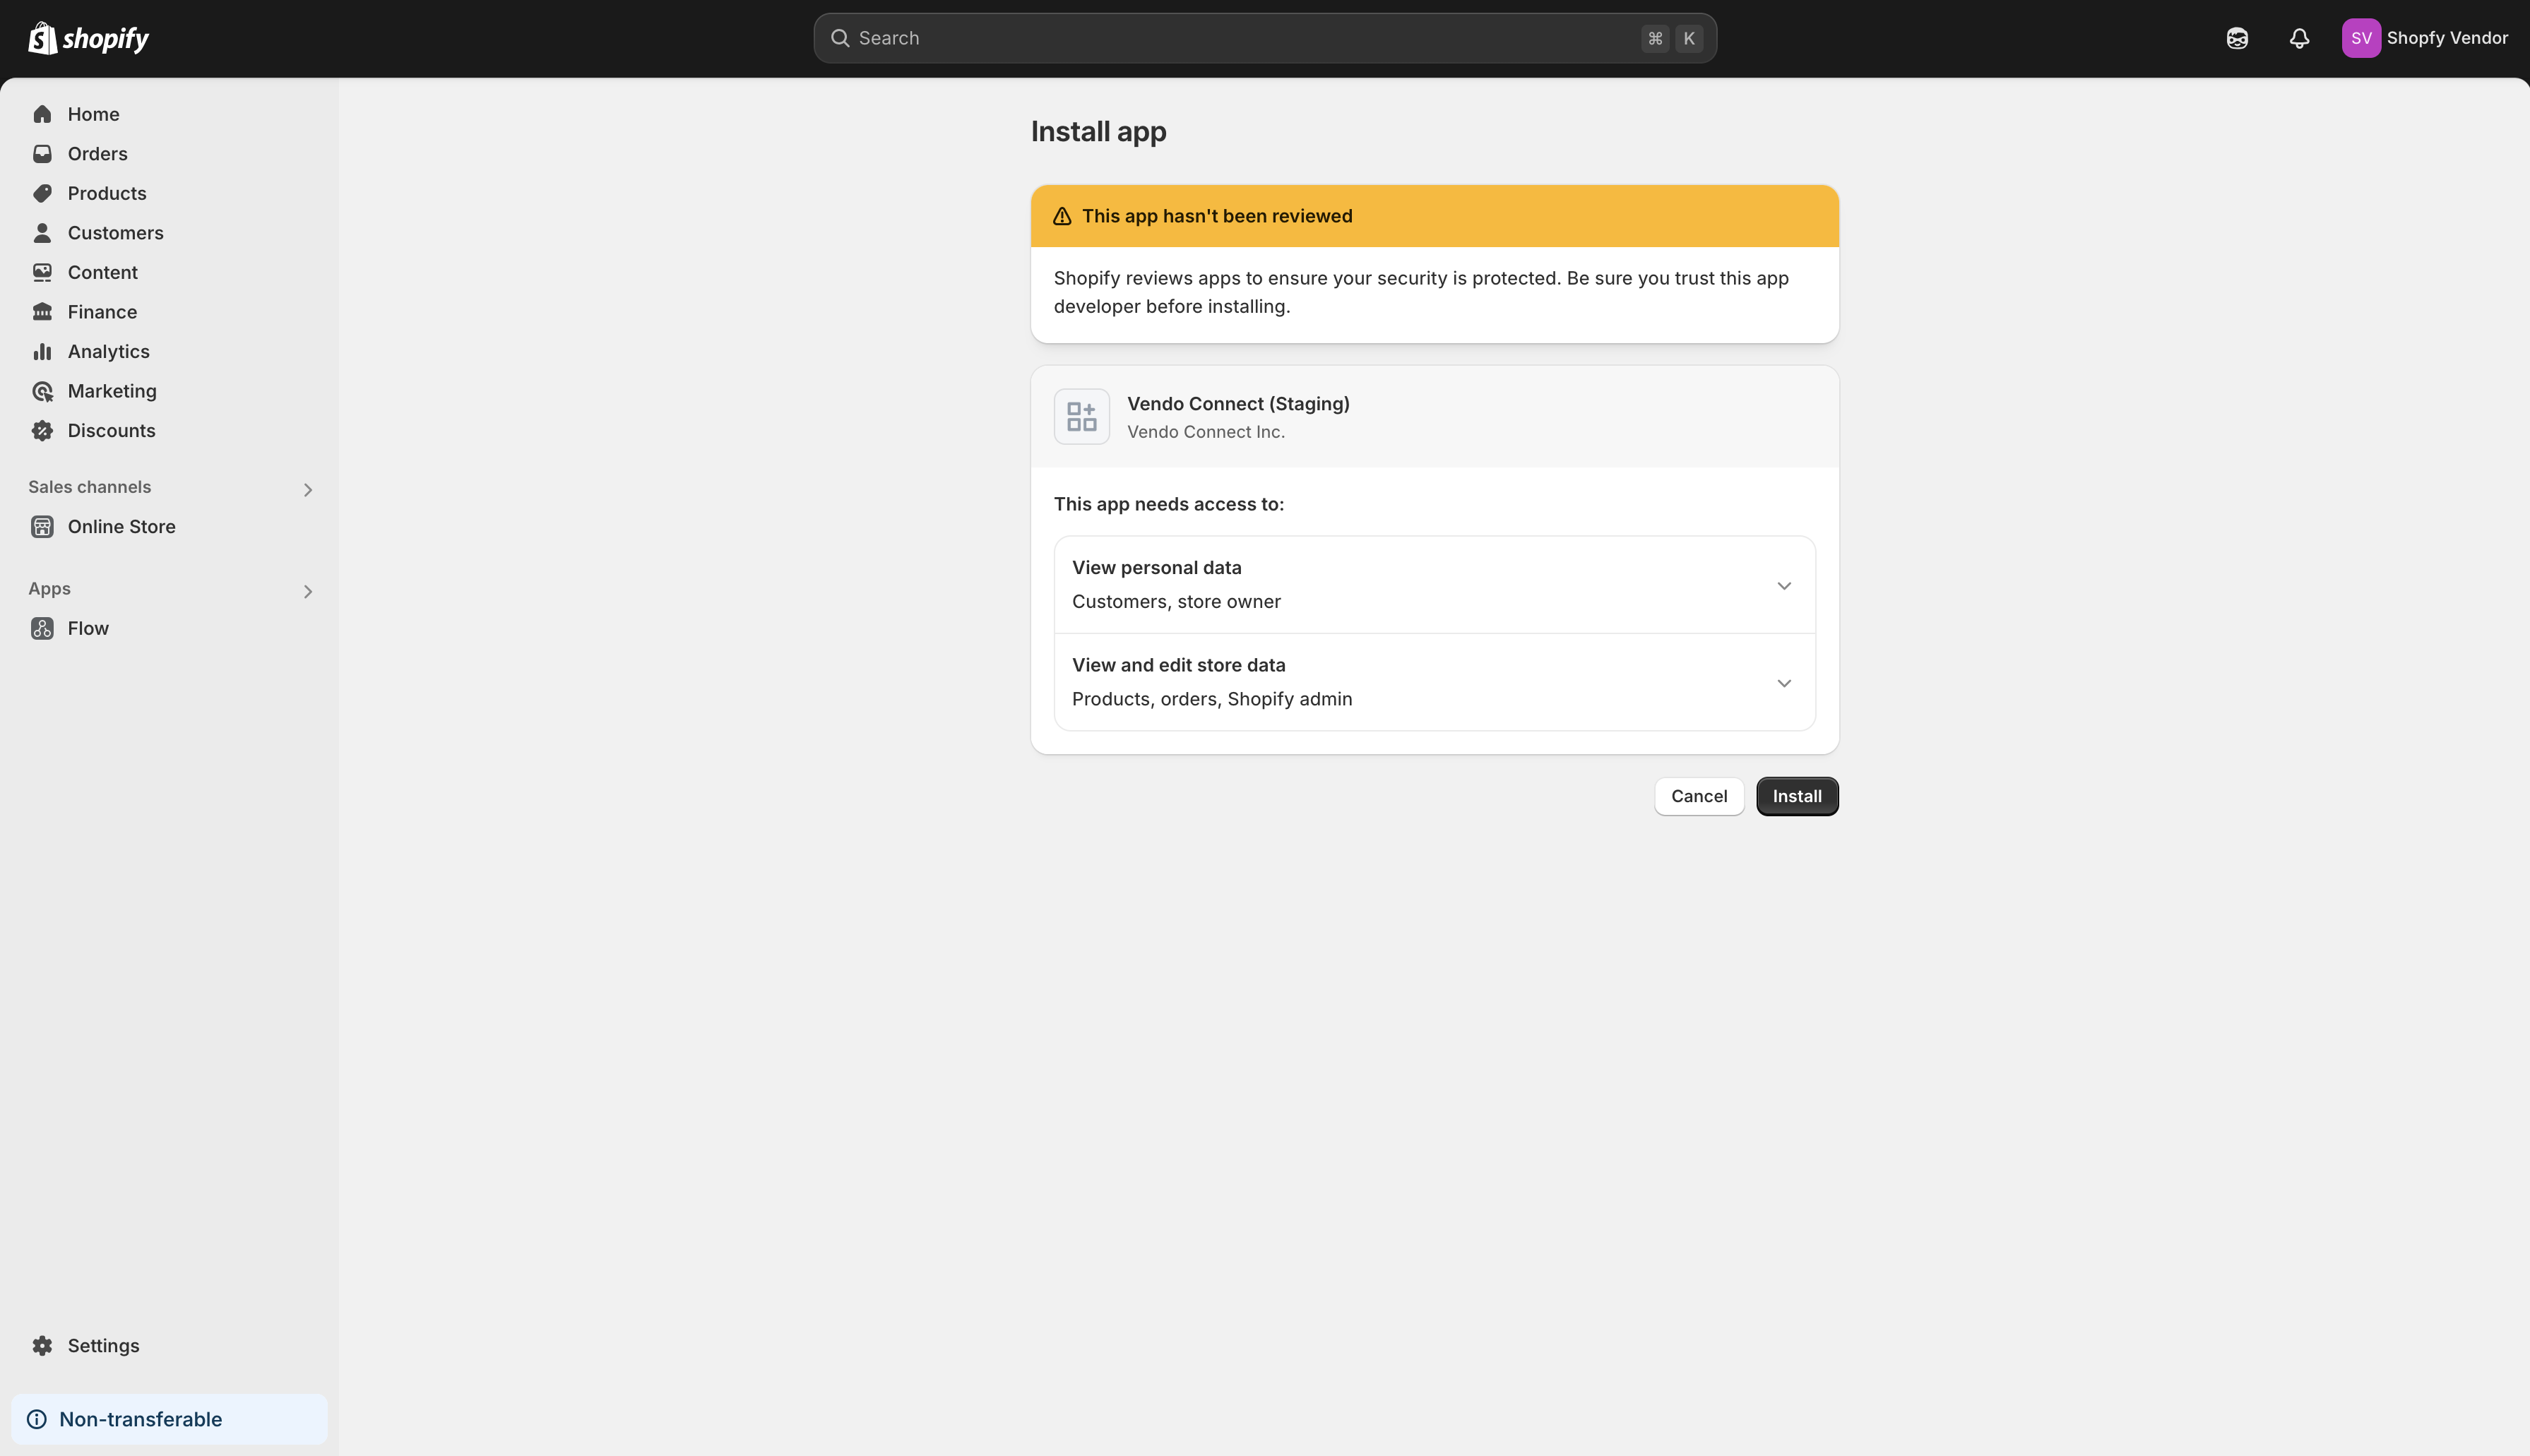 Click ‘Install’ again to install the app, and you’ll be redirected to the setup screen.
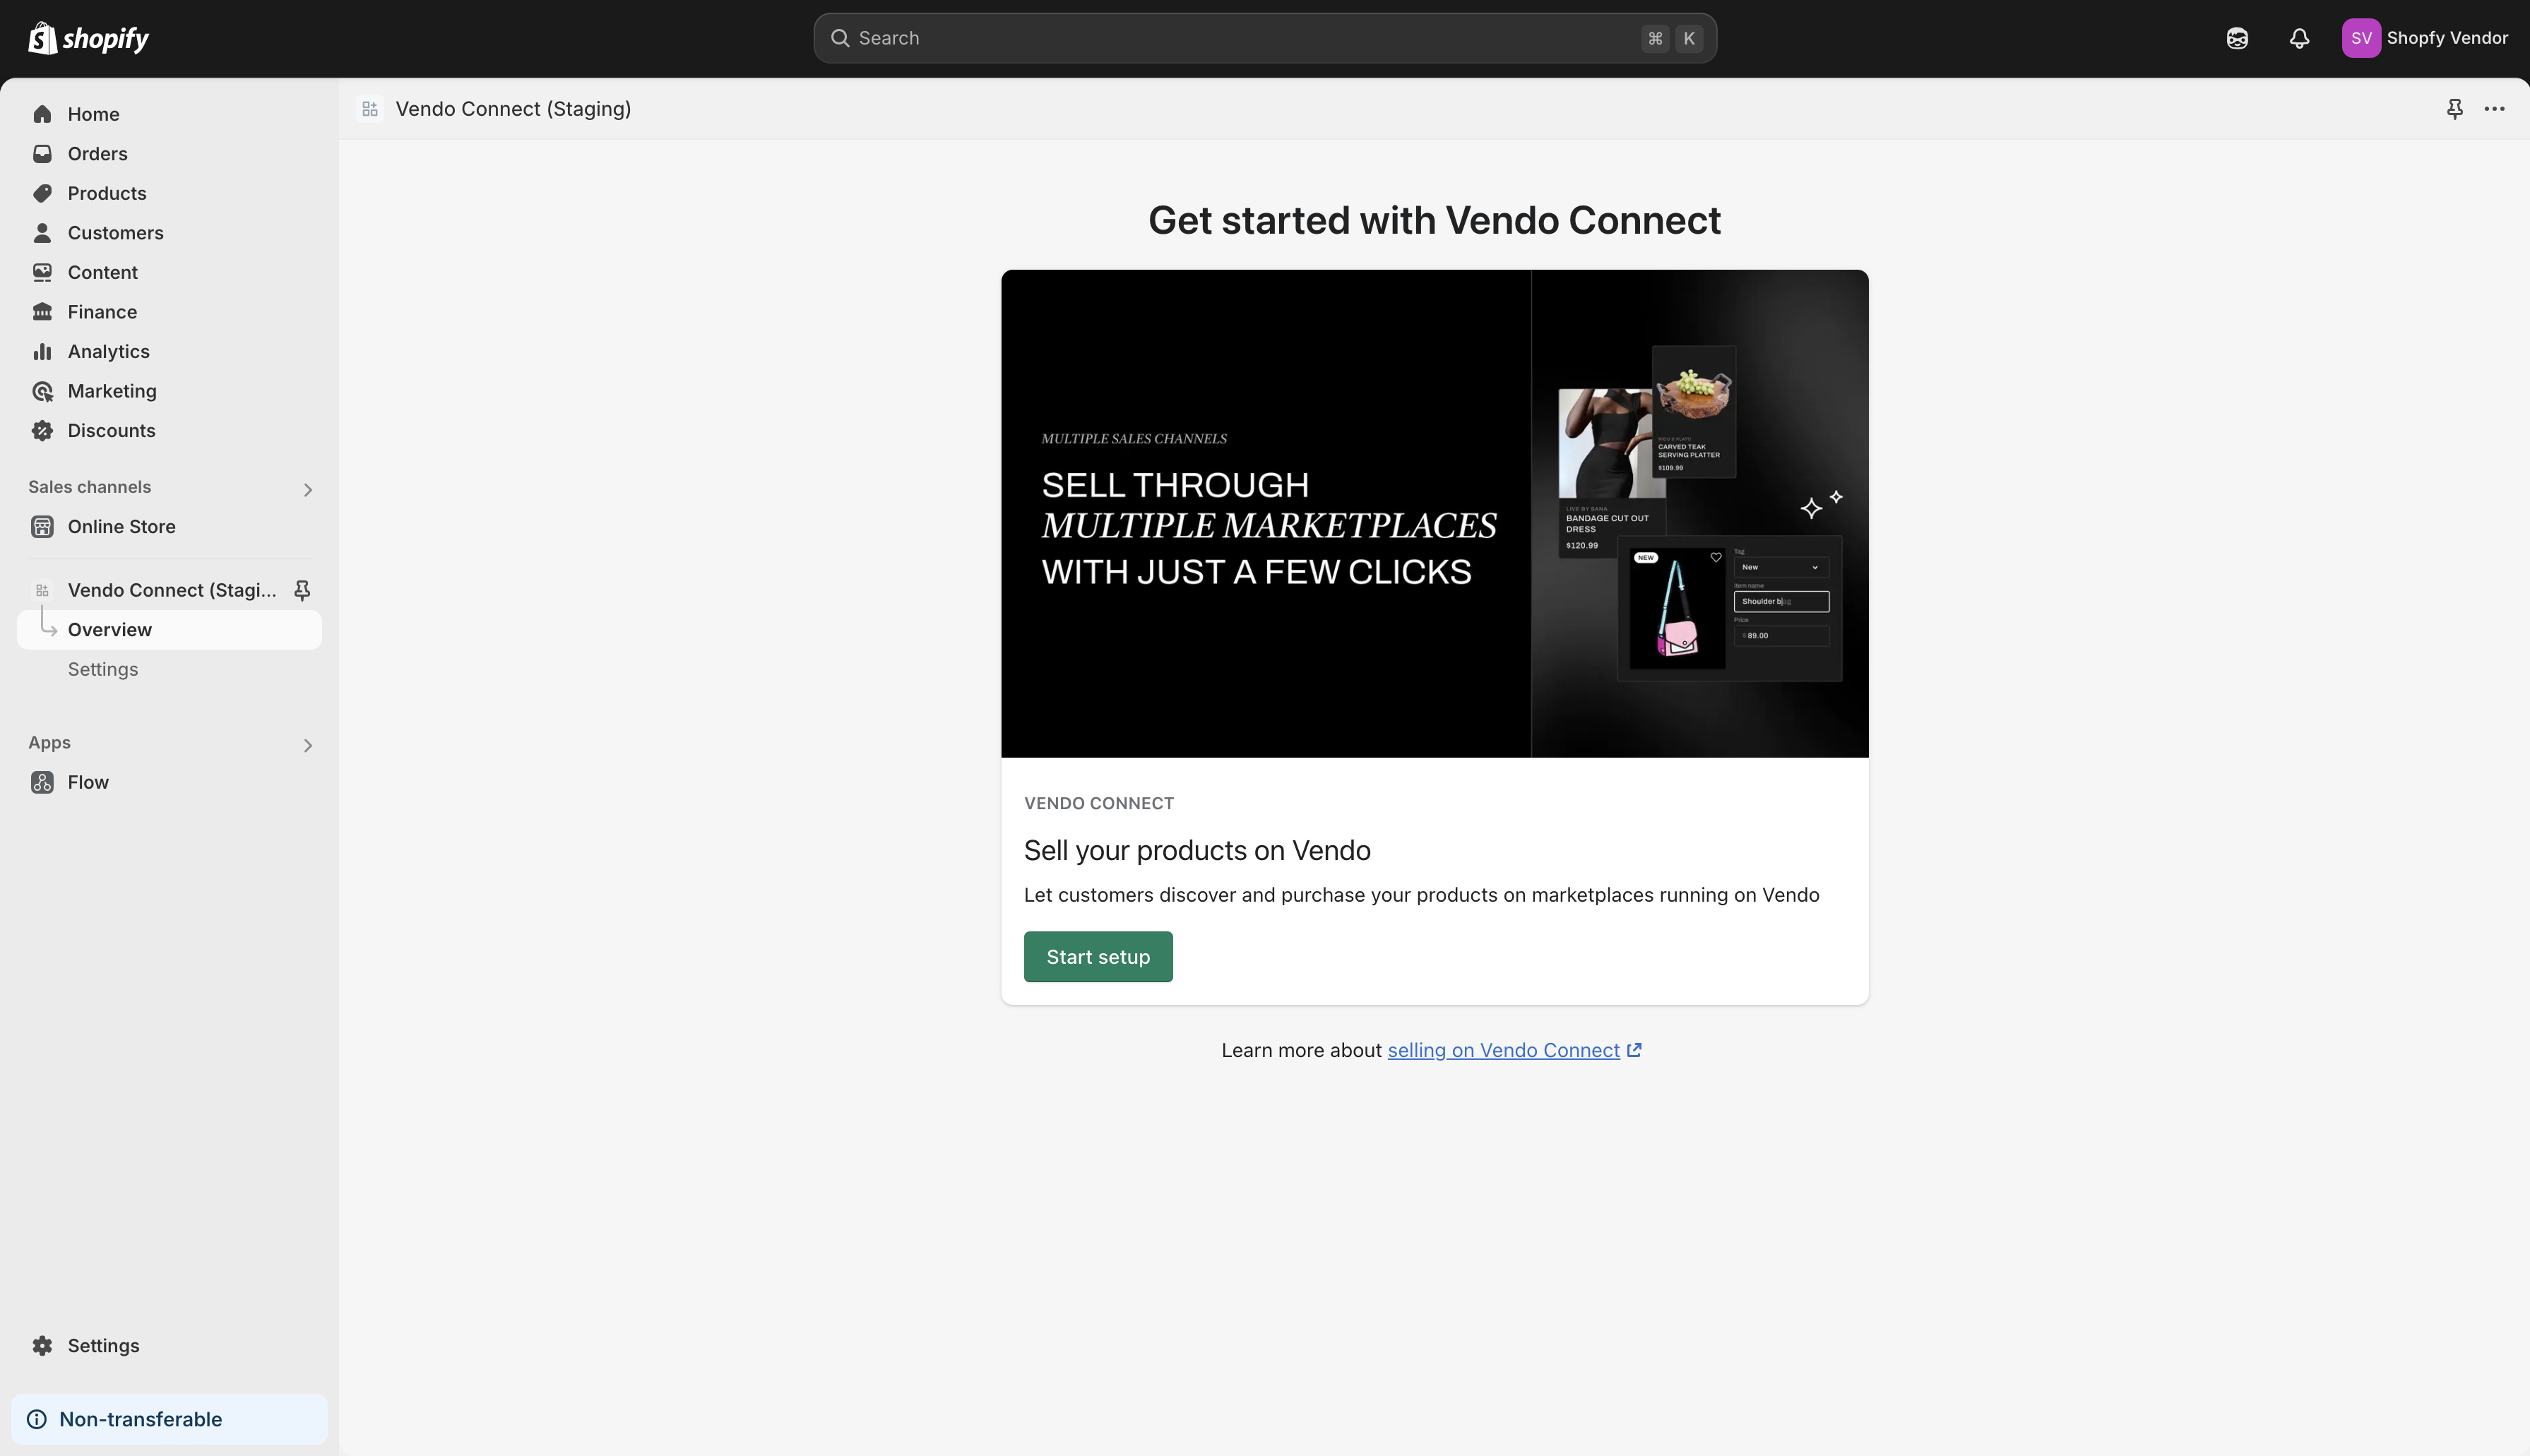 Simply click ‘Start Setup’ and your store will start synchronizing with the marketplace.
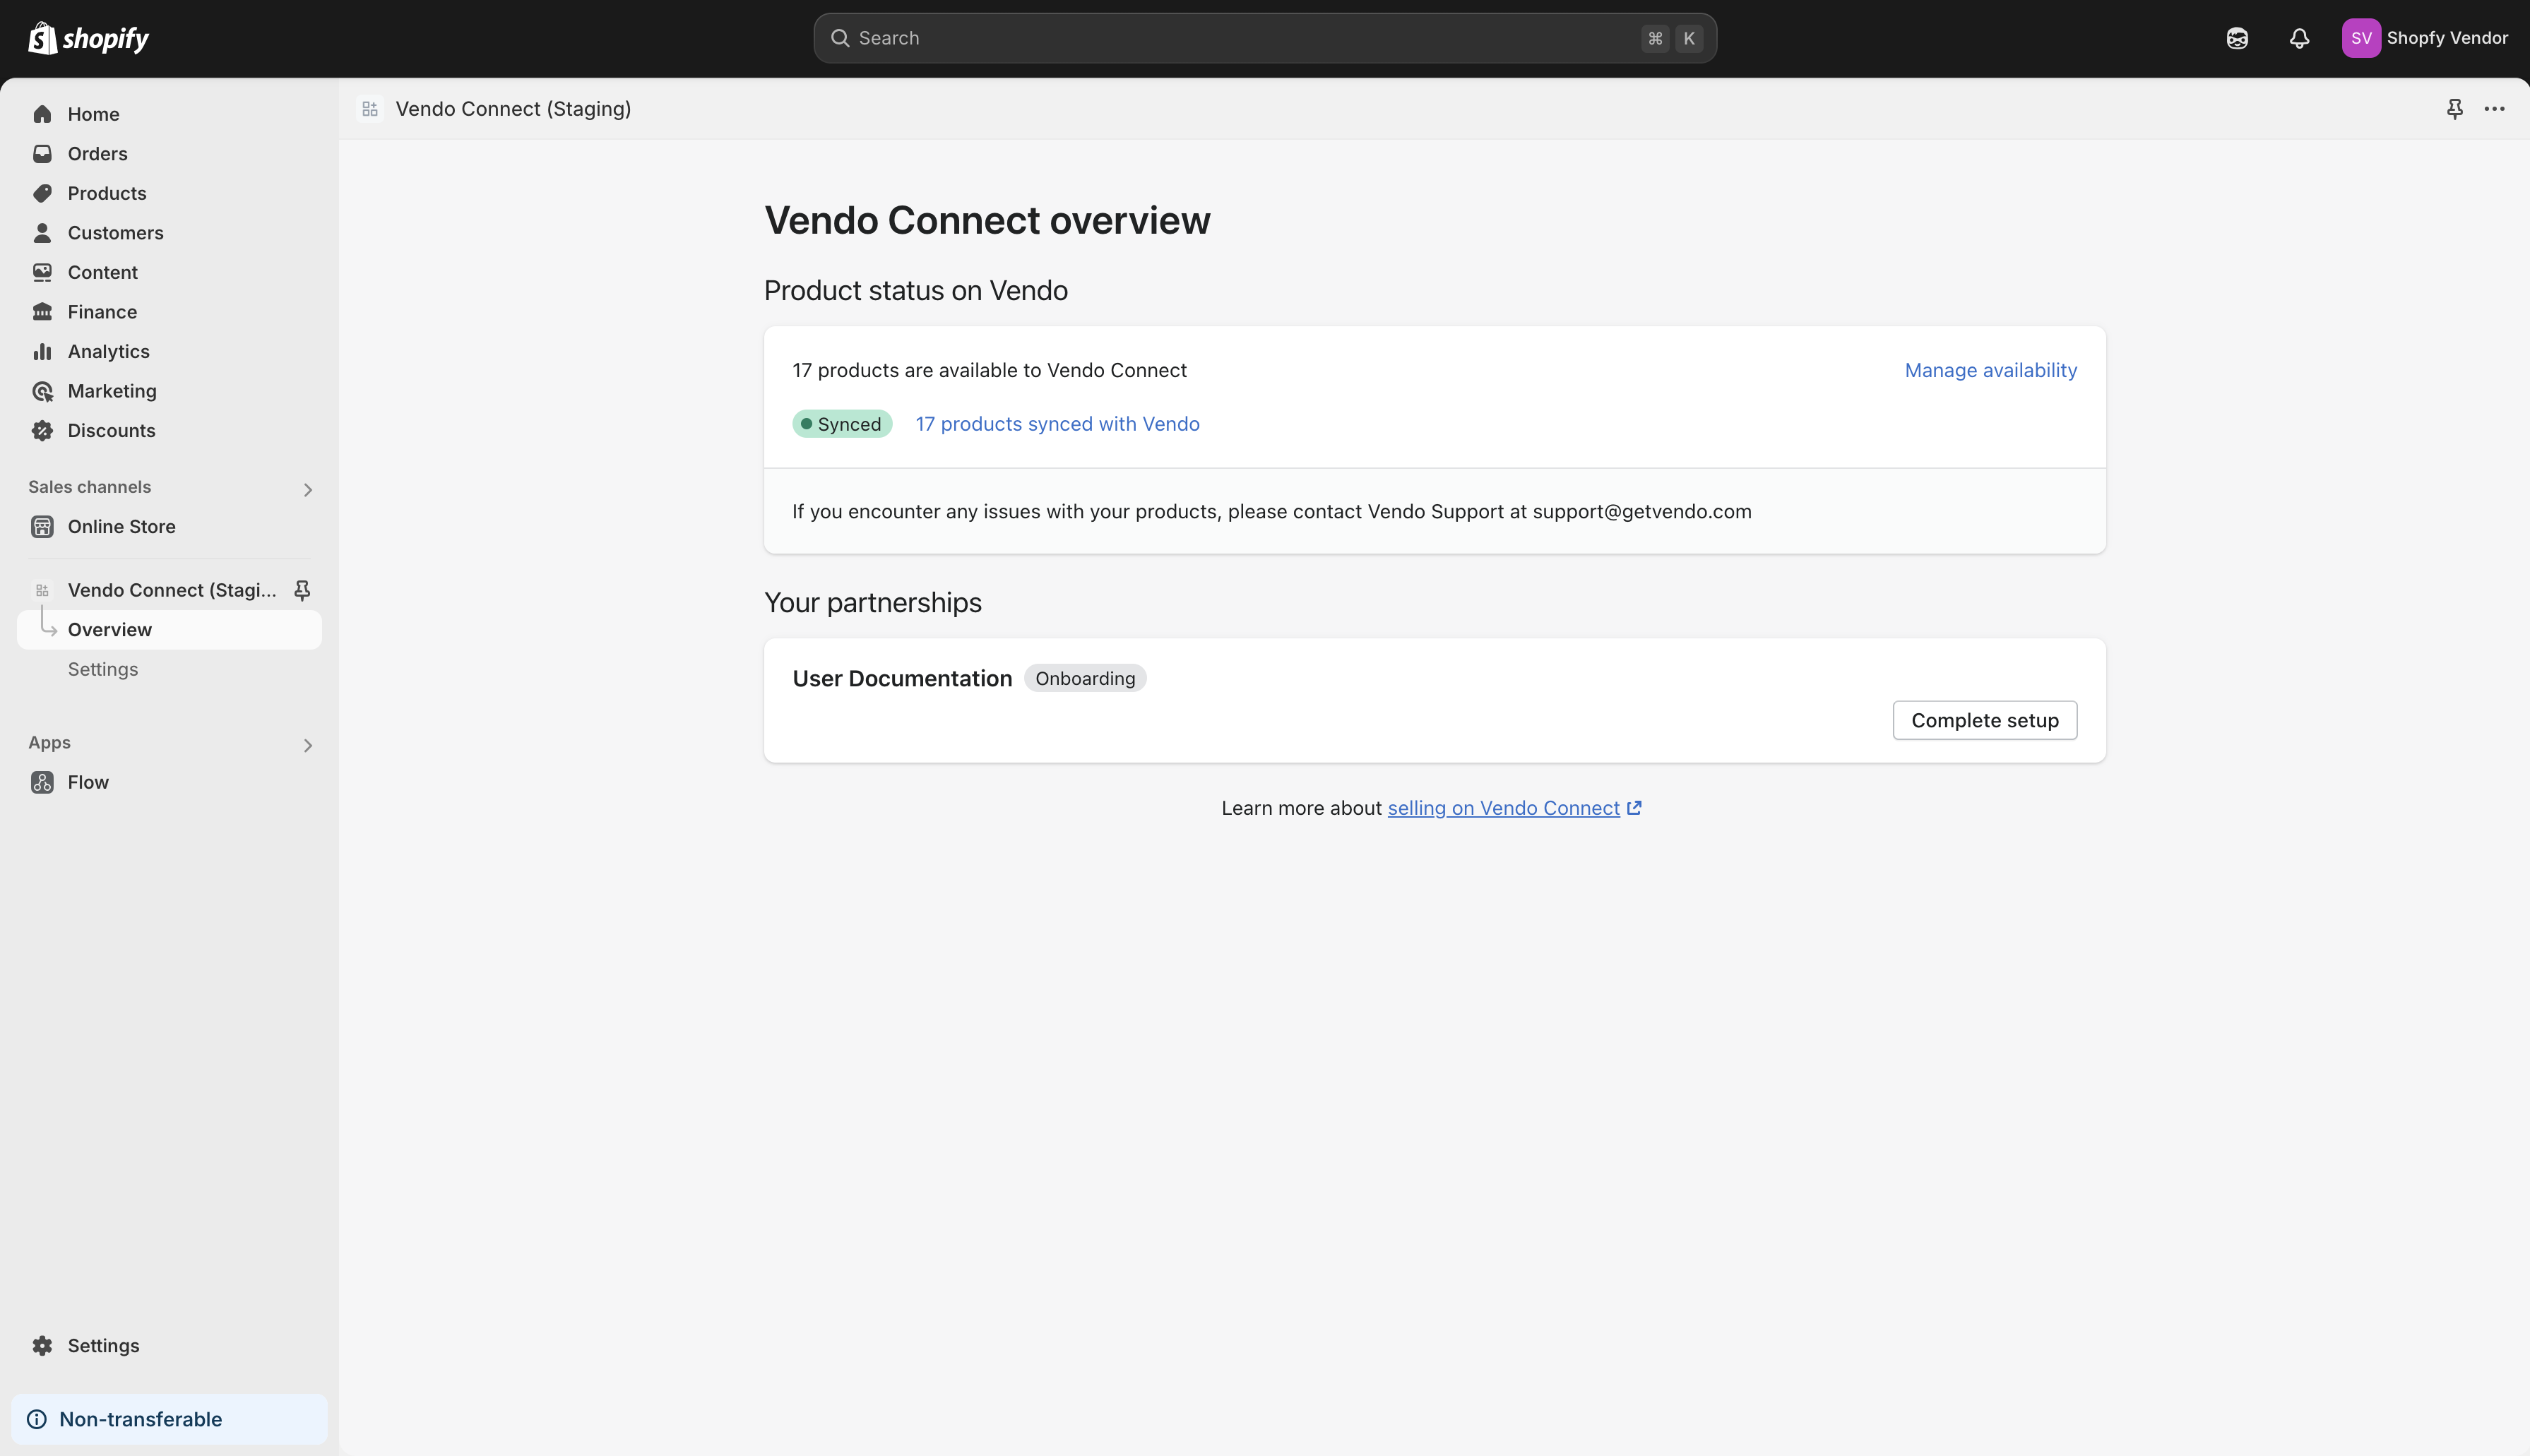 Here’s a summary of how it works:
- Active products are synced with the marketplace
- Inventory levels are synced both ways in real-time
- Shipping methods (including prices) are synced with marketplace
- Orders are routed to your Shopify dashboard for fulfillment
- Fulfillment status and shipment tracking is synced with the marketplace
- Future price updates are synced with the marketplace
- Content updates are synced with the marketplace (if not previously edited by the marketplace owner)
Of course, you can select which products you’d like to make available to the marketplace by adding/removing the sales channel to the products.
Once the app is set up, it’s essentially business as usual for Shopify stores - no need to use the Spree vendor dashboard other than for completing the rest of the onboarding steps and accessing payout information or invoices on occasion.

WooCommerce
The WooCommerce store connector works similarly to the Shopify connector by automating important parts of the onboarding process.
To connect your WooCommerce store to the marketplace, click ‘WooCommerce’.
Doing so will open a popup that requires you to enter your WooCommerce store’s URL.
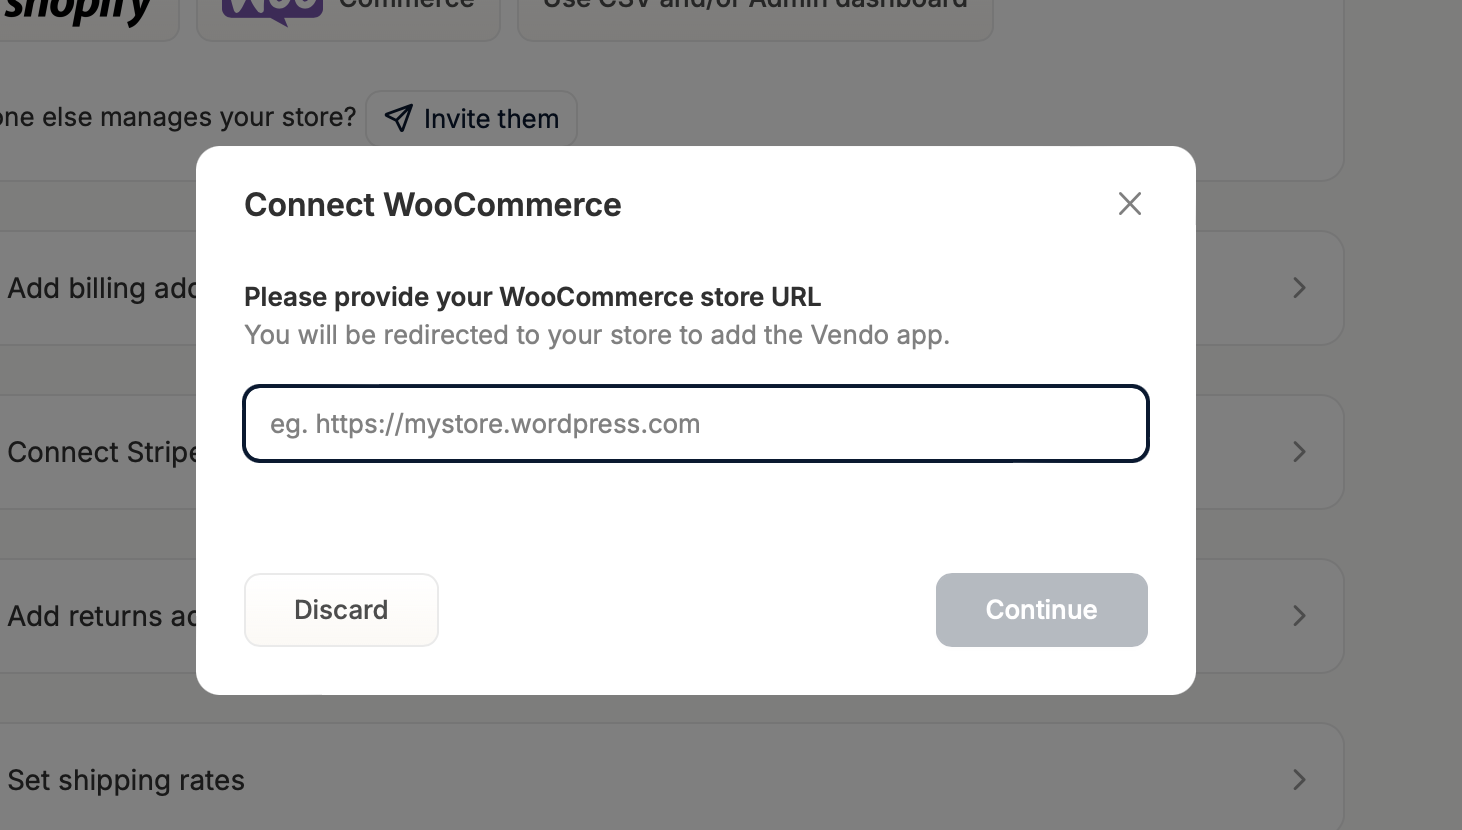 Enter the URL, click ‘Continue’, and you’ll be redirected to a page that asks you to approve the marketplace’s connection to your store.
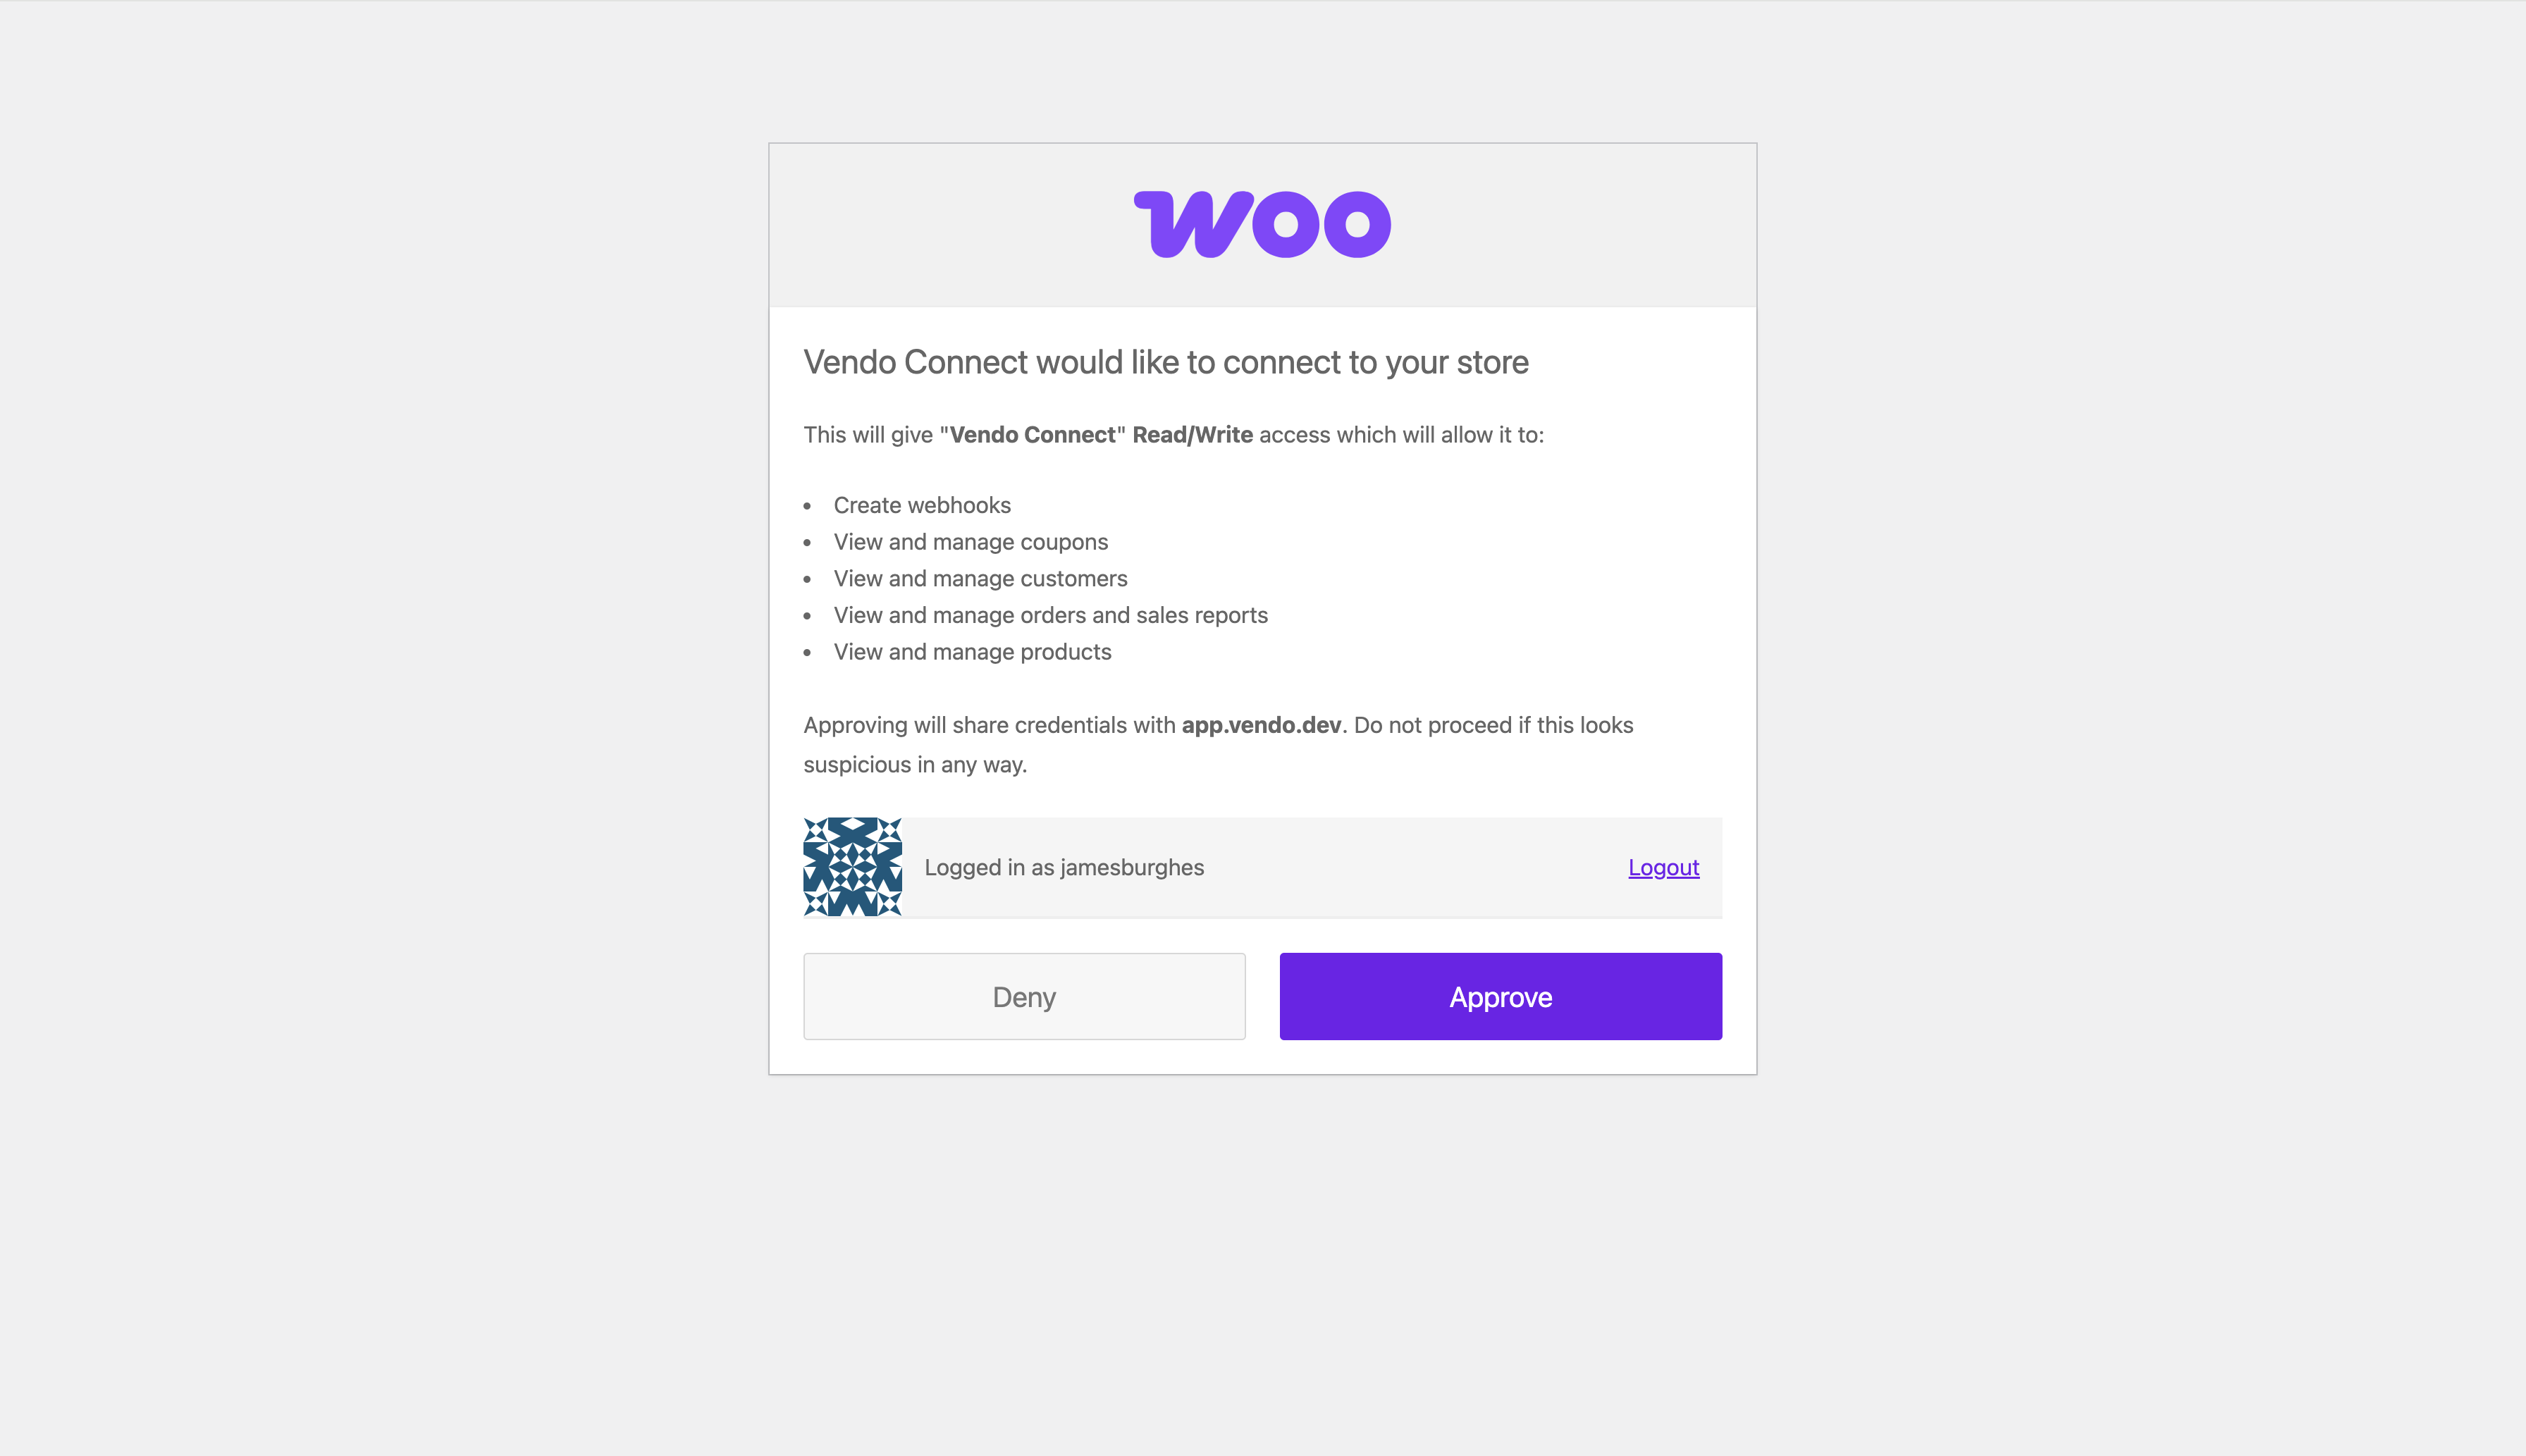 Click ‘Approve’ and you’ll be redirected to the vendor dashboard and the task will be marked as complete.
 Here’s a summary of how it works:
- Active products are synced with the marketplace
- Inventory levels are synced both ways in real-time
- Shipping methods (not including prices) are synced with marketplace
- Orders are routed to your WooCommerce dashboard for fulfillment
- Fulfillment status and shipment tracking is synced with the marketplace
- Future price updates are synced with the marketplace
- Content updates are synced with the marketplace (if not previously edited by the marketplace owner)
Use CSV and/or Admin dashboard
As the name suggests, this method requires you to add products manually one-by-one or by uploading a product CSV file.
To use this method to add products to the marketplace, click ‘Use CSV and/or Admin dashboard’ and the task will be checked off.
 While the task is complete, you’ll still need to add products to your store if you want to sell anything on the marketplace.
To do so, navigate to the Products tab of the vendor dashboard.
While the task is complete, you’ll still need to add products to your store if you want to sell anything on the marketplace.
To do so, navigate to the Products tab of the vendor dashboard.
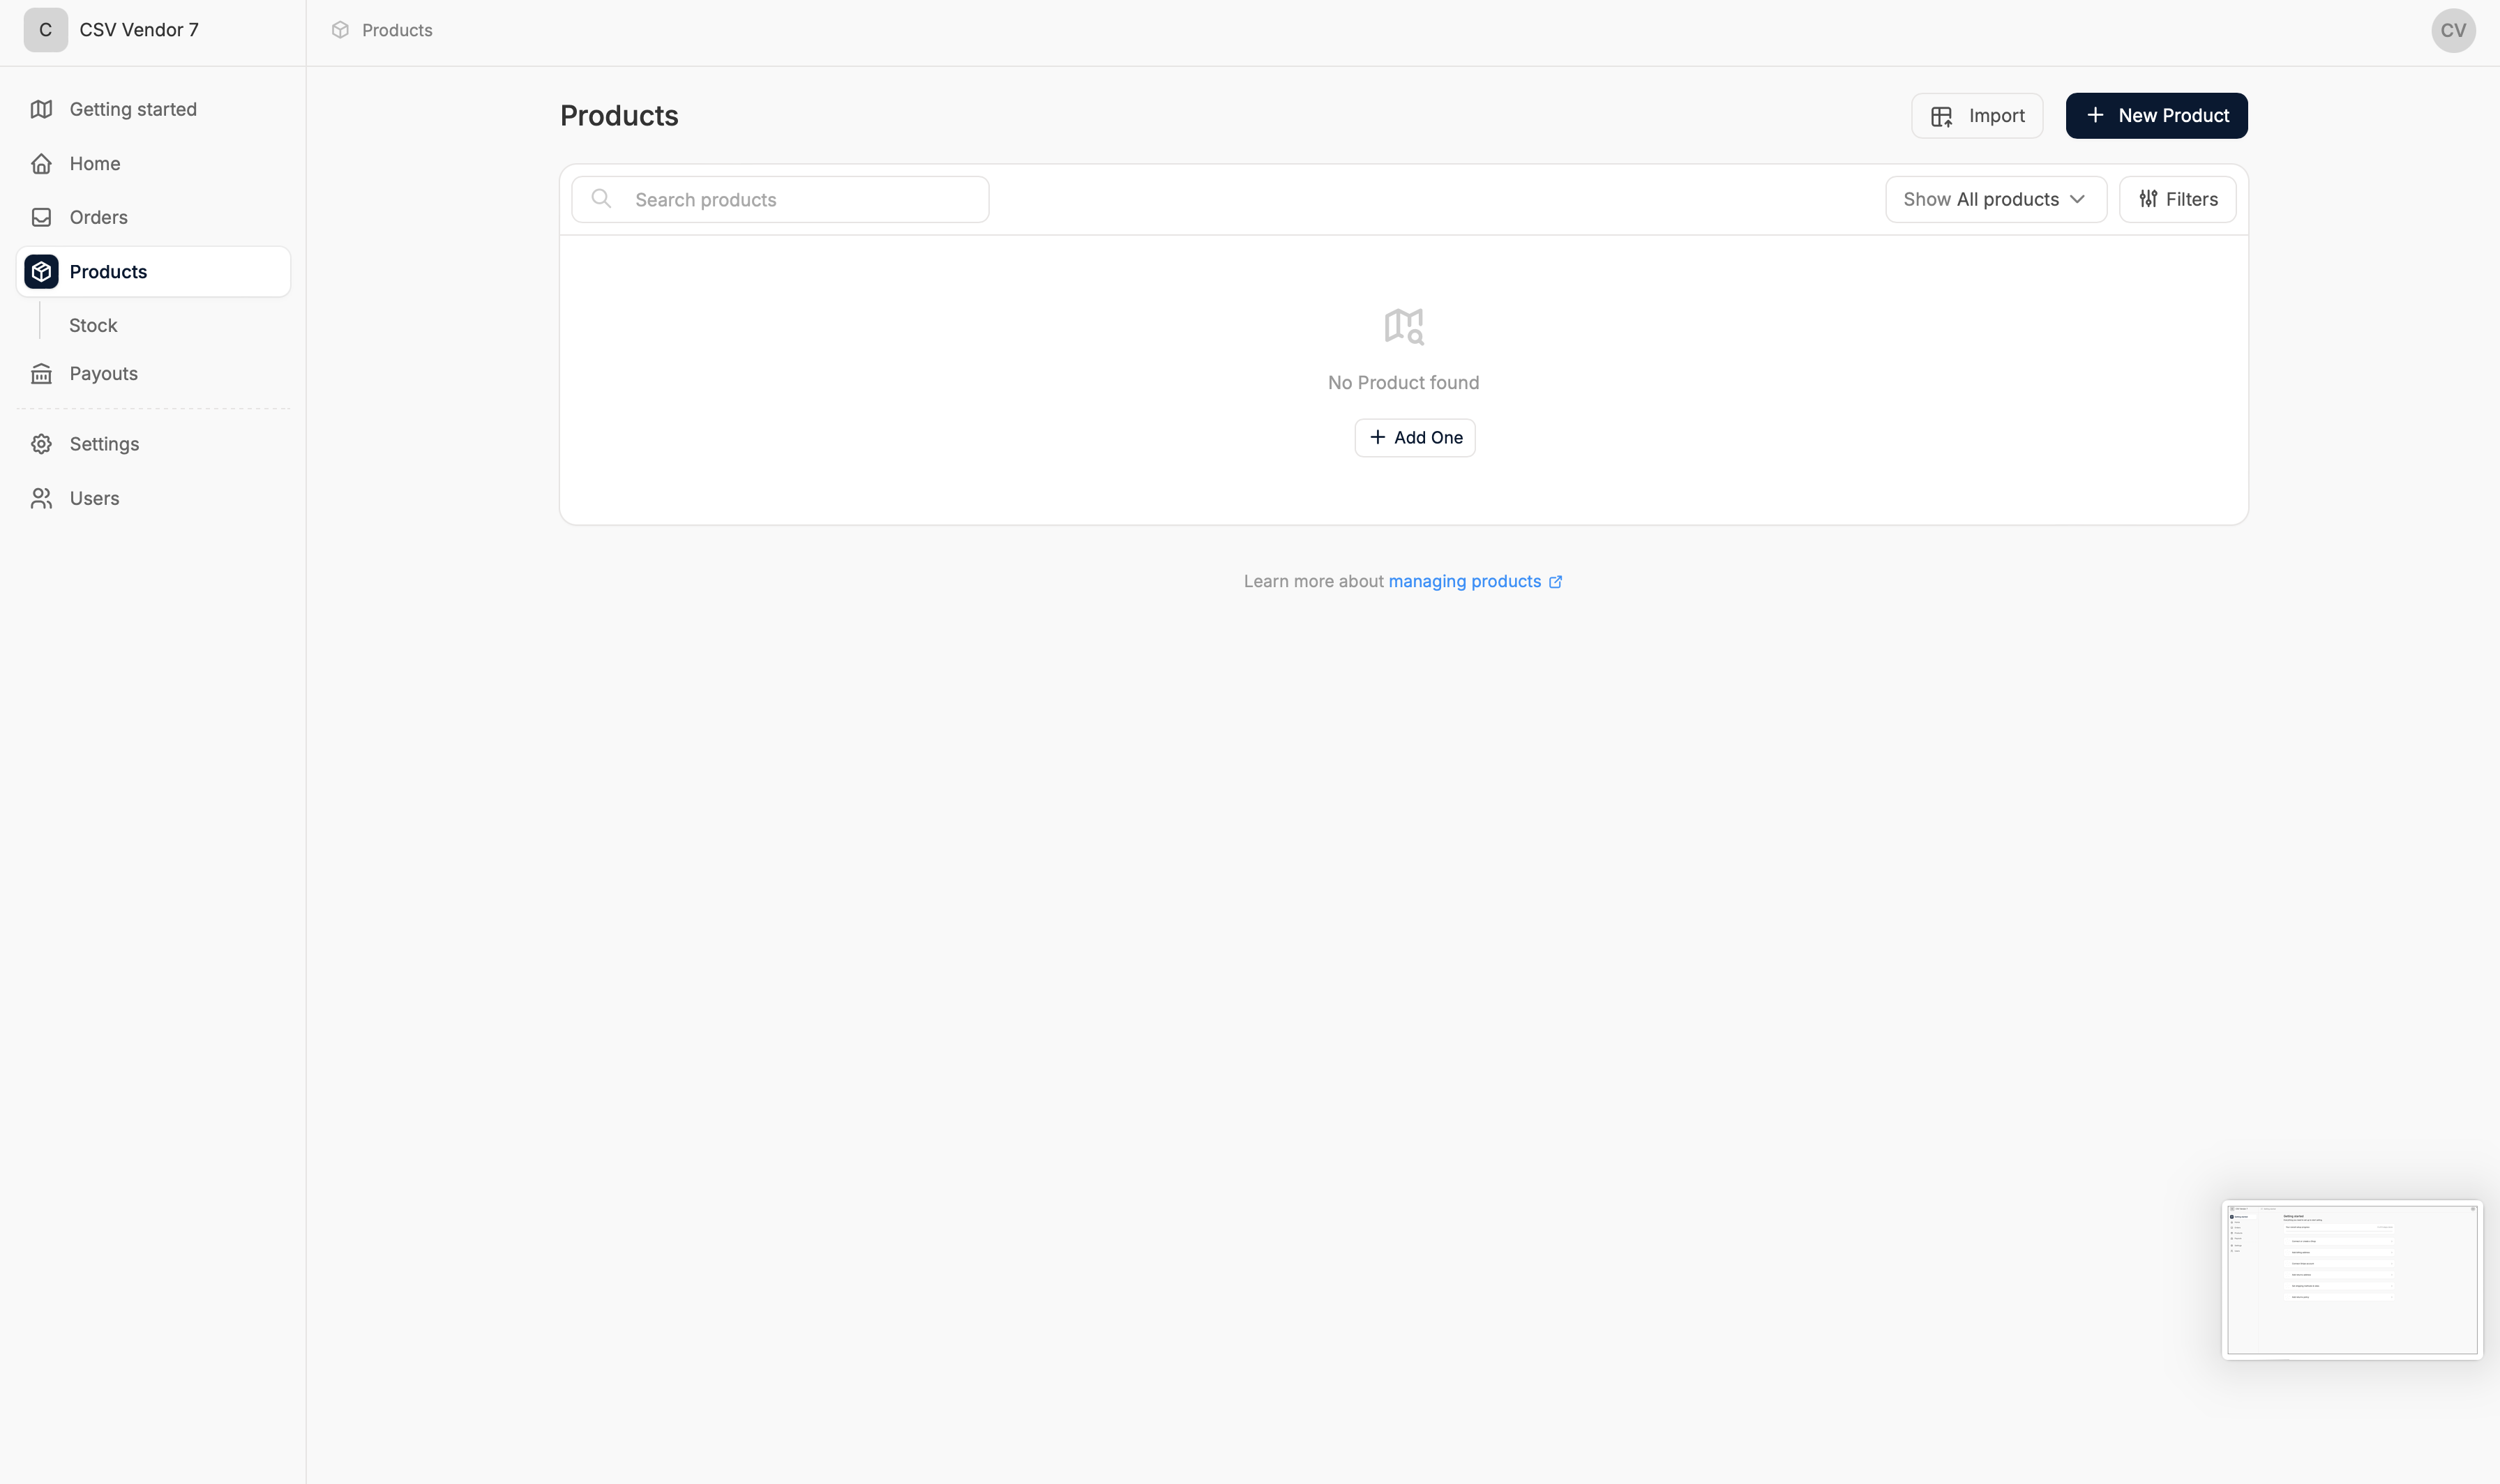 Please refer to the Products section of our user docs for guides on how to add products to your vendor account.
Add billing address
Adding your company’s billing address is essential as it is needed for vendor payouts and invoices.
Simply click on the task to reveal the form and enter your company’s billing information.
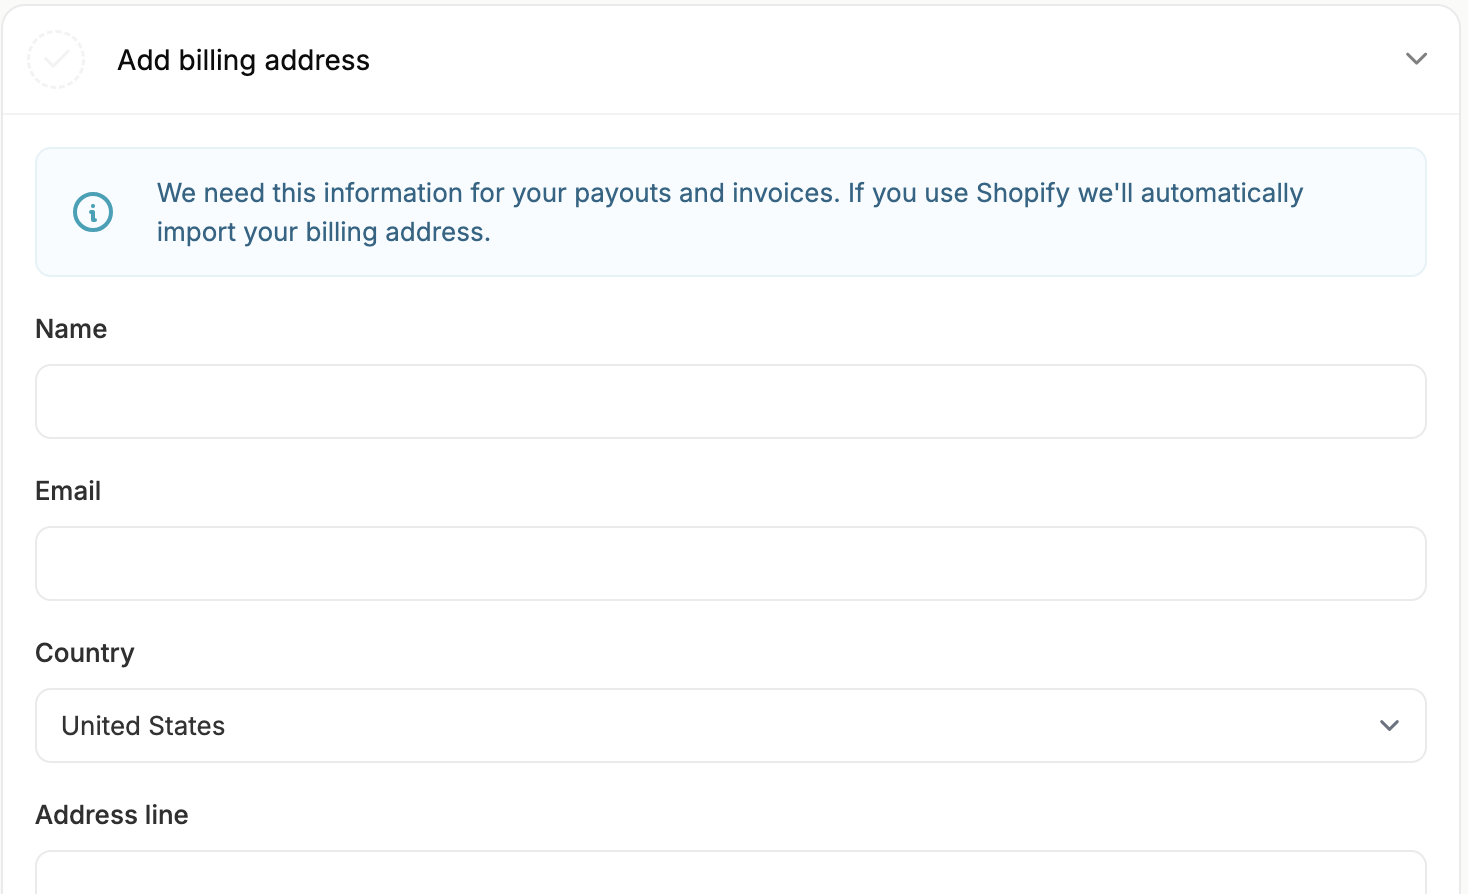 Fill in all the required fields, click ‘Save’, and the task will be marked as completed.
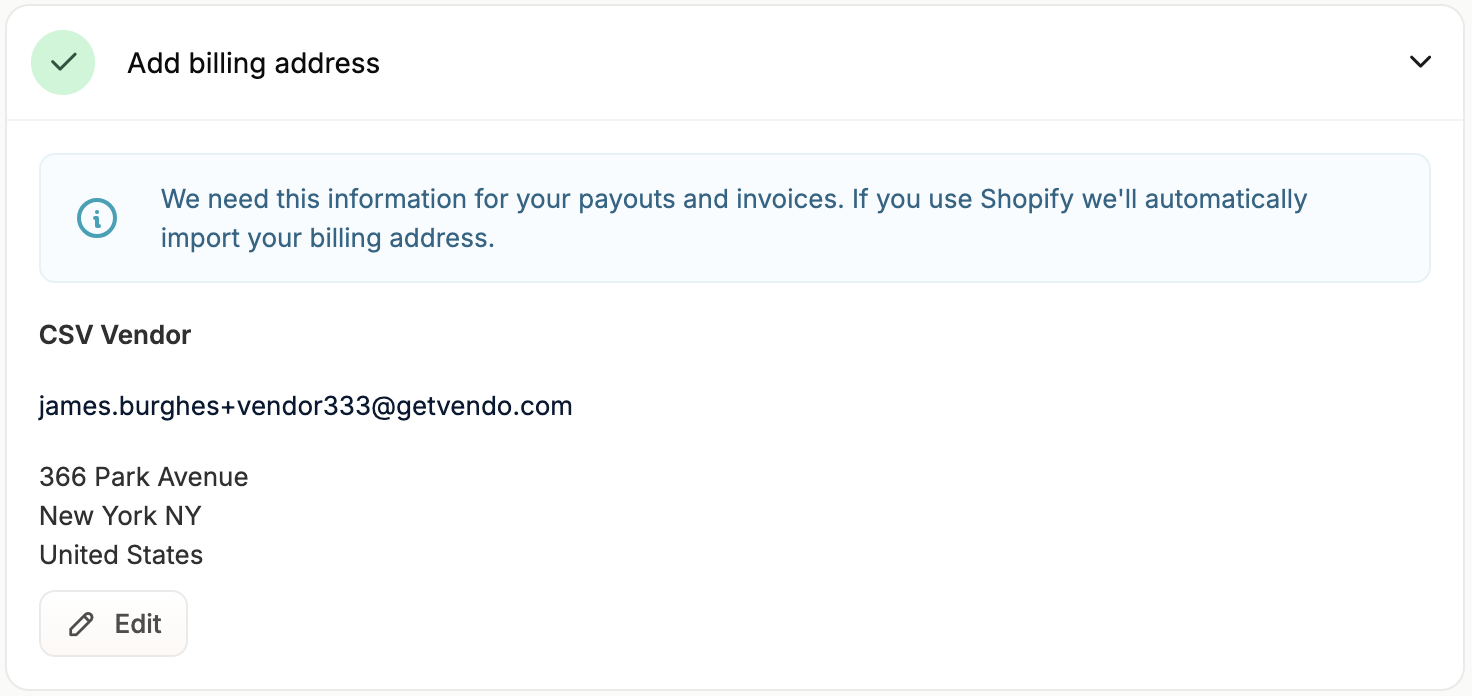
If you use the Shopify store connector, your billing address will be automatically imported.
Connect Stripe account
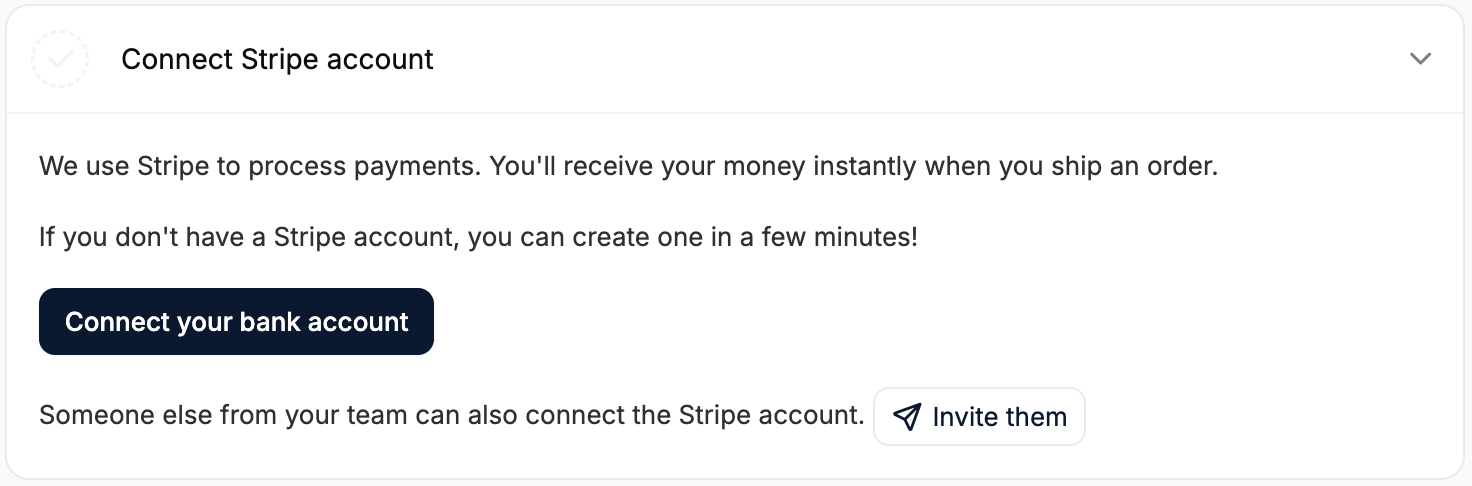 Stripe is used to process payments and to send vendor payouts. In order to receive your payouts, you’ll need to connect a Stripe account to the marketplace’s account.
An existing Stripe account is not required. Clicking on ‘Connect your bank account’ will lead you through a short Stripe onboarding process which should only take a few minutes.
When an order is placed, you’ll receive the money instantly whenever you ship the order.
If you’re not in charge of the financial responsibilities of your company, you can invite another team member to complete this task instead.
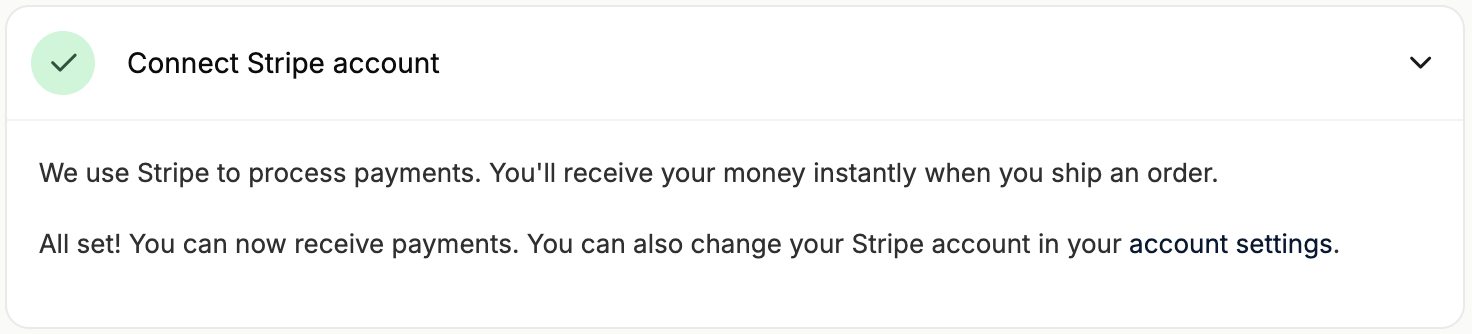
Once Stripe onboarding is complete, the associated task will be checked off.
Stripe is used to process payments and to send vendor payouts. In order to receive your payouts, you’ll need to connect a Stripe account to the marketplace’s account.
An existing Stripe account is not required. Clicking on ‘Connect your bank account’ will lead you through a short Stripe onboarding process which should only take a few minutes.
When an order is placed, you’ll receive the money instantly whenever you ship the order.
If you’re not in charge of the financial responsibilities of your company, you can invite another team member to complete this task instead.
Once Stripe onboarding is complete, the associated task will be checked off.
 If you’ve missed any information when submitting your Stripe account, the task will not be marked off and you’ll be asked to complete onboarding.
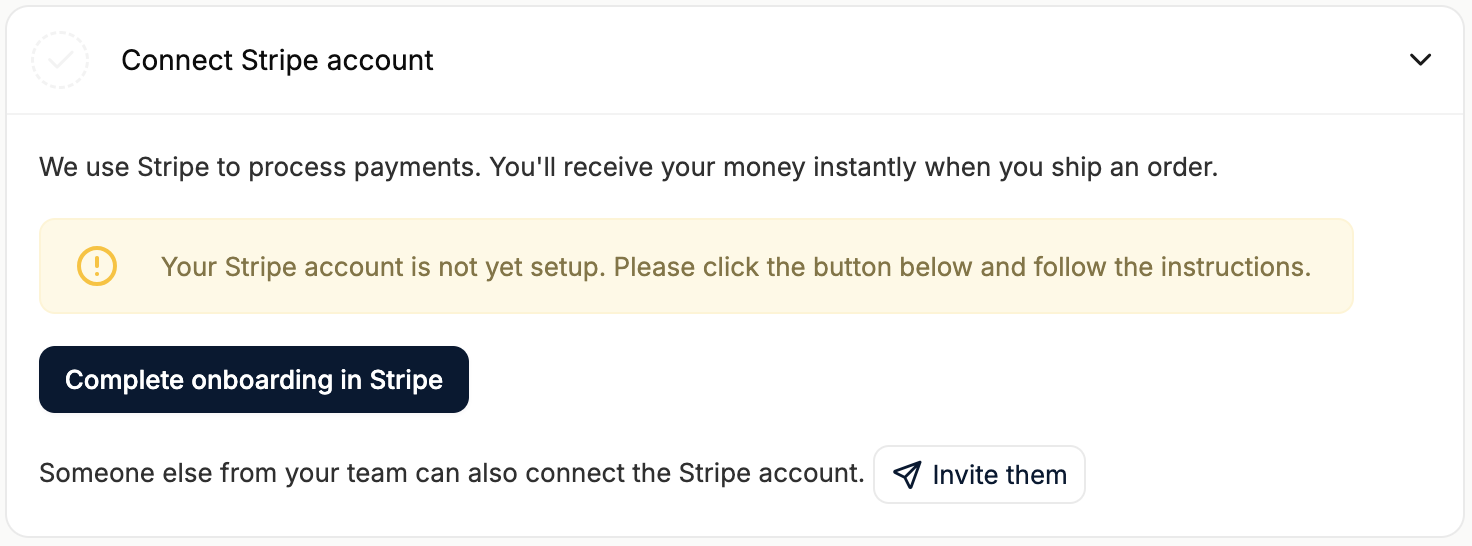
While Stripe is popular among marketplace platforms, the marketplace you are joining may not use Stripe. However, you will likely still be required to connect a bank account to receive payouts unless they are reconciling them manually.
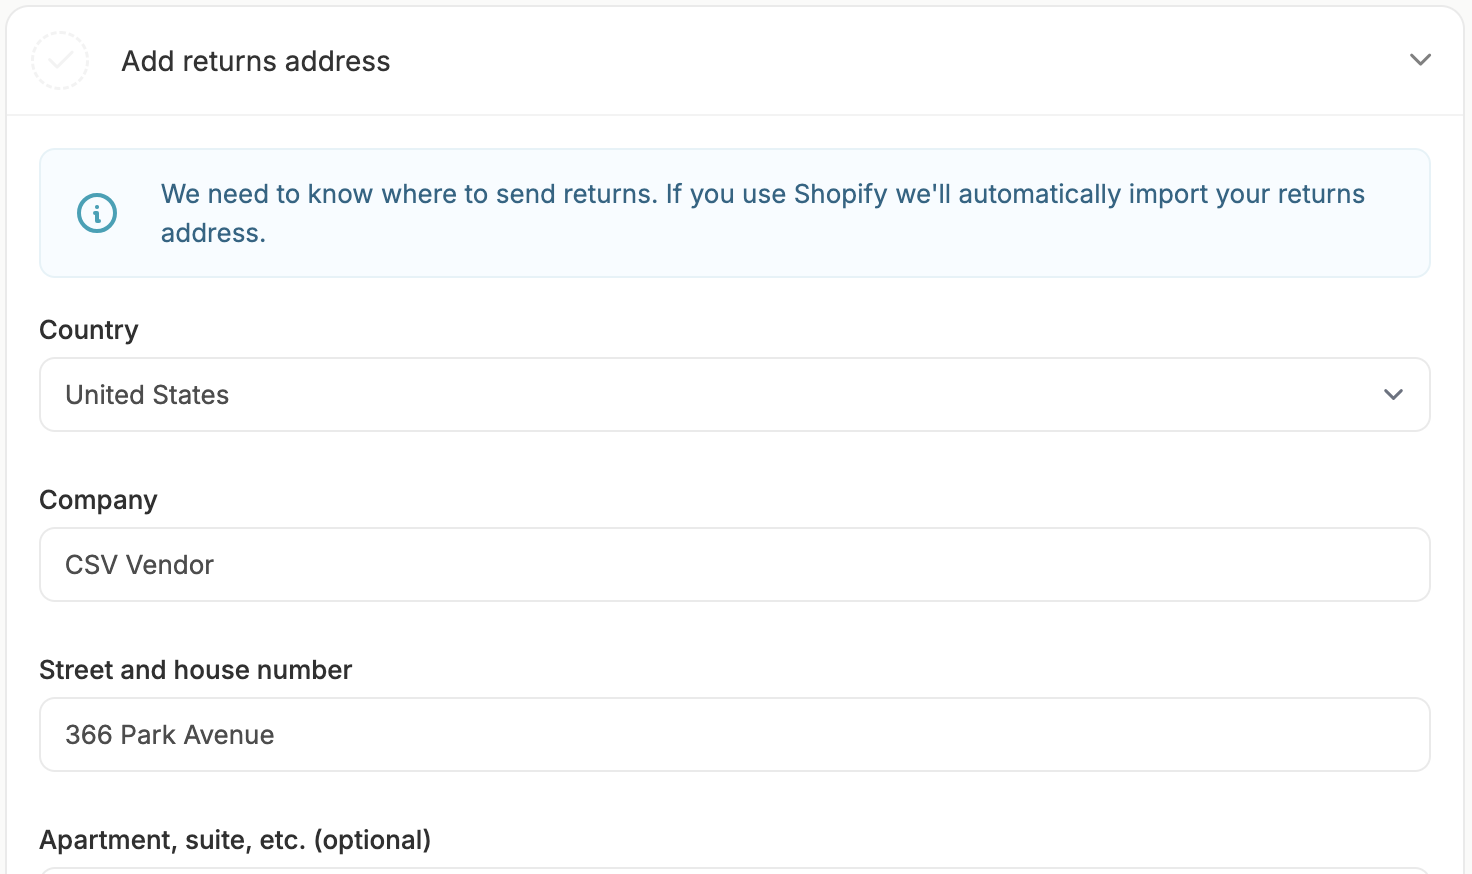
Add returns address
Adding a return address as a vendor is important because it ensures customers know where to send returns, streamlining the return process and helping maintain a positive customer experience.
Simply click on the task to reveal the form, and enter your company’s return address.
 Fill in all the required fields, click ‘Save’, and the task will be marked as completed.
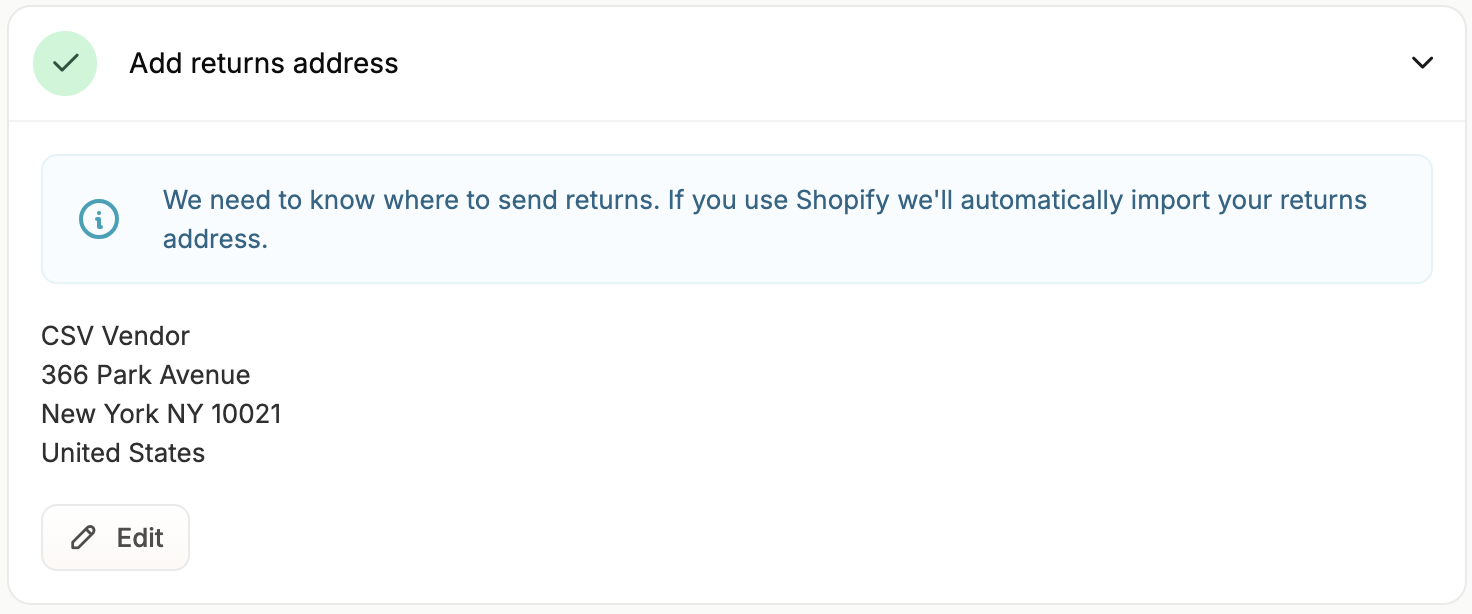
If you use the Shopify store connector, your billing address will be automatically imported.
Set shipping rates
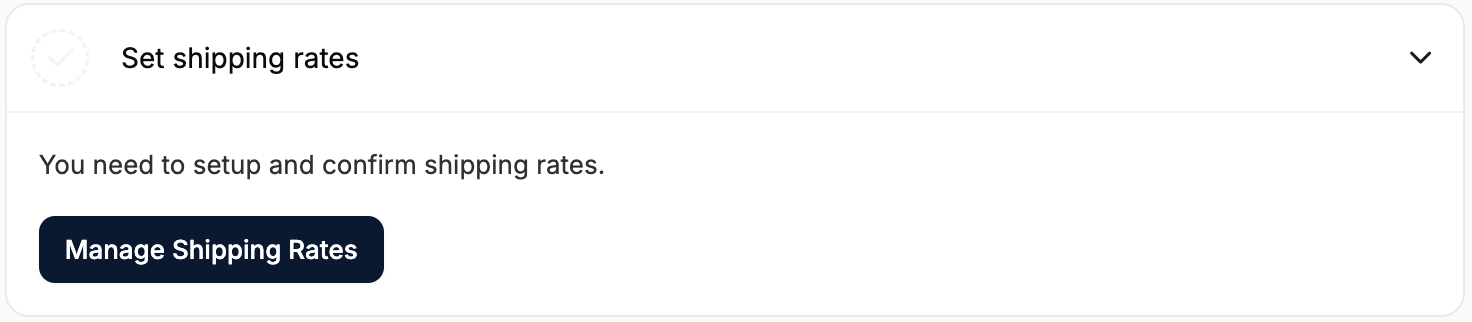 Shipping rates must be set up and confirmed. Otherwise, customers will not be able to order your products.
Click on ‘Manage Shipping Rates’ and you’ll be redirected to ‘Shipping Methods’ section of the vendor dashboard’s Settings menu.
Shipping rates must be set up and confirmed. Otherwise, customers will not be able to order your products.
Click on ‘Manage Shipping Rates’ and you’ll be redirected to ‘Shipping Methods’ section of the vendor dashboard’s Settings menu.
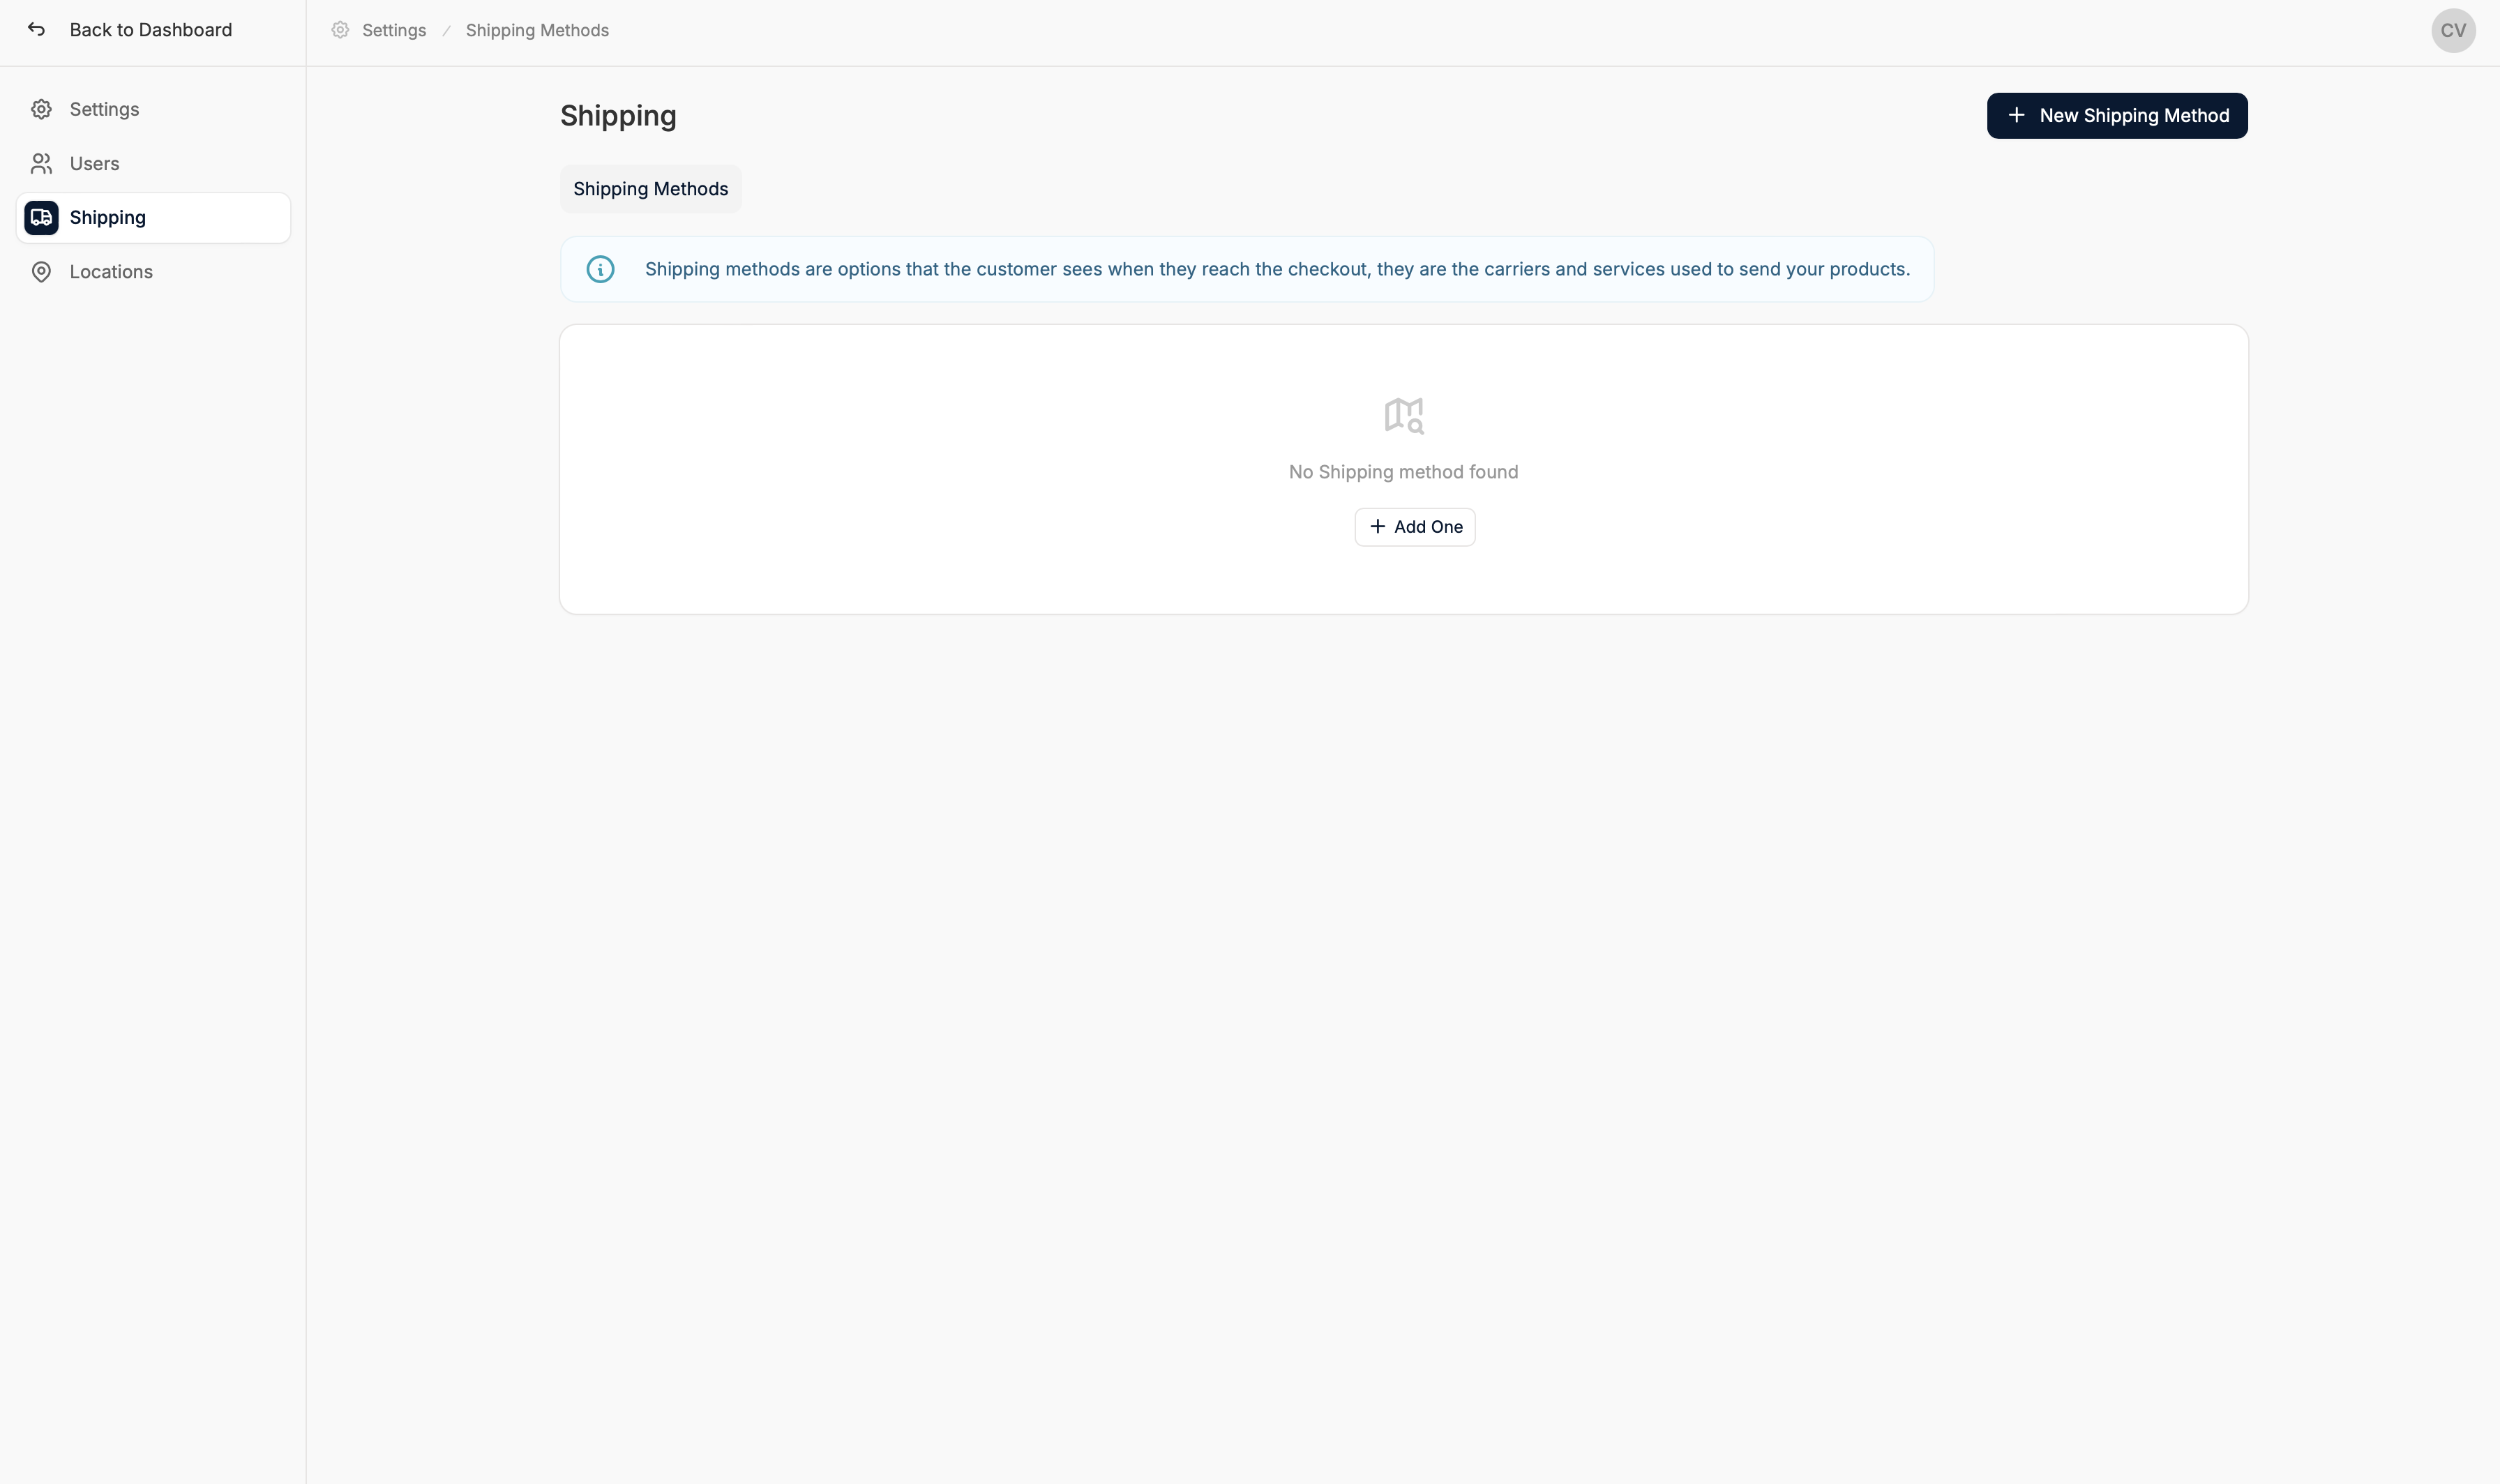 How you completed the first task (Connect or Create a Shop) determines what you’ll need to do here:
- If you connected Shopify, your shipping methods and rates will be synced. You’ll just need to click ‘Confirm Shipping Rates’ in the top right corner.
- If you connected WooCommerce, your shipping methods will be synced. You’ll need to set the rate of each method, and then click ‘Confirm Shipping Rates’.
- If you imported a product CSV, you’ll need to add shipping methods and rates, and then click ‘Confirm Shipping Rates’.
Whatever the case, please refer to our support article on Shipping Methods to learn how to setup and manage shipping methods.
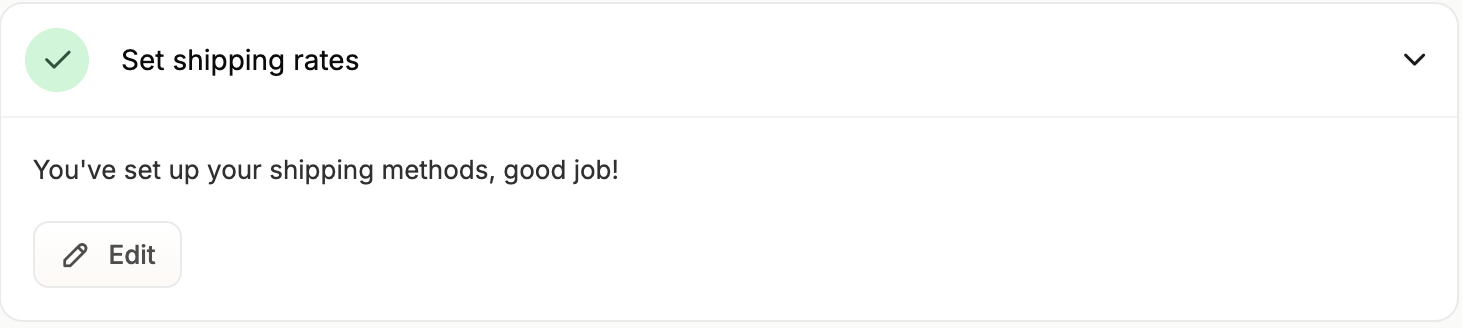
After confirming the shipping rates, the task will be marked as completed.
You can edit existing shipping methods or add new ones at any time.
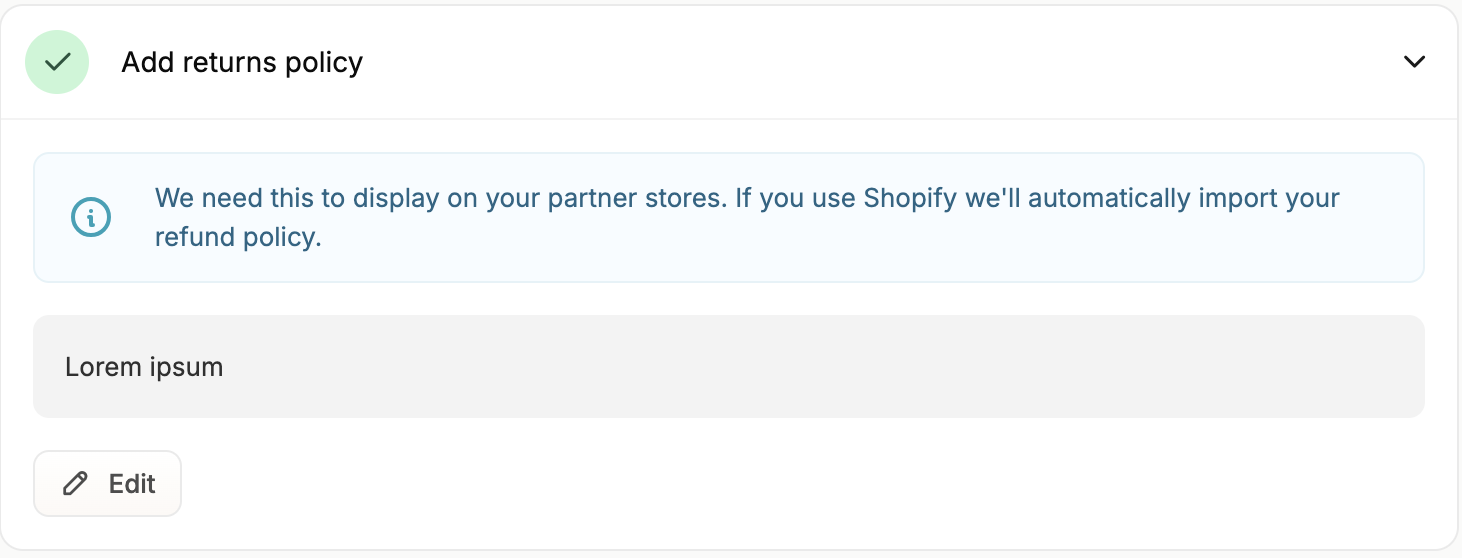
Add returns policy
Last but not least, you’ll need to add a return policy. Adding a return policy as a vendor is important because it builds trust with customers, sets clear expectations, and helps prevent disputes over returns and refunds.
Simply click on the task to reveal the text field.
 Copy and paste your returns policy into the field, click ‘Save’ and the task will be completed.
Onboarding Completed!
Congratulations, you have successfully completed the onboarding process. All that’s left now is for the marketplace owner to approve your vendor profile, merchandise your products and brand page, and start selling!