Before you can set up a Market for a country, you need to make sure that country is included in a configured Zone. See Zones for setup instructions.
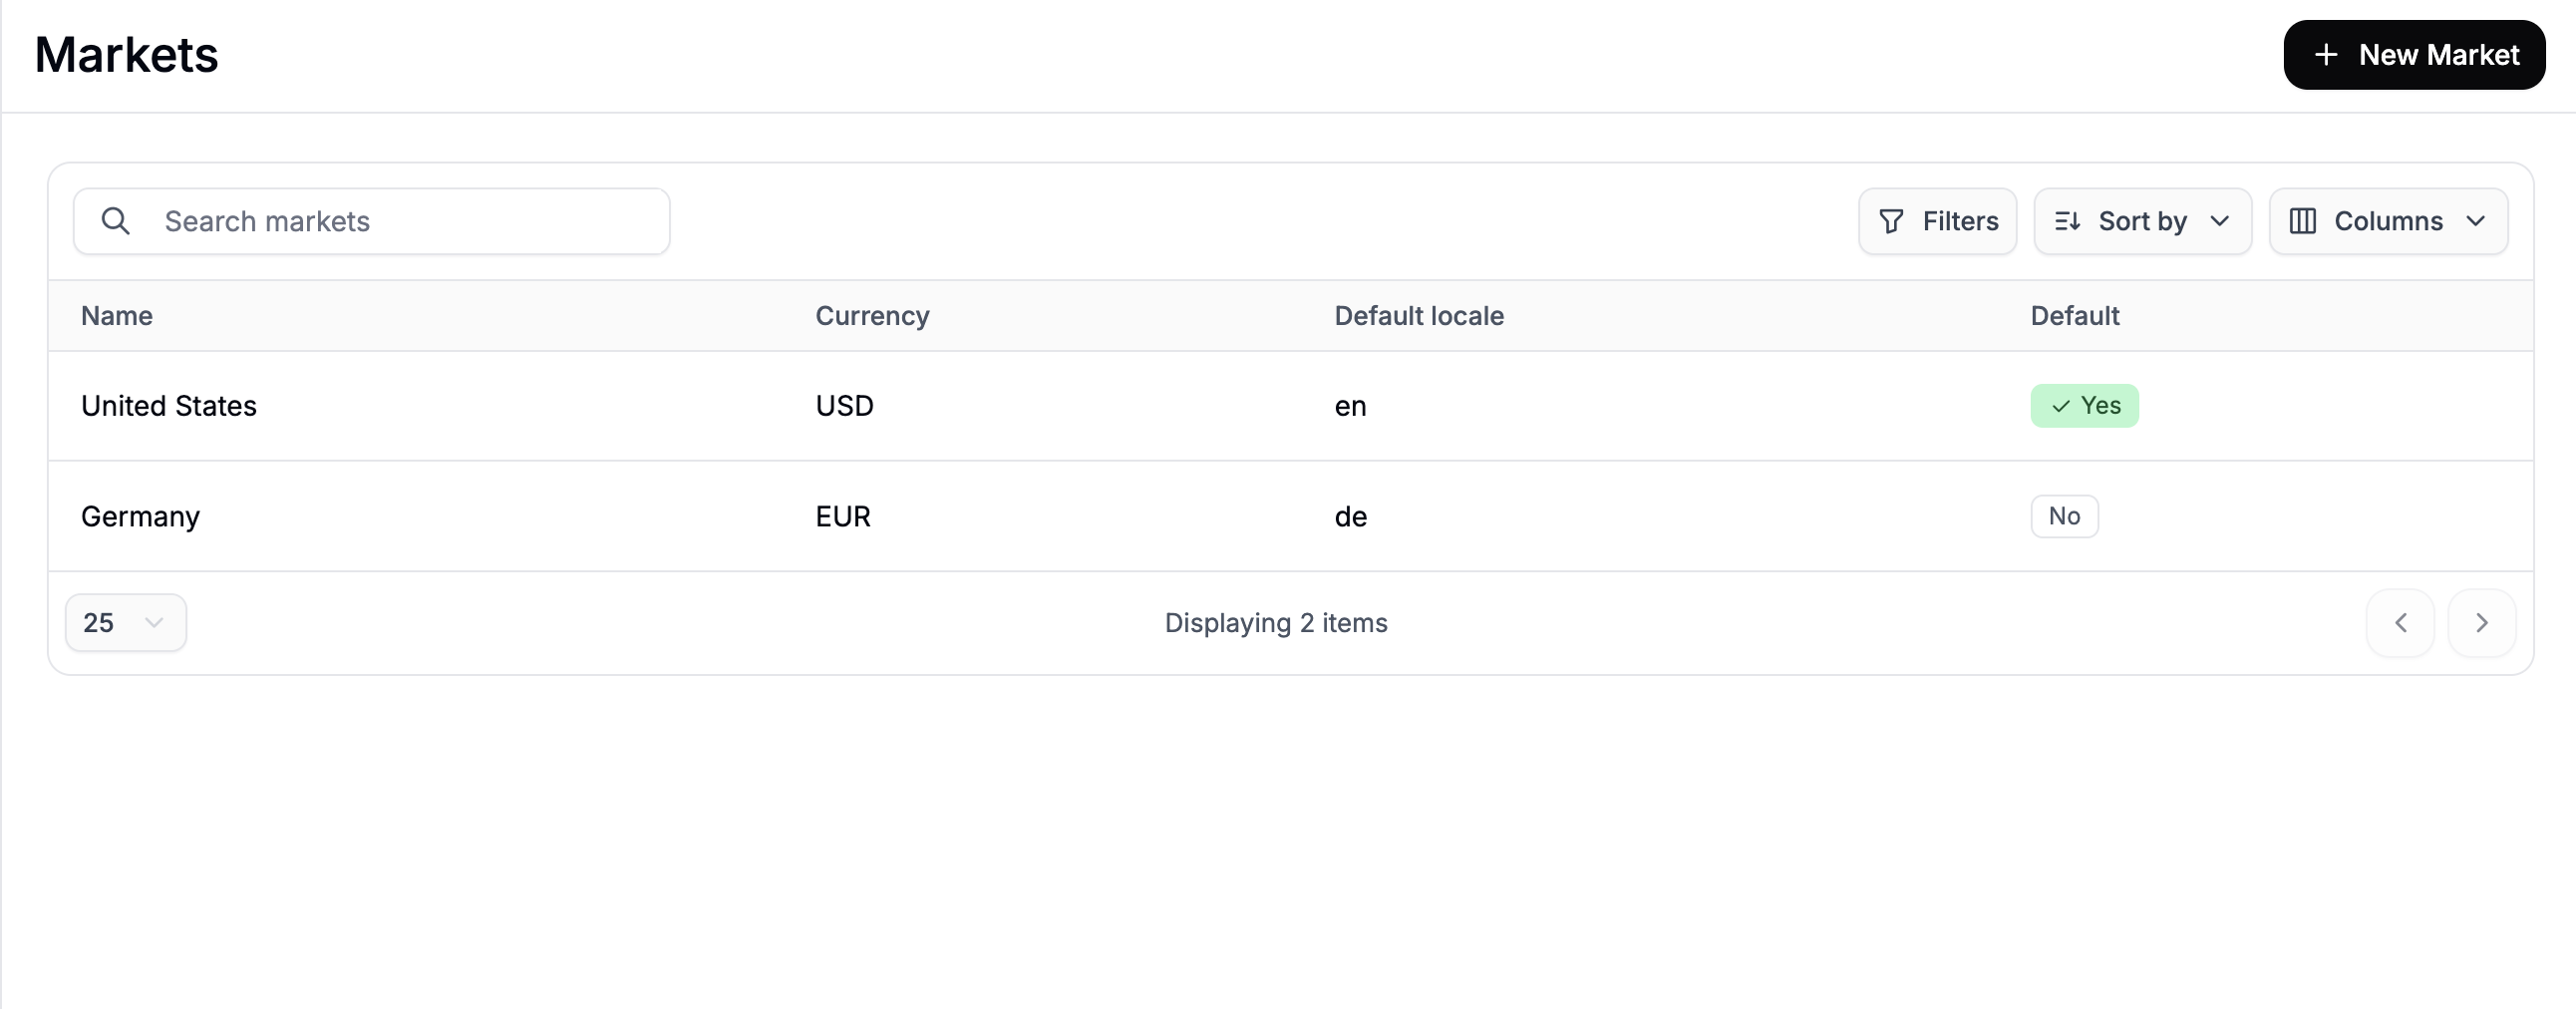
Markets Overview
The Markets table displays all configured markets with the following details:- Name — the internal label for the market (e.g., “United States”, “Europe”)
- Currency — the currency customers in this market will see at checkout
- Default Locale — the primary language for this market
- Default — indicates which market is set as the default for new visitors
Create a Market
To create a new market, click New Market in the top-right corner.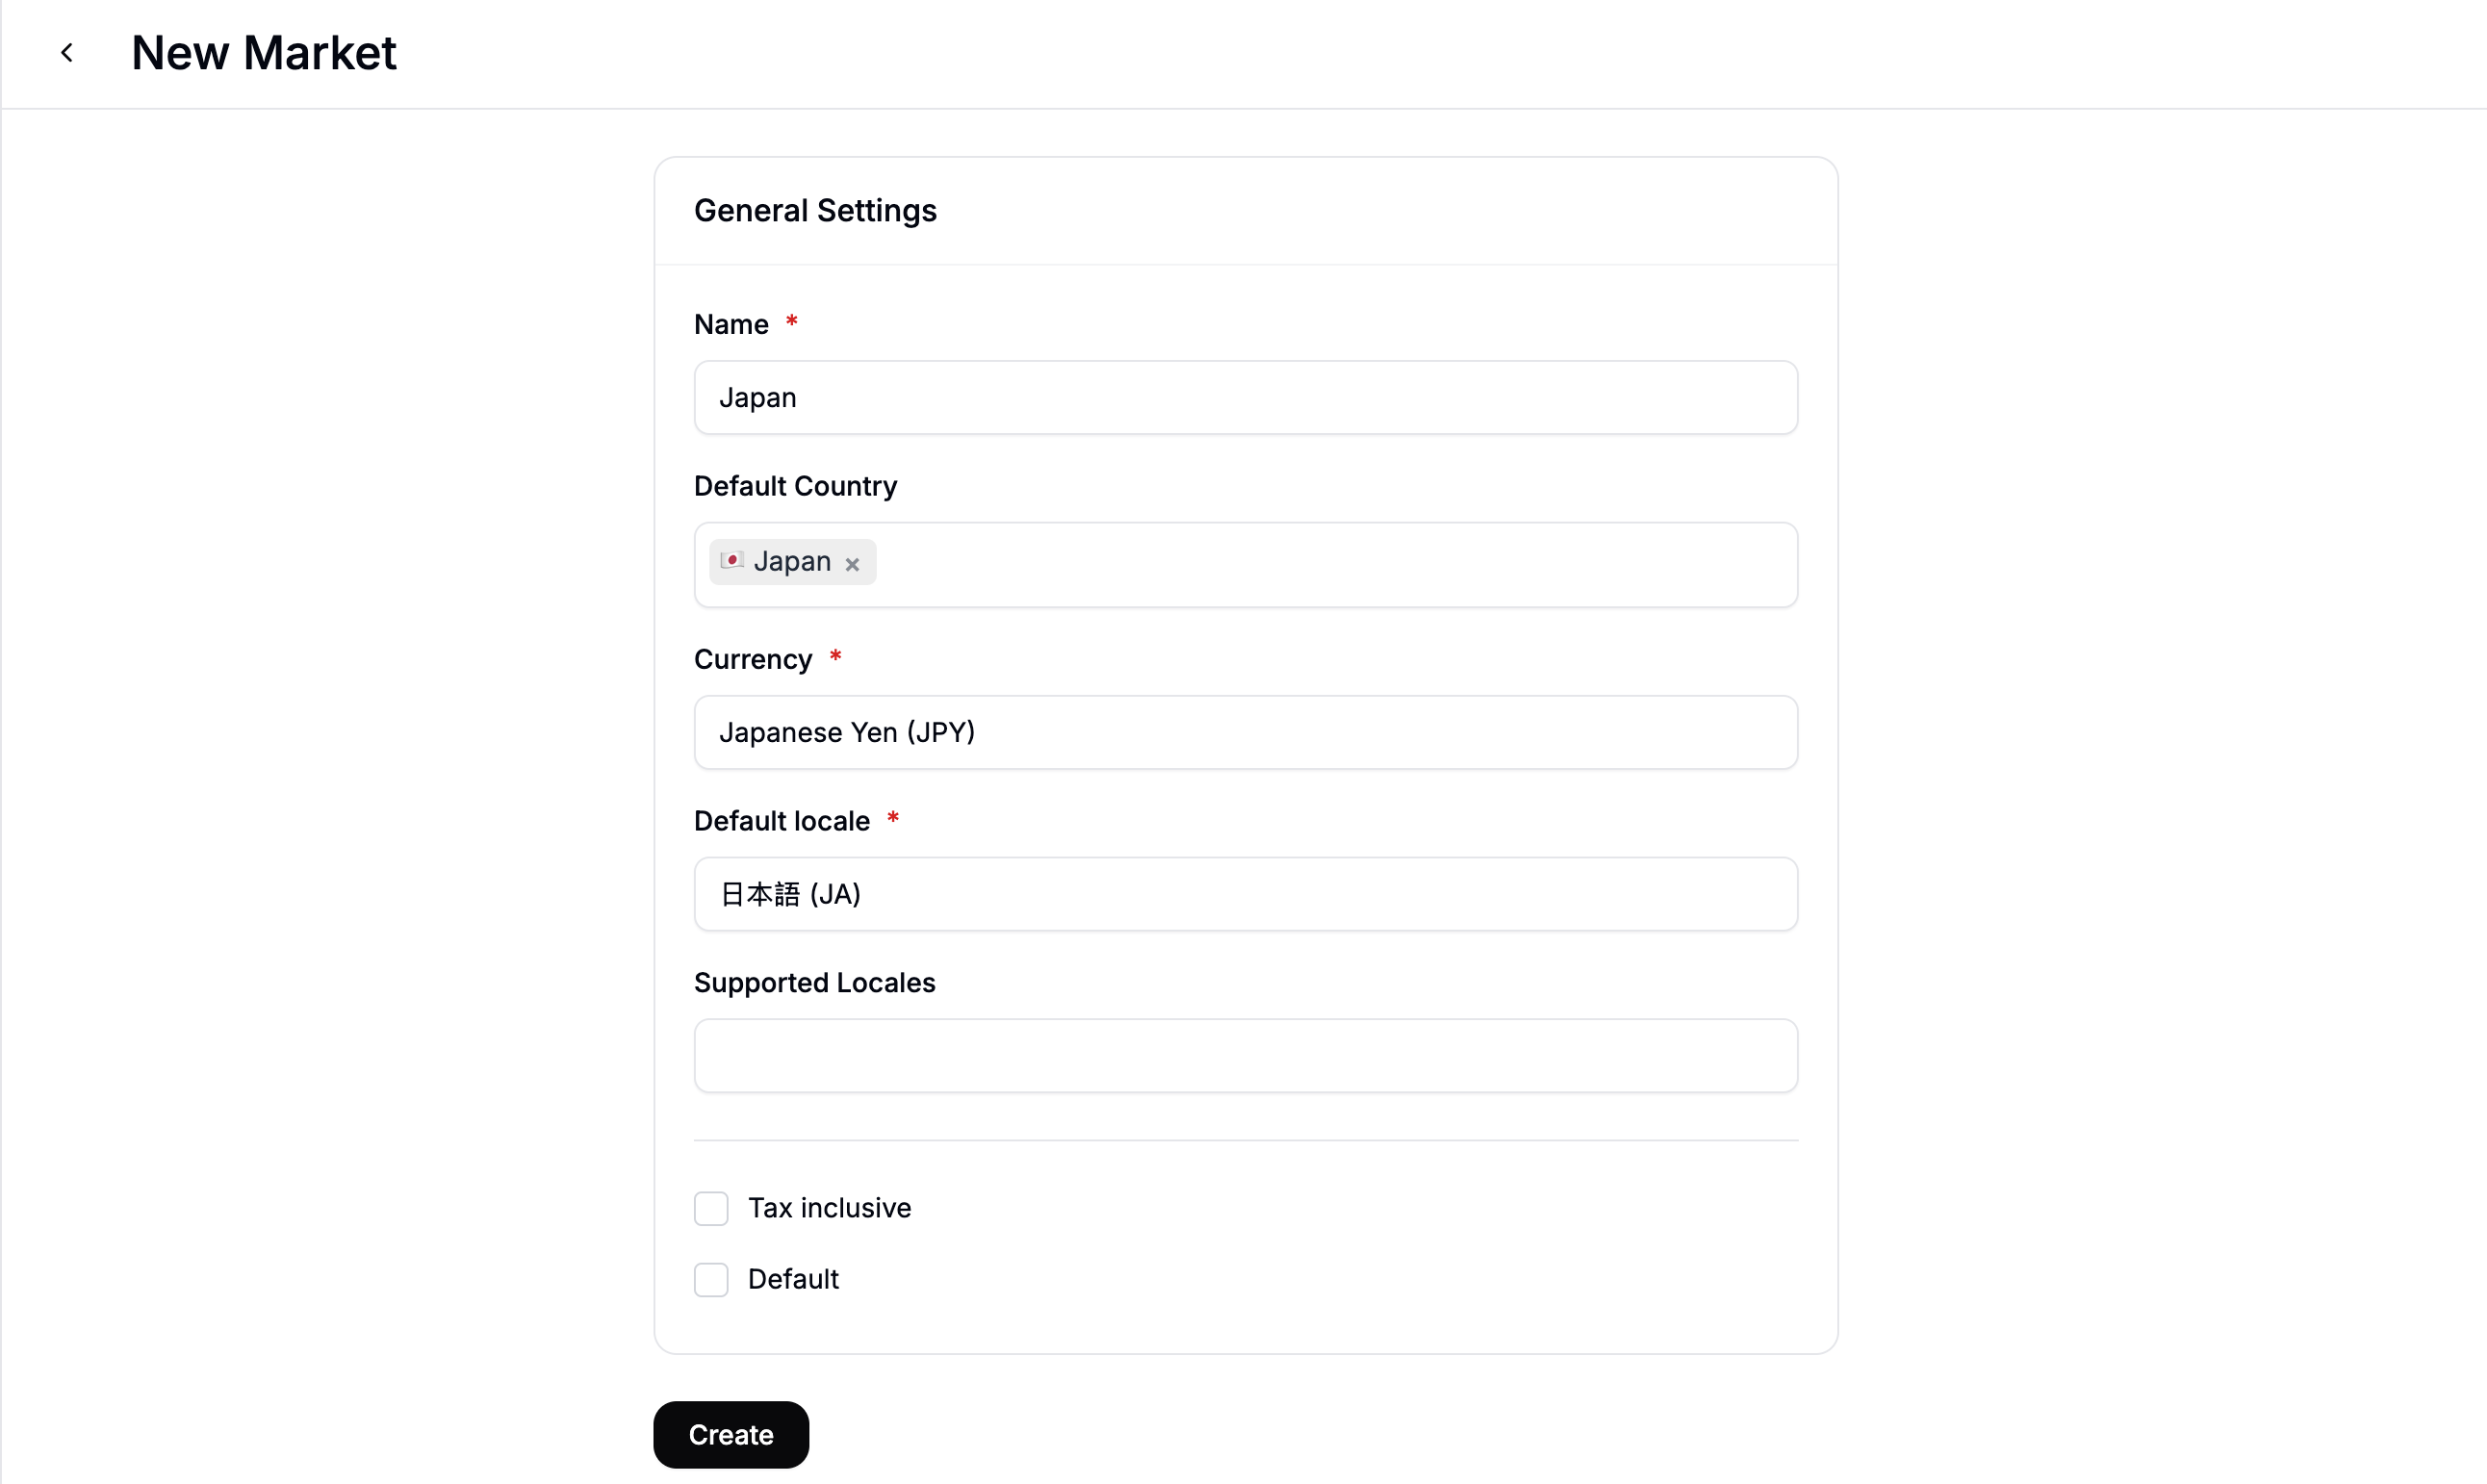
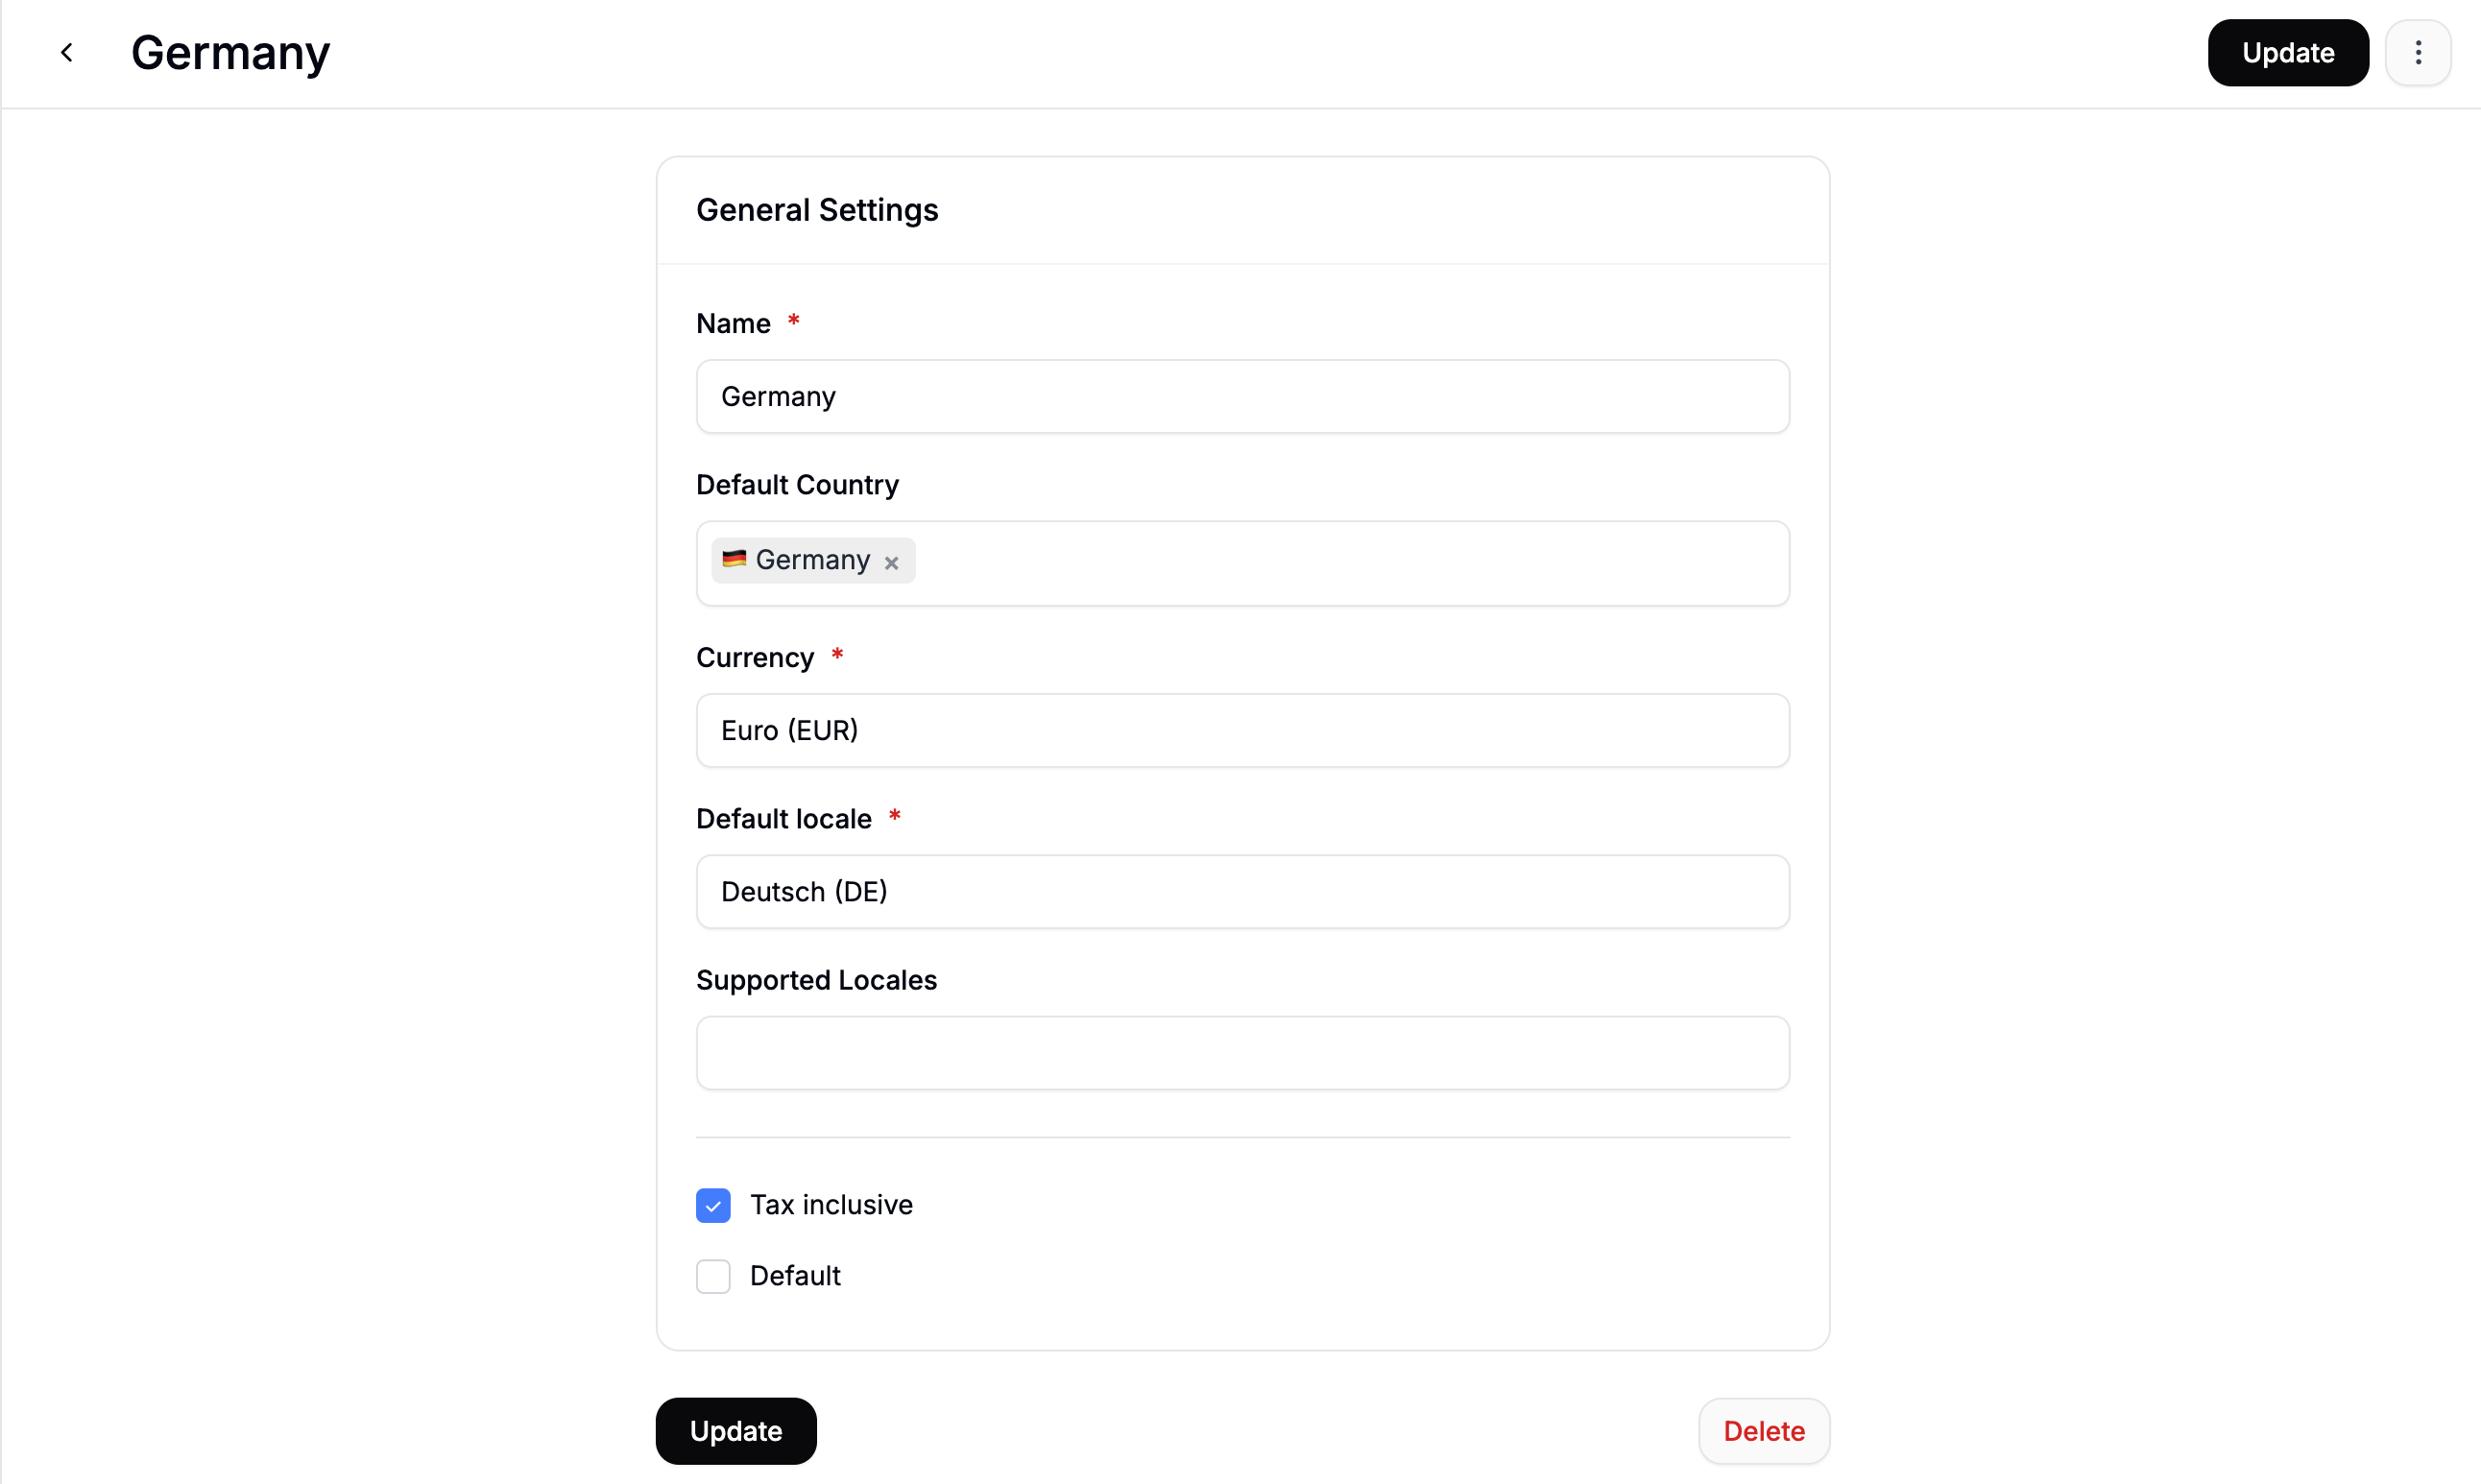
- Name — an internal label to identify this market (e.g., “United Kingdom”, “DACH Region”)
- Default Country — the primary country for this market, used to determine default shipping and tax behaviour
- Currency — the currency displayed to customers in this market at checkout
- Default Locale — the primary language shown to customers in this market
- Supported Locales — additional languages customers can switch to within this market
- Tax Inclusive — check this if prices should be displayed with tax already included (common in VAT-inclusive markets such as the EU)
- Default — check this to make this the default market for visitors who haven’t selected one
A country must be included in a configured Zone before it can be set as the Default Country for a Market. See Zones for setup instructions.
Edit a Market
To edit a market, click on its row in the Markets table to open the edit form.