

A catalog keeps its prices on the catalog itself, so they will never appear under price lists. The two are managed separately even though both end up as prices a buyer pays.
Reviewing Price Lists
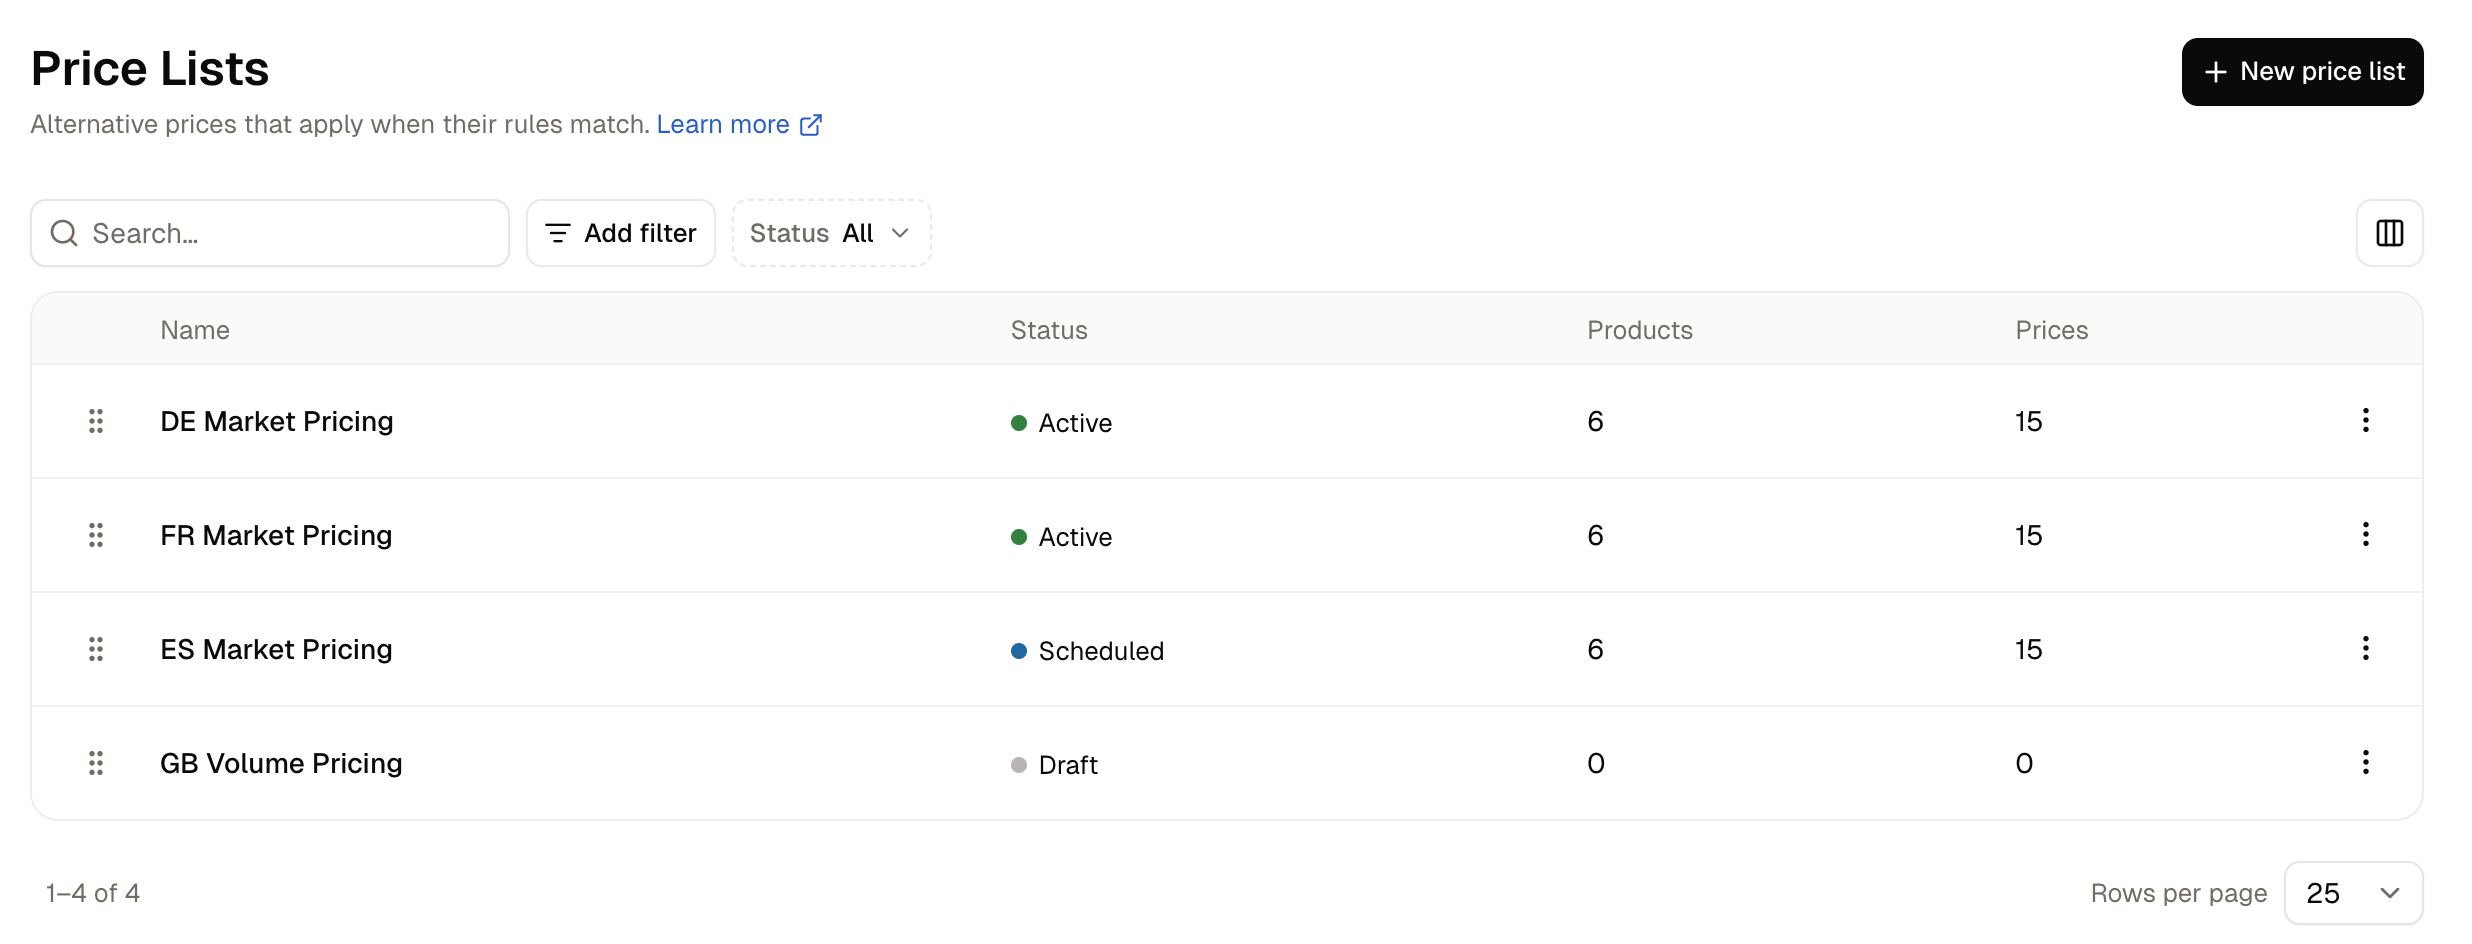
The Status filter narrows the list to any of the four states, and Add filter narrows it by start date, end date, or when a list was created or last updated.
A slot is counted for every variant of every product in every currency as soon as the product is added, so a new list with three products can show a large Prices figure before a single amount has been typed.
How to Create a Price List
Click New price list to open a form with four sections.- Name - What your team calls the list, such as the region or arrangement it covers. Shoppers never see it, and it is the only required field.
- Description - A note for your team on who the list is for.
- Rules - Who the list applies to. A list with no rules applies to every shopper.
- Starts and Ends - The dates it runs between. Leaving both empty means it applies from the moment it is activated, with no end date.
How to Choose Who a List Applies To
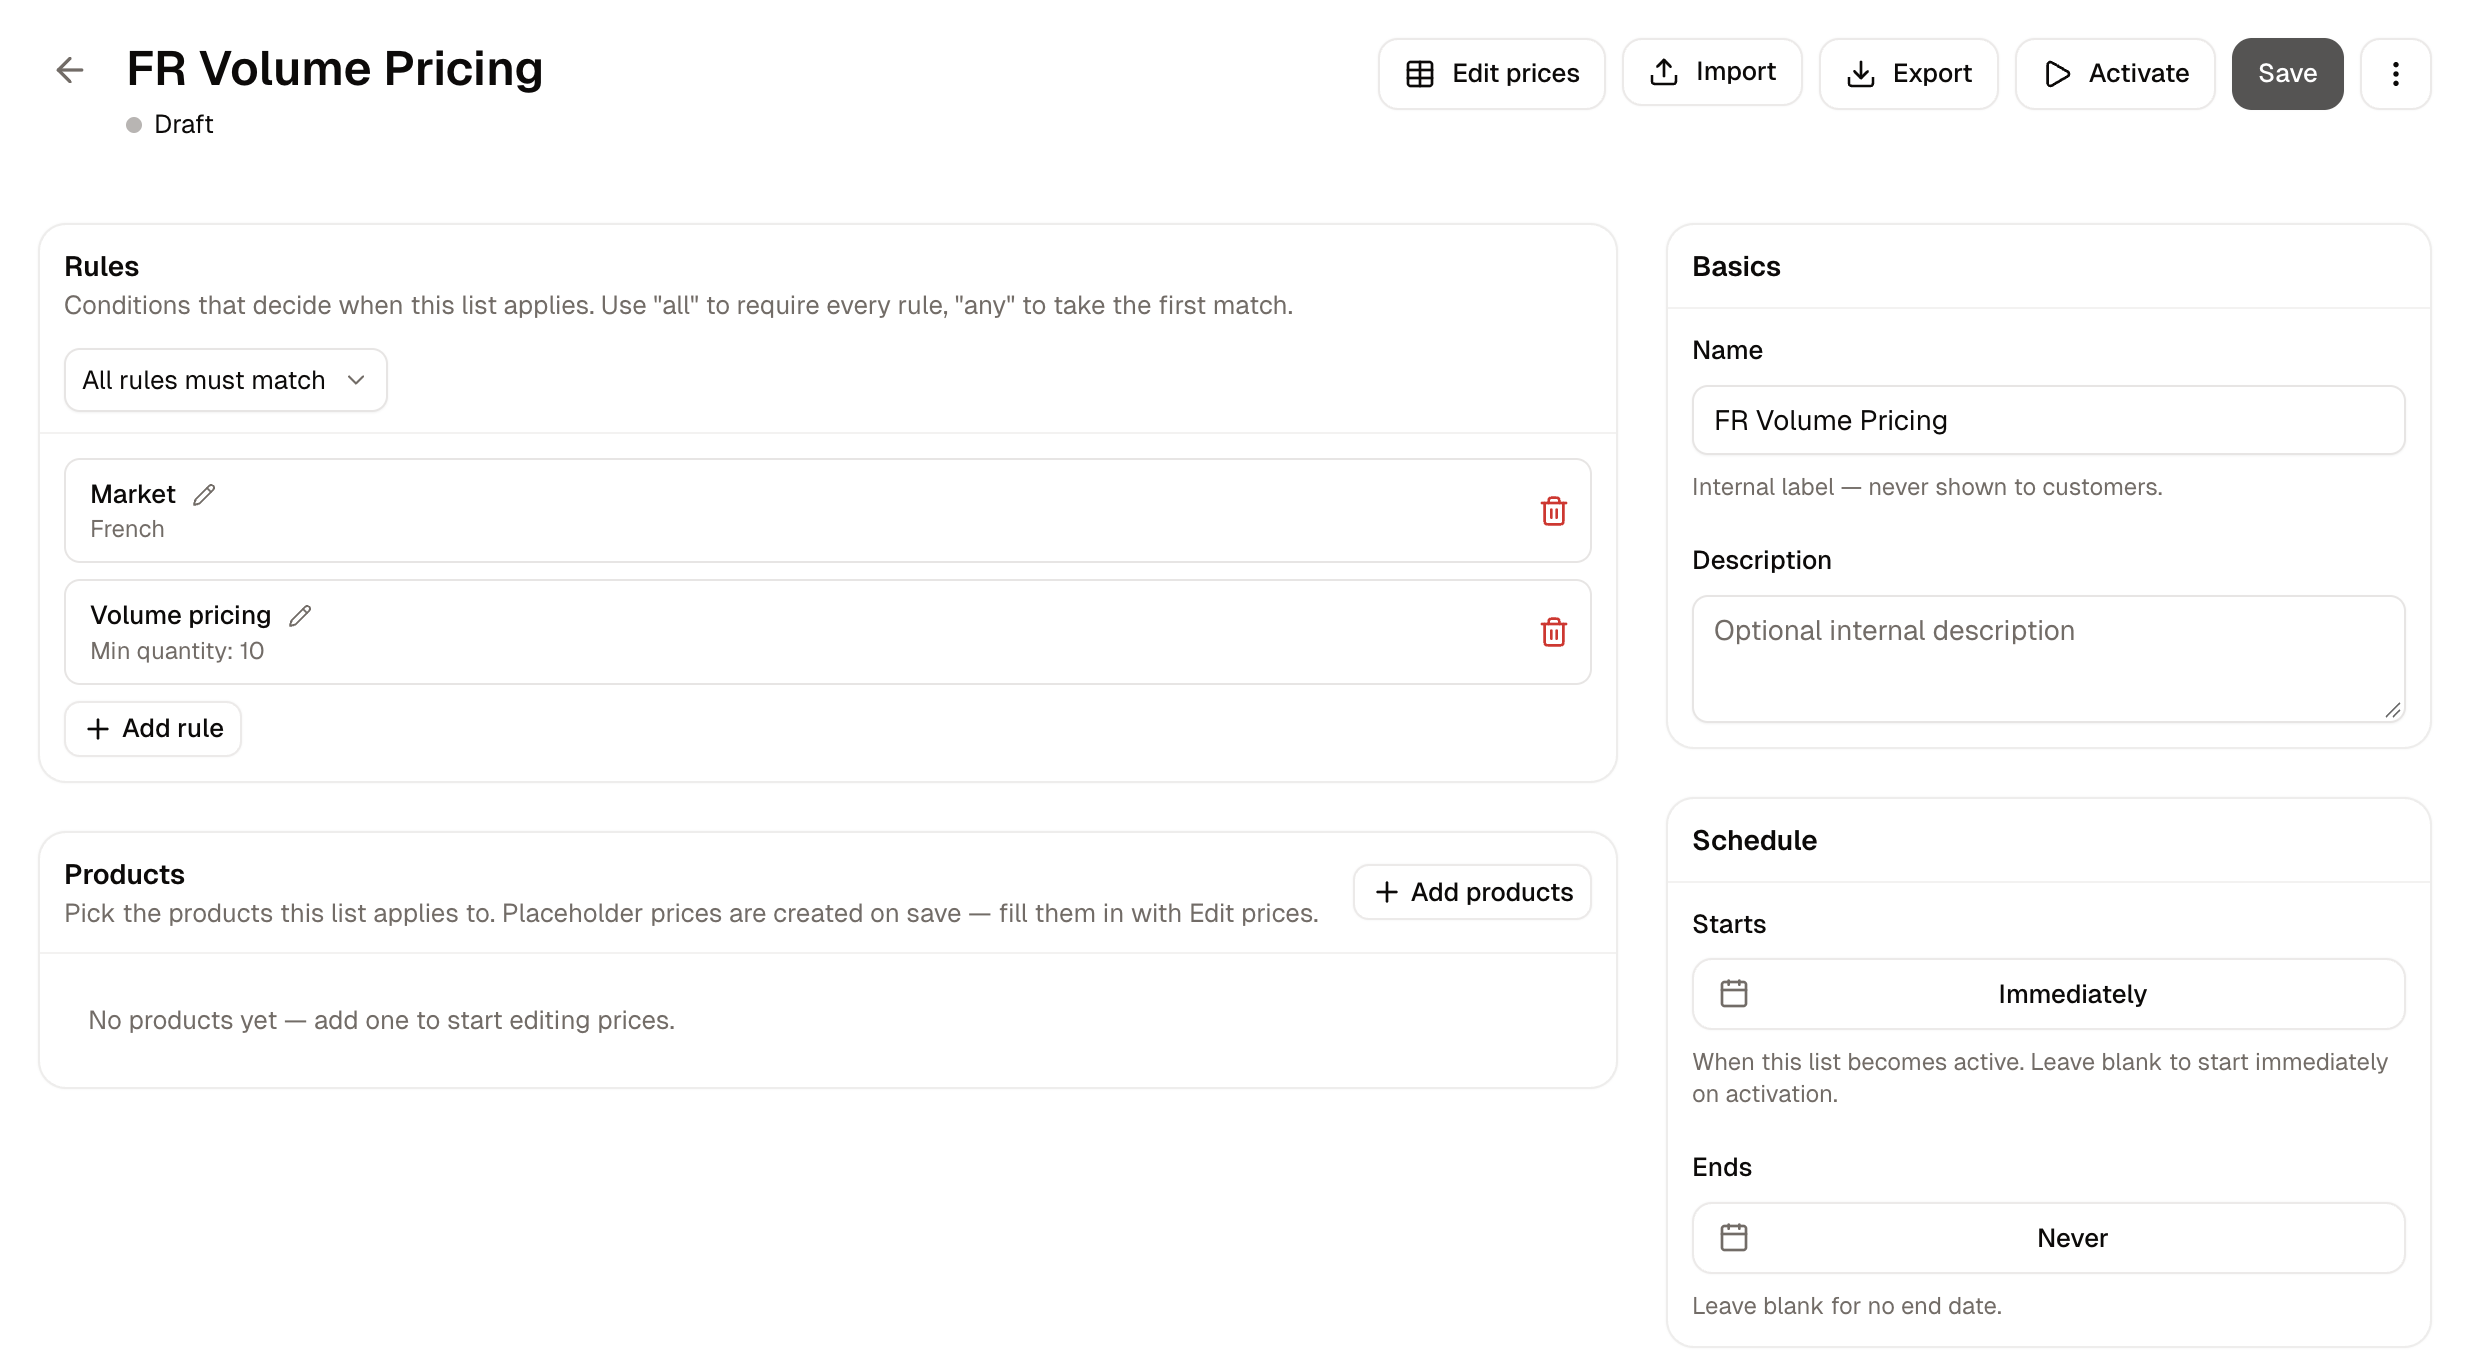
- Market - One or more of your markets. Leaving the box empty applies the rule in every market. A market rule reaches every shopper there, signed in or not. See Markets.
- Channel - Ties the list to a sales channel, so the same product can cost one thing in your online store and another somewhere else. See Sales Channels.
- Volume pricing - A Minimum quantity, and a Maximum quantity where there is a ceiling. Leaving the maximum empty means no upper limit.
Customer group and individual customer rules are not offered on price lists. To give a customer group or a company its own prices, assign them to a catalog instead.
How to Add Products to a Price List
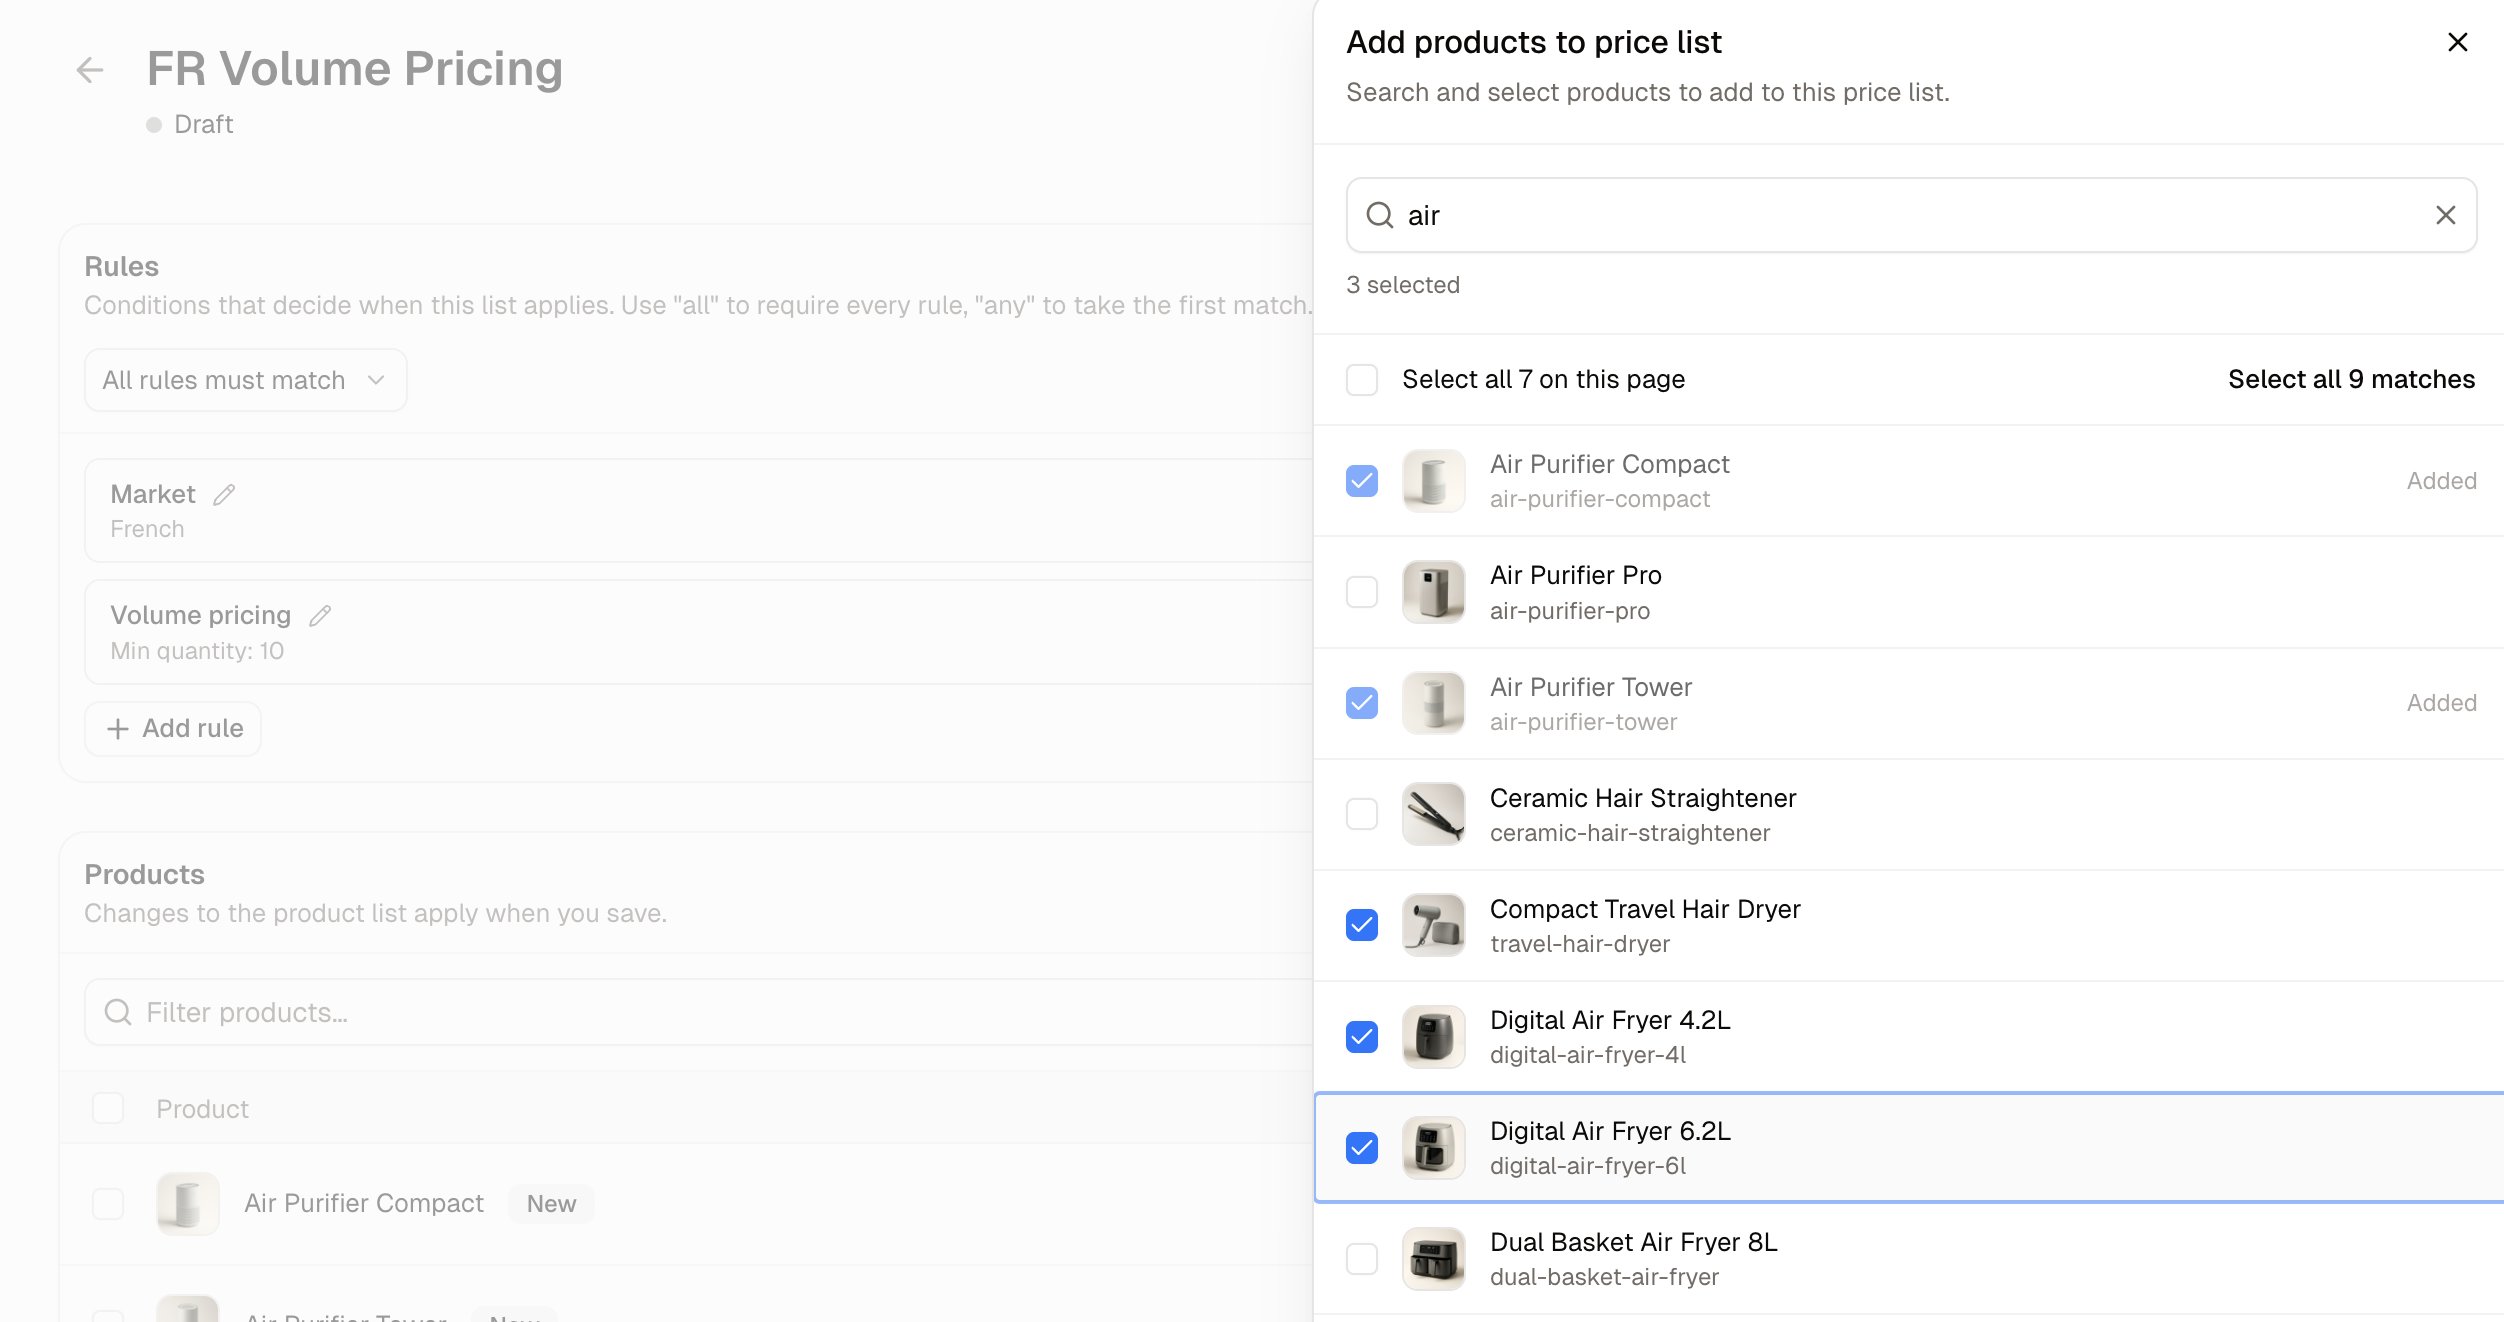
- On the list’s page, click Add products.
- Search, tick each product you want, and click Add. Products already on the list are marked Added.
- Click Save at the top of the page.
How to Enter Prices and Quantity Breaks
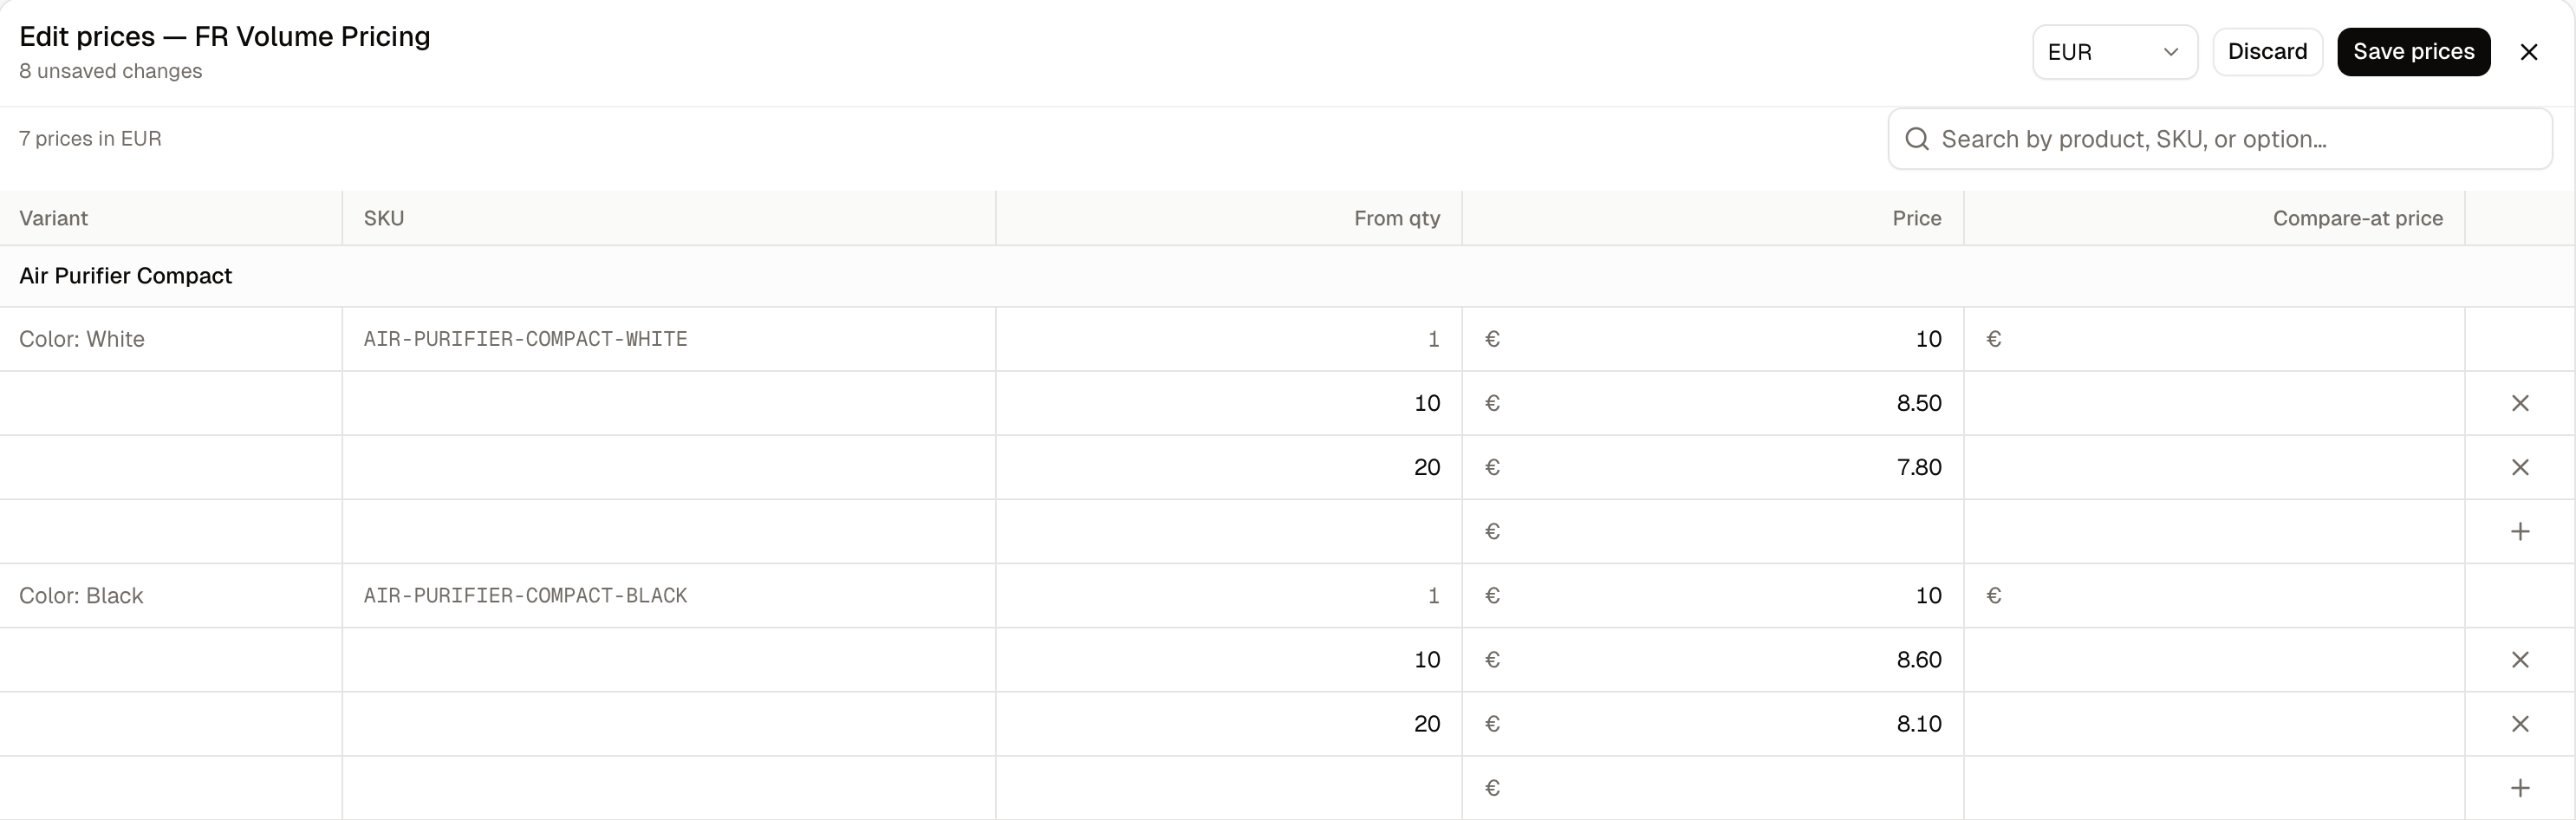
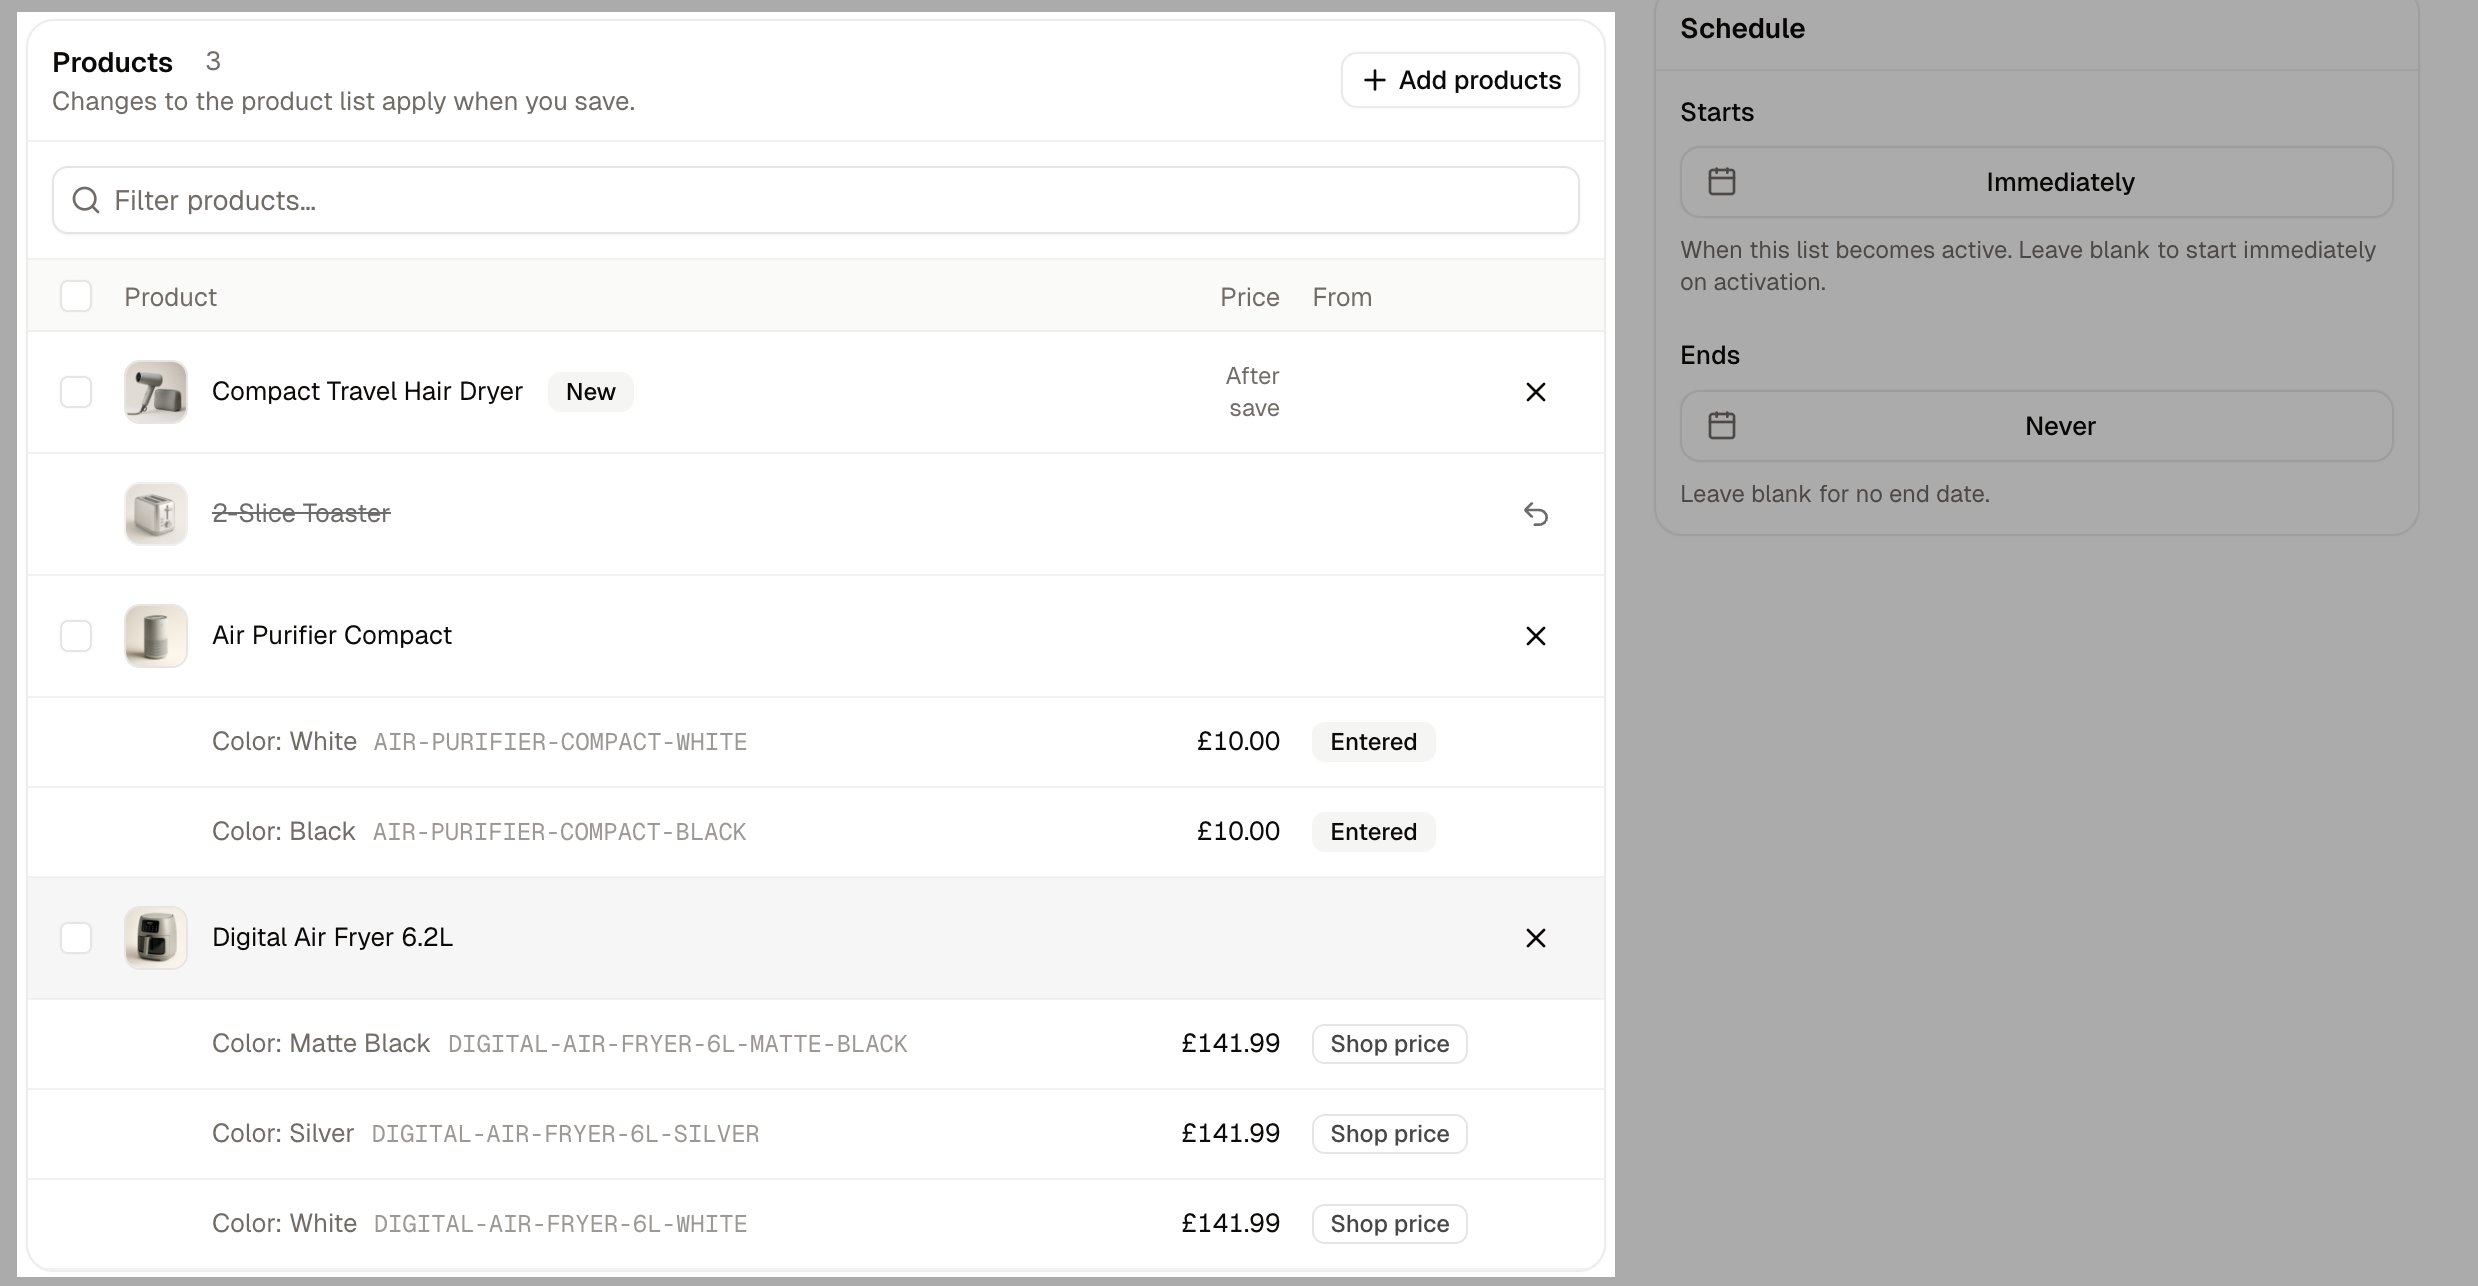
- Click Edit prices. A full-screen grid opens with one row per variant.
- Choose the currency at the top. The table on the list’s page shows one currency at a time, so this grid is where the others are checked.
- Click into a Price cell and type the amount, adding a Compare-at price where you show a crossed-out price.
- For a lower price on larger orders, type a quantity in the empty row beneath a product’s first price, then the price for that quantity. The first price always starts at From qty 1.
- Click Save prices.
Quantity Breaks
A quantity break lowers the price of every unit in the cart once the quantity is reached, not just the units above it. Take a product priced at 35.00 with a break from 10 units at 30.00:- A shopper with 9 in the cart pays 35.00 each, so 315.00 in total.
- A shopper with 10 in the cart pays 30.00 each, so 300.00 in total.
How to Activate a Price List
A new list starts as a Draft and reaches nobody. Click Activate to start enforcing it. What happens next depends on the dates set on the list. With no start date, or one that has already passed, the status changes to Active and shoppers matching the rules see its prices straight away on the product page and in the cart. With a start date still in the future, the status changes to Scheduled instead, and the prices begin applying when that date arrives. Deactivate switches it off again and keeps everything it holds, so activating it later brings its prices back. Fill in every price you mean to charge before activating. A list carrying no rules, no products and no catalog cannot be activated at all, because it would price nothing.To verify a price list has taken effect, open your storefront as a shopper the list should reach and look at one of its products. That single check tests the rules and the prices together.
How to Update Prices from a Spreadsheet
Import and Export on the price list’s page move its prices as a CSV file, which is how prices are changed in bulk without working through the grid row by row. Export downloads every price on the list that has an amount. Empty slots are left out. Import takes the file back:- Click Import, drop the file in or browse for it, and set the Column separator your file uses. Download CSV template gives an empty file in the right shape.
- Click Continue and match each column to the field it holds. SKU and Price are required, and Currency, Minimum quantity and Compare at Price are optional.
- Click Start import.
Because the minimum quantity is a column, quantity breaks travel as extra rows for the same SKU. The surest way to get a file the import accepts is to export the list first, change the amounts, and import the same file back.
Further Reading
- Catalogs - Agreed prices and ranges for a company or group
- Markets - The regions and currencies a market rule picks from
- Sales Channels - The channels a channel rule picks from
- Adding Products - A product’s own prices, which a list sits alongside
- Set Up Volume Pricing - Cheaper prices for bigger orders