Maintaining accurate stock levels is critical for delivering a smooth customer experience, avoiding overselling, and ensuring clean operational and financial reporting.
There are two main ways to manage inventory, depending on your workflow:
- Edit stock levels individually via the product editor
- Manage inventory directly from the Stock Items tab (covered in this article)
When a customer places an order, stock quantities are automatically reduced based on the quantity purchased. Similarly, when items are returned and marked as resellable, the stock quantities will automatically increase.
How to Manage Stock Levels
To manage stock levels across your catalog, navigate to Products → Stock → Stock Items.
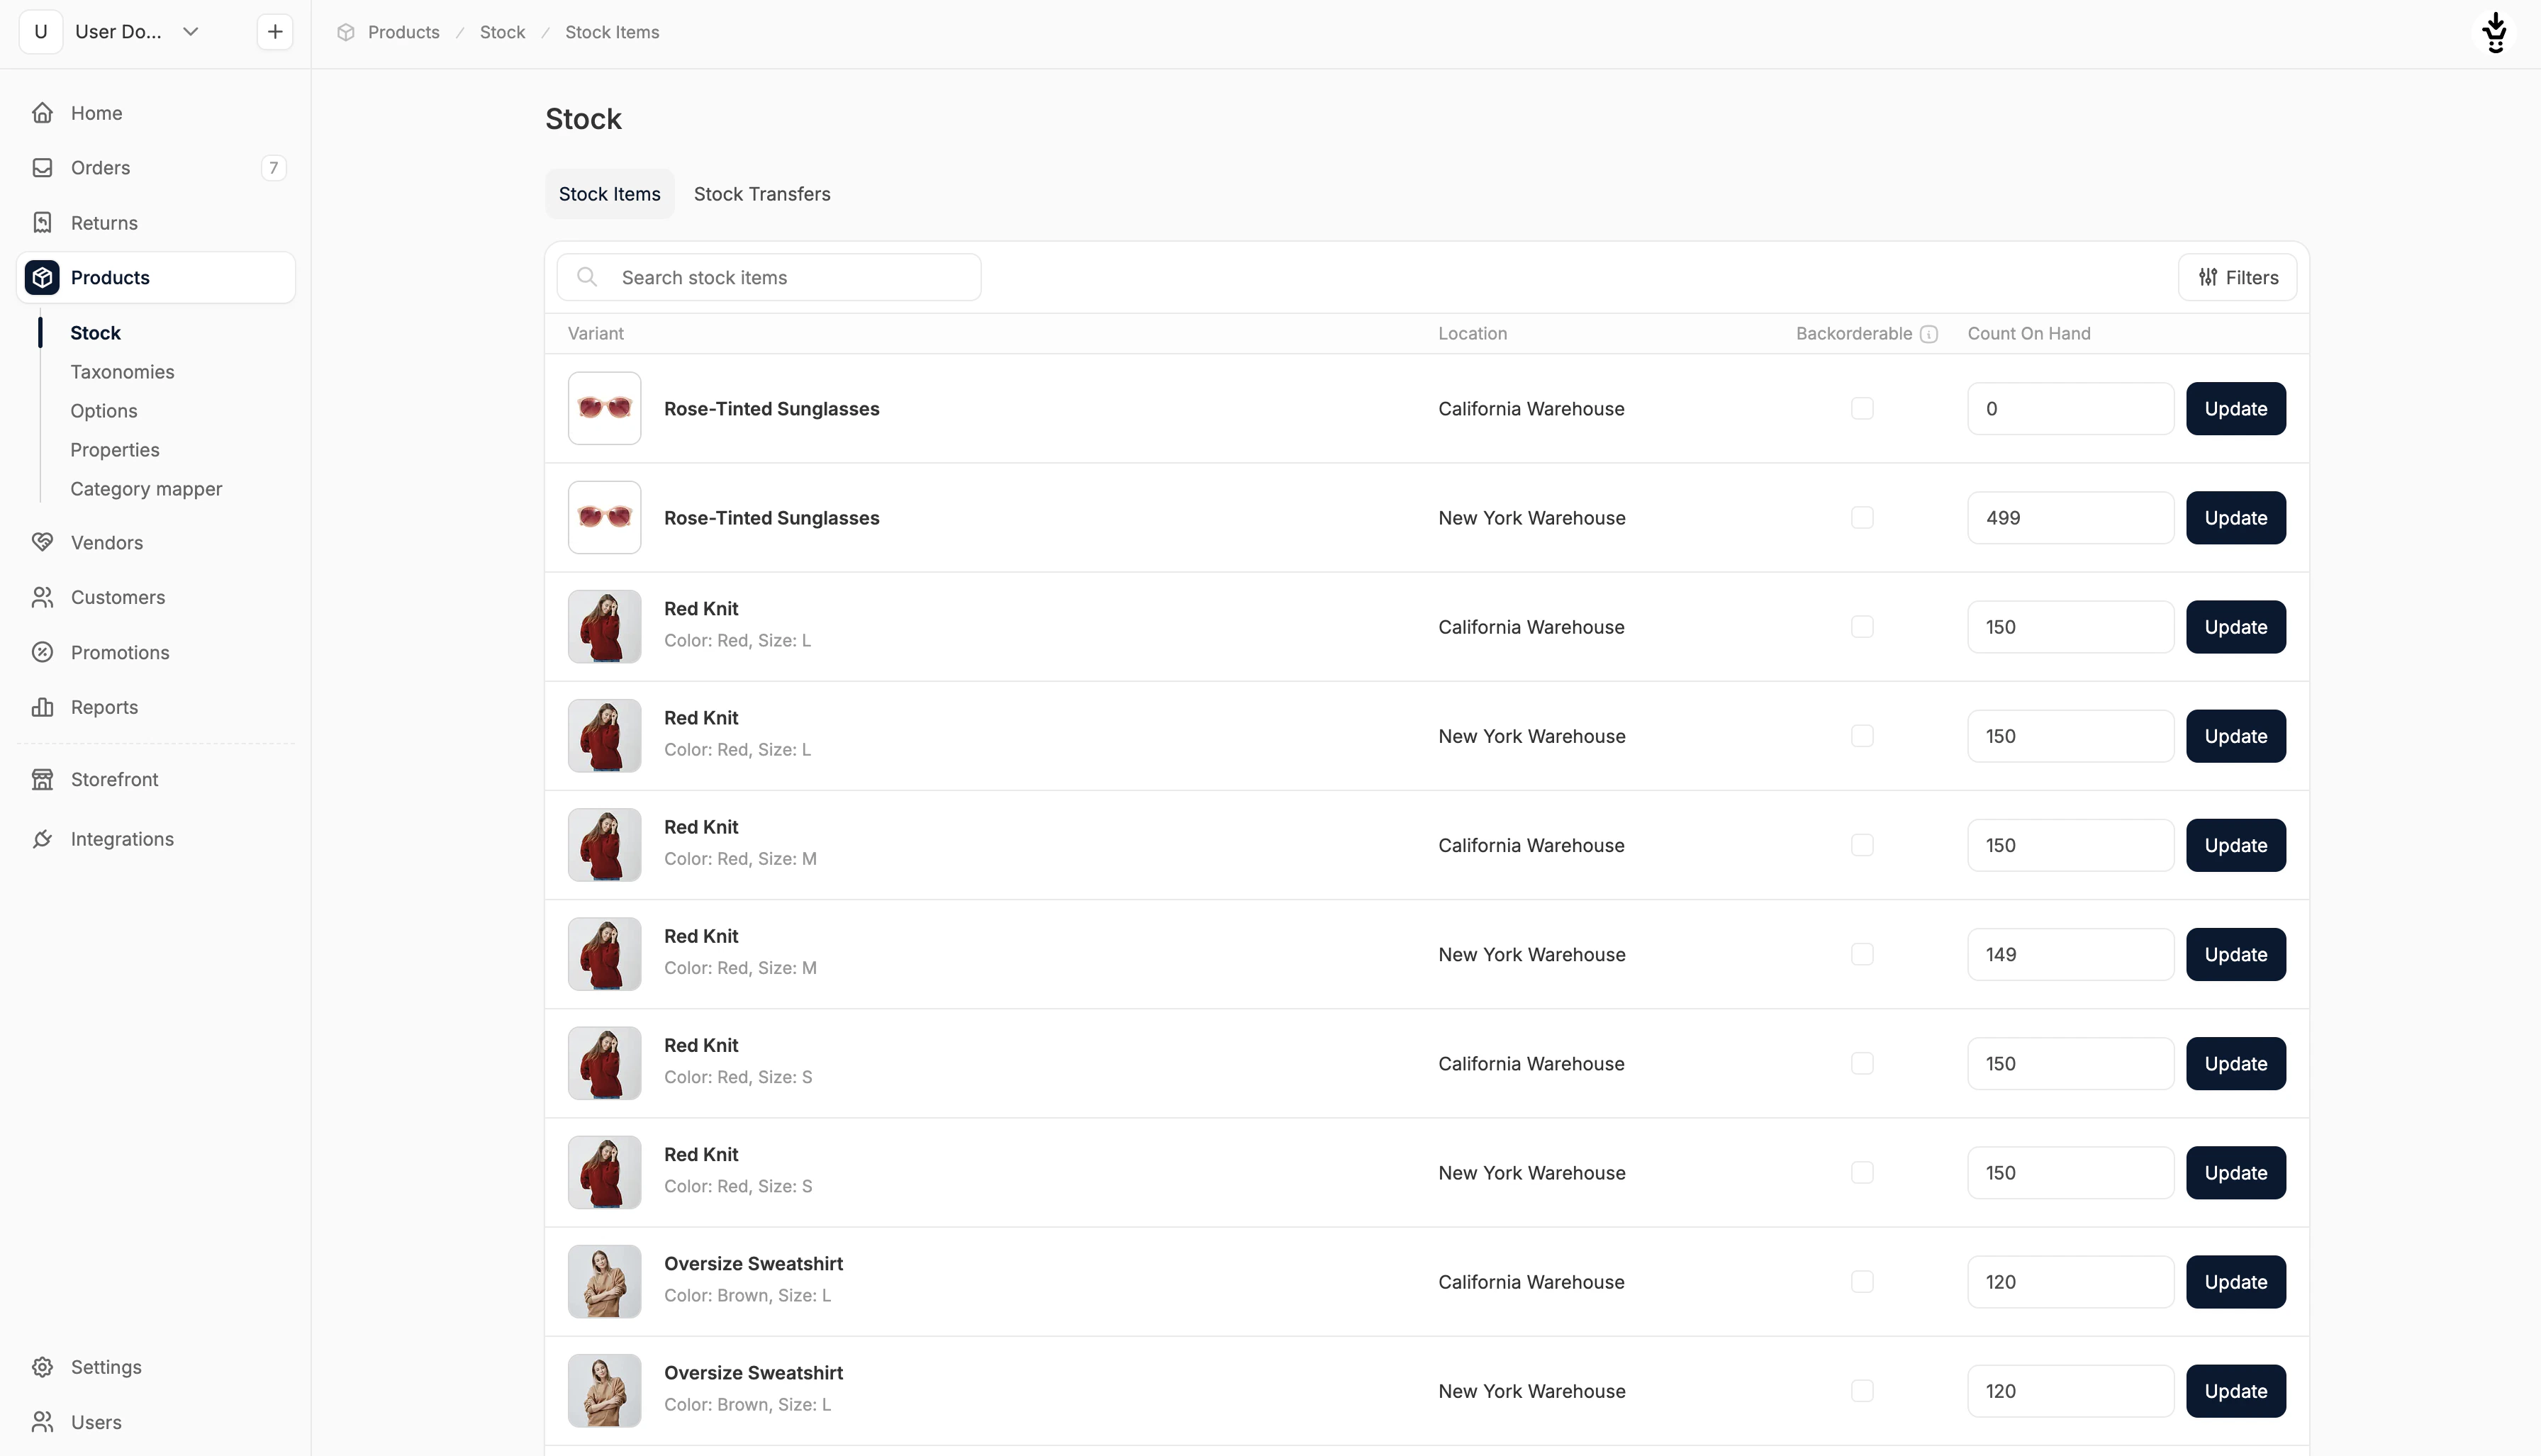 Here you’ll see a list of all product variants, separated by stock location (i.e., if you have two stock locations, each variant will have two rows in the table).
You can use the search bar to filter by product name, SKU (partial or full), or stock location.
Here you’ll see a list of all product variants, separated by stock location (i.e., if you have two stock locations, each variant will have two rows in the table).
You can use the search bar to filter by product name, SKU (partial or full), or stock location.
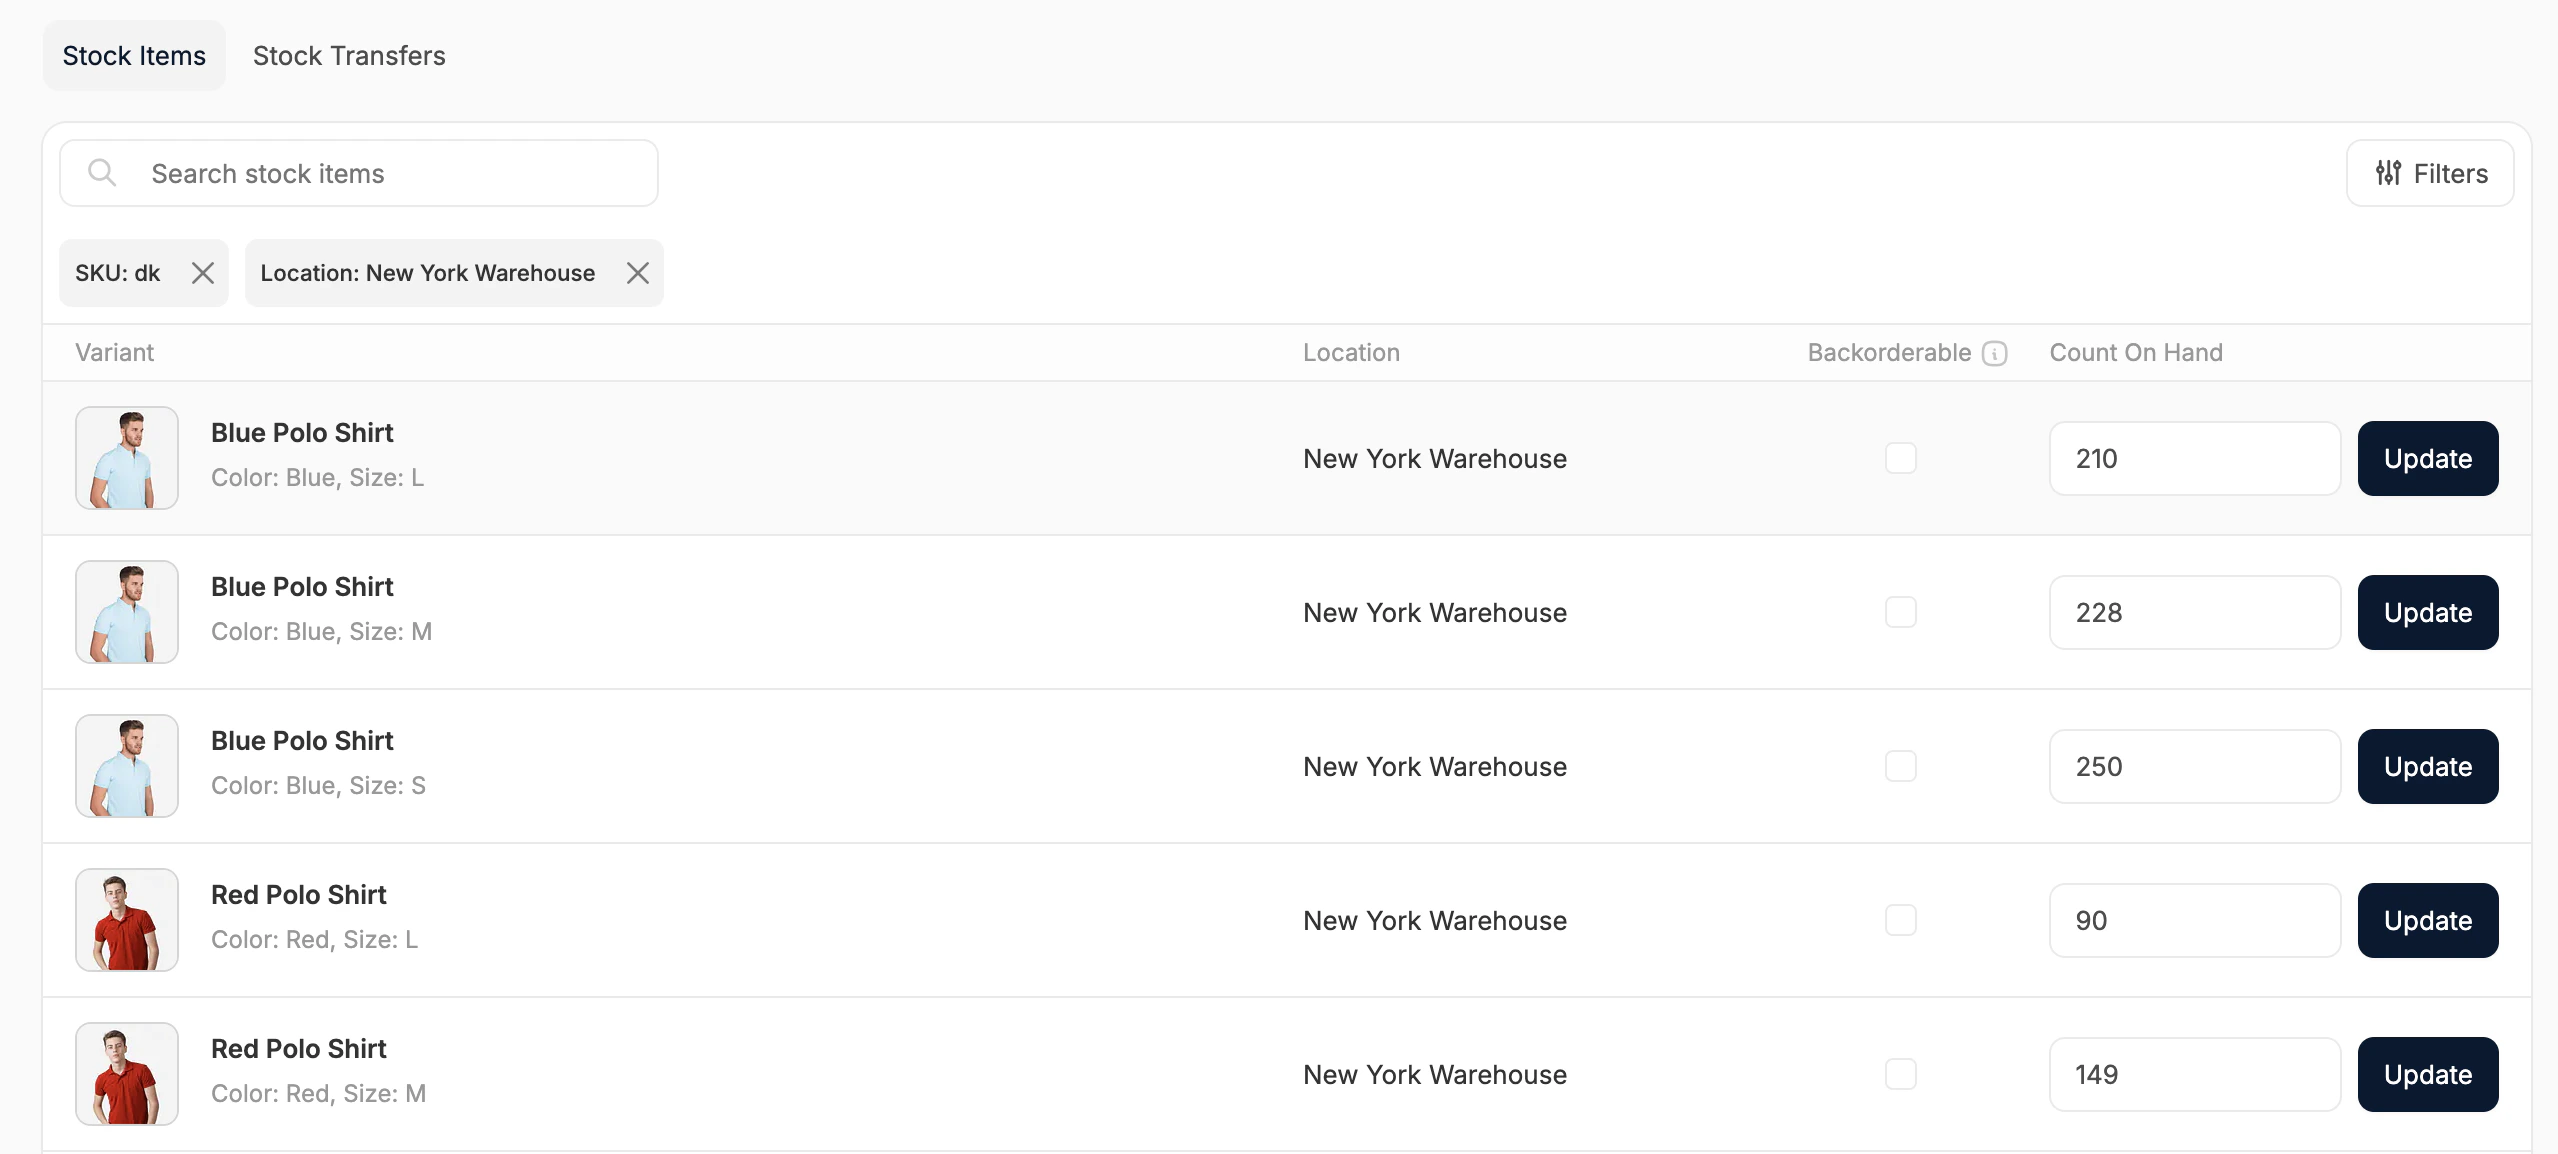 This makes it easier to manage stock updates when, for example, receiving a new shipment to a specific warehouse or restocking a particular product line.
Updating Stock Levels
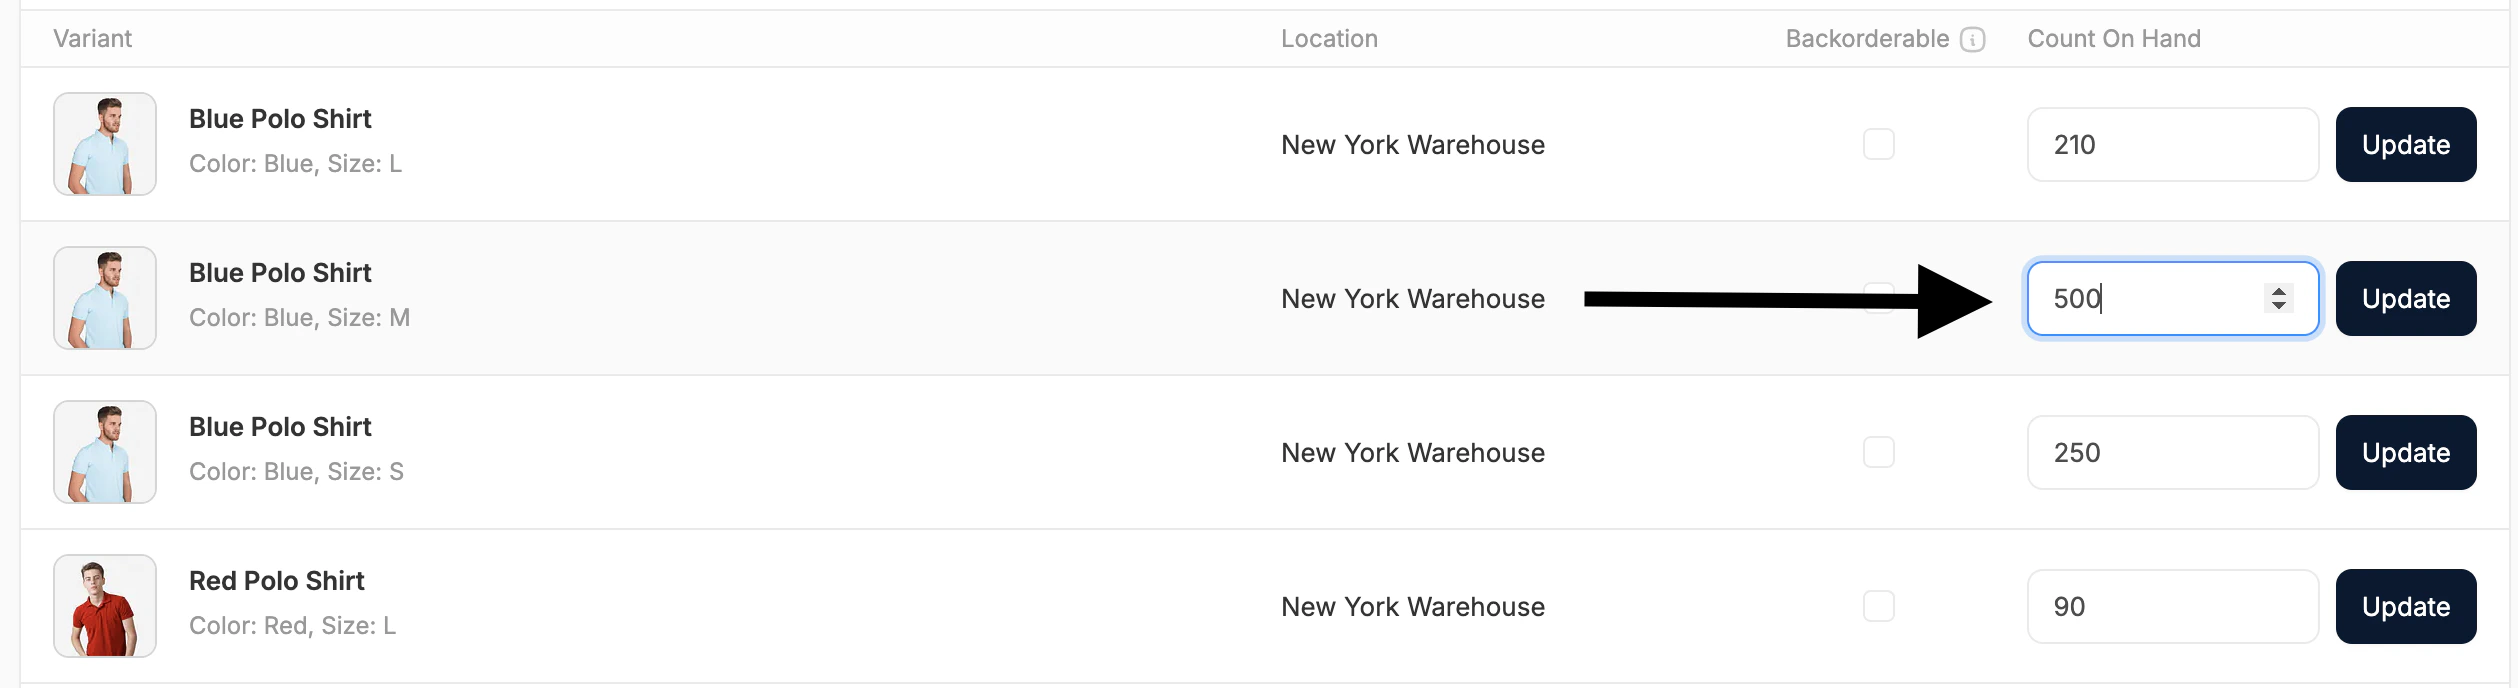 To adjust stock levels:
- Locate the variant you want to update
- Enter the new quantity in the Count On Hand column
- Click Update at the end of the row
You’ll see a green confirmation popup at the top of the screen once the update is saved.
Each variant/location combination must be updated independently.
Enabling Backorders
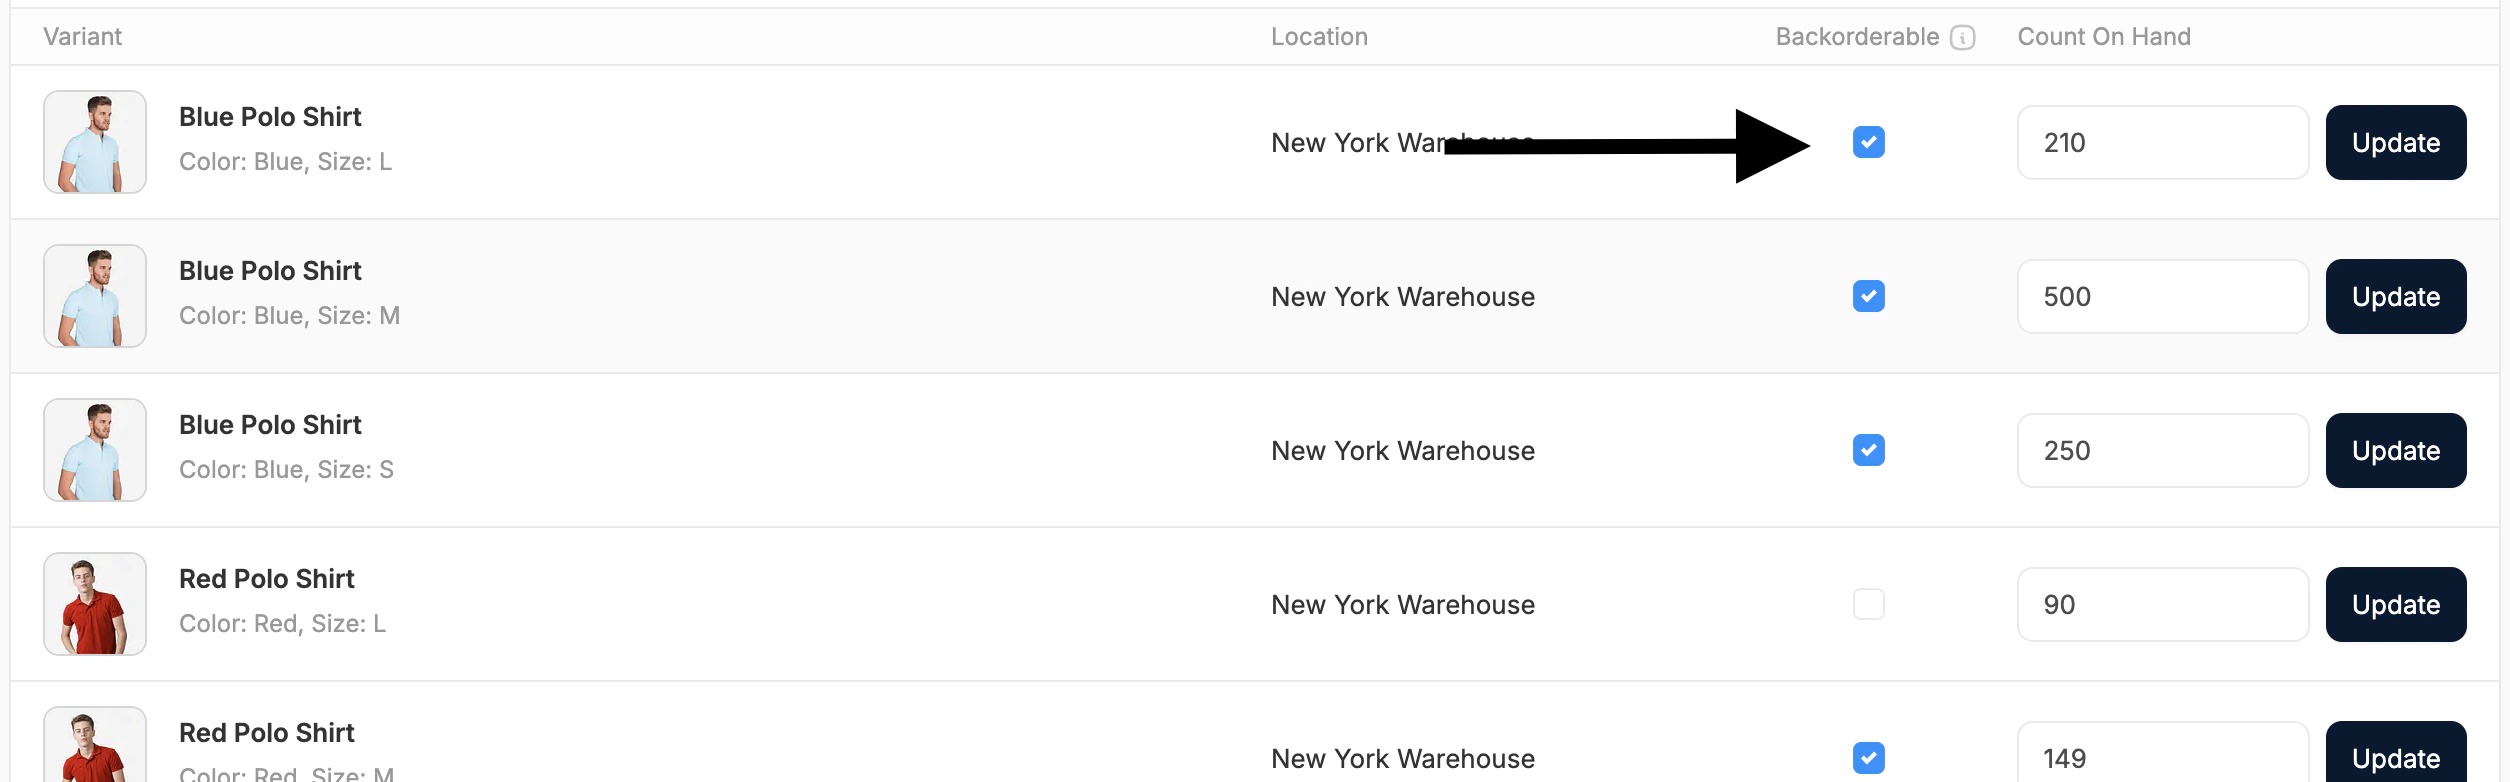 You can allow a product to be sold even when its inventory reaches zero by marking it as Backorderable.
To do so, simply check or uncheck the box in the Backorderable column in the associated row.
This setting saves automatically, so there’s no need to click Update.
You can allow a product to be sold even when its inventory reaches zero by marking it as Backorderable.
To do so, simply check or uncheck the box in the Backorderable column in the associated row.
This setting saves automatically, so there’s no need to click Update.
Only mark products as backorderable if you plan to restock them. Enabling backorders for discontinued or limited-stock items may result in customer service issues.