

- Terms of Service
- Privacy Policy
- Returns Policy
- Shipping Policy
Each policy has an address of its own, which Spree’s Next.js storefront publishes as a page automatically. A custom or headless storefront reads policies through the API, so where they appear is up to whoever built it.
Reviewing Your Policies
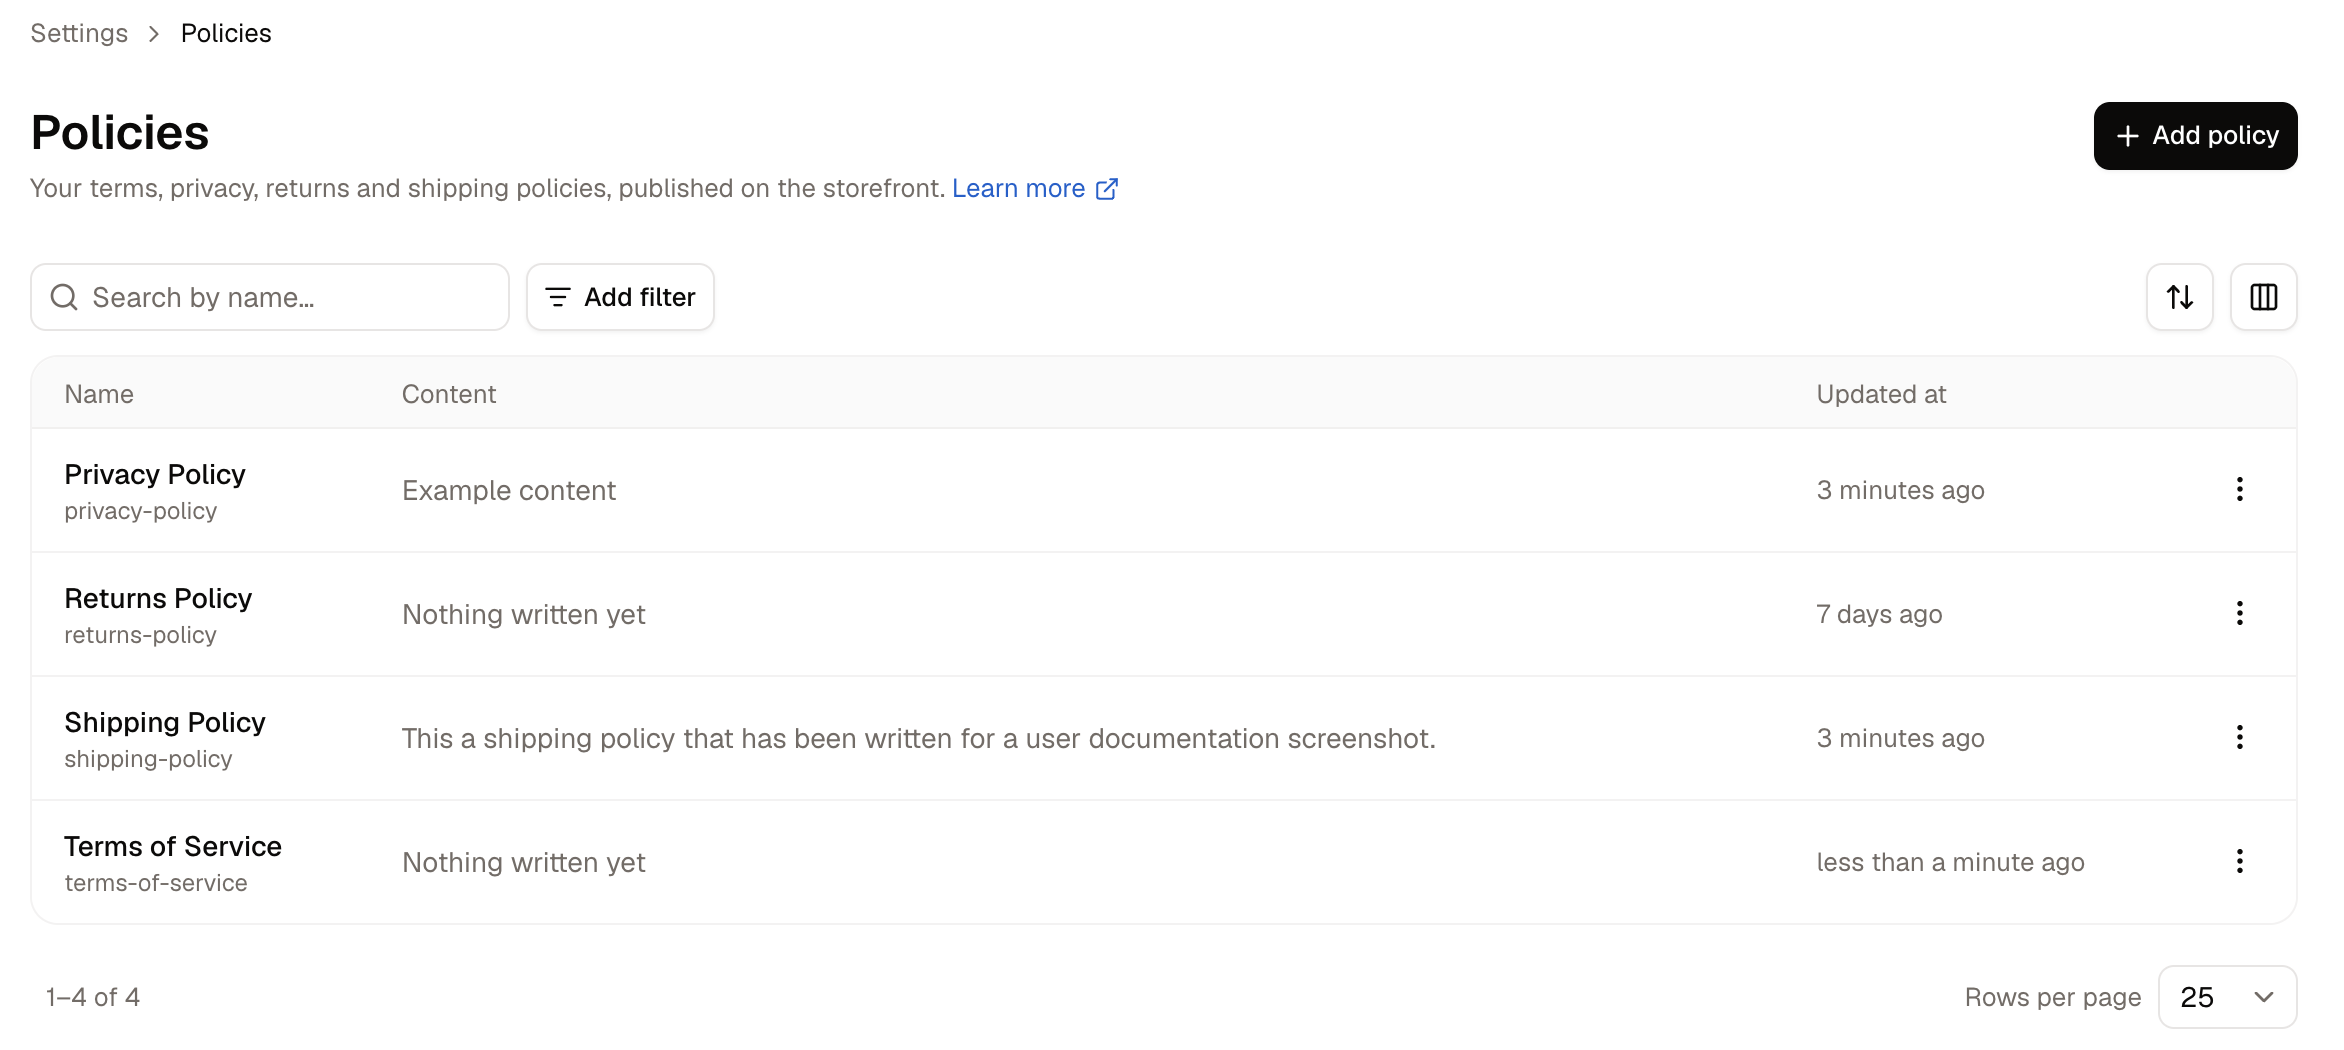
- Name - What the policy is called, with its address beneath it.
- Content - A preview of the document. A policy you have not written yet reads Nothing written yet.
- Updated at - When it was last changed.
How to Write a Policy
Click a policy’s row to open it. The panel is titled with the policy’s name.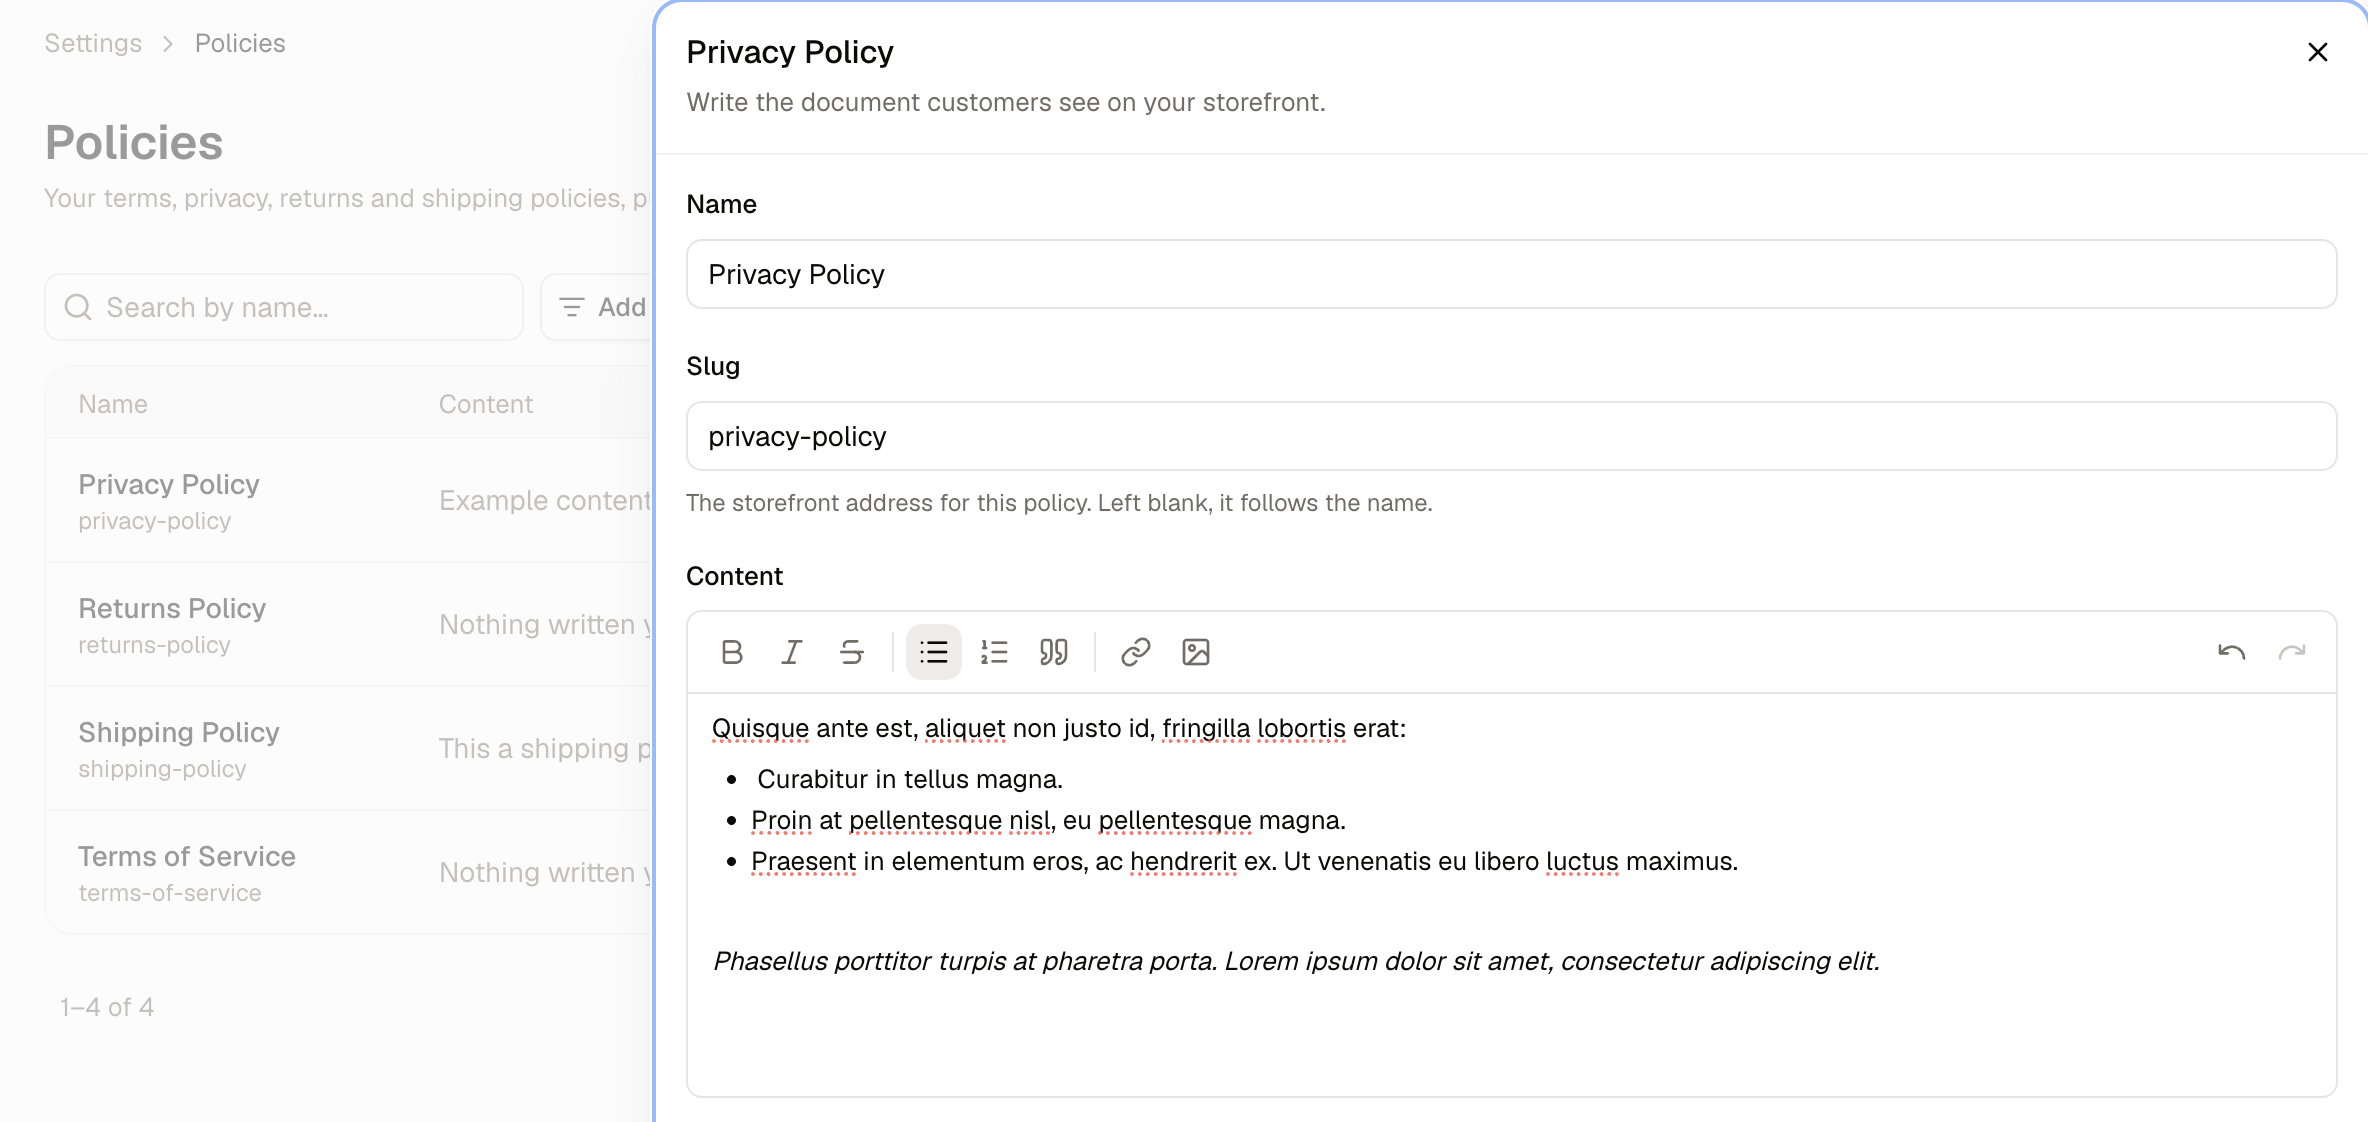
- Name - The title shown at the top of the document.
- Slug - The address for this policy, such as
returns-policy. Leave it blank and it follows the name. - Content - The document itself.
Changing the Slug changes a published policy’s address, so any link you have shared pointing at the old one stops working. Set it once and leave it.
How to Add a Policy
Click Add policy for a document the four built-in ones do not cover, such as a warranty, an accessibility statement or a cookie notice. Fill in the Name, leave Slug blank unless the address needs to differ, write the Content, and click Create policy.How to Delete a Policy
Open the row menu and choose Delete.Further Reading
- Returns & Reasons - The reasons behind the returns your policy describes
- Emails - Where your support address is set
- Store Details - Your store’s name and regional defaults