

Reviewing Your Delivery Profiles
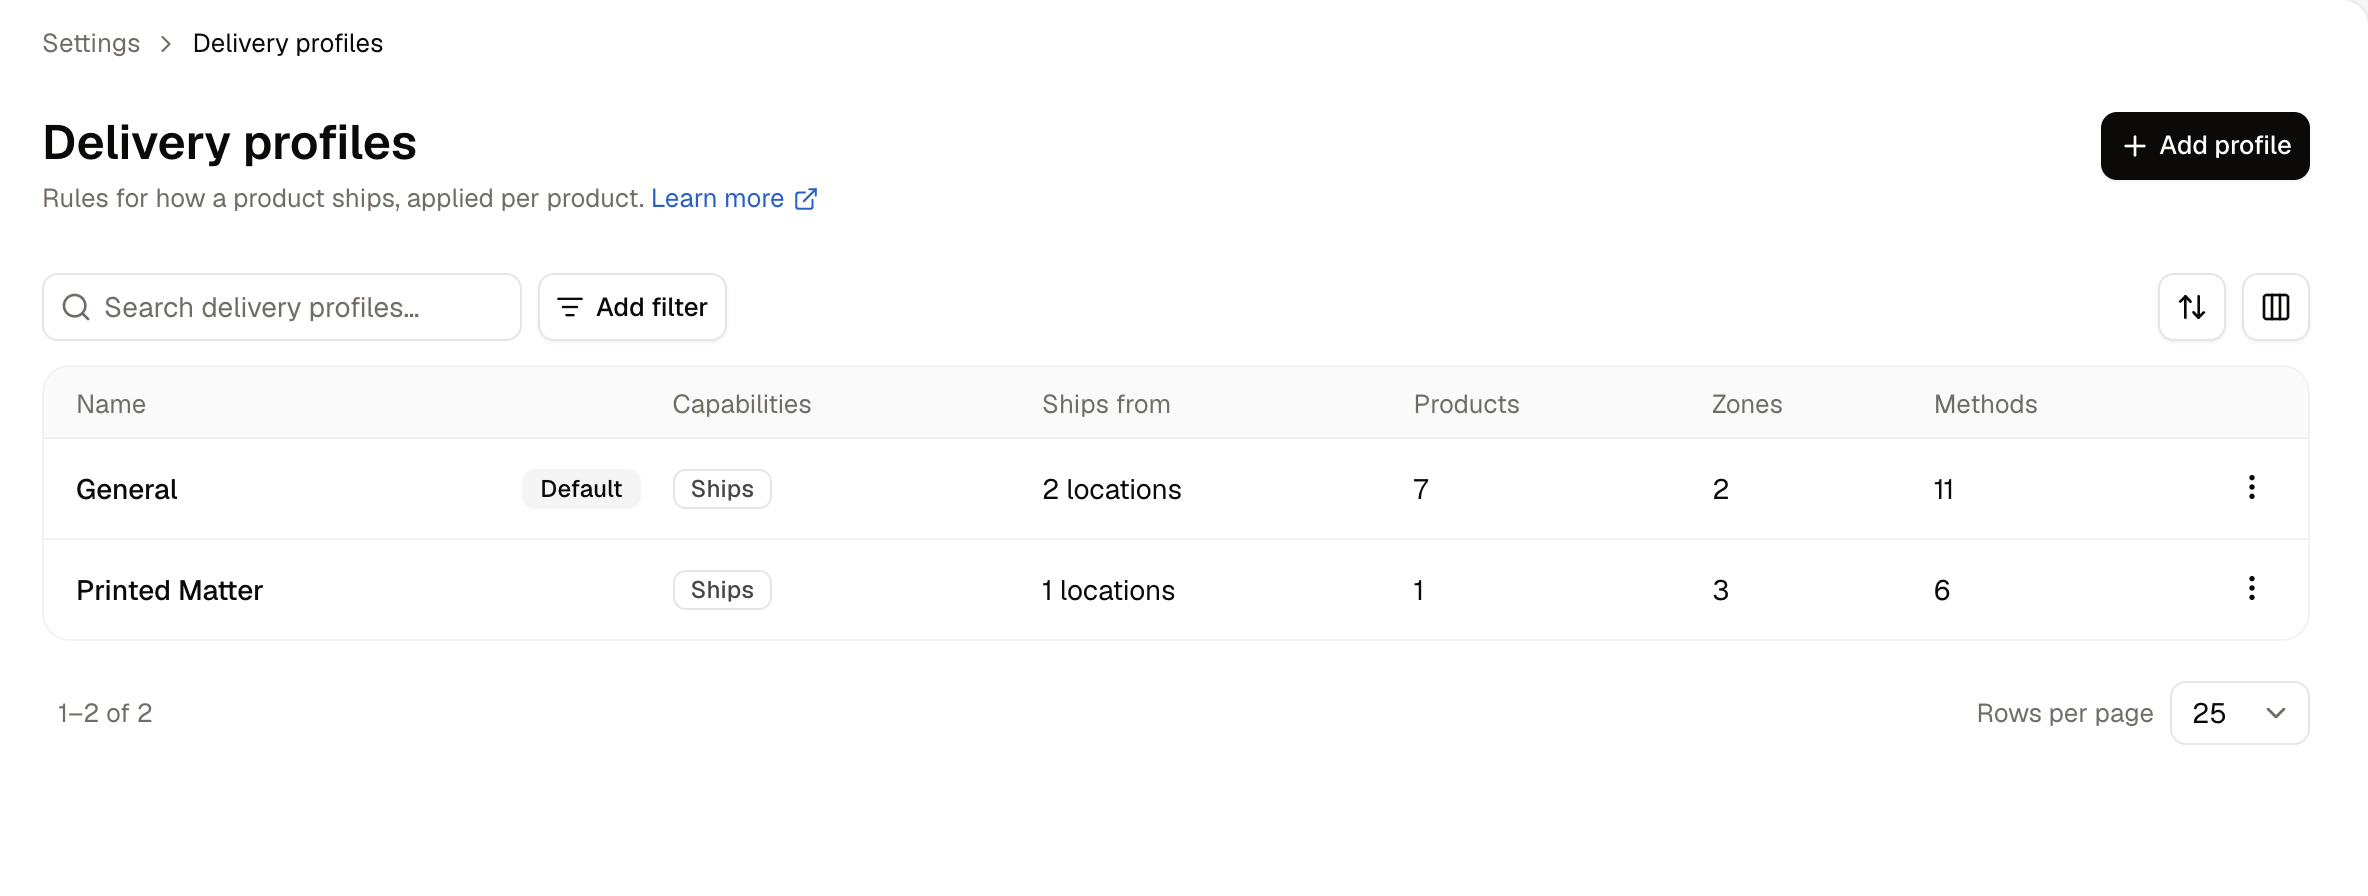
- Name - What the profile is called. One profile carries a Default badge.
- Capabilities - What this profile can do: Ships, Pickup, Digital, or a combination.
- Ships from - How many stock locations its goods leave from, or All locations.
- Products - How many products are assigned to it.
- Zones - How many destination zones it covers.
- Methods - How many delivery methods it offers in total.
The Products count is read-only. A product is assigned to a profile from the product page, not from the delivery profile.
How to Create a Delivery Profile
Click Add profile to open the delivery profile creation form.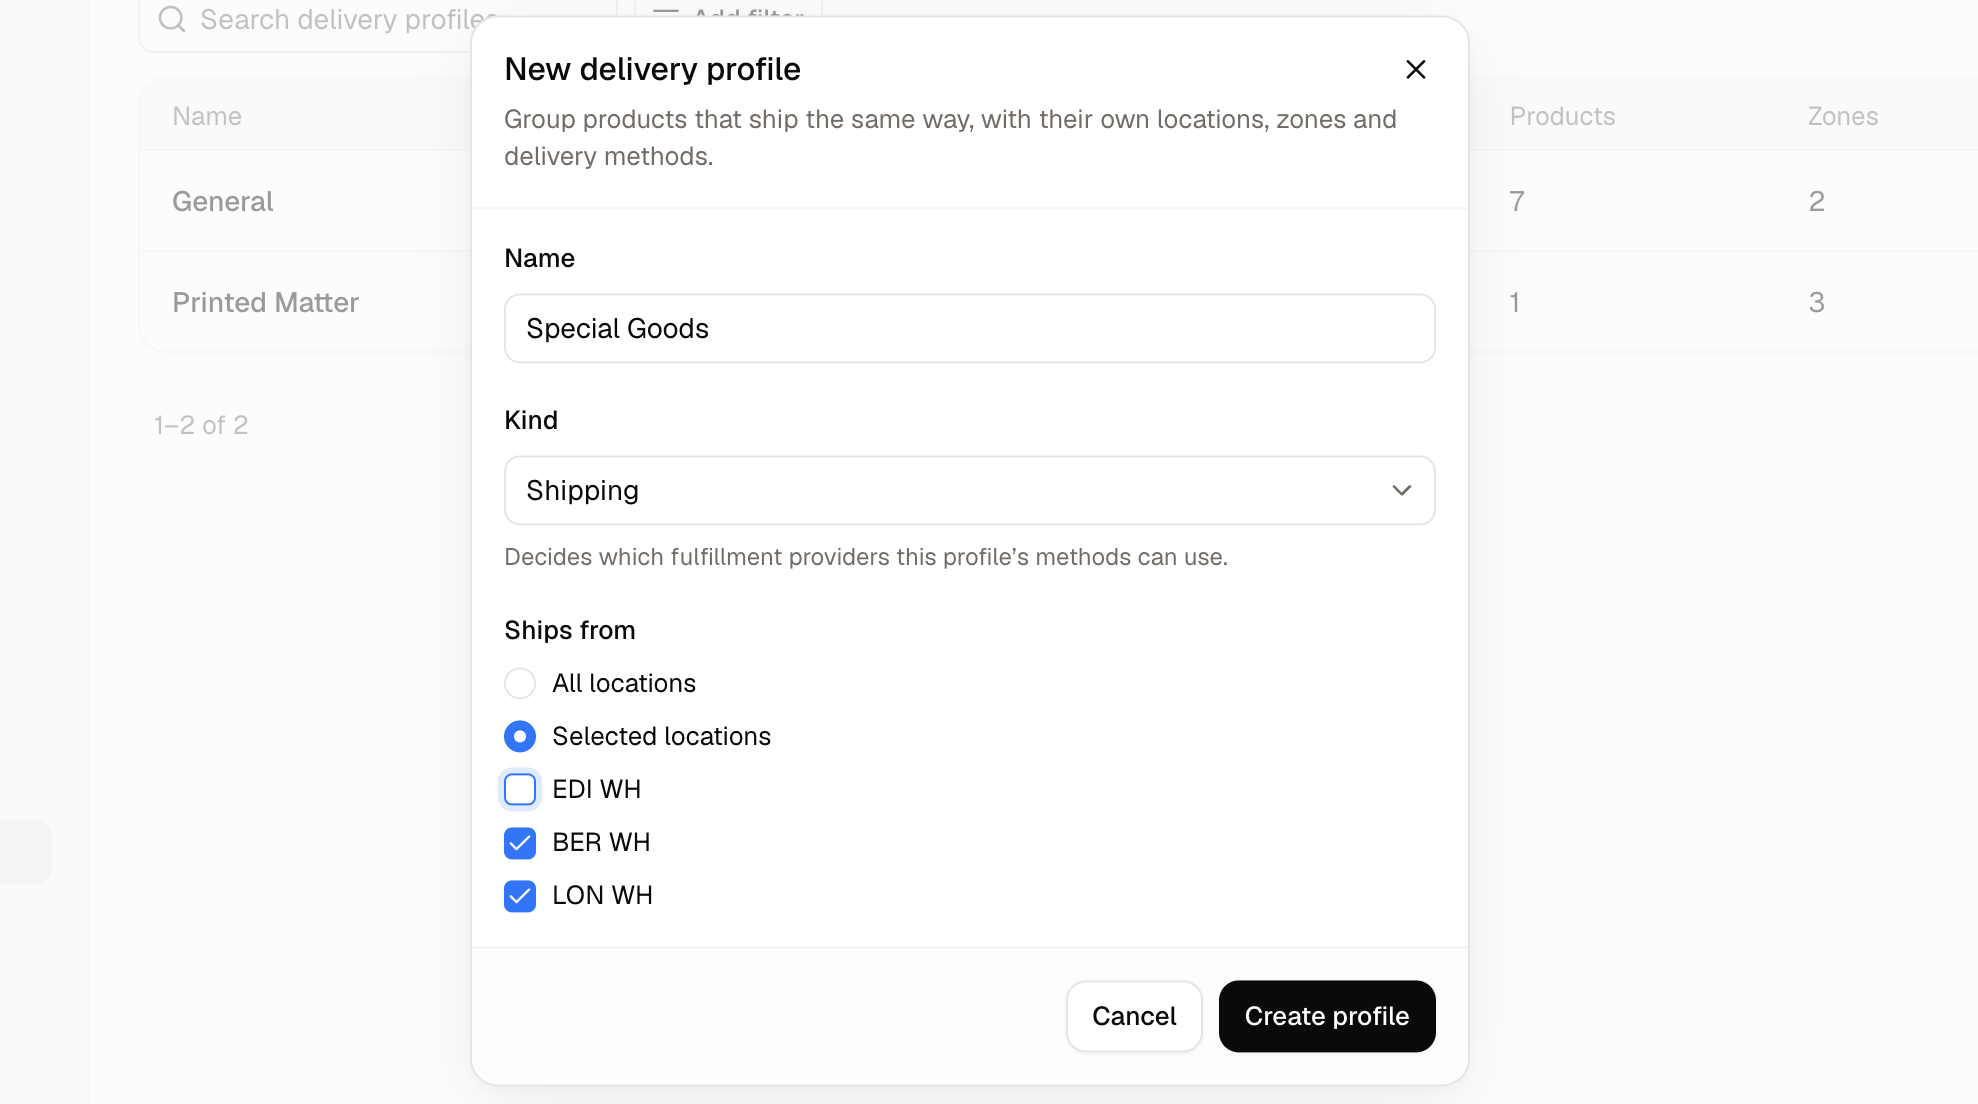
- Name - Name it after the kind of goods it covers, such as Bulky Items or Digital, rather than after a carrier.
- Kind - Shipping for physical goods, or Digital for downloads. This decides which fulfillment providers the profile’s methods can use.
- Origins - All locations, or Selected locations to name the warehouses these goods ship from.
Inside a Profile
A delivery profile is built in three layers: the origin the goods leave from, the zones that origin can reach, and the delivery methods offered within each zone.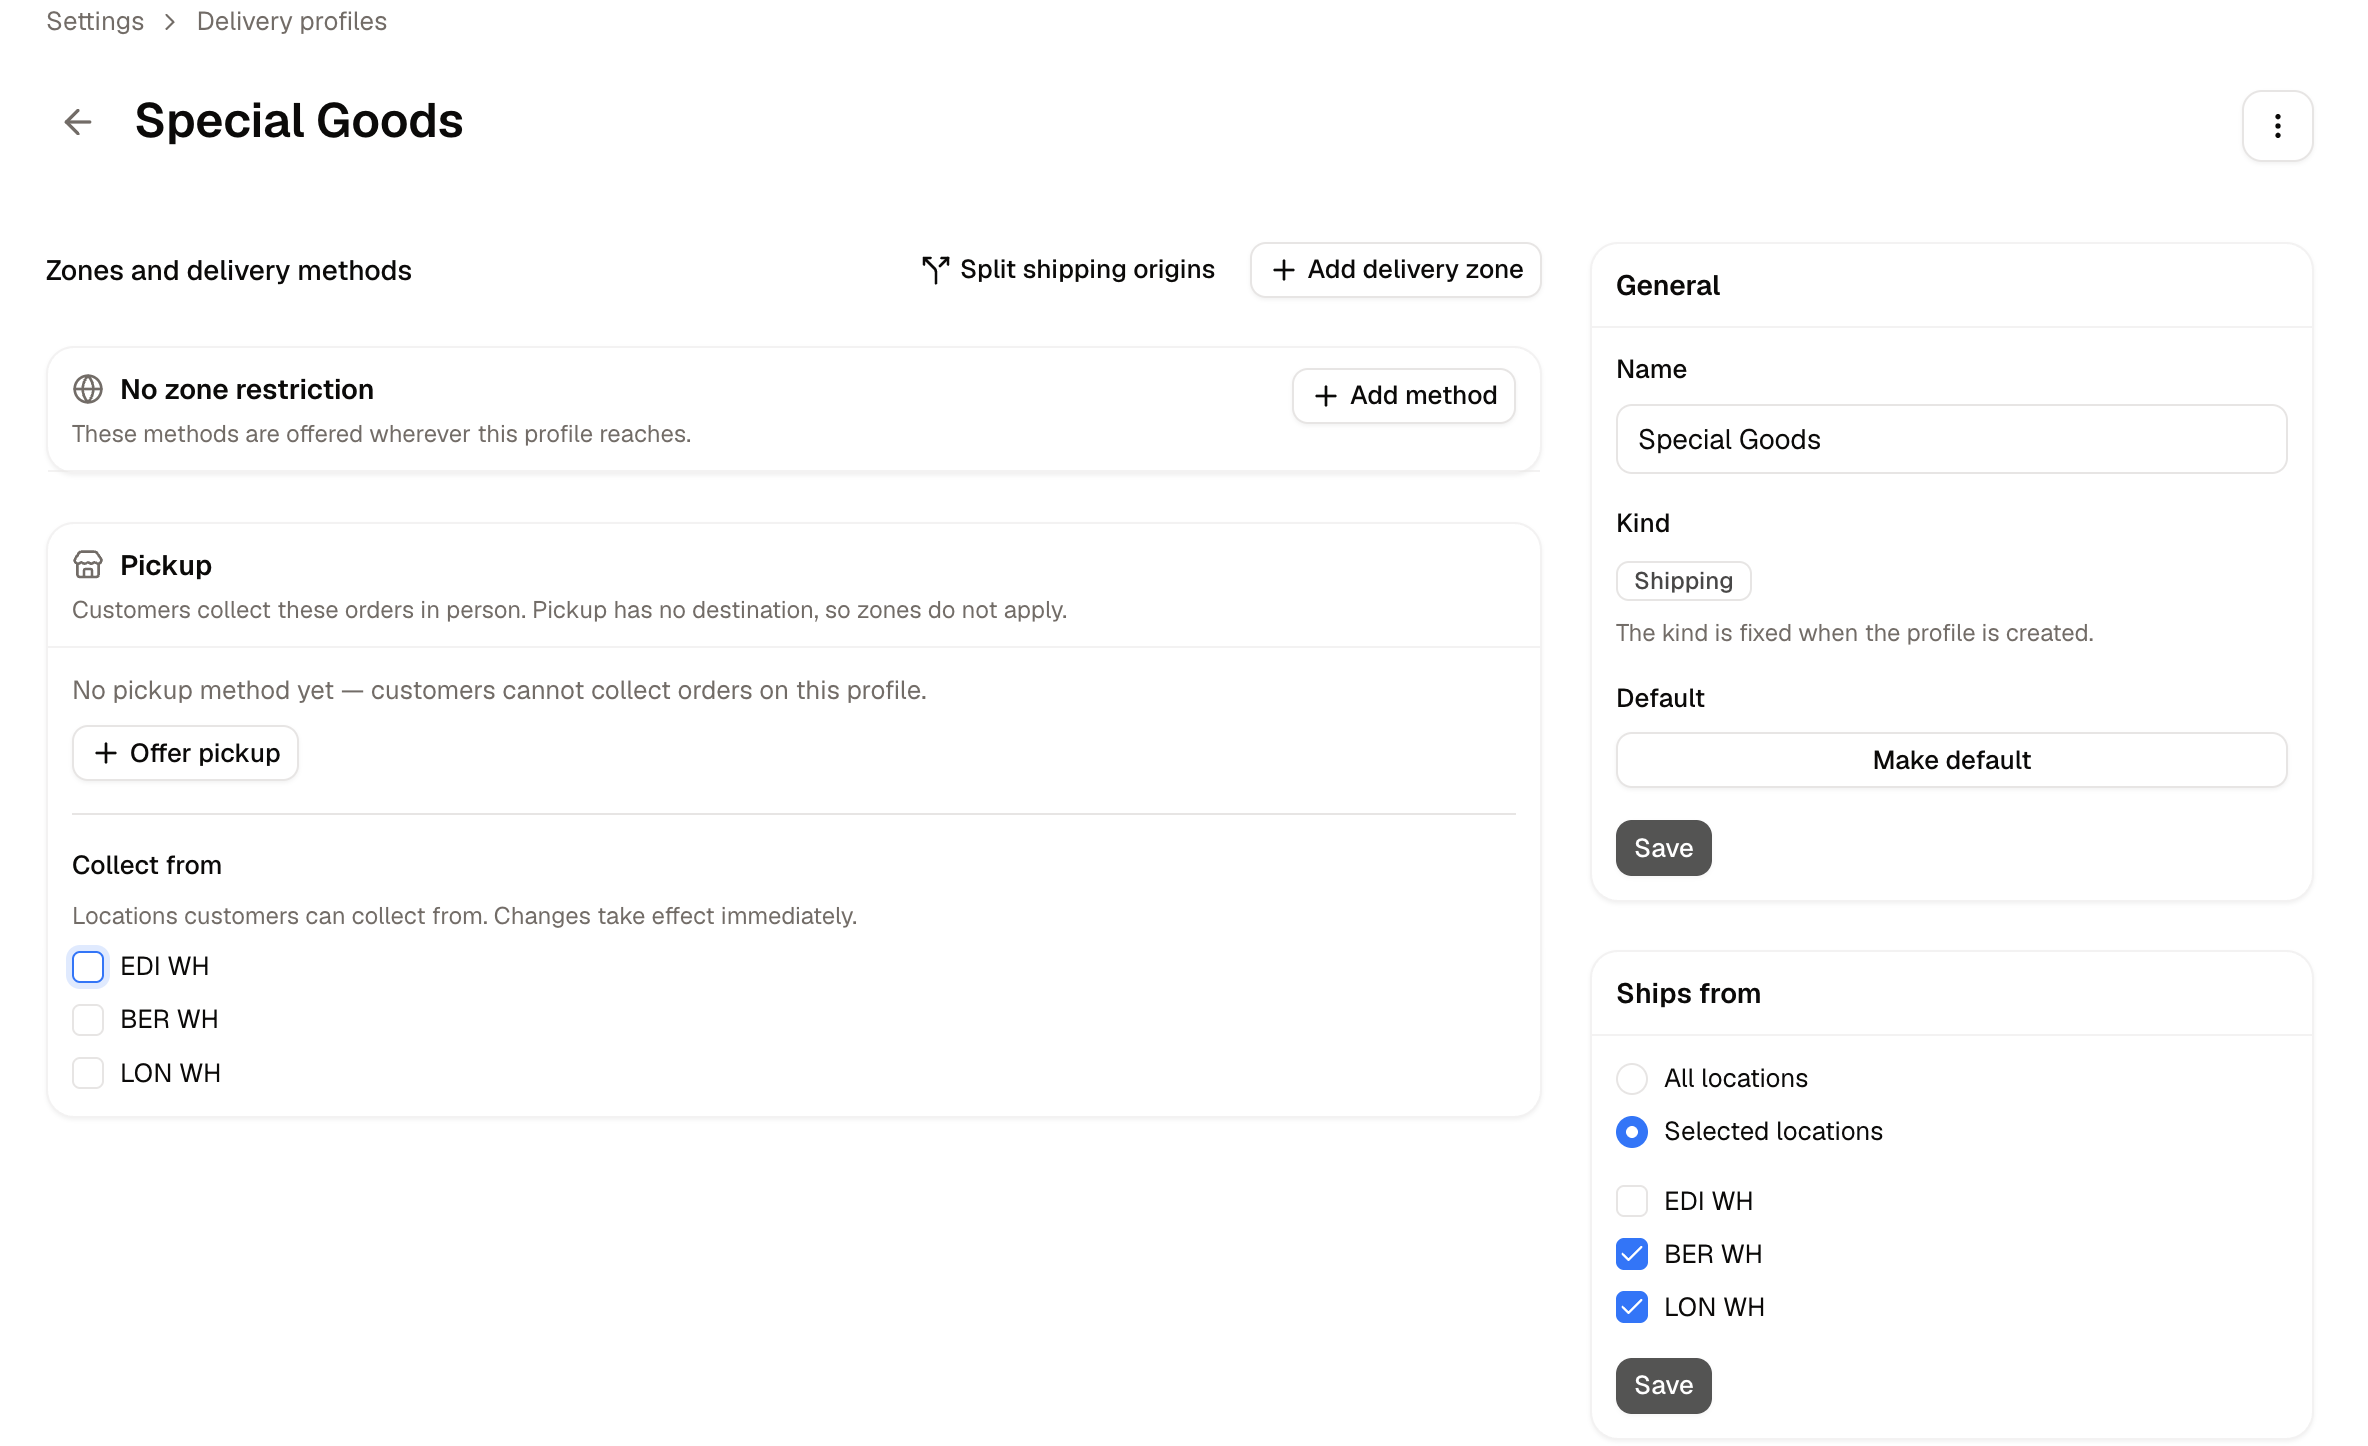
- General - The profile’s Name, its Kind (fixed at creation), and a Default switch. The default profile is what products without a profile of their own ship on.
- Ships from - All locations, or a tick box per stock location.
Shipping from more than one warehouse
If goods leave from several warehouses and the rates differ, click Split shipping origins. This breaks the profile into origin groups, each with its own zones and methods, so stock leaving Amsterdam can be priced differently from the same goods leaving California. If rates are the same wherever goods ship from, leave it unsplit.How to Add a Delivery Zone
A zone is a set of destinations a method can be offered to. Click Add delivery zone within the origin group it belongs to.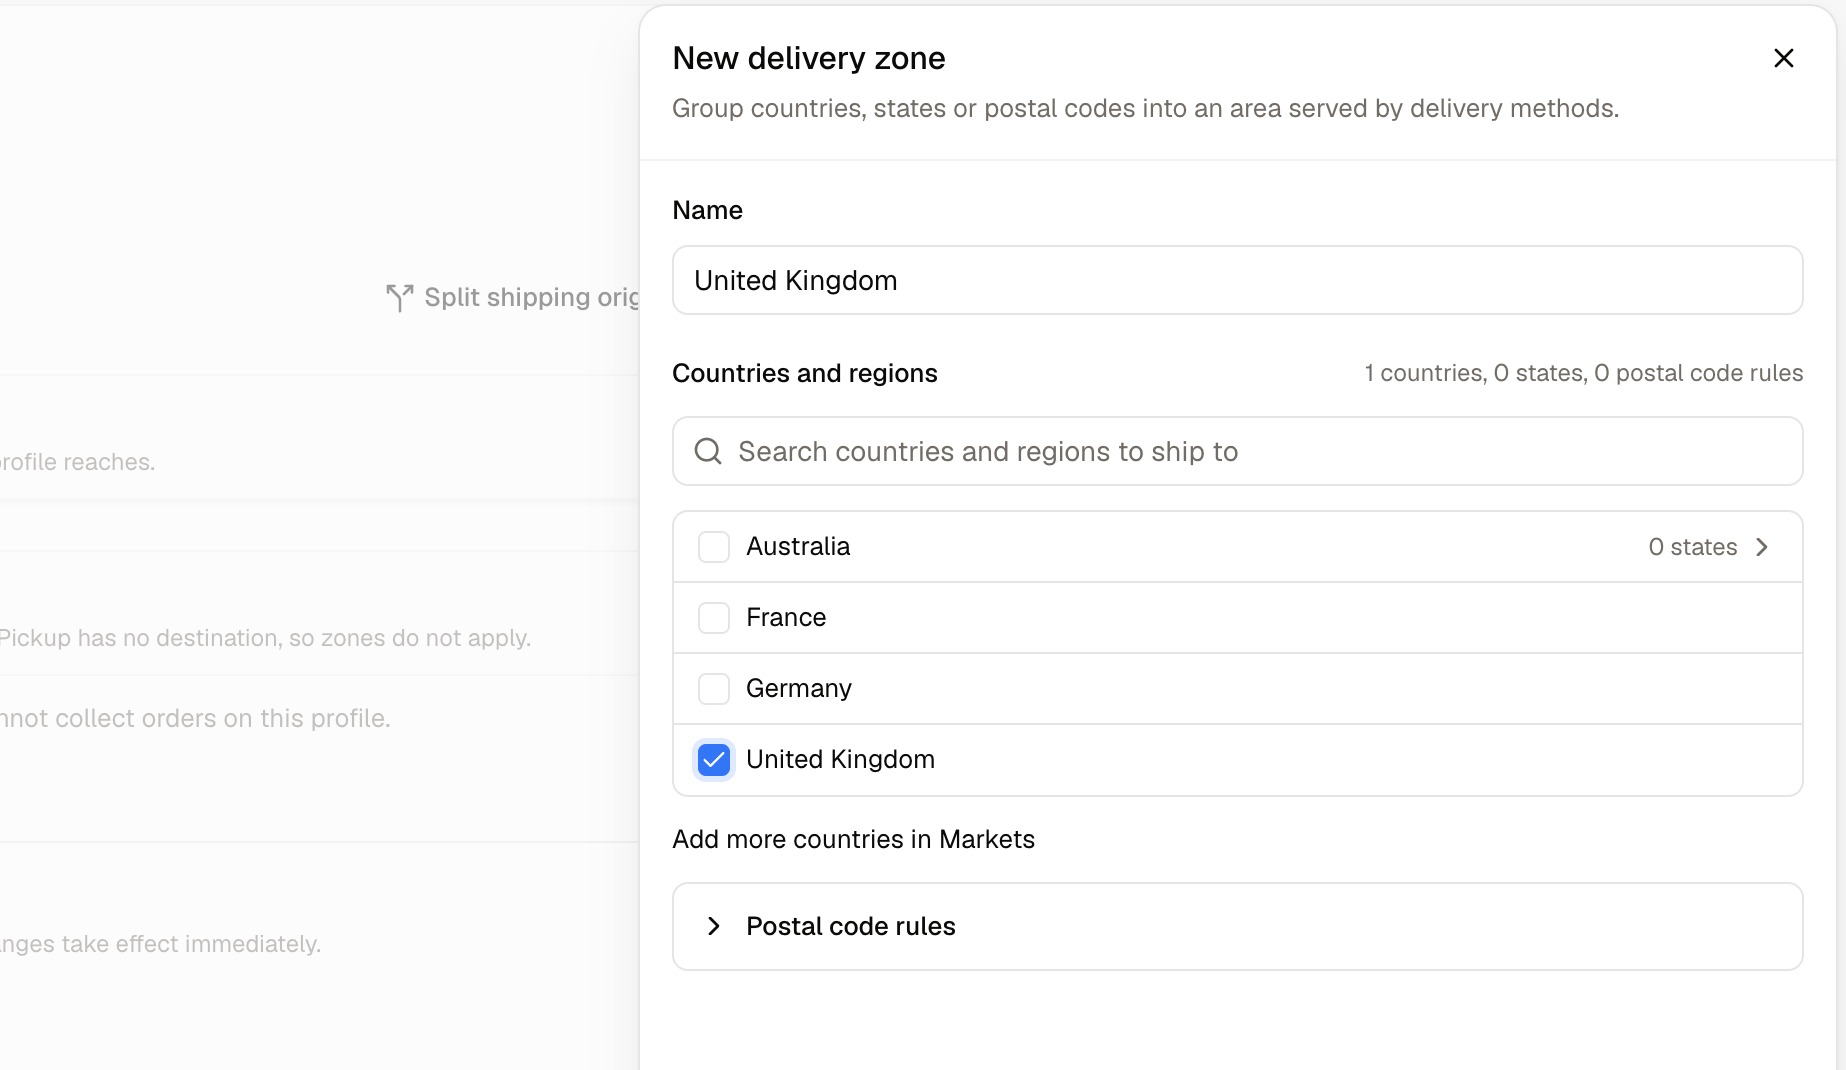
Every profile has a default No zone restriction container. Methods placed inside it are offered wherever the profile reaches, regardless of destination.
Postal code rules
For finer control, add postal code rules within a country. This is how you separate destinations that cost more to reach, such as pricing the Scottish Highlands differently from the rest of the United Kingdom, or excluding offshore postcodes from a next-day service. Each rule offers three fields:- Prefix - Matches any postal code starting with what you enter, so
IVcovers every code in the Scottish Highlands. Works with every postal code format. - From and To - Matches a range of postal codes, and the range includes both ends.
1000to1999covers1000and1999as well as everything between them.
How to Add a Delivery Method
A delivery method is what the customer actually chooses at checkout. Click Add method inside the zone it should belong to.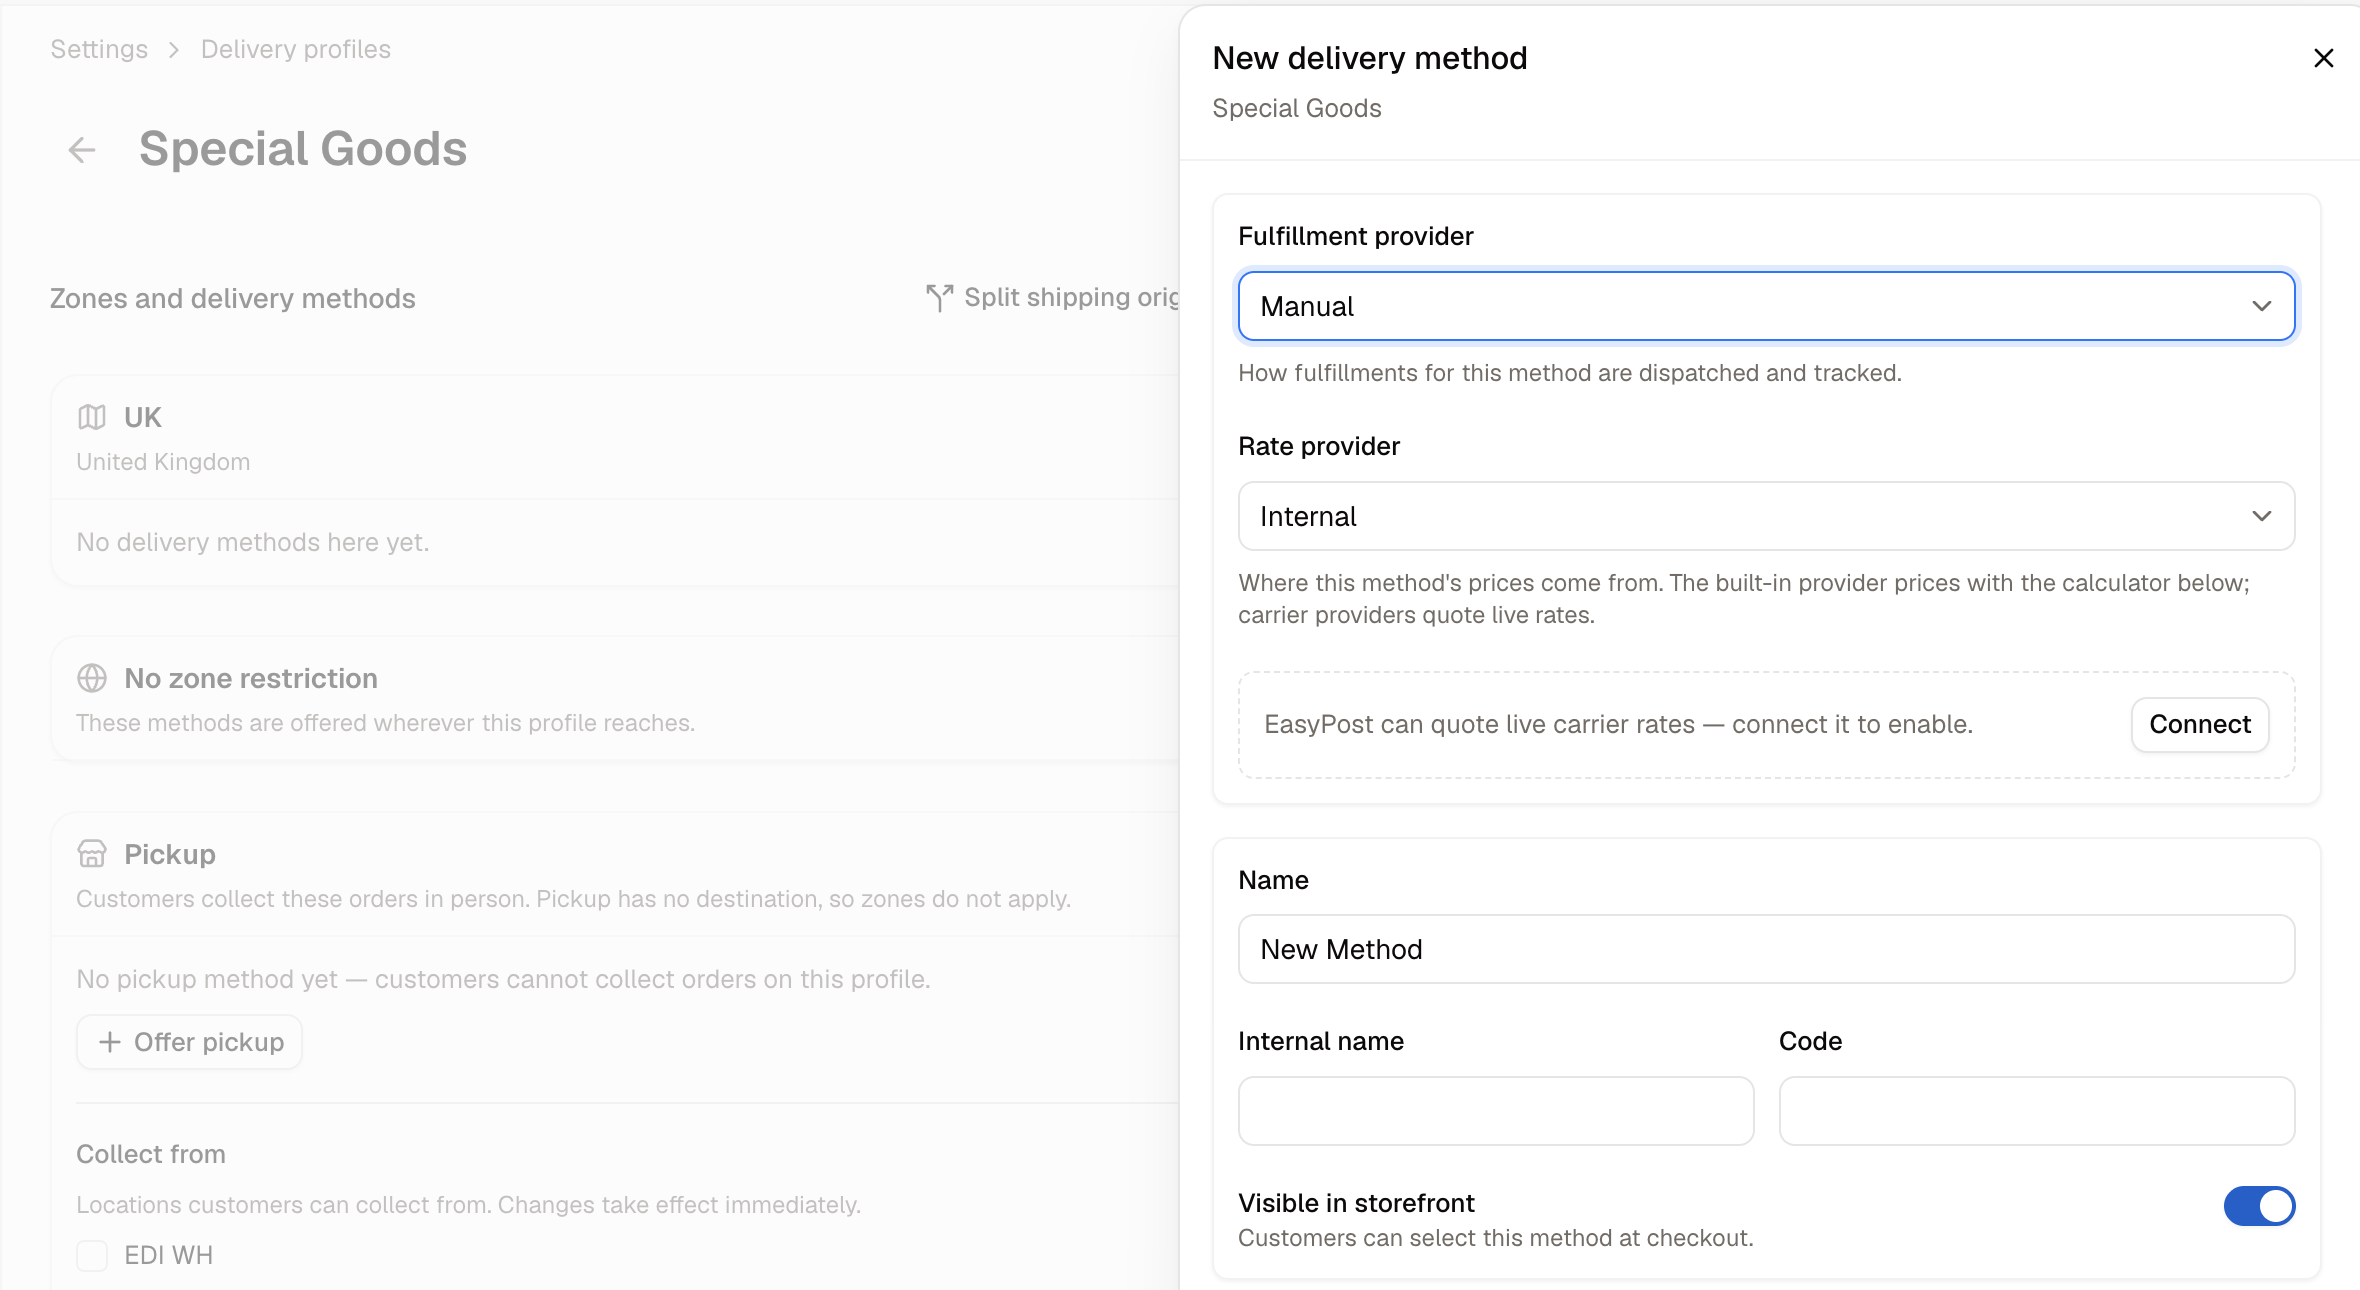
Providers
These two settings decide who handles the delivery and where its price comes from. Most stores can leave both on their defaults and price the method themselves.- Fulfillment provider - How fulfillments for this method are dispatched and tracked:
- Manual for goods you ship yourself,
- Pickup for collection,
- Pickup Point for a third-party collection point.
- Delivery rate provider - Where the price comes from:
- Internal prices with the calculator below, which is what most stores want.
- Freight is for freight carriers.
Both dropdowns show a greyed entry reading “Connect EasyPost to use it”. That is a prompt, not a choice. Connecting EasyPost lets these methods quote live carrier rates instead of using an internal calculator.
Naming and visibility
What this method is called, who sees it, and where it can be used. Customers only ever see the Name, so it is worth wording it around how fast the delivery is rather than which carrier you use.- Name - What customers see at checkout. Be specific about speed rather than carrier, such as “Next day” rather than “DHL”.
- Internal name - What your team sees. Useful when two methods look alike at checkout.
- Code - A short reference for integrations and exports.
- Visible in storefront - On by default. Turn it off to keep a method for staff-created orders only.
- Available to sellers - Off by default. Turn it on to let marketplace sellers ship with this method.
Pricing
What the method charges and how that charge is taxed.- Rate Calculator - How the price is worked out. See the calculators below.
- Tax category - Which tax applies to the delivery charge, if delivery is taxed where you sell.
- Currency - Which currency the rate is priced in. This only applies to the rate-based calculators, so it has no effect on a method that does not charge a set amount.
Rate calculators
The calculator decides what a method charges. Six are available:Delivery expectations
What you tell the customer about timing and tracking. Neither field changes the price, but both reduce the number of “where is my order” messages your team answers.- Estimated transit, business days - A minimum and a maximum, shown to the customer at checkout.
- Tracking URL - The carrier’s tracking link, with
:trackingbeing where the tracking number goes.
Conditions
Conditions limit when a method is offered, based on what is in the cart or who is buying. A method with no conditions is offered to everyone who reaches it. Click Add condition to choose from:- Item total - Offer the method only above or below a cart value. This is how a free delivery threshold is built.
- Weight - Offer the method only within a certain weight range.
- Excluded products - Hide the method when the cart contains particular products.
- Channel - Offer the method only on certain sales channels.
- Volume - Offer the method only within a certain size range.
- Company - Offer the method only to particular business customers.
Free delivery over a threshold is an Item total condition on a method priced at zero, not a setting of its own.
Pickup
Pickup is for orders customers collect in person. It sits in its own section on the profile page, outside the origin groups, because collection has no destination and zones do not apply.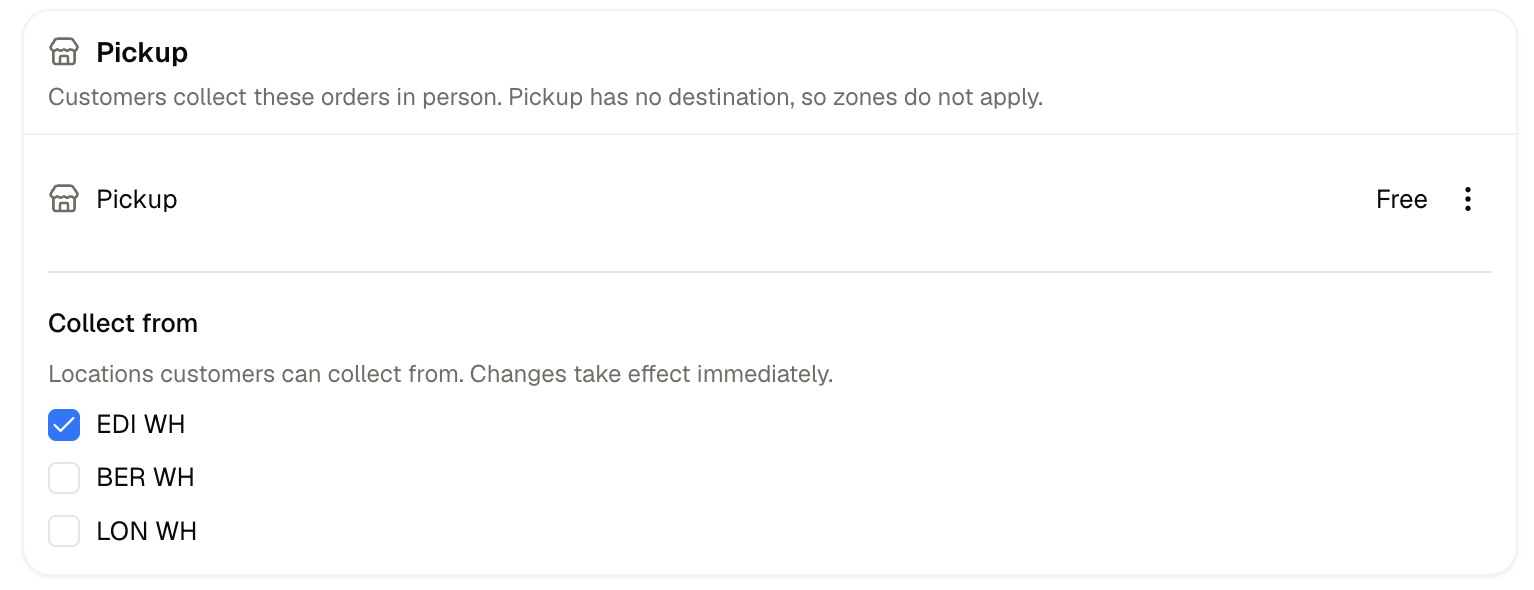
How to Delete a Delivery Profile
Open the row menu on the profiles list and choose Delete.The default profile cannot be deleted. Its row offers Edit only, because products with no profile of their own rely on it. Make another profile the default first if you need to remove it.
Further Reading
- Stock Locations - The warehouses and pickup points a profile ships from
- Package Types - The boxes and pallets used when quoting
- Create a Product - Where a product is assigned to a profile