Getting Started
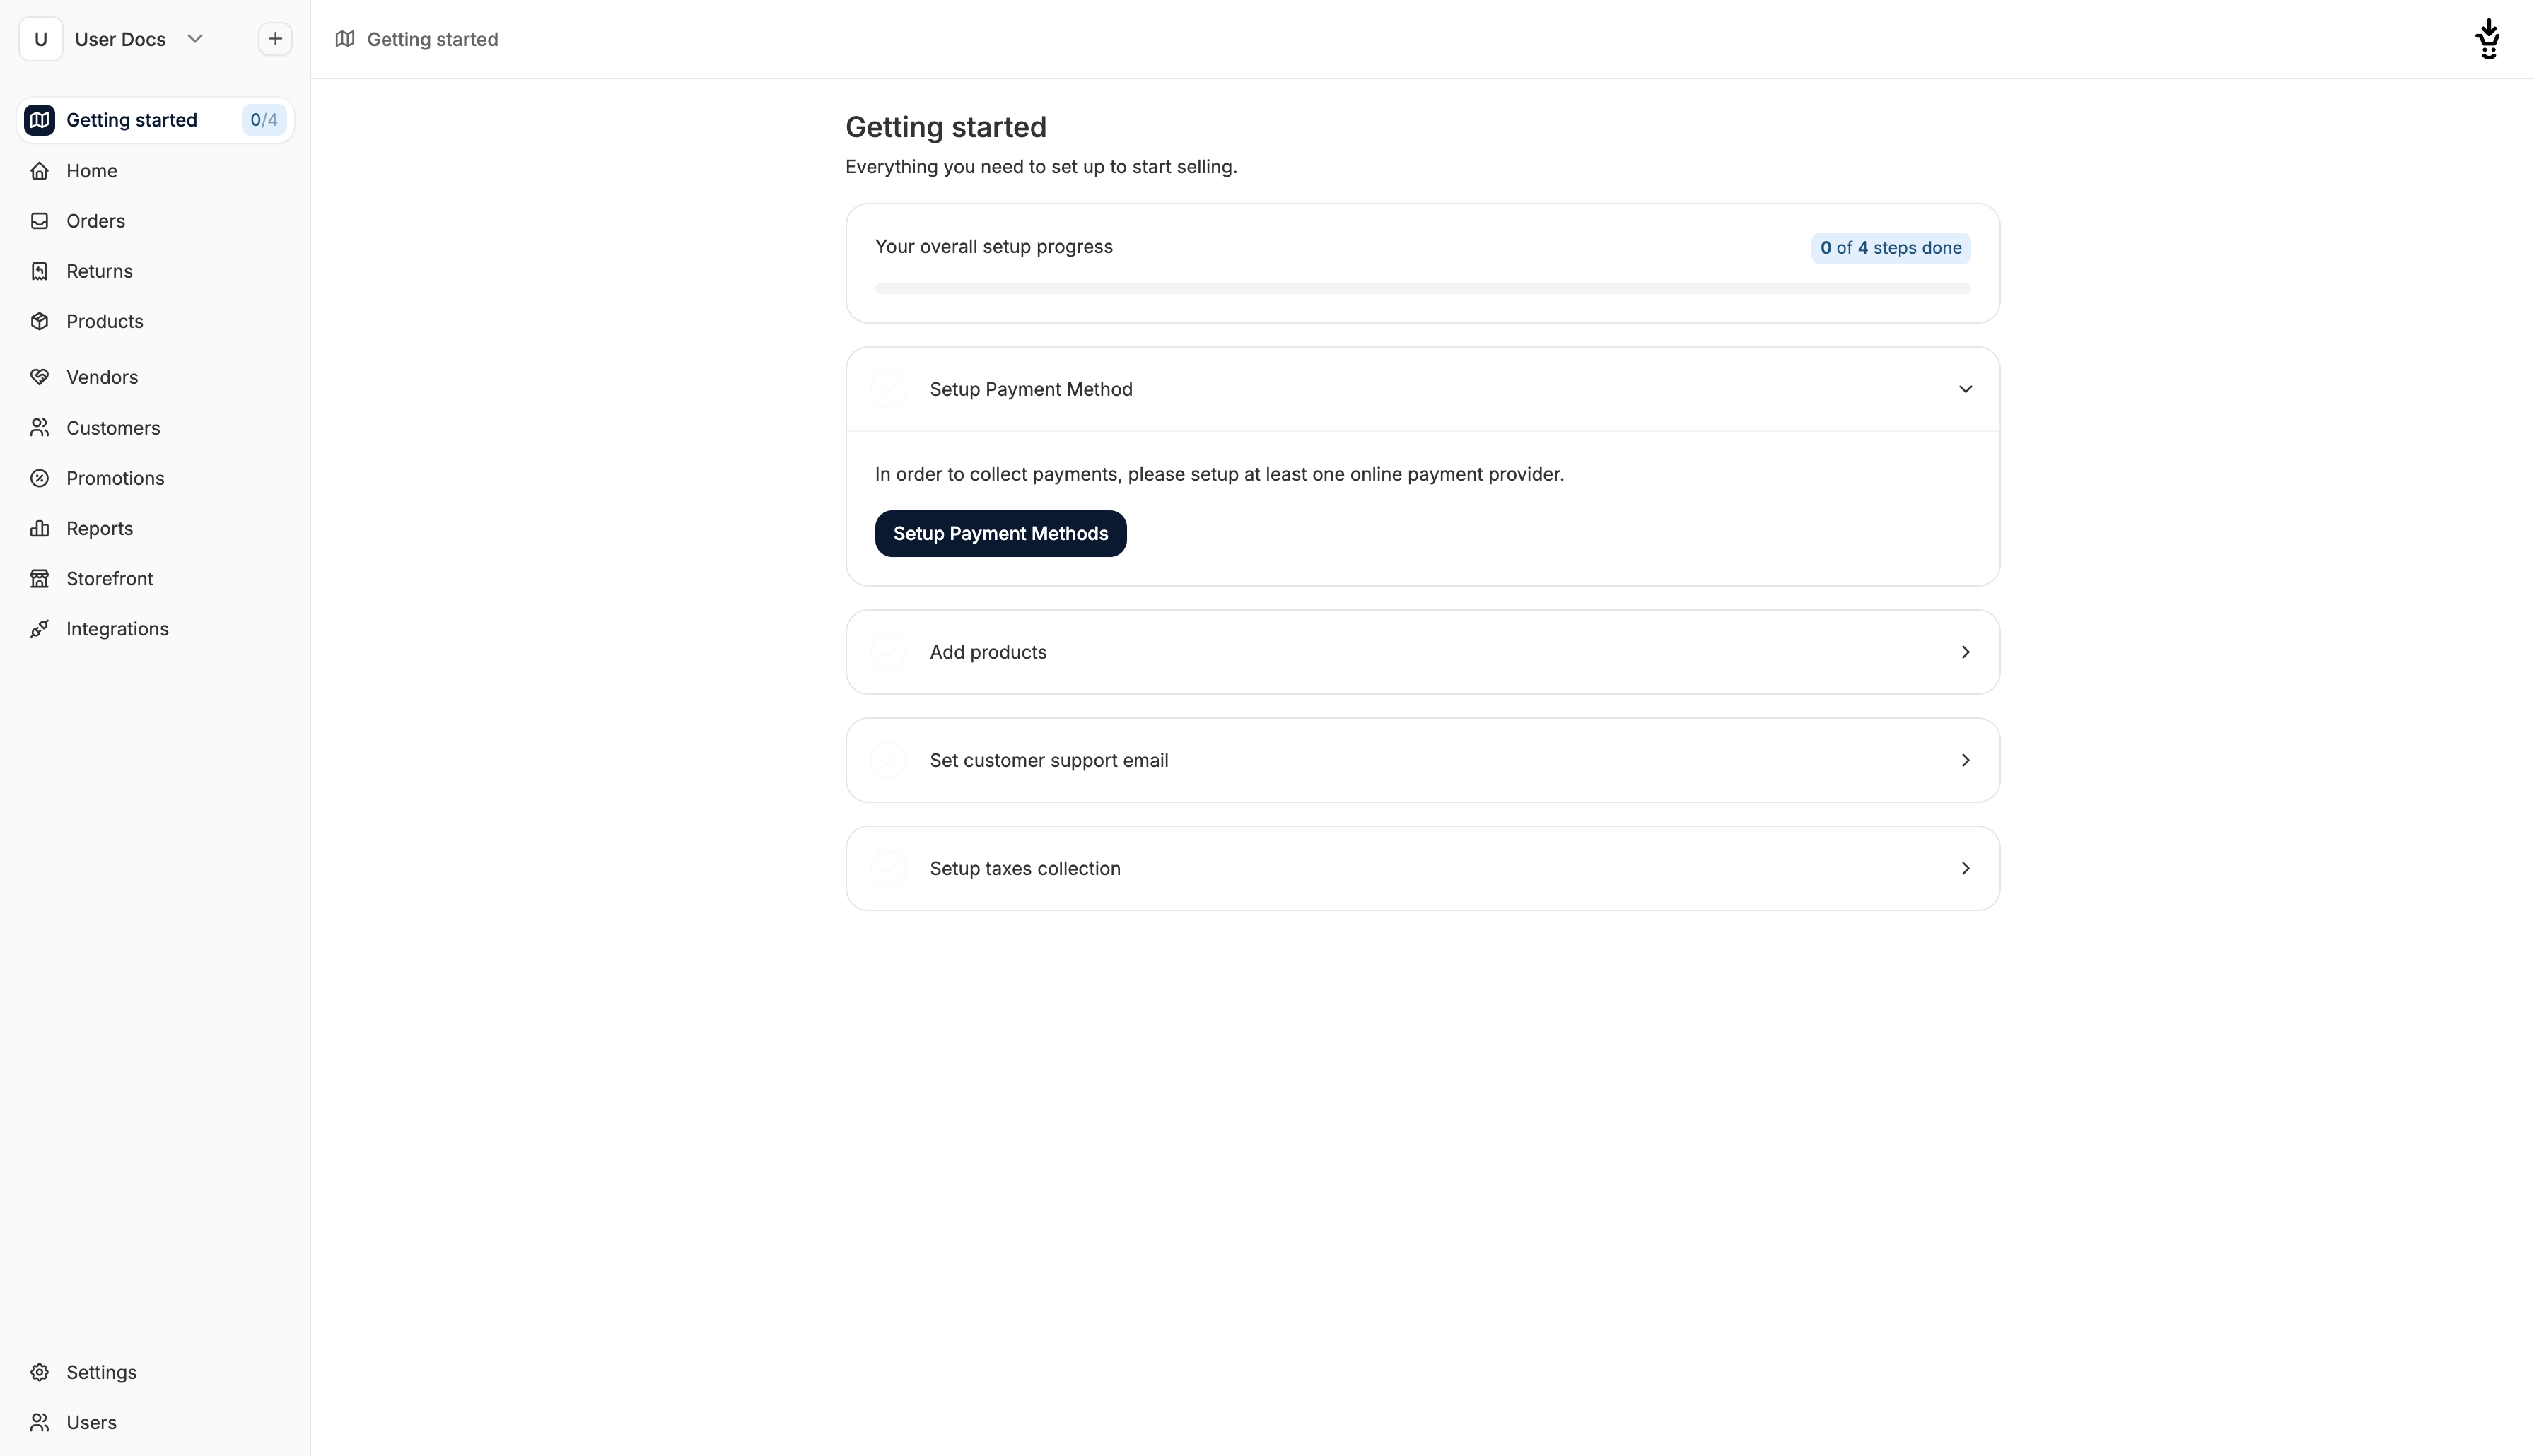
- Setup payments
- Add products
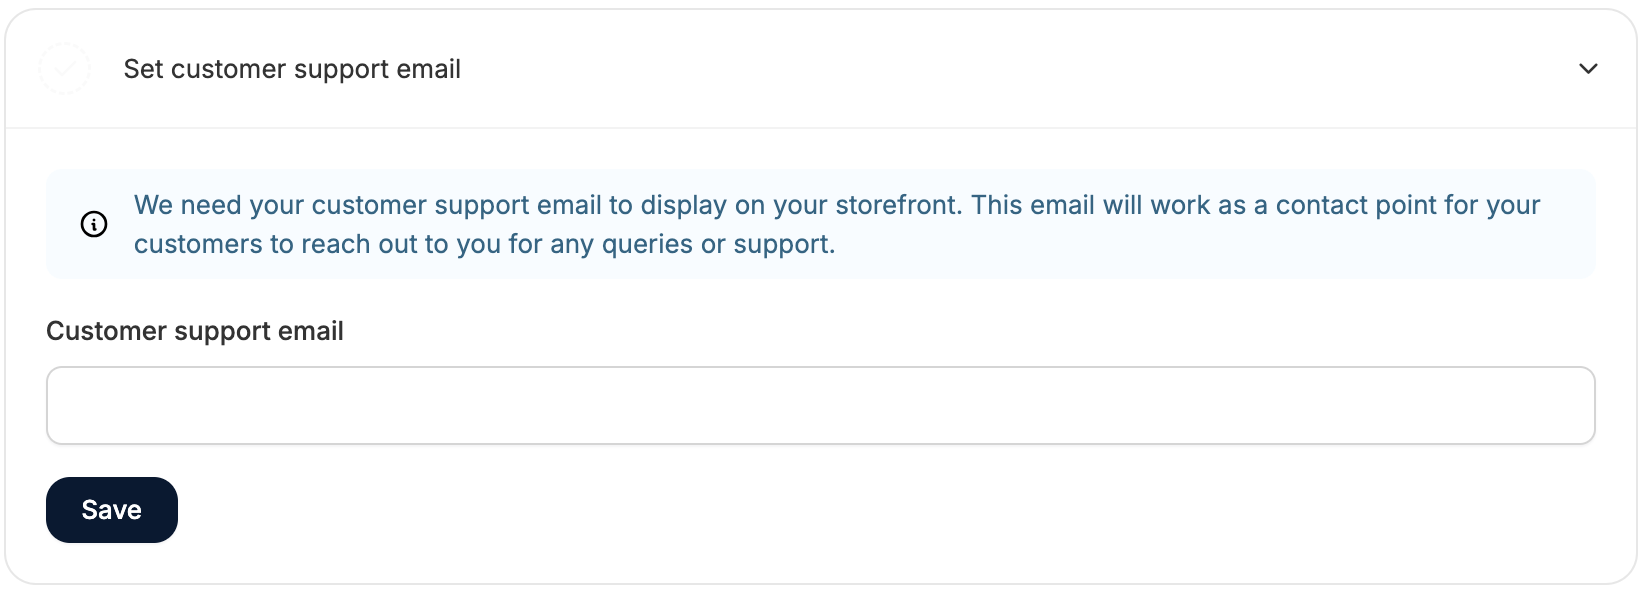
- Set customer support email
- Setup taxes collection
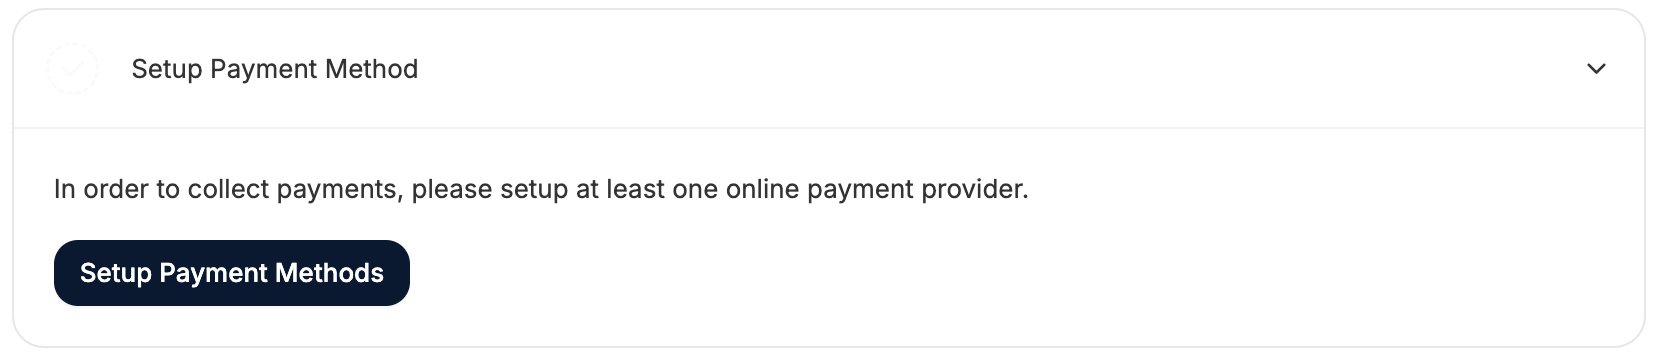
Setup Payment Method
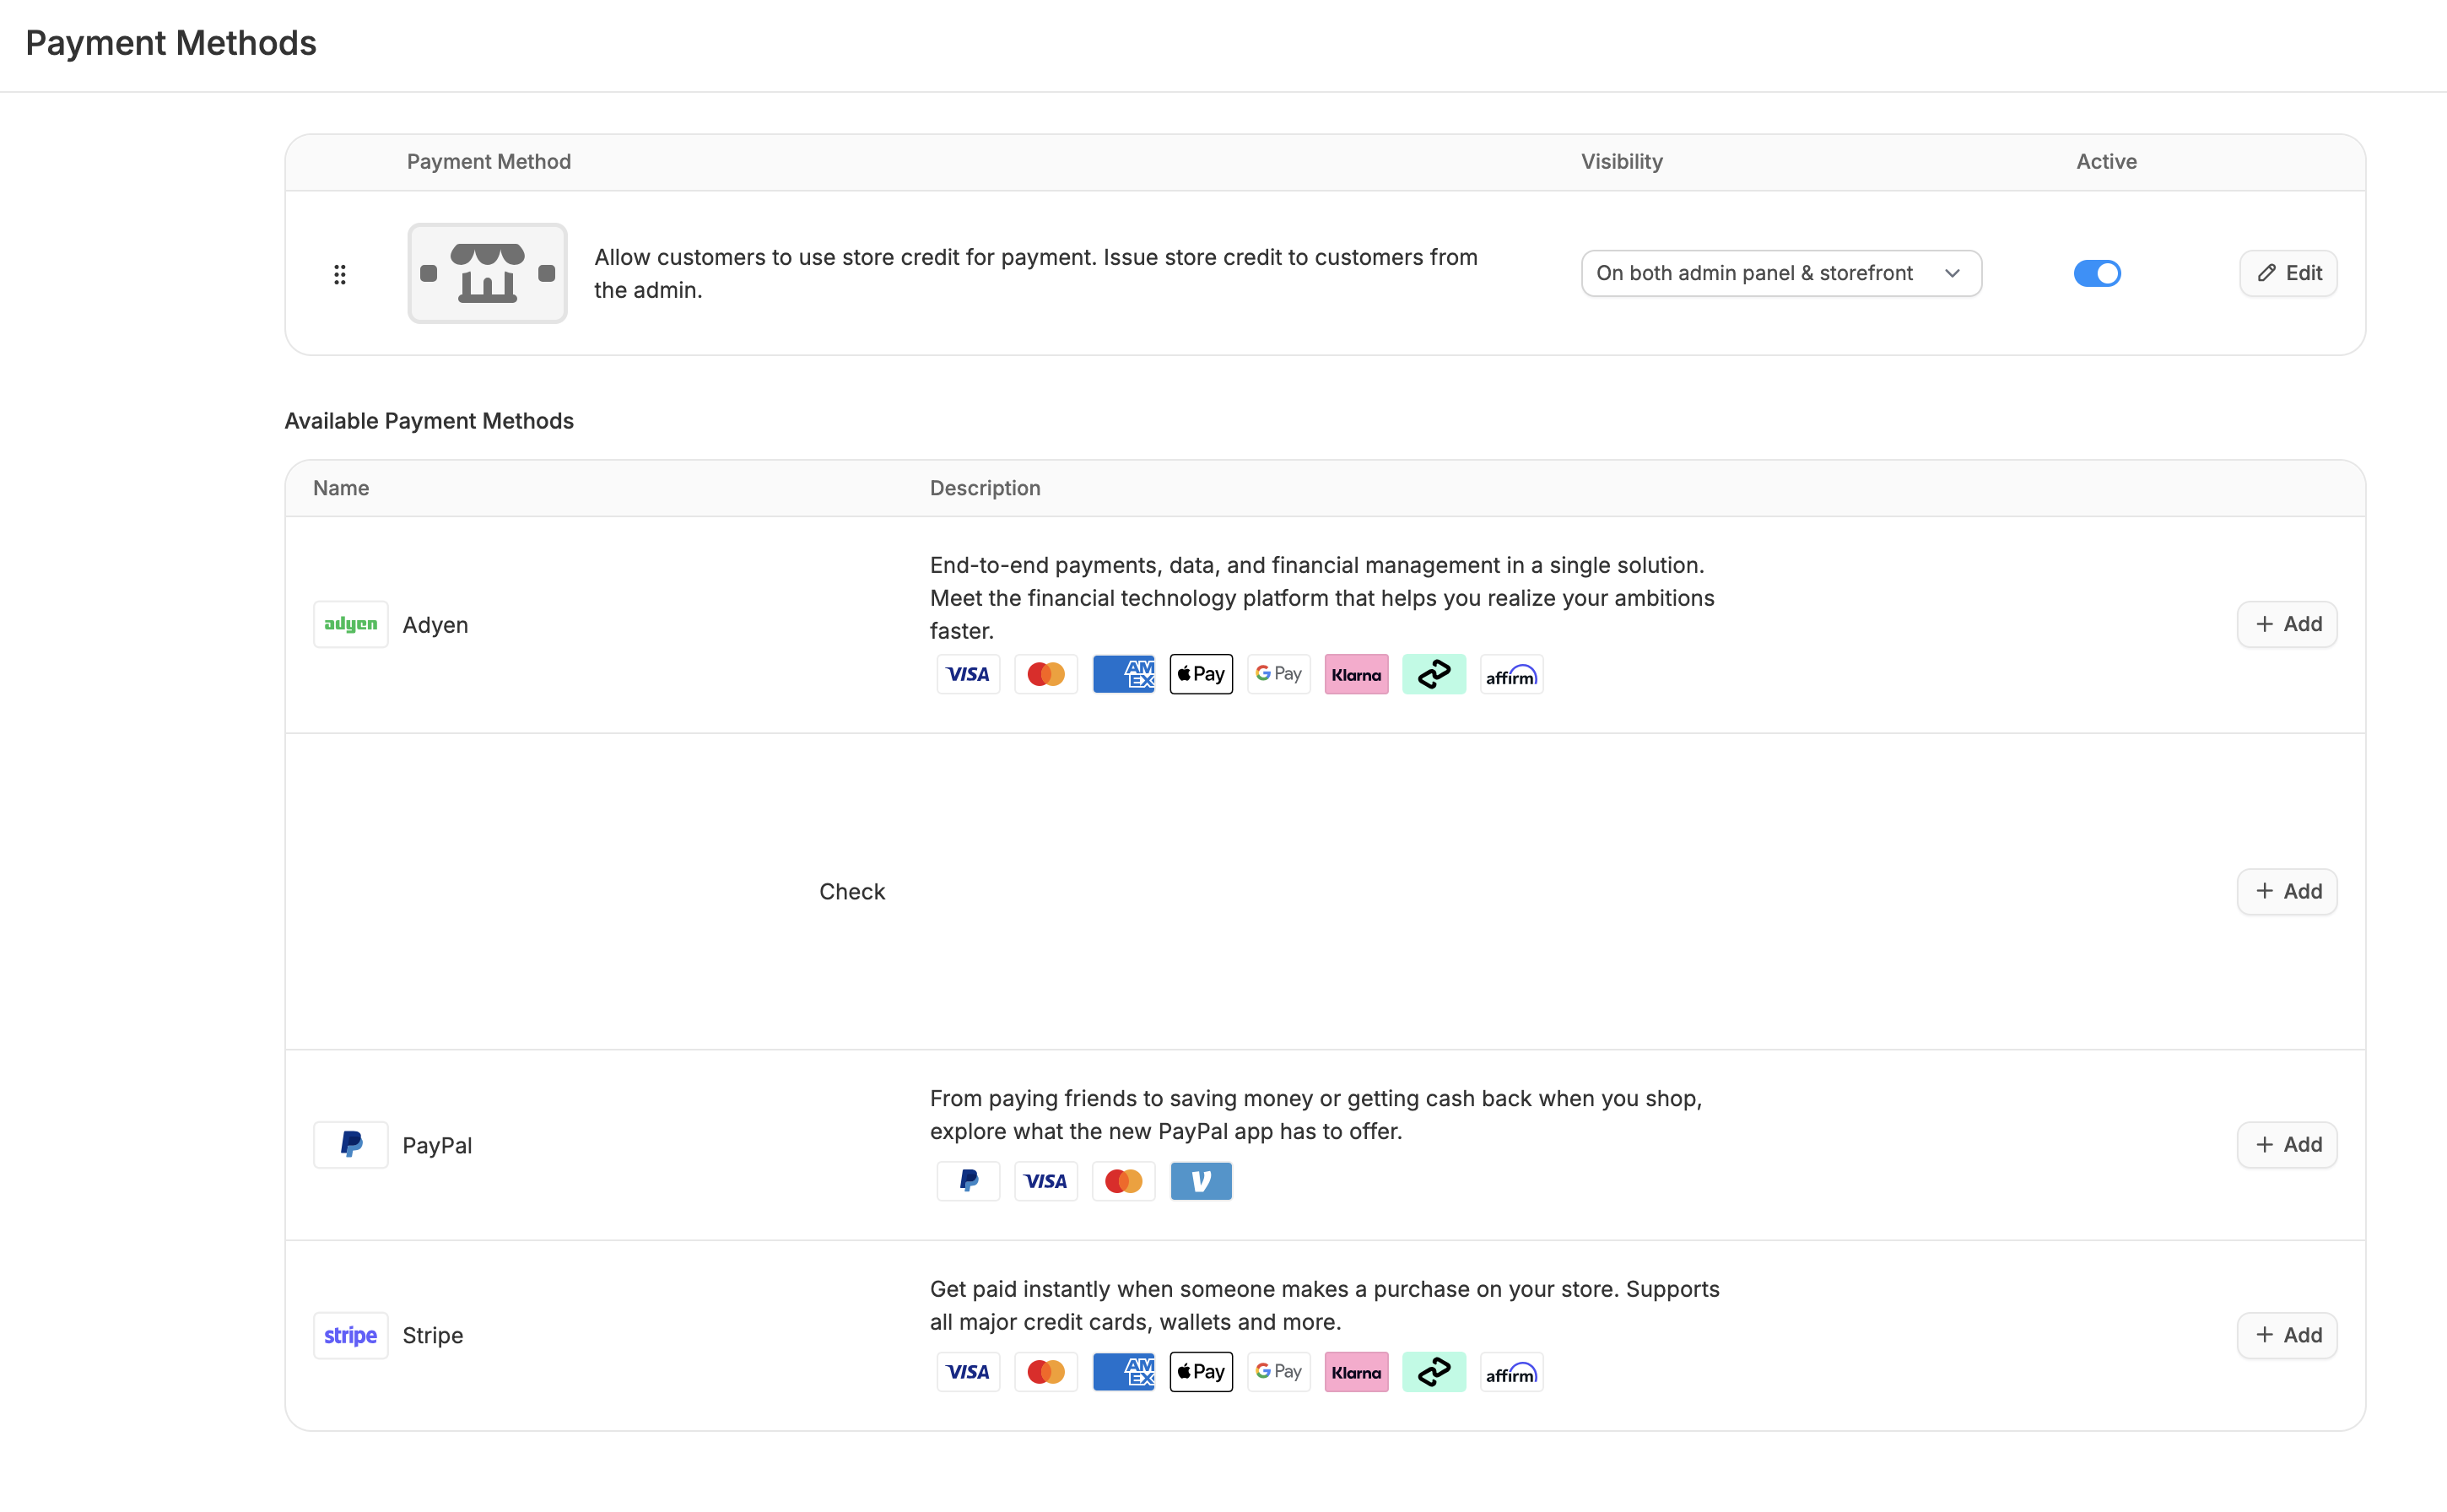
Only payment methods that have been installed will appear in the Available Payment Methods list. If a method you’re expecting isn’t listed, ask your developer to confirm it has been added to the codebase.
- Click Add next to your chosen method
- Follow the setup instructions in the form
- Click Create to enable it
Most payment gateways require you to have an account with the provider before setup.
Add Products
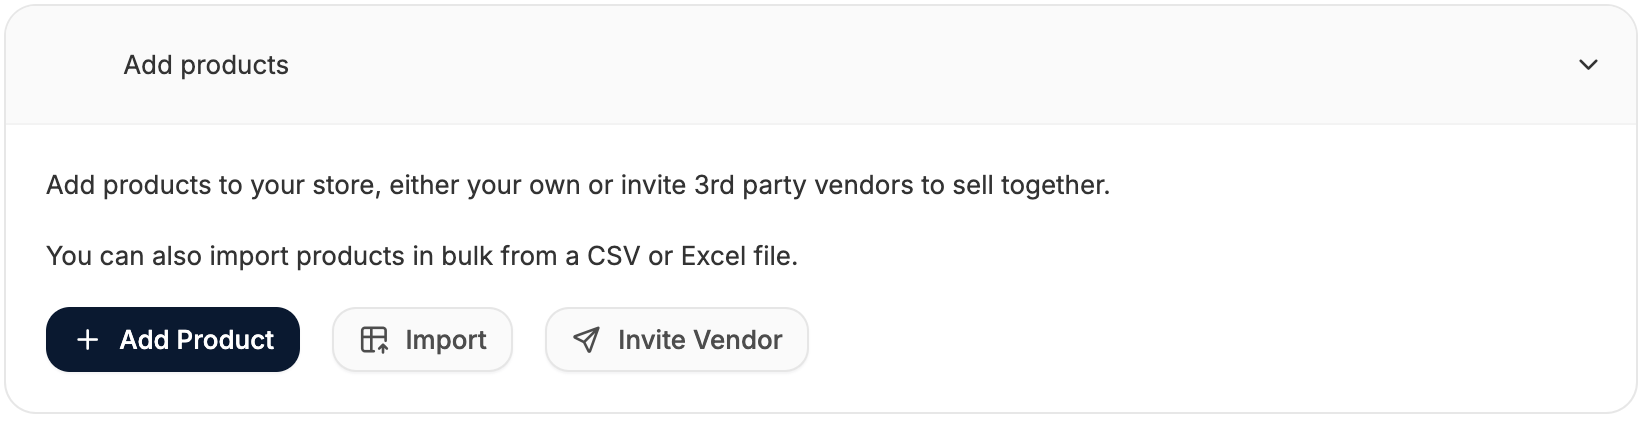
- Add products manually (ideal for small catalogs or testing)
- Import products using CSV (essential for large catalogs)
- Invite vendors to add their own products (for marketplaces - Spree Enterprise only)
Add Customer Support Email
Setup Taxes Collection
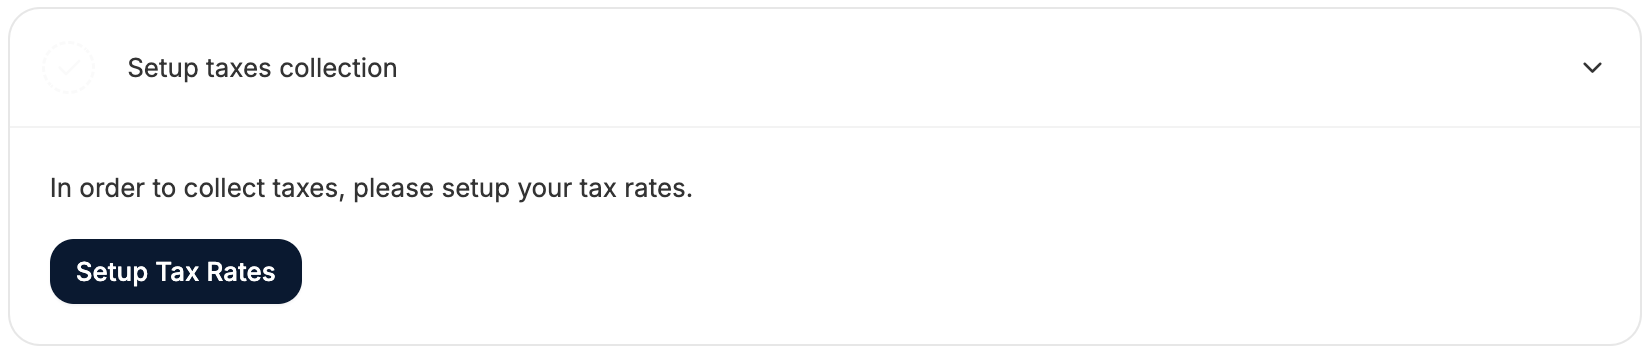
- Tax rates (manual or through third-party services like Avalara)
- Tax categories
Shipping Methods
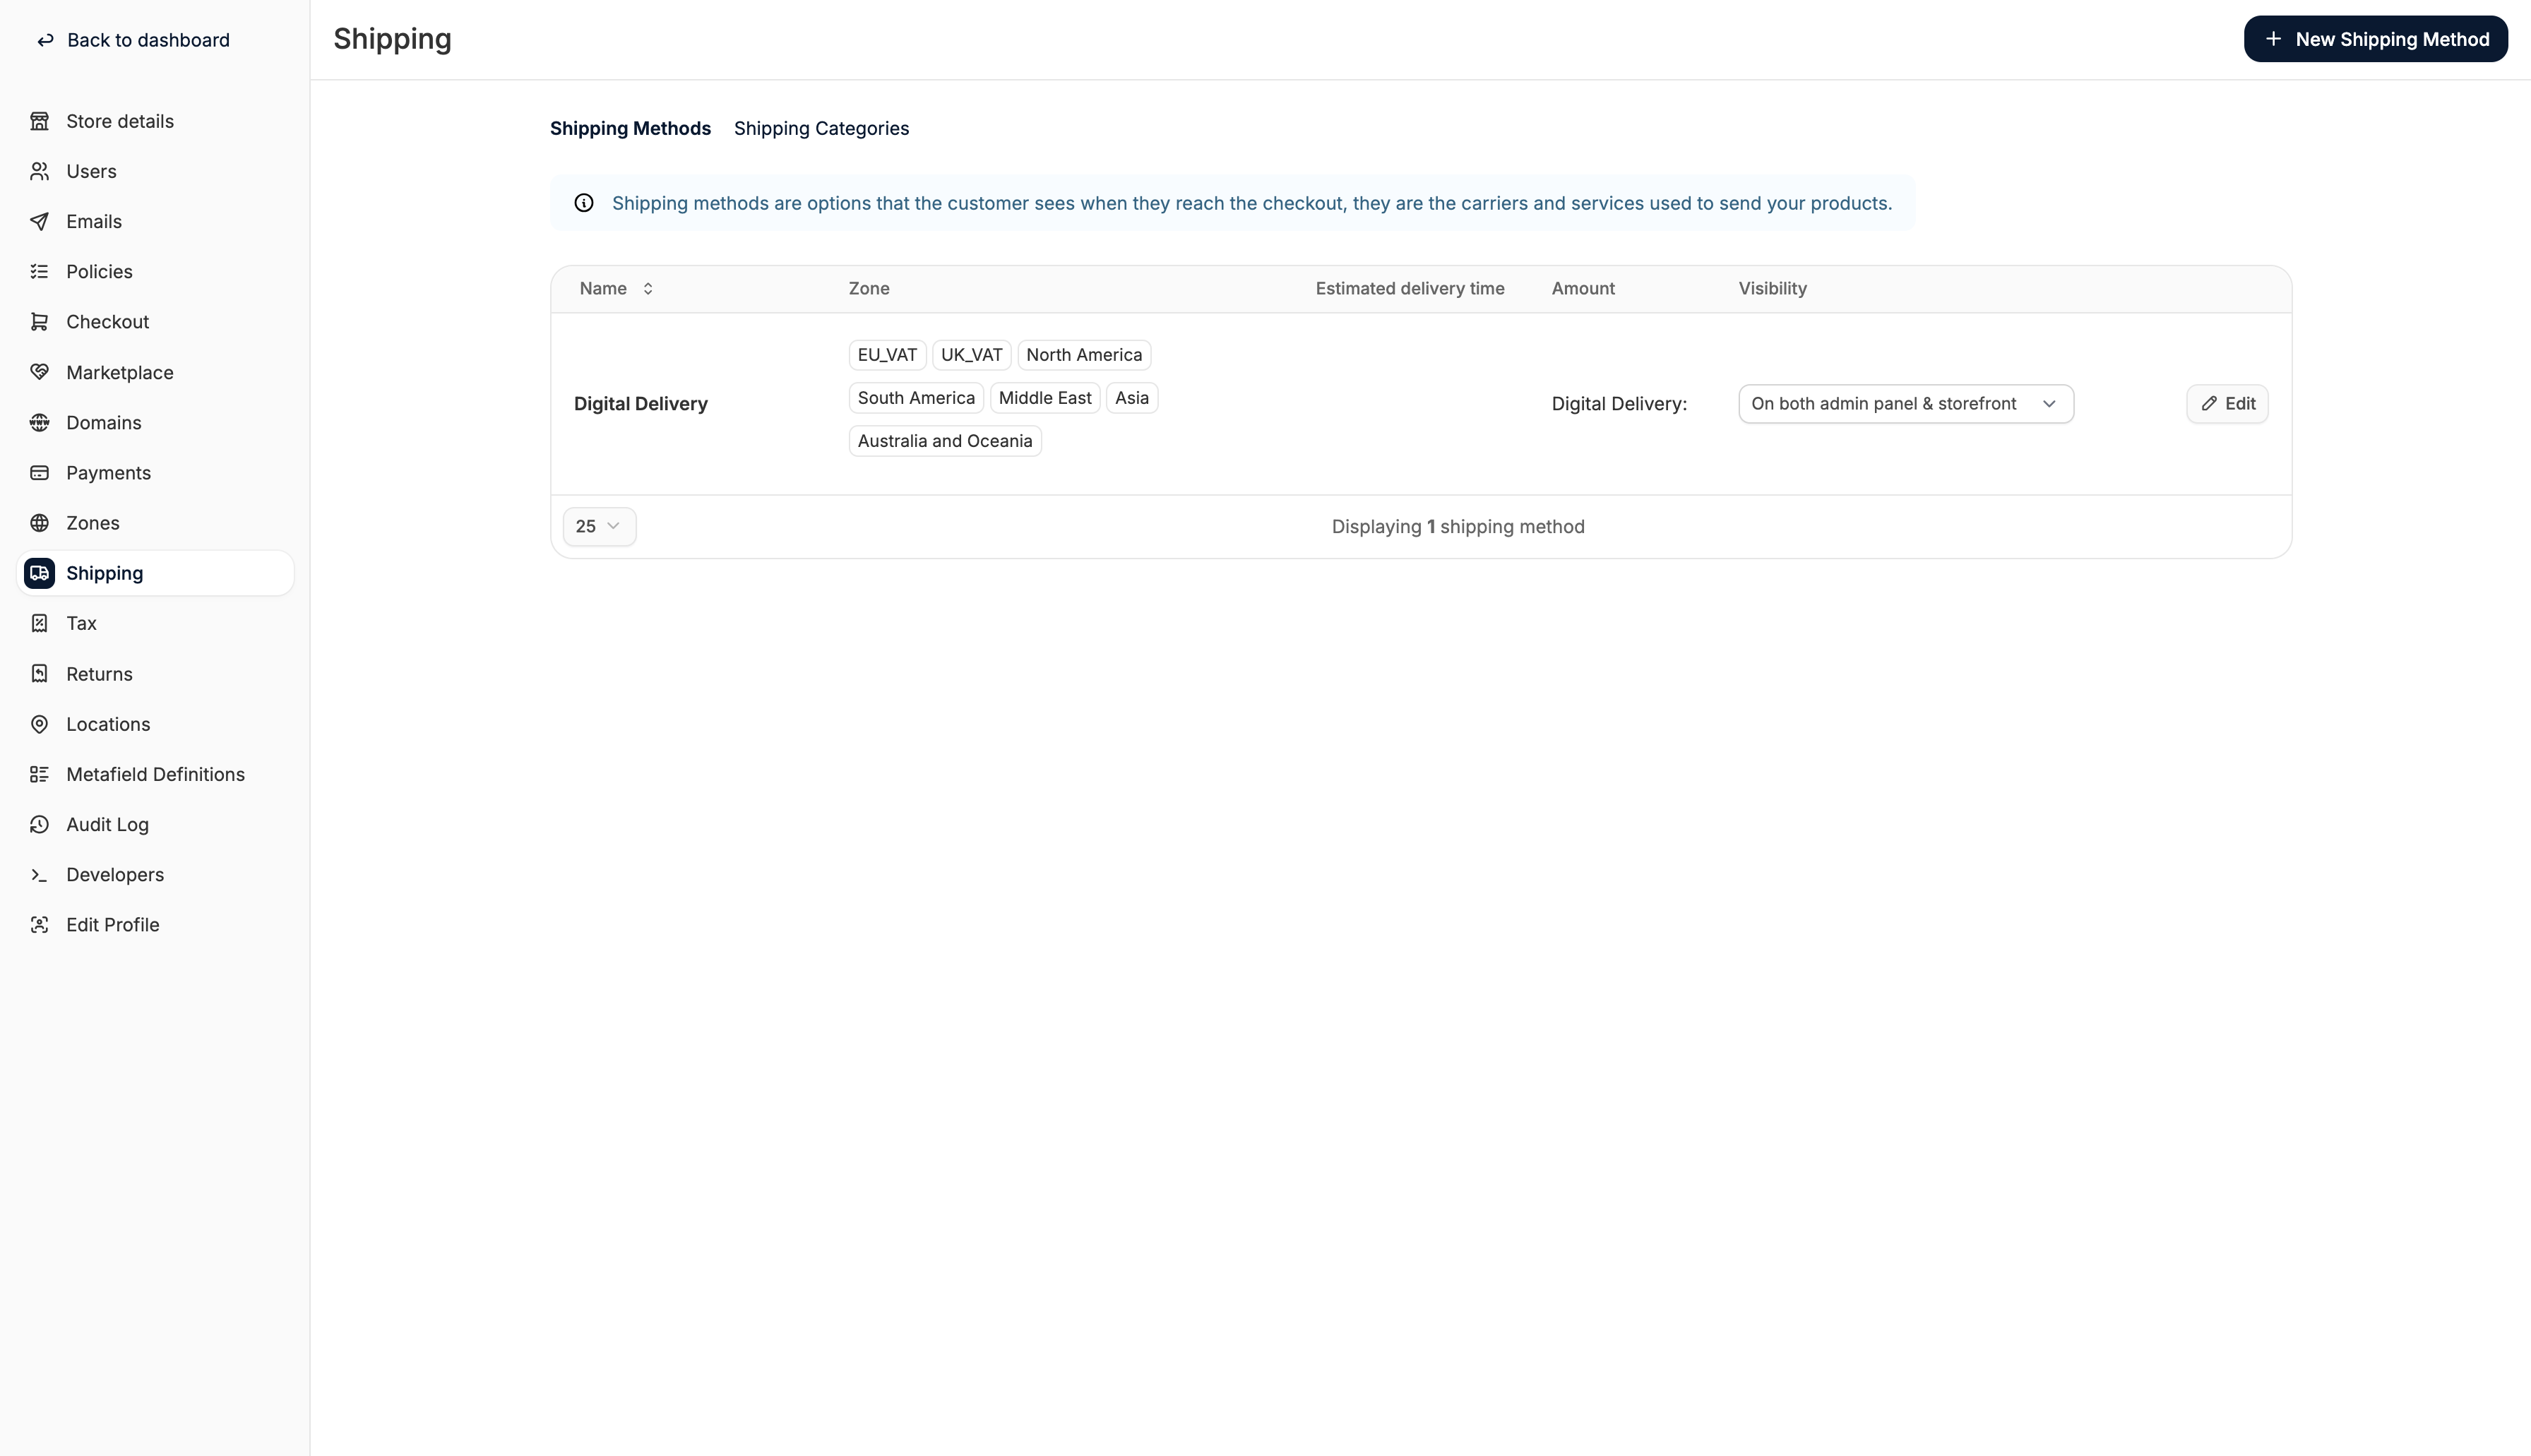
- Shipping zones
- Cost calculator settings
- Estimated delivery times
- Shipping and Tax categories
- Tracking links
By default, all Spree stores have a Digital Delivery method pre-configured. If you plan on selling digital products, be sure to assign those products the Digital shipping category.
Next Steps
Once you’ve completed the basic setup, you’re ready to explore more advanced features and tailor your store to your business model. Here’s some recommended reading:- Learn how to manage orders - process payments, fulfill shipments, create and edit orders
- Learn how to process returns - configure returns flow, authorize returns, reimburse customers
- Launch a B2B storefront - offer net terms, tiered pricing, company accounts, and purchase flows optimized for wholesale
- Build a multi-vendor marketplace - invite third-party vendors to sell through your platform
- Create a multi-tenant platform power multiple stores or clients from a single backend
- Sell digital products - deliver files automatically, skip shipping steps, and disable inventory tracking