- Online store + POS — keep retail and in-person orders separate for reporting and fulfilment
- B2C + B2B wholesale portal — show different catalogues and pricing to different audiences from one backend
- Marketplace or affiliate channel — attribute orders to the source channel for commission tracking
- Mobile app — route mobile orders separately and track conversion independently
- Seasonal microsite — run a limited-time catalogue without affecting your main storefront
Developers connect a storefront or integration to a specific channel by passing the
X-Spree-Channel header with the channel’s code in API requests. See the Spree API docs for details.Sales Channels Overview
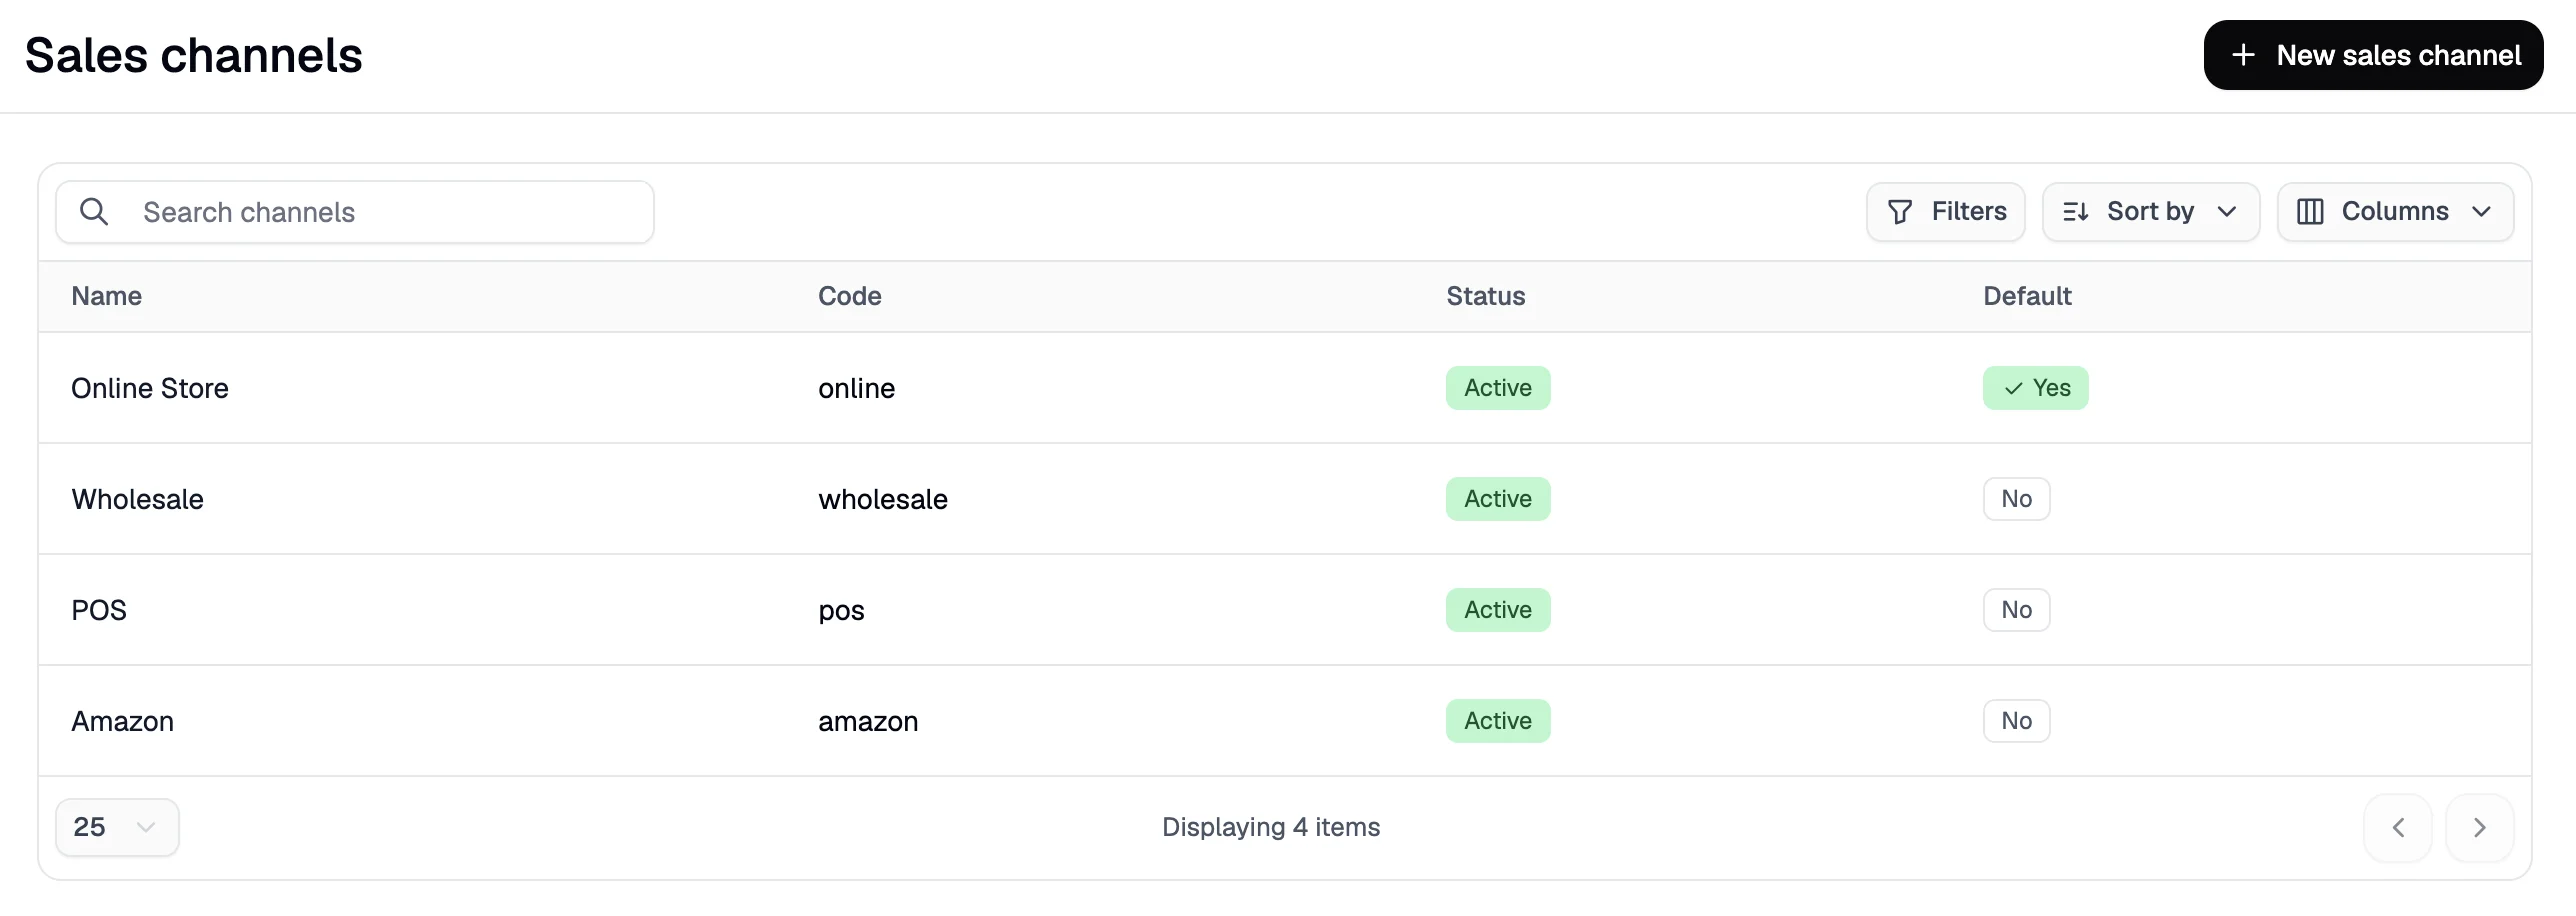
- Name — the internal label for the channel (e.g., “Online Store”, “Wholesale Portal”)
- Code — the unique identifier used in API requests to attribute orders to this channel
- Default — indicates which channel is used when no channel is specified in a request
- Active — whether the channel is currently enabled
Create a Sales Channel
To create a new channel, click New Sales Channel in the top-right corner.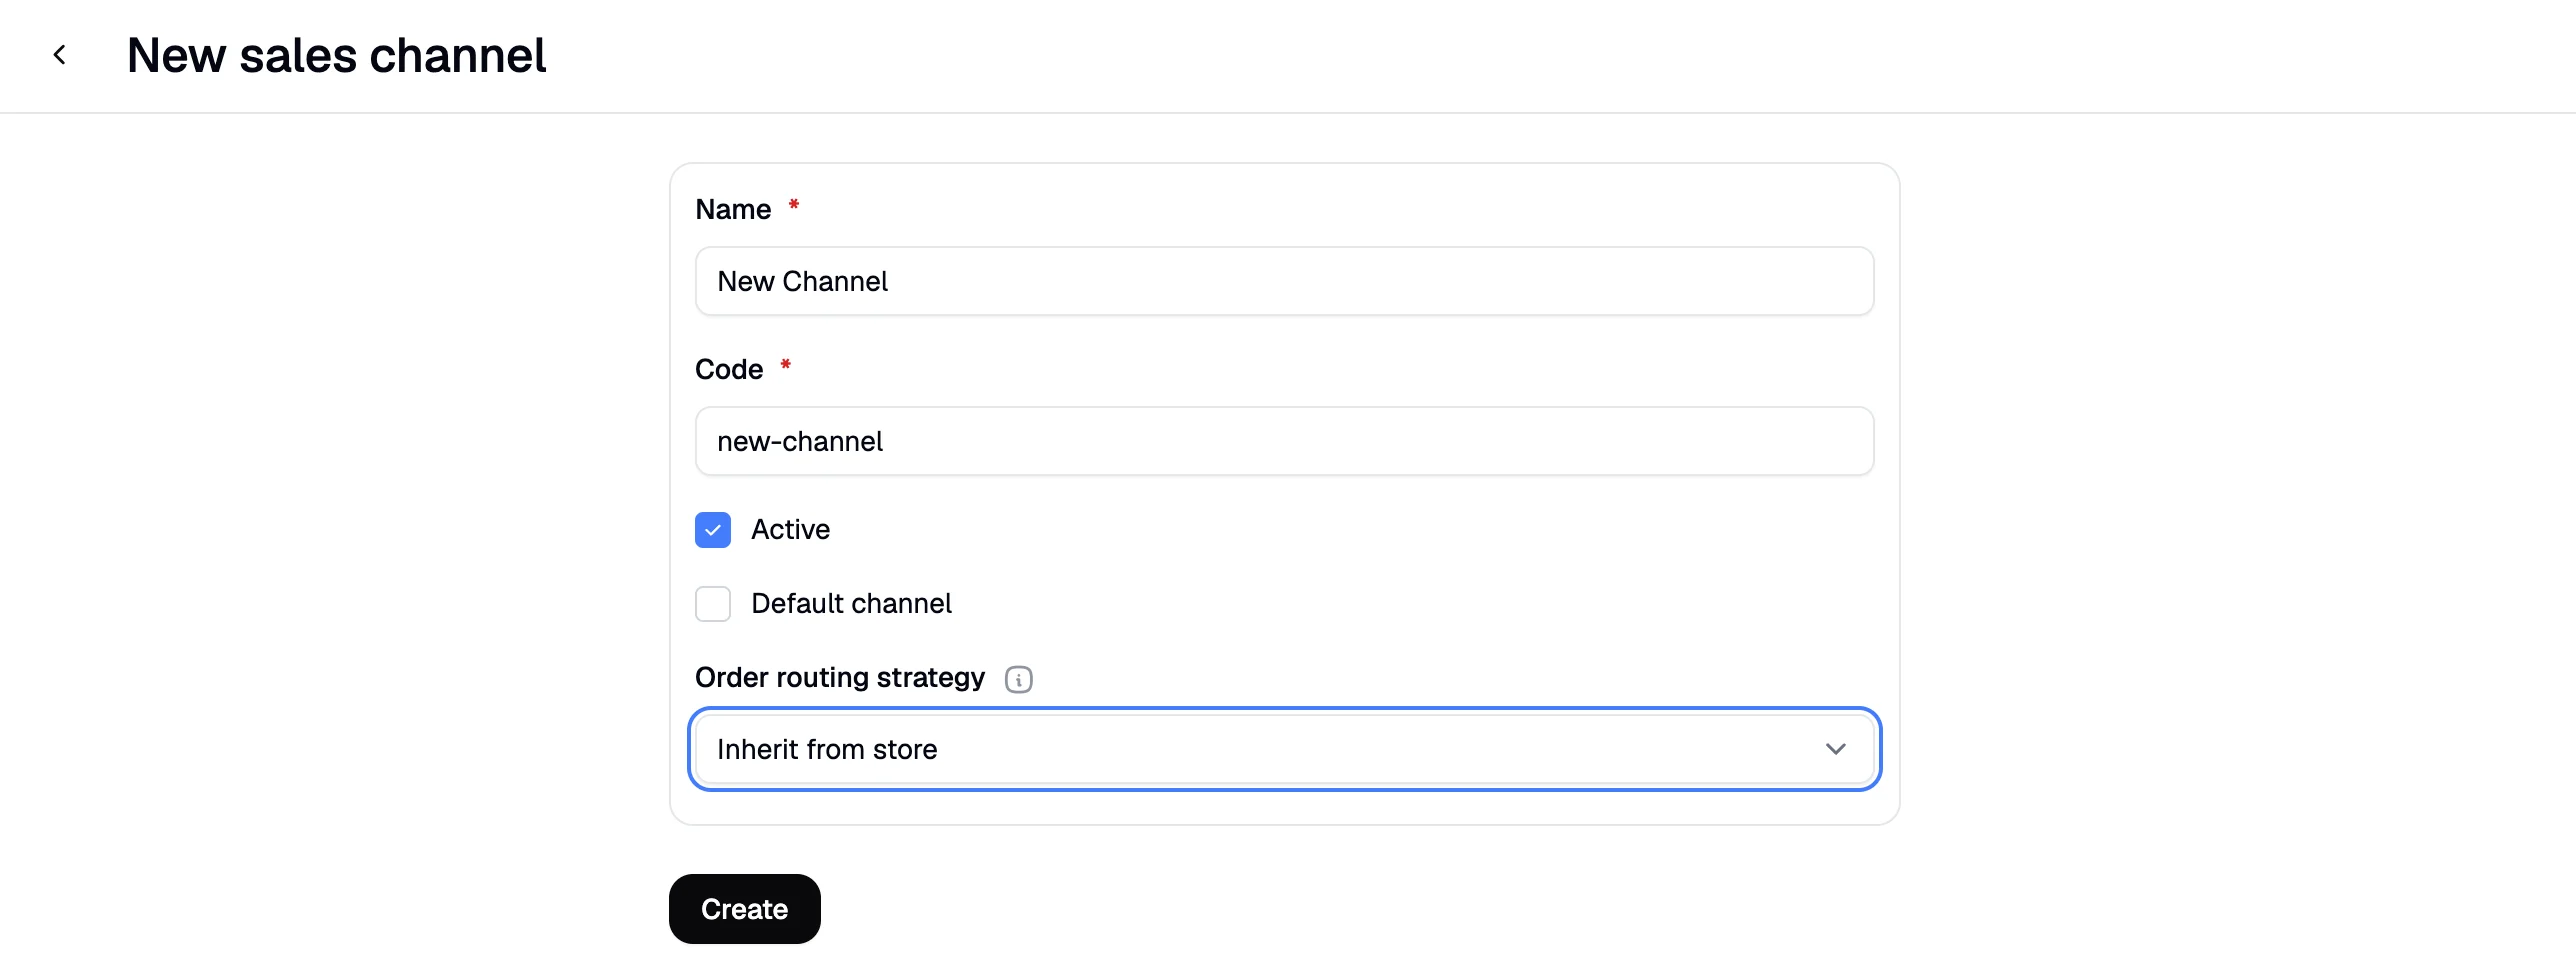
- Name — an internal label to identify this channel (e.g., “iOS App”, “EU Wholesale”)
- Code — a short, unique identifier used in API requests (e.g.,
ios-app,eu-wholesale). This cannot be changed after creation. - Active — uncheck to disable this channel without deleting it
- Default — check to make this the fallback channel for orders placed without a channel header
- Order Routing Strategy — controls how orders placed through this channel are allocated to stock locations for fulfilment. Select from:
- Inherit from store — uses the same routing strategy as the default channel
- Rules (ordered) — sets up a rules-based strategy; the specific rules can be configured via code
- Legacy — uses the original Spree fulfilment flow
Order Routing Strategy
Order routing determines which stock location fulfils an order when you have multiple warehouses or fulfilment points. When an order is placed, Spree evaluates the assigned strategy for that channel to decide where to source each shipment from. Channels that serve different regions or customer types often benefit from dedicated routing rules — for example, routing wholesale orders to a separate warehouse, or ensuring a specific fulfilment centre handles all orders from a particular storefront. When using the Rules (ordered) strategy, the following rules can be configured and arranged in priority order:- Preferred location — always attempts to fulfil from a specific, designated stock location first, regardless of stock levels at other locations
- Minimize stock locations — tries to fulfil the entire order from as few stock locations as possible, reducing split shipments and simplifying fulfilment
- Default location — falls back to a designated stock location when no other rule has been satisfied
Rule rankings within the Rules (ordered) strategy can be adjusted by a developer per channel. See the developer documentation for details.
Products and Sales Channels
When a product is created, it is automatically assigned to the default channel only. Any additional channels must be assigned manually. This means products are not visible on non-default channels until explicitly added. To manage which channels a product is available on, open the product in the editor and locate the Publishing card.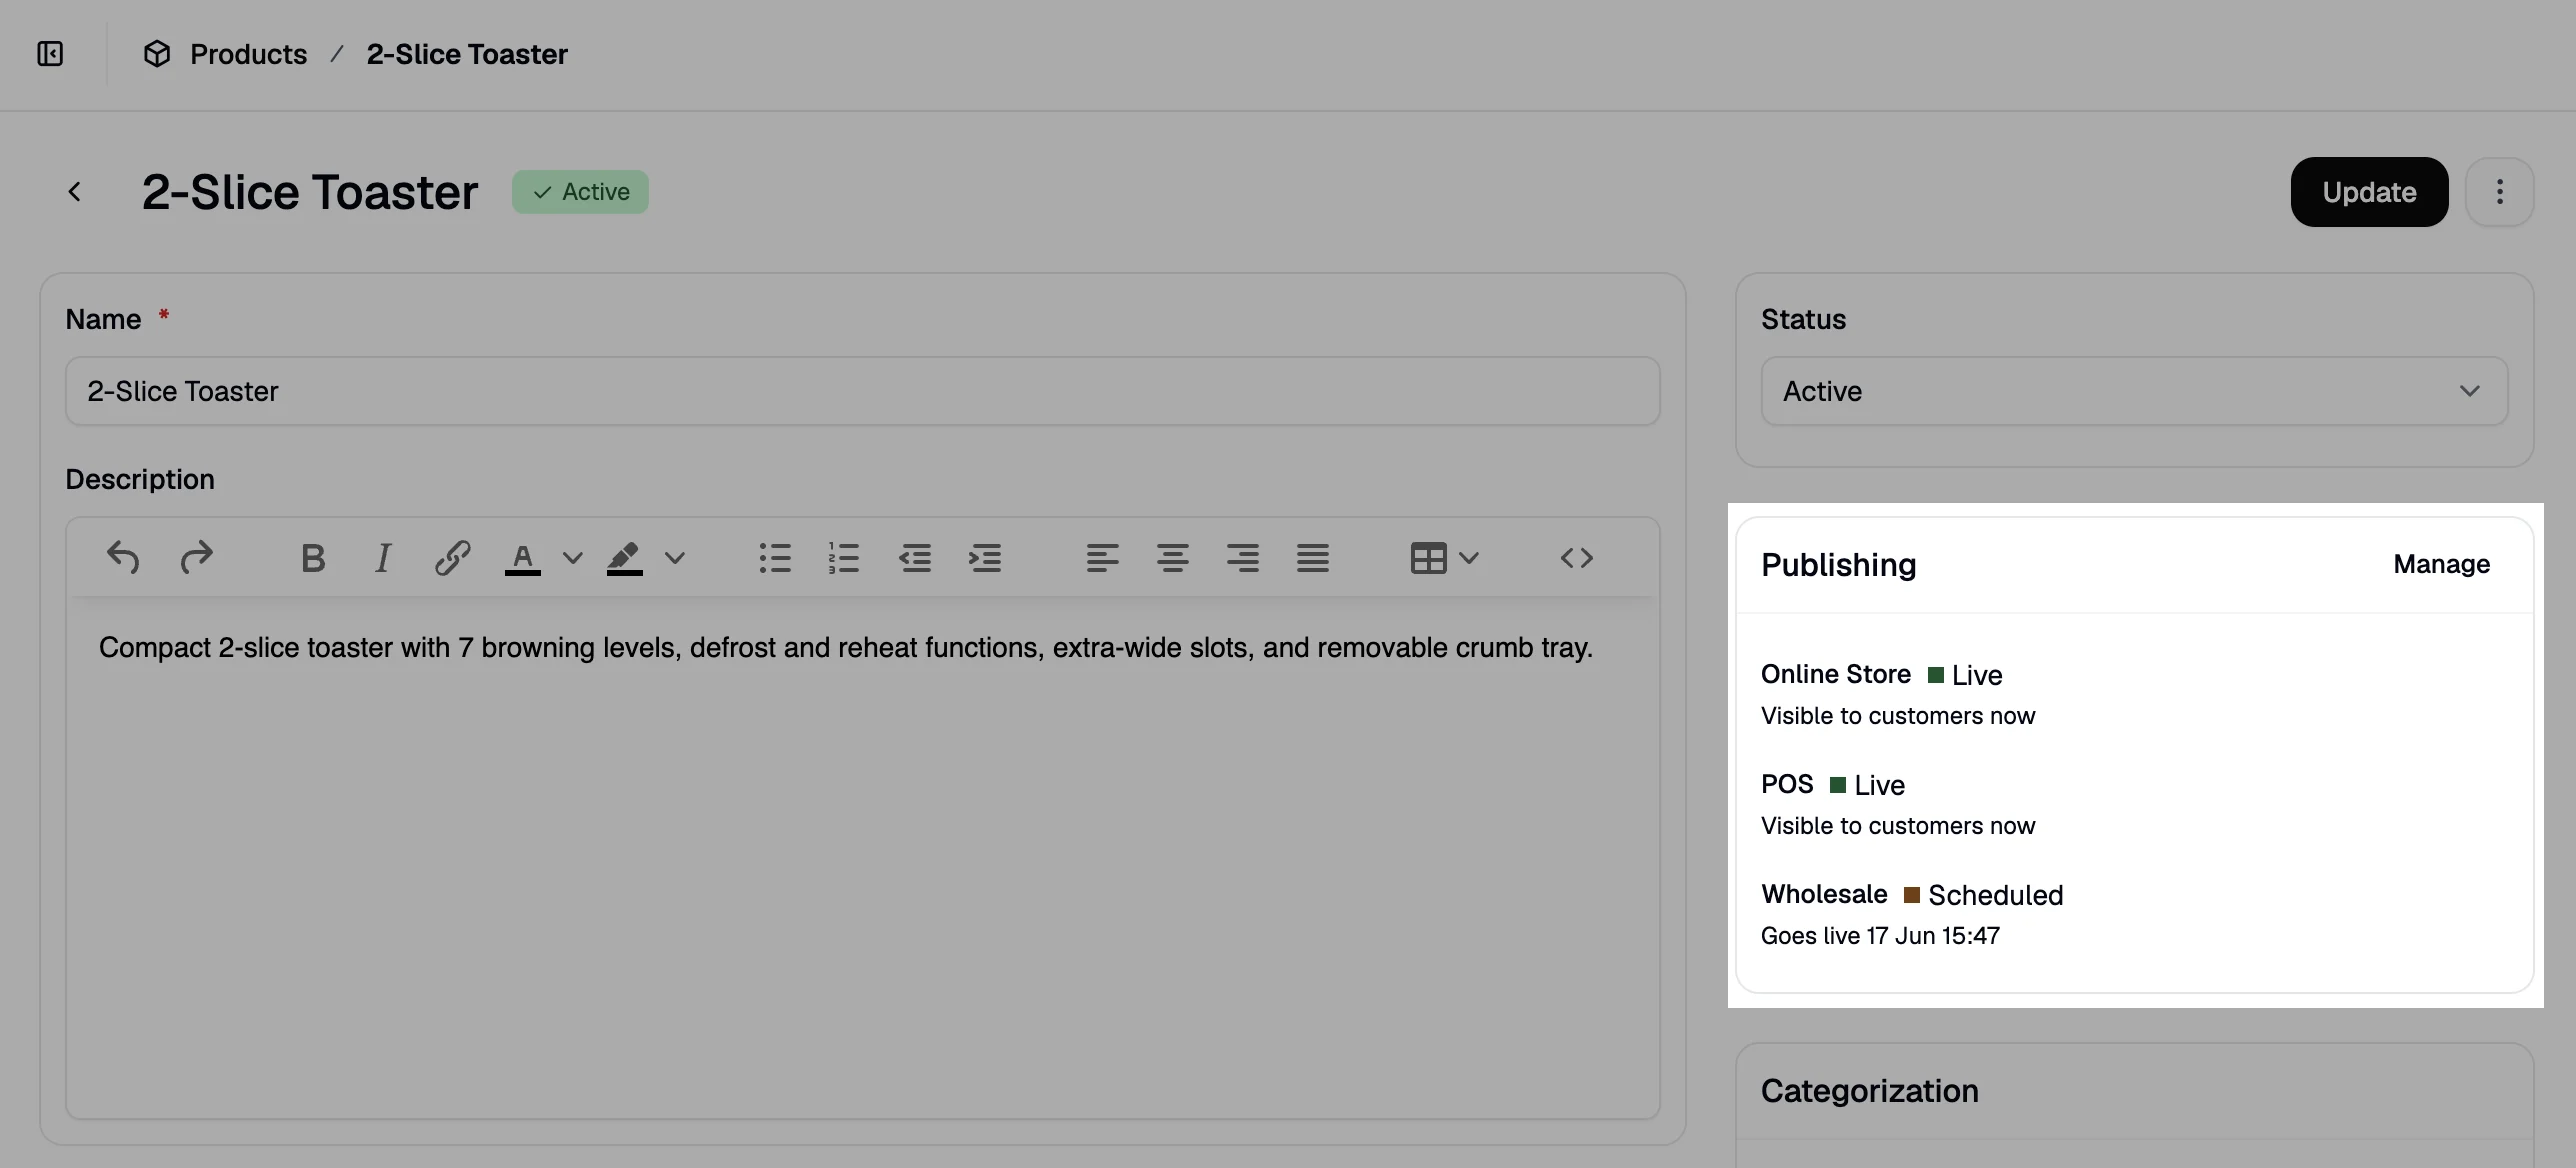

- Live — visible and purchasable on that channel
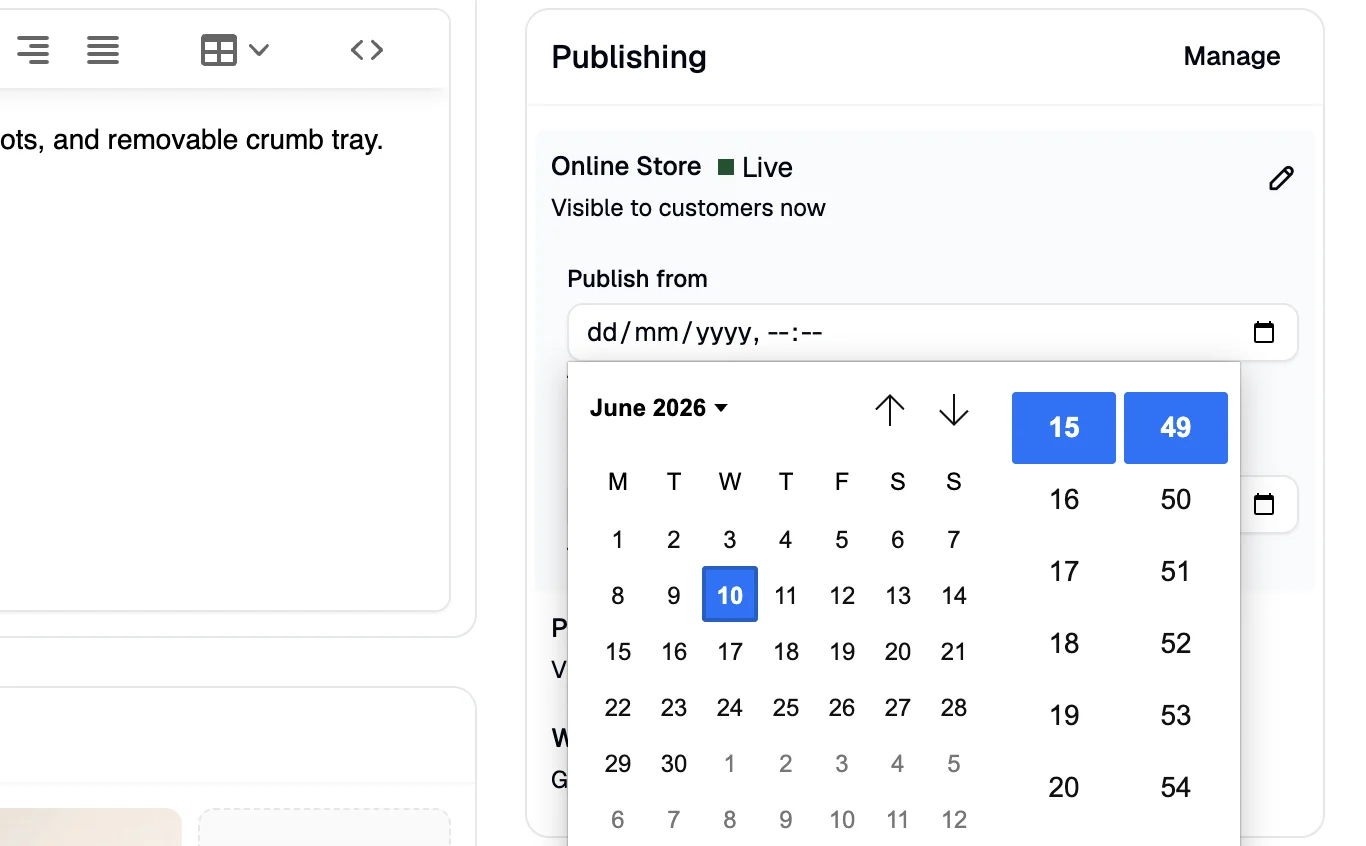
- Scheduled — will become active automatically at the configured start date
- Not available — assigned to the channel but hidden from customers
If creating products via the Admin API, the product will have no channels assigned unless a channel is explicitly set in the request.
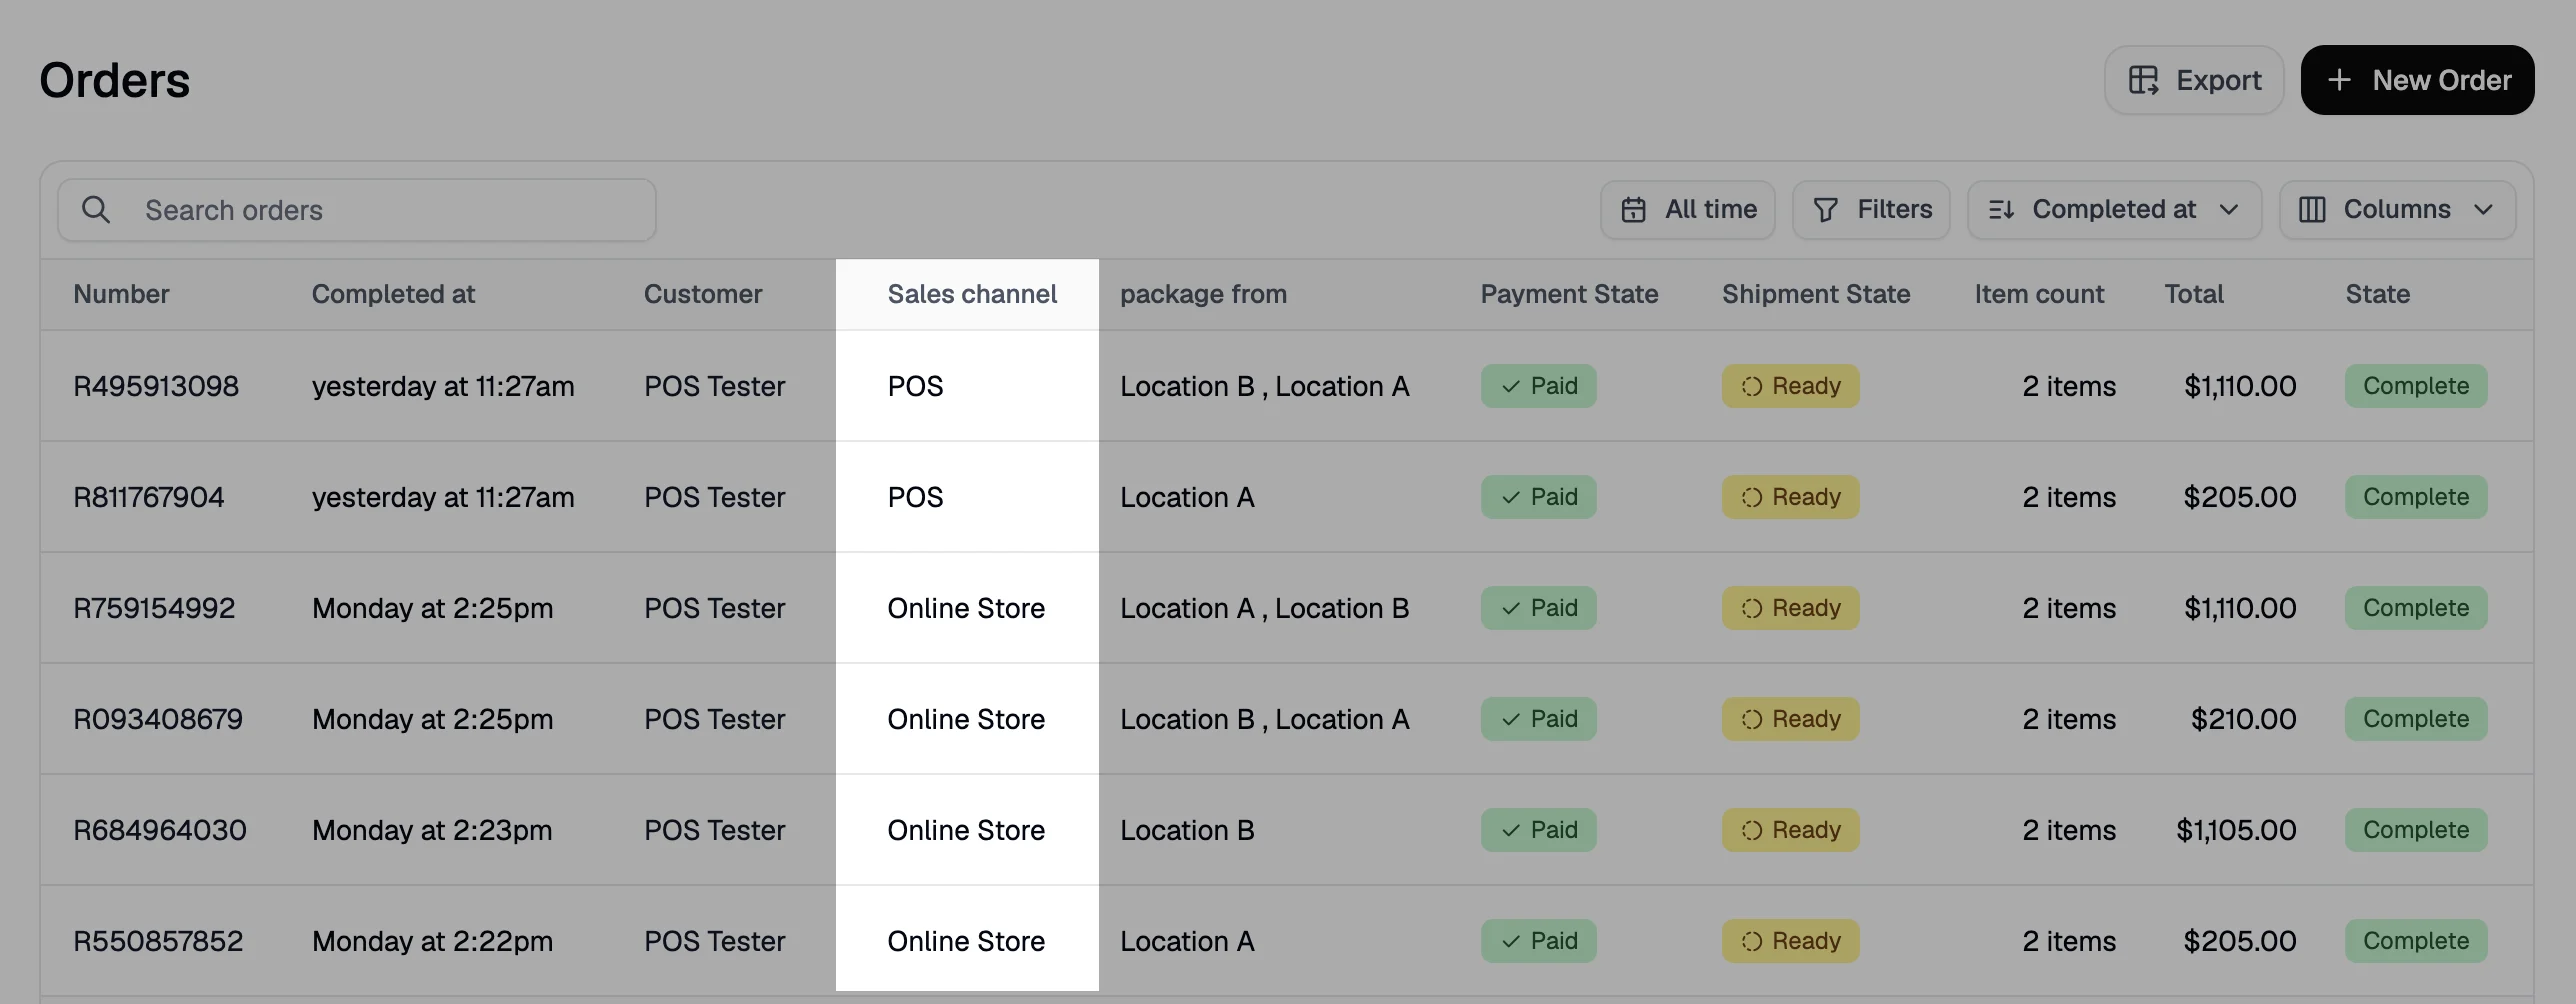
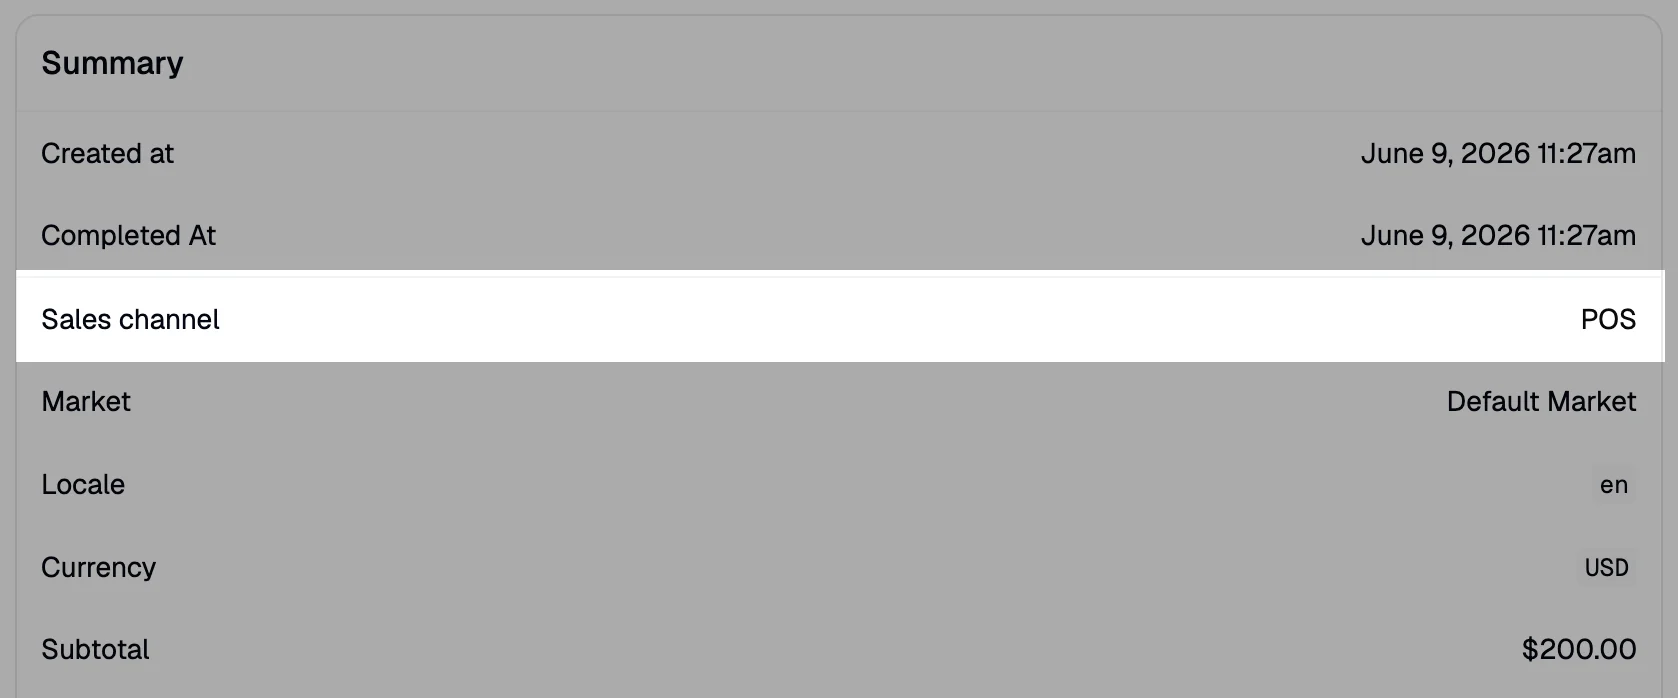
Orders and Sales Channels
Every order placed through a channel is automatically attributed to it, making it easy to track volume and manage fulfilment per channel without any manual tagging. In the Orders list, a Channel column shows which channel each order came from at a glance. You can also use the Channel filter to narrow the list to a specific channel.