

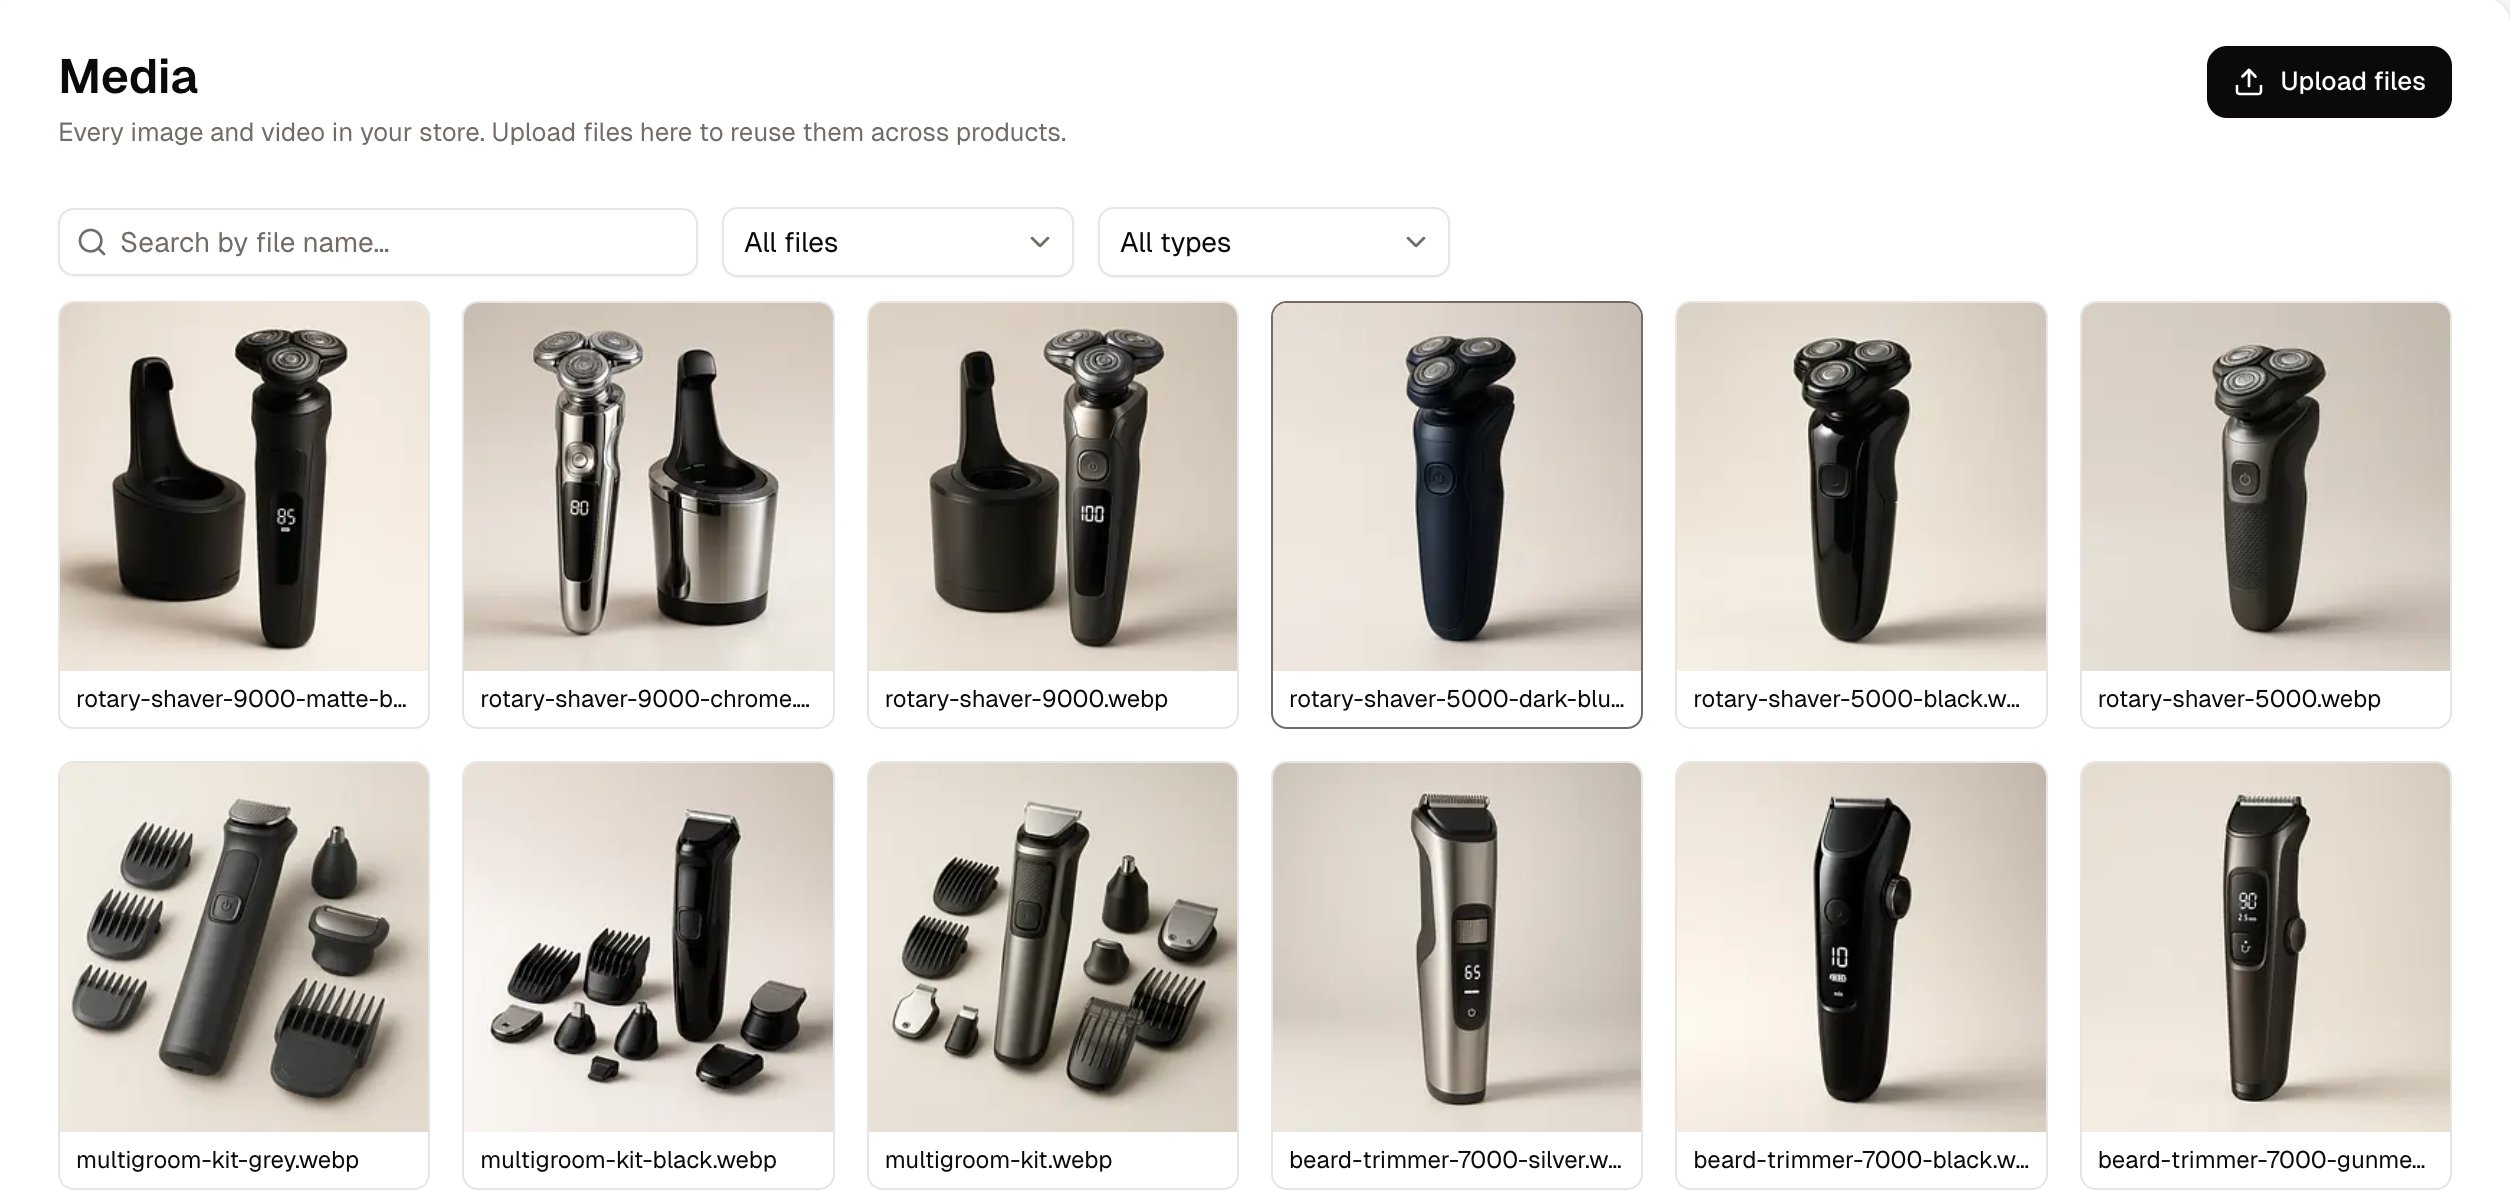
The media library holds every image and video in your store, wherever they are used. It is where you upload files, describe them for accessibility and search engines, identify unused files, and delete the ones you no longer need. Keeping every file in one place means an image used in several places is uploaded once, and a photograph you have not got round to using is still somewhere you can find it. Uploading a file to the library does not put it in front of customers on its own. A file has to be attached to a product, a category or a collection before it appears anywhere on the storefront. To manage your files, navigate to Products → Media in the admin dashboard.

Reviewing Media

The media library, with its search box, filters and grid of tiles The library is a grid of tiles, newest first, with the number of files beneath. Each tile is labeled with its file name until you give the file alt text, and with the alt text after that. Three controls narrow the grid: Not used yet is the one worth knowing. It is how you find files taking up space that nothing points at. Right-click a tile to open its menu, which holds Edit, Download and Delete.

How to Upload Files

  1. Click Upload files.
  2. Choose one or more files from your computer.
The new tiles appear at the front of the grid and the file count goes up. Each file starts as Not used yet, with its file name already in place as its alt text. Images can be PNG, JPG or WebP. Video can be MP4, WebM or MOV.
A file uploaded here is not attached to anything yet. Putting it on a product, a category or a collection is done from that record.

How to Add Alt Text to a File

Alt text describes an image for customers using a screen reader, and for search engines. A file's details, showing its usage, type, size and alt text
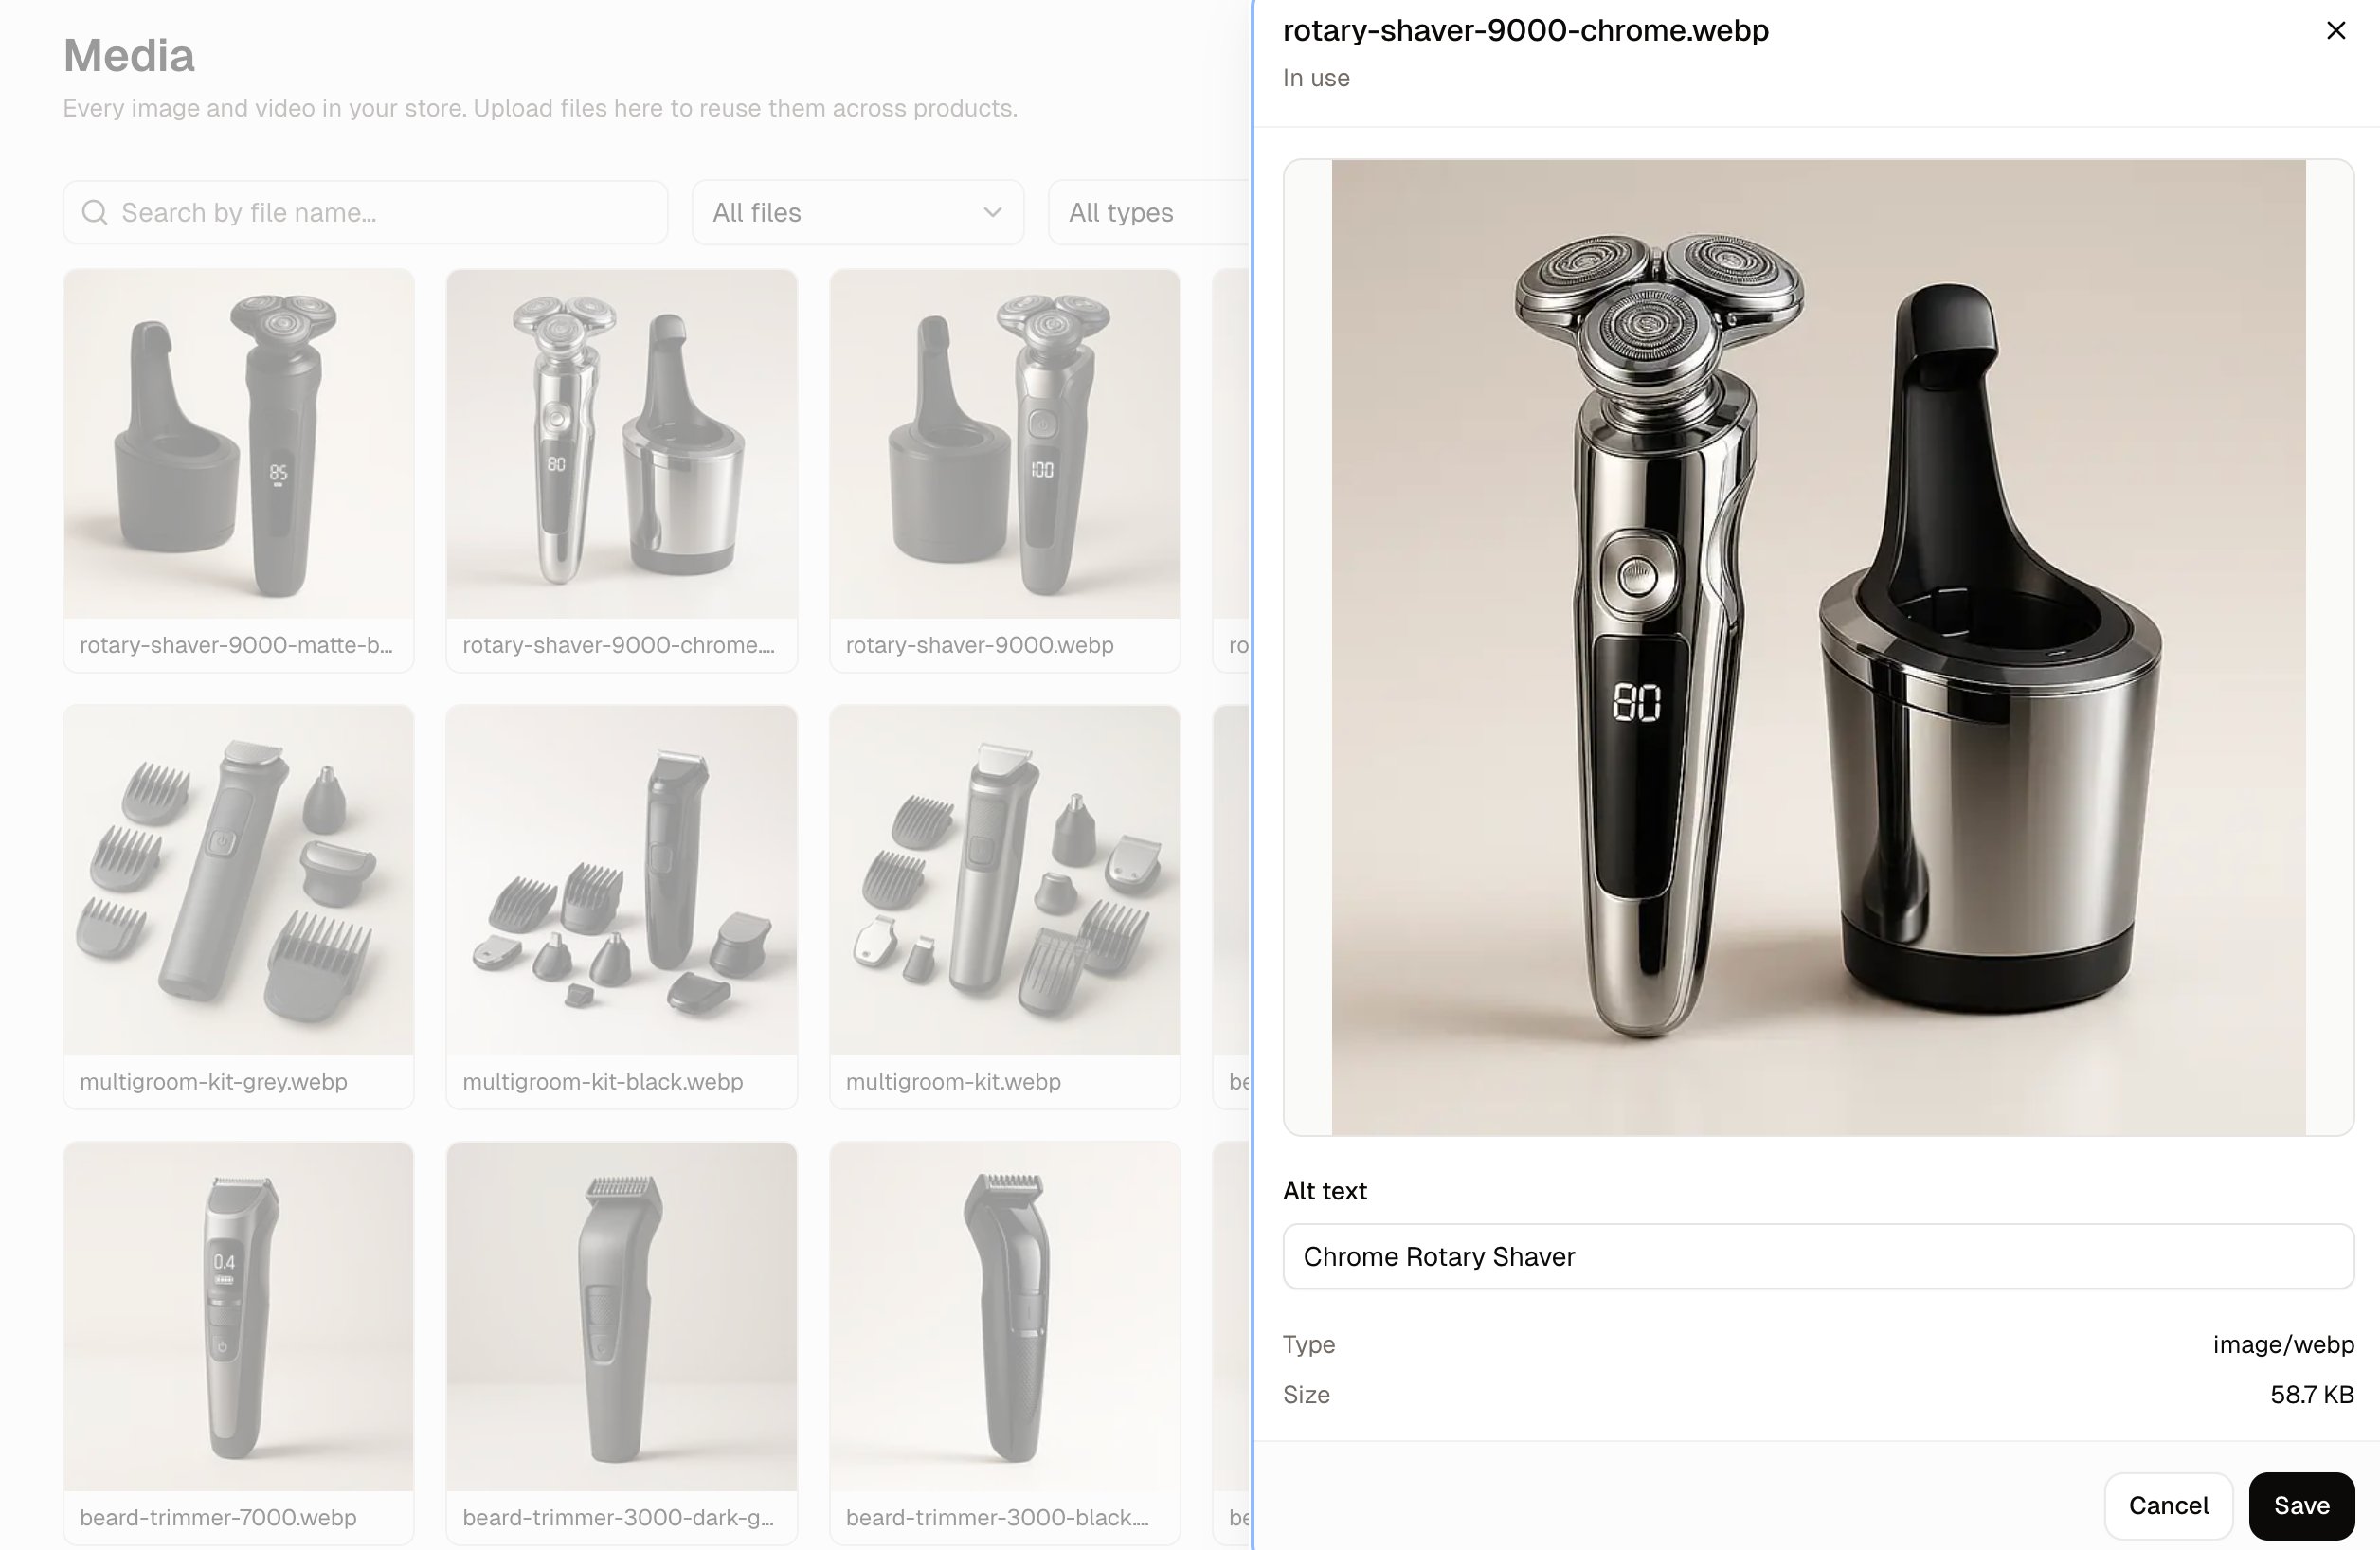
  1. Click a tile. Its details open, showing whether the file is in use, its type, its size, and where it is used.
  2. Type into Alt text, replacing the file name that is already there.
  3. Click Save, which is disabled until you change the text.
  4. Click Close.
The tile is then labeled with your alt text instead of the file name.
Every uploaded file starts with its file name as its alt text, so a file you have not described is not blank: a screen reader will read out something like rotary-shaver-9000-matte-black.webp. Replace it on any image a customer will see.

How to Delete a File

  1. Right-click a tile and choose Delete.
  2. Read the confirmation, which names the file and says how many places use it.
  3. Click Delete.
Deleting a file in use removes it from every product using it, and from any description that embeds it. The products keep their other images. This cannot be undone.

How to Add a Library File to a Product

Files are attached from the product, not from the library. A product's Media card with its tiles
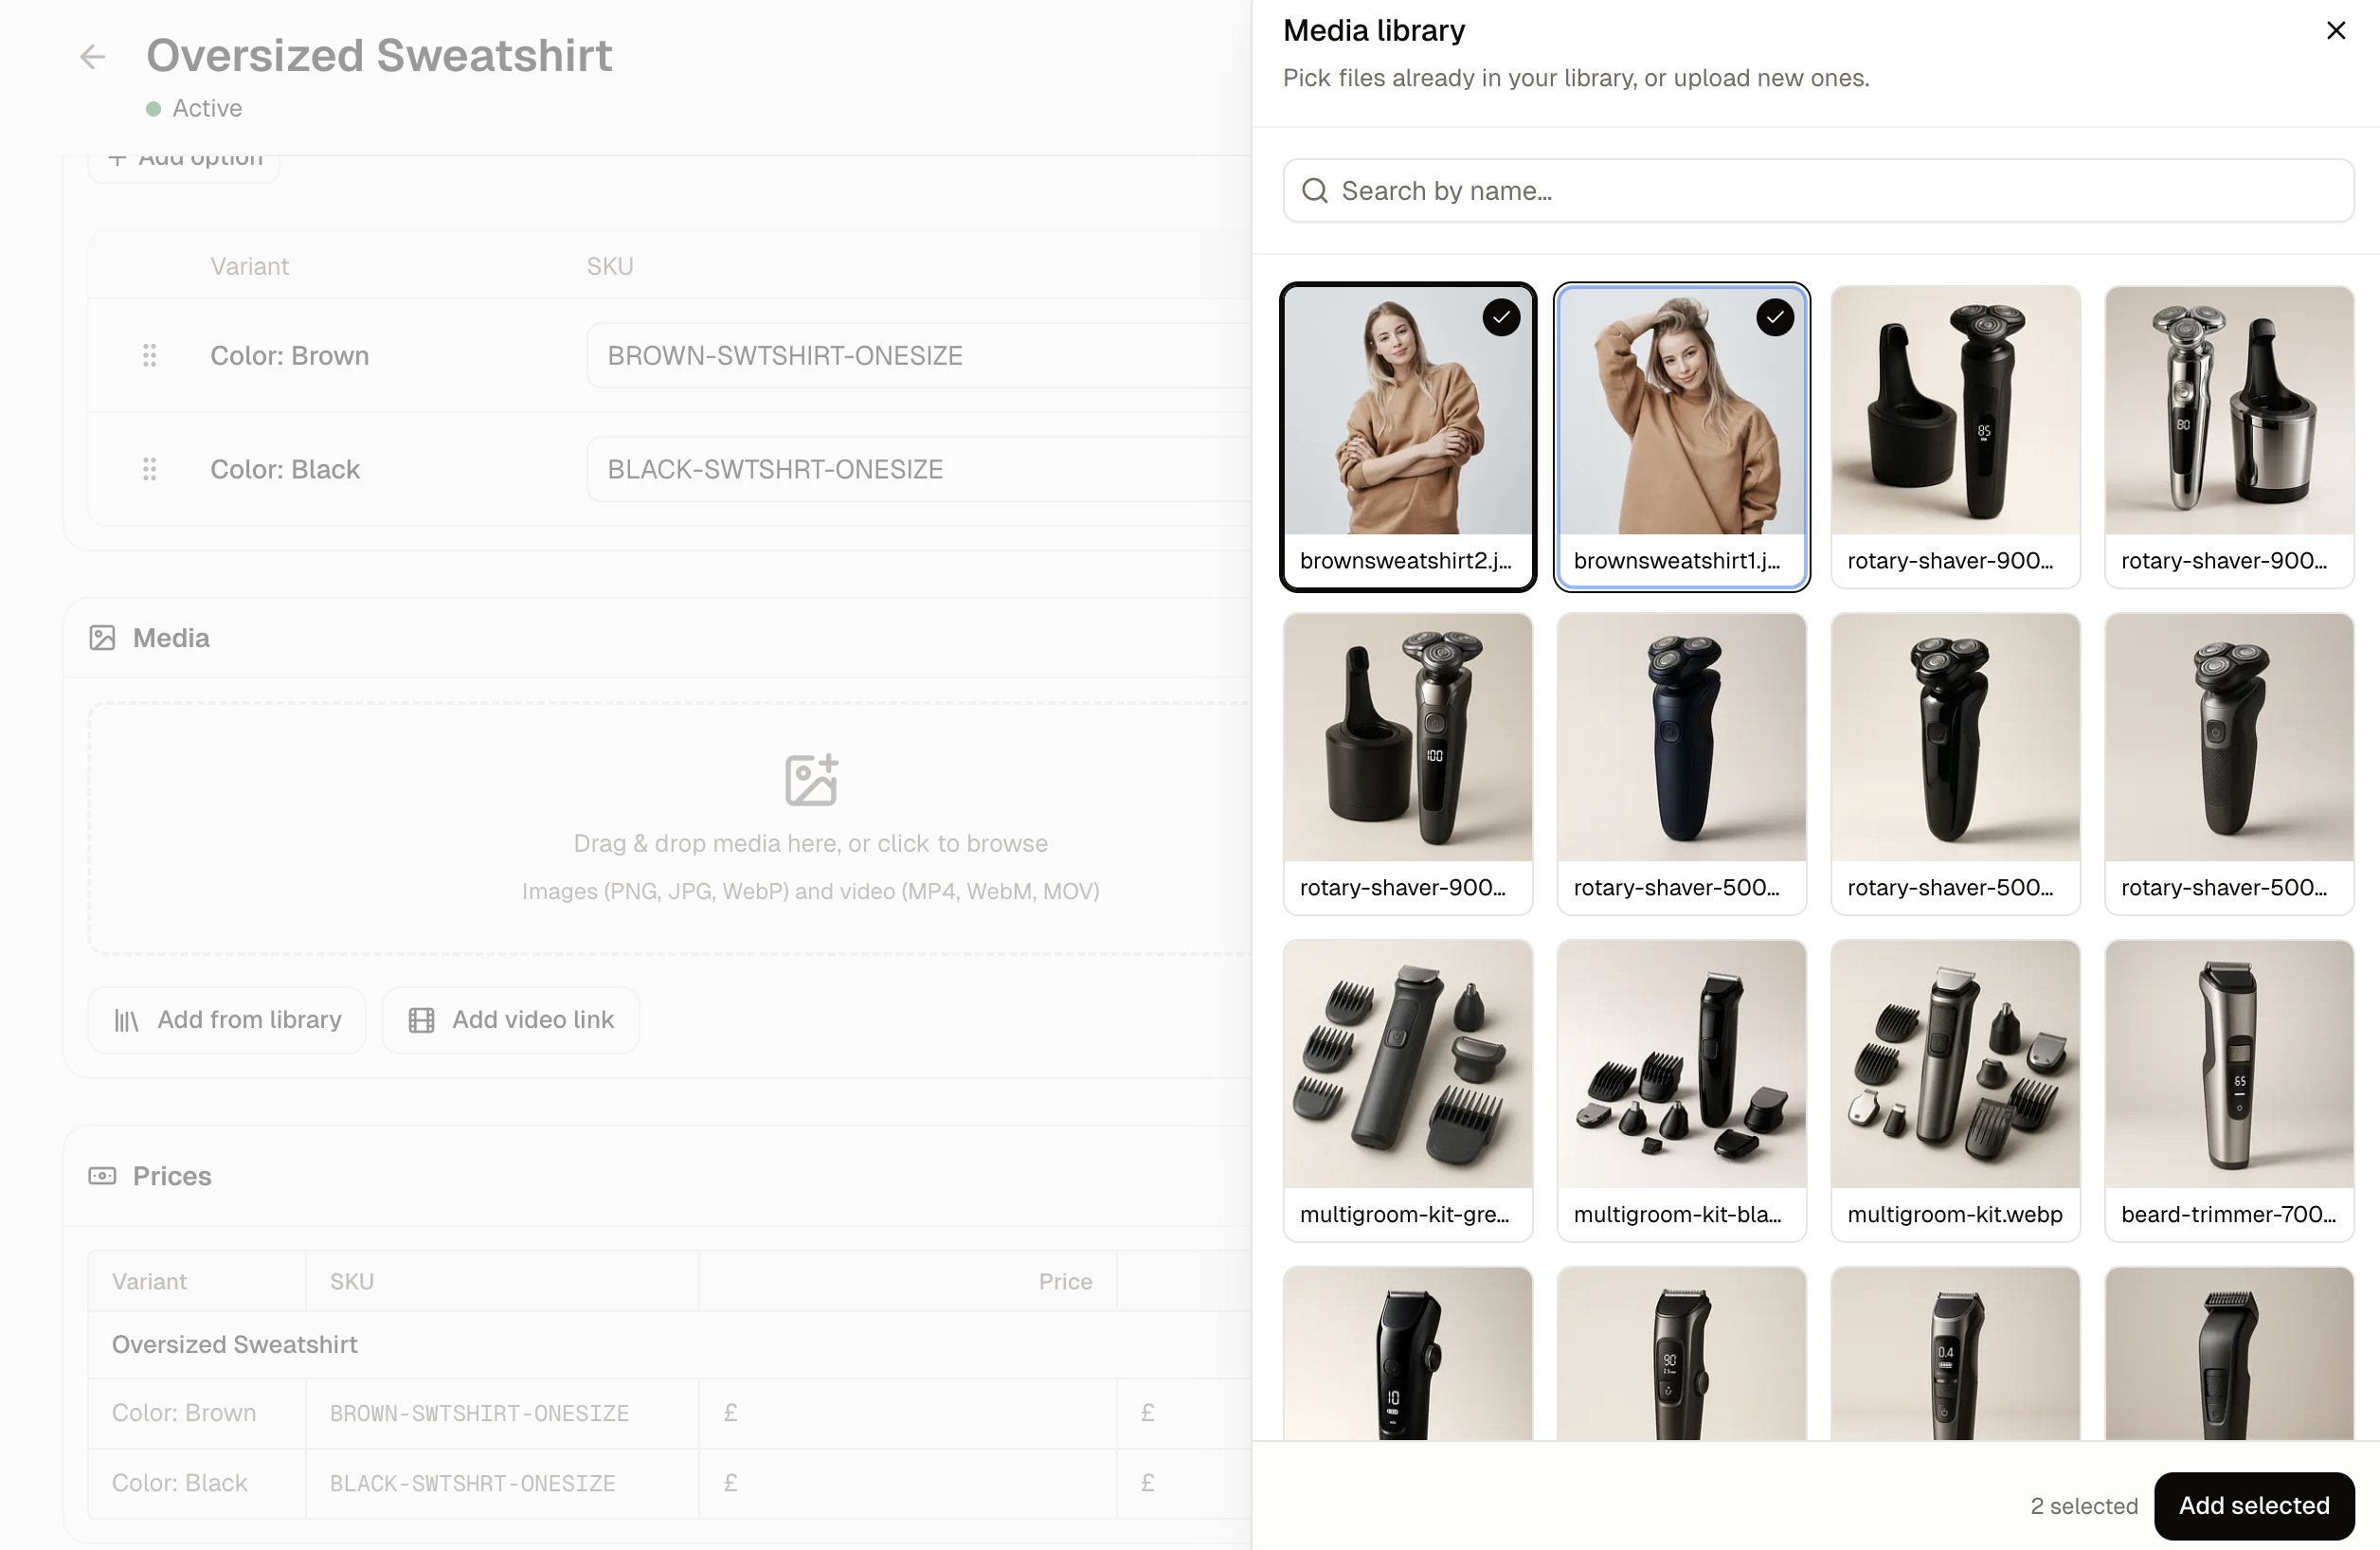
  1. Open the product and find its Media card.
  2. Click Add from library to open the media library side panel.
  3. Search for the file and click its tile. The counter at the foot of the panel shows how many you have picked.
  4. Click Add selected.
  5. Click Save product.
Adding a file from the library attaches a copy of it to the product. The original stays in the library, still counted as Not used yet, even though the same image is now on a product.
Nothing you change on a product’s Media card is kept until you click Save product, including files you add and files you delete.

How to Replace a Product Image

Replacing an image is two steps: take the old one off the product, then add the new one.
  1. Open the product and find its Media card.
  2. Right-click the image you are replacing, choose Delete, and confirm.
  3. Click Add from library, pick the new file, and click Add selected.
  4. Click Save product.
Deleting an image from a product’s Media card takes it off that product only. The file stays in your library for other products to use. To remove a file from the store entirely, delete it from the library instead. The first tile on the card is the product’s primary image, the one customers see first. Drag the tiles to change their order. Categories and collections work the same way, from their own image slots. Each has a banner image and a compact navigation image, and Choose from library beneath each one picks the file. See Categories and Collections.

Further Reading

  • Adding Products - The product’s Media card, alongside the rest of the product form
  • Products - The products list, statuses and bulk actions
  • Variants - Assigning an image to one size or color rather than the whole product