

Reviewing Your Purchase Orders
The list shows everything you have on order from suppliers, and what has already arrived.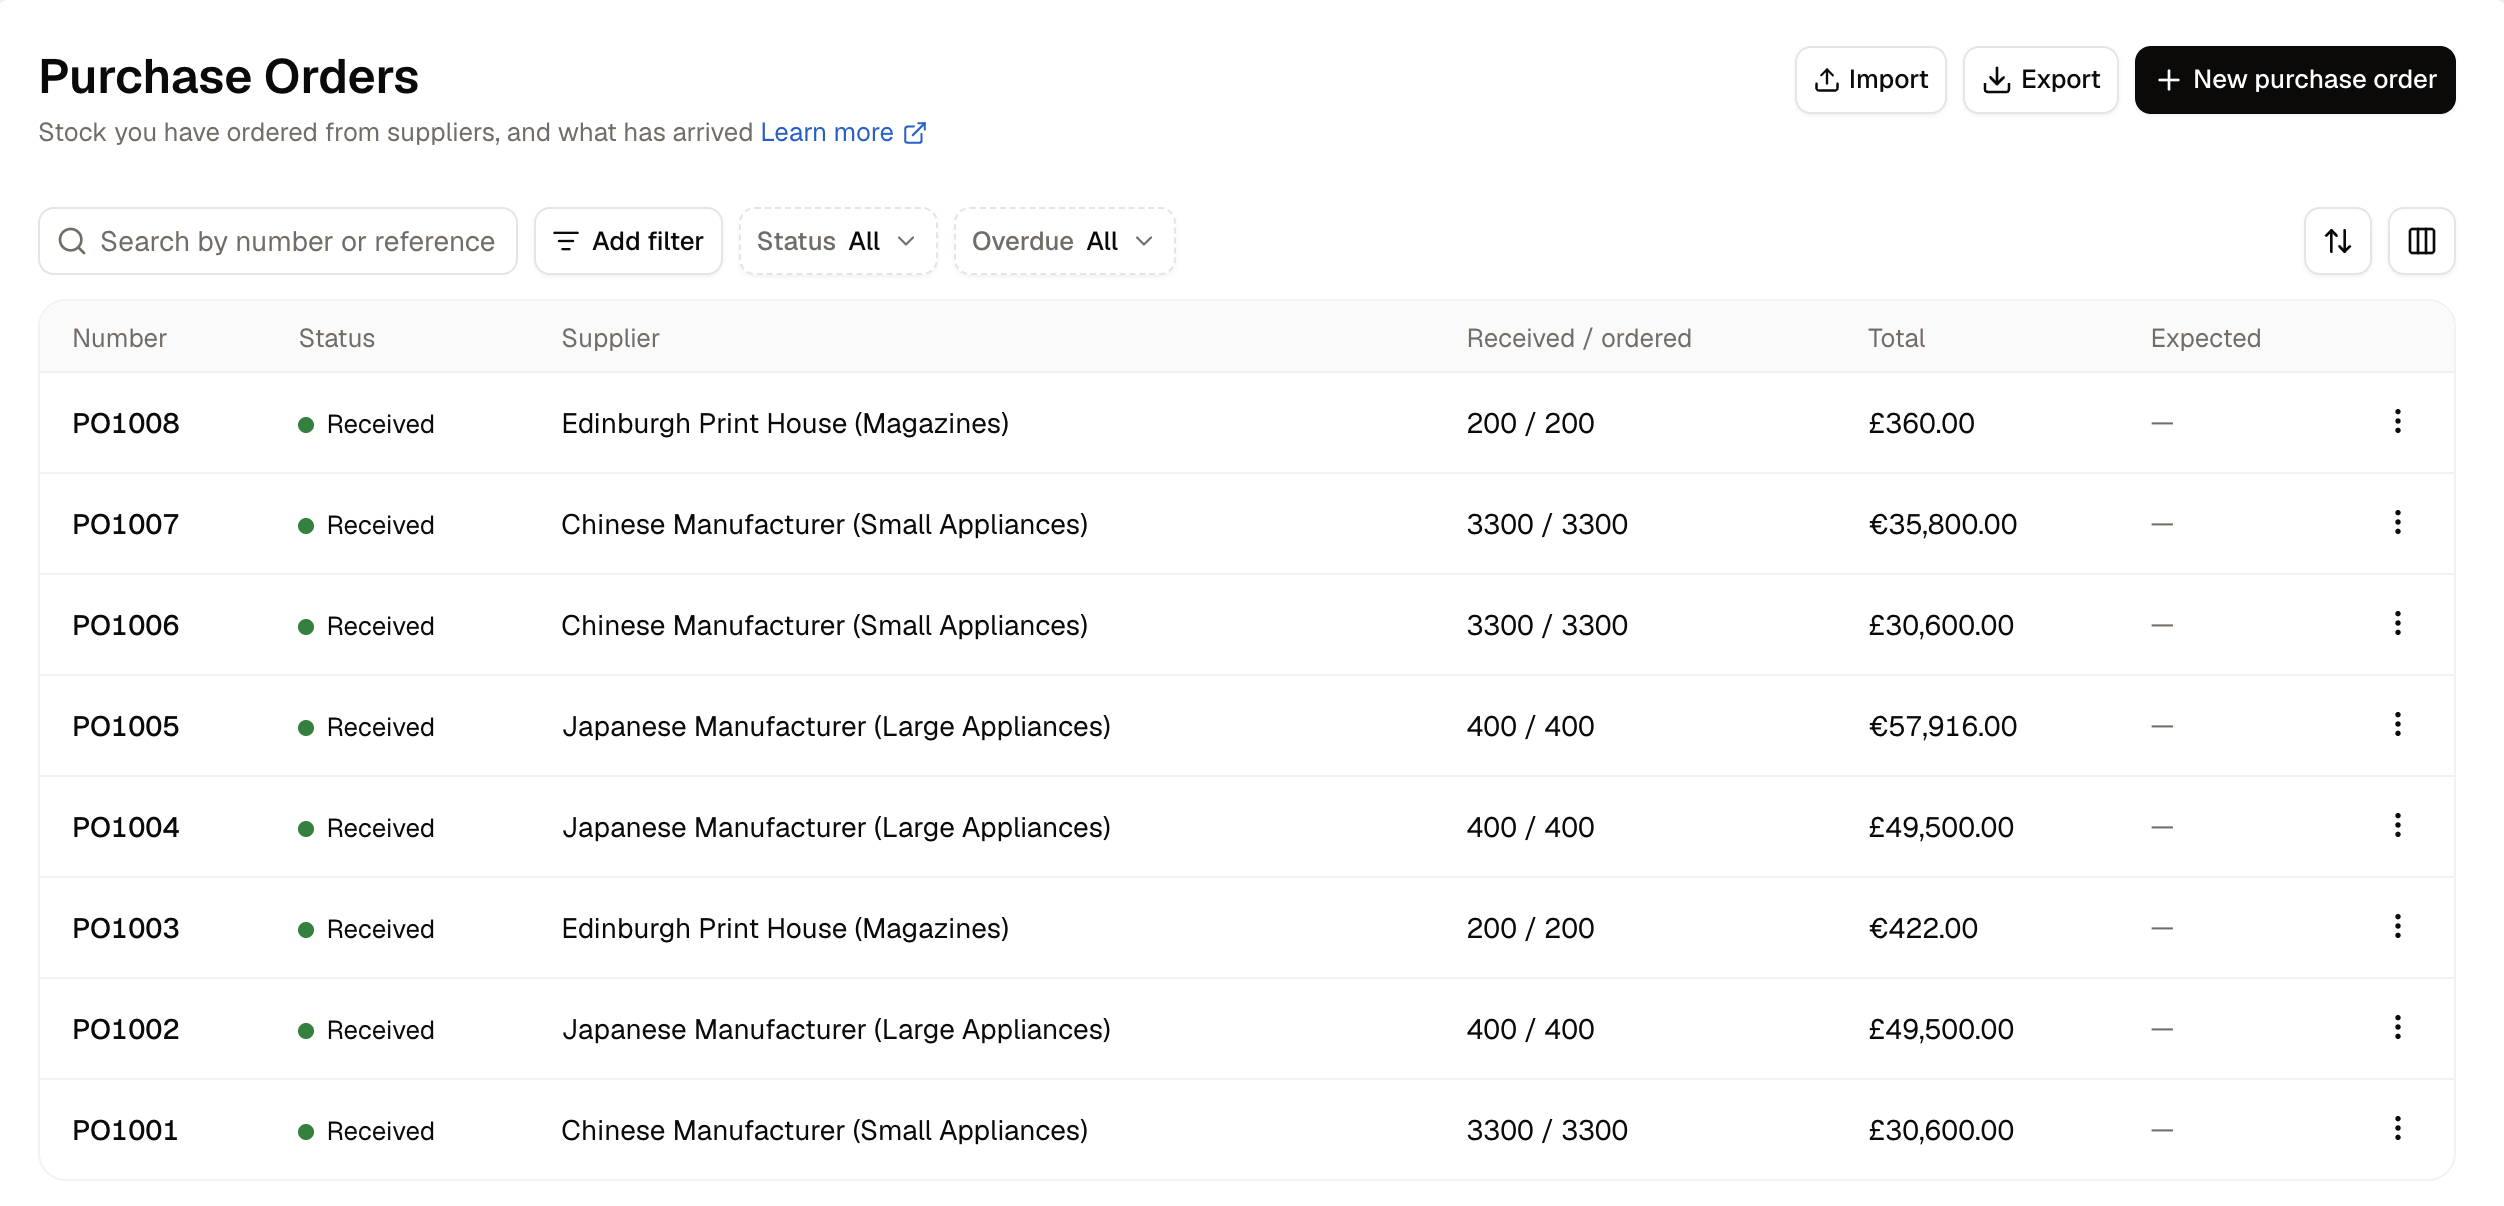
- Number - The reference Spree gives each order.
- Status - Where the order has got to. See How to Place the Order for what each one means.
- Supplier - Who the order was placed with.
- Received / ordered - Two figures in one column: how many units have been counted in, against how many were ordered.
- Total - What the order comes to.
- Expected - The day the supplier promised.
- Status separates drafts you are still building from orders that are out with a supplier and orders that have landed.
- Overdue finds orders that have passed the day they were promised, so you know who to chase.
How to Create a Purchase Order
Click New purchase order in the top-right corner. The form has Items on the left and Details on the right.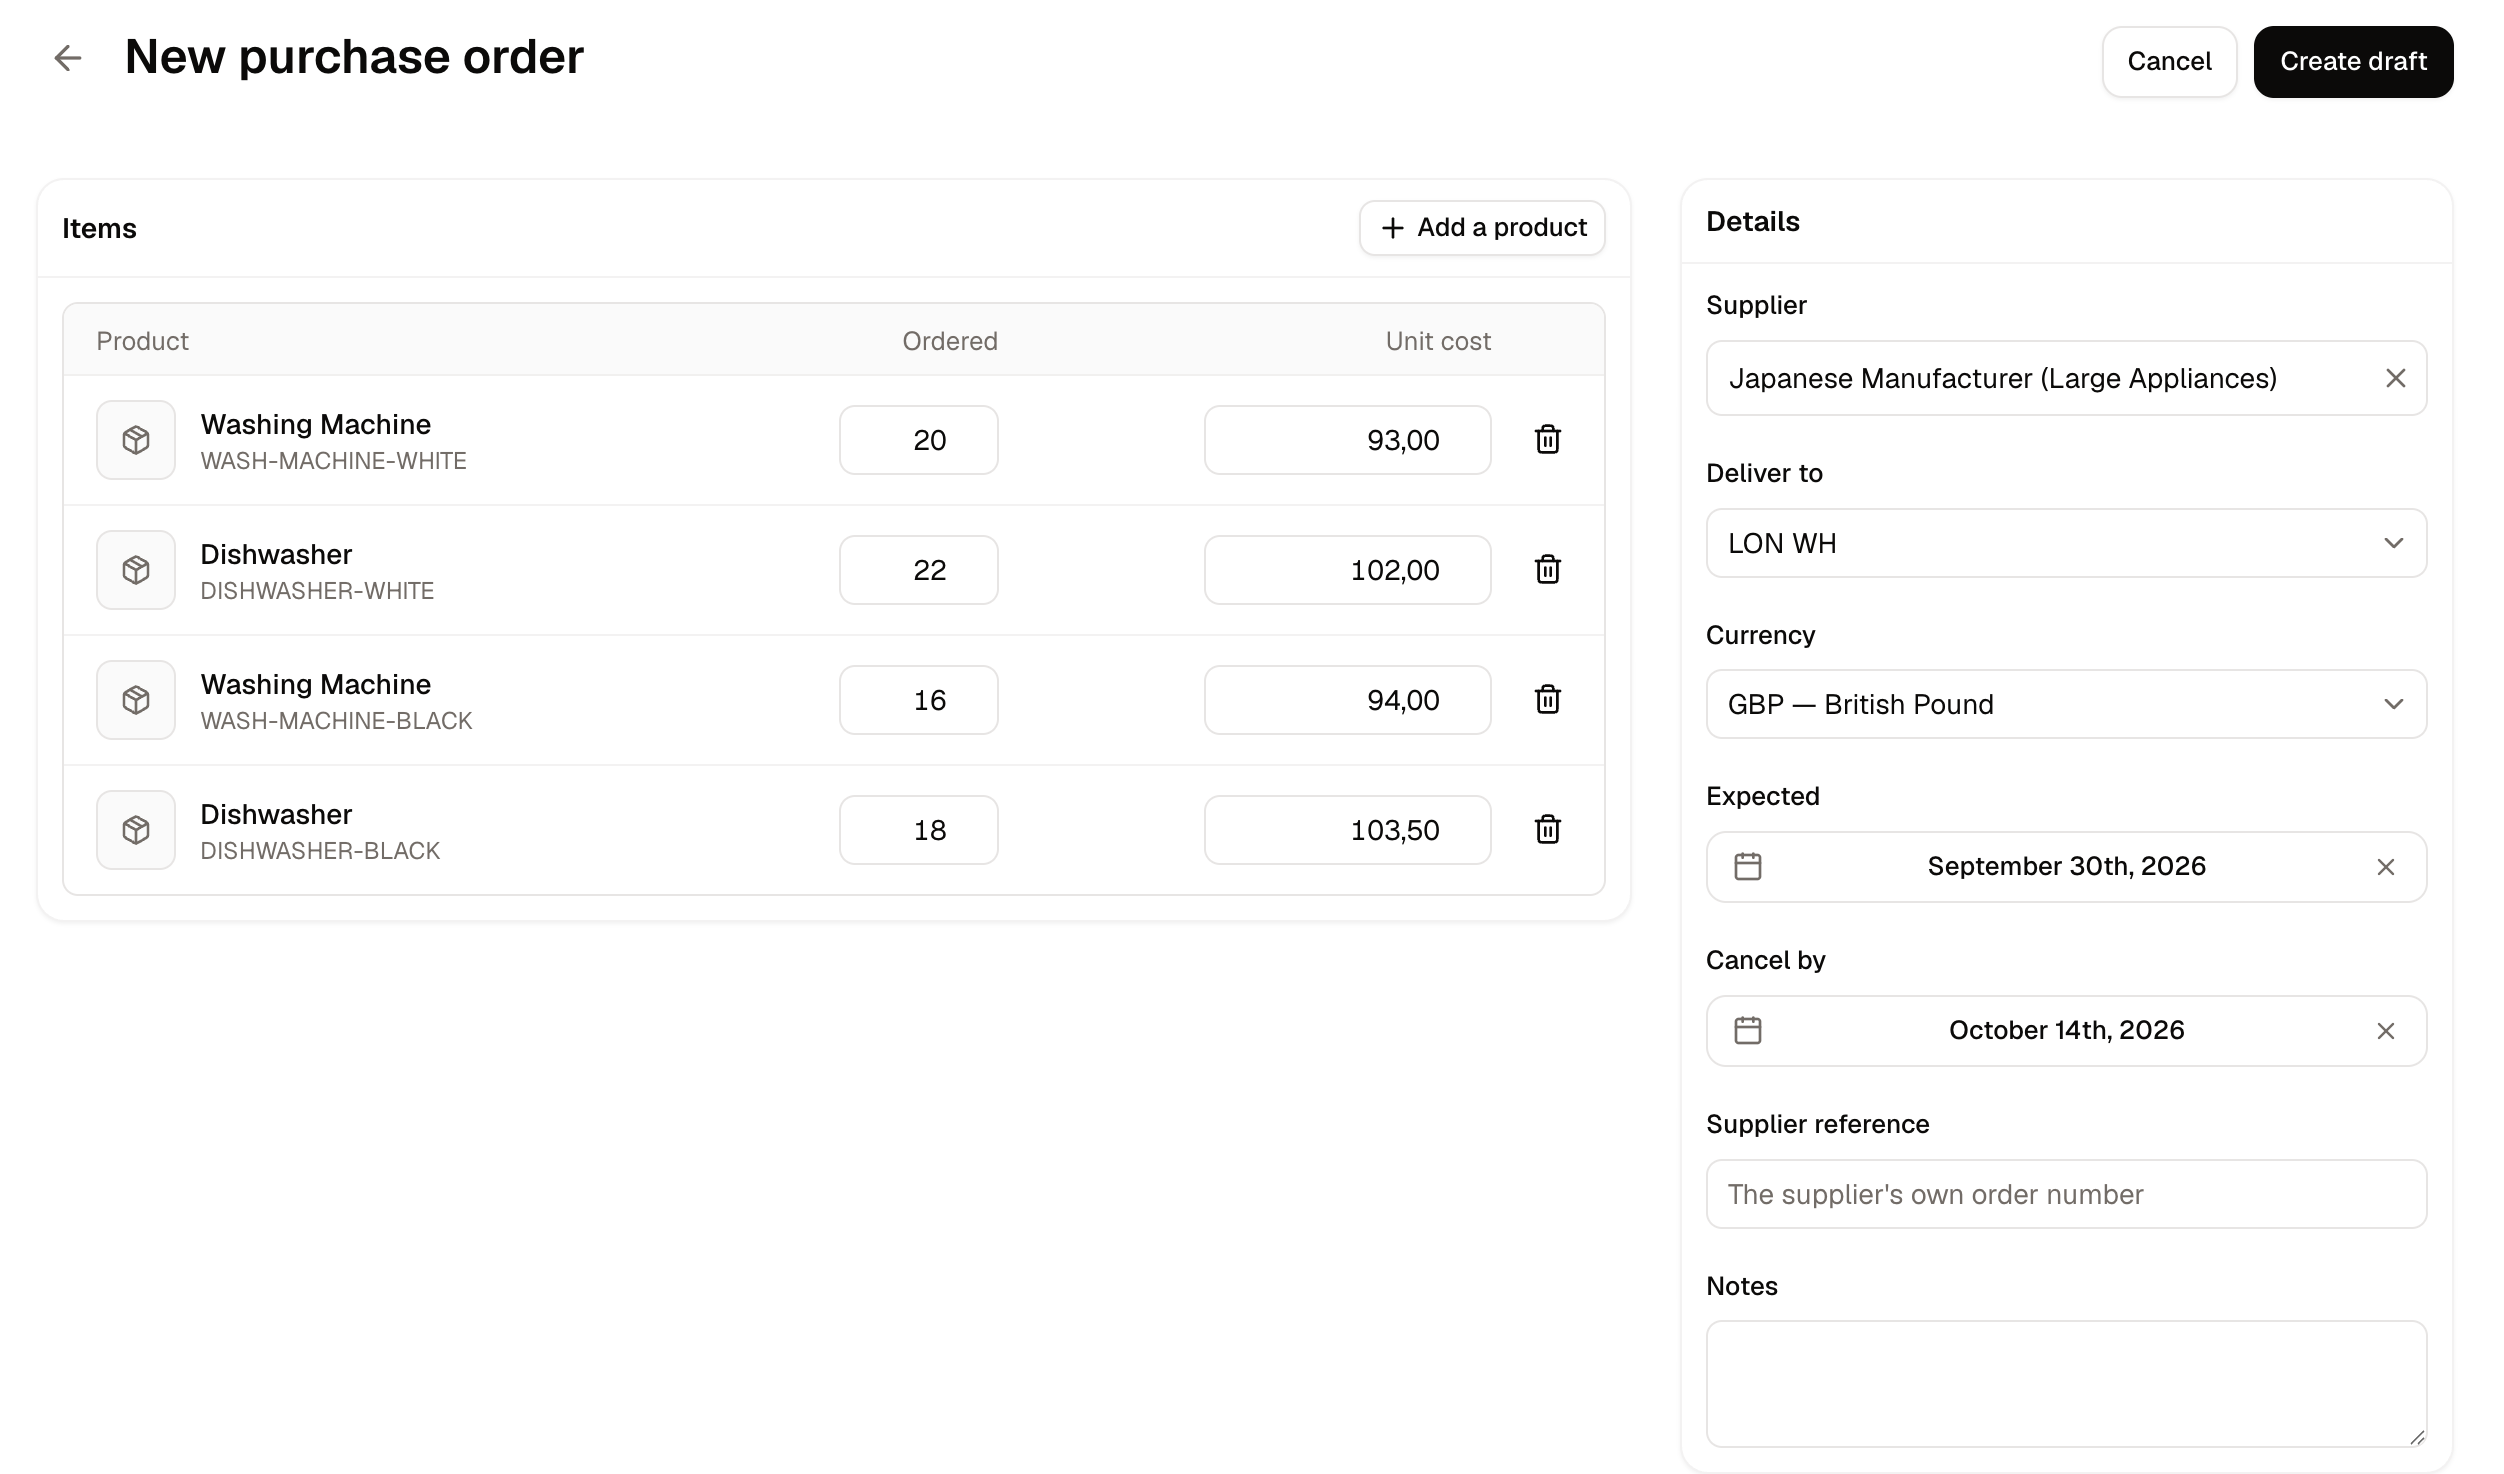
- Supplier - Who you are buying from. Only suppliers already on record appear here.
- Deliver to - The warehouse the goods are coming to.
- Currency - What the line costs are priced in.
- Expected - The day the supplier promised to deliver.
- Cancel by - The day after which you no longer want the goods.
- Supplier reference - The supplier’s own order number, so paperwork matches later.
- Notes - Anything your team needs to know.
Create draft orders nothing. The units do not count as on their way until you mark the order as ordered.
Expected and Cancel by
Both are dates, both are optional, and they answer different questions.- Expected is the day the supplier promised to deliver. It is what the Overdue filter measures against, so an order past its expected date shows as overdue and is worth chasing.
- Cancel by is the day after which the goods are no longer any use to you. Seasonal stock is the clearest case: a delivery of Christmas lines arriving in January is worth nothing, however apologetic the supplier is. It is what the Past cancel-by filter measures against.
How to Place the Order
Open the draft and click Mark as ordered once you have actually placed it with the supplier. Spree confirms with “The lines are frozen once the order goes to [supplier]. Ordered stock still does not count as available until it arrives.”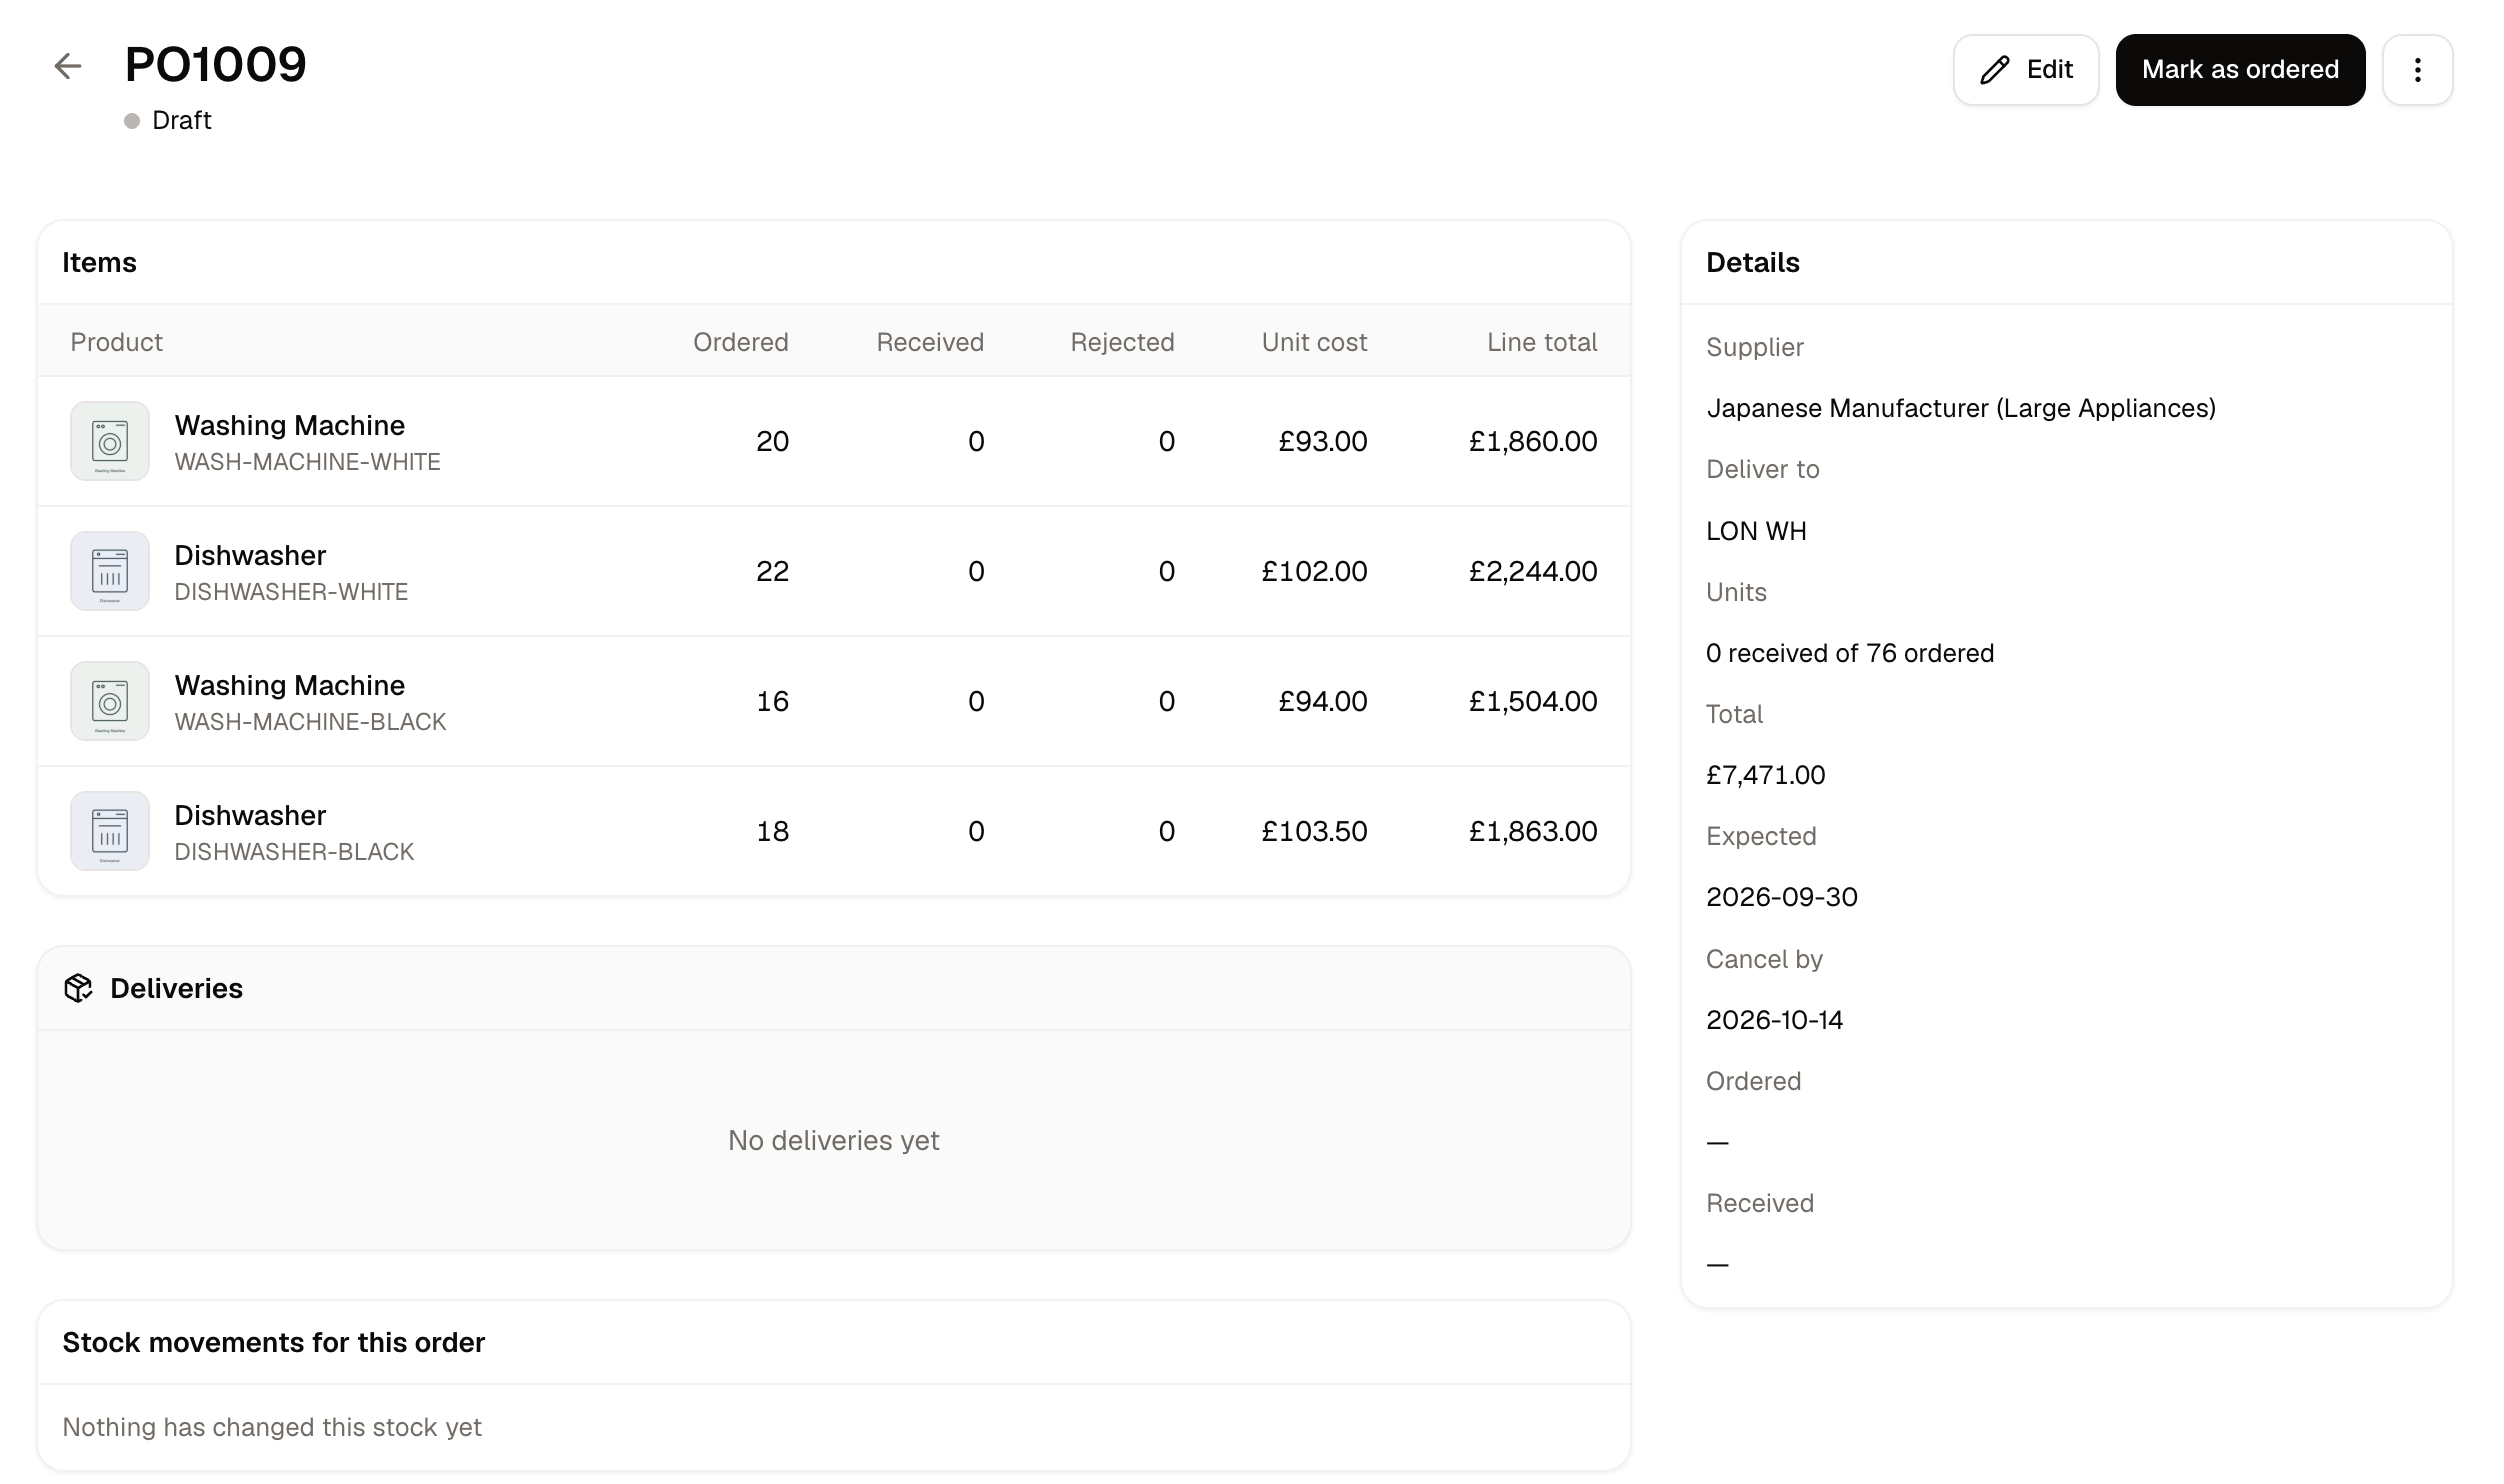
Once an order has gone to a supplier its lines are a matter of record between two businesses, so they can no longer be edited. Cancel the order if it should not stand.
How to Receive a Delivery
Once an order is marked as ordered it is ready to receive against, so there is no separate screen to open. Record what arrived on the order itself, then commit it.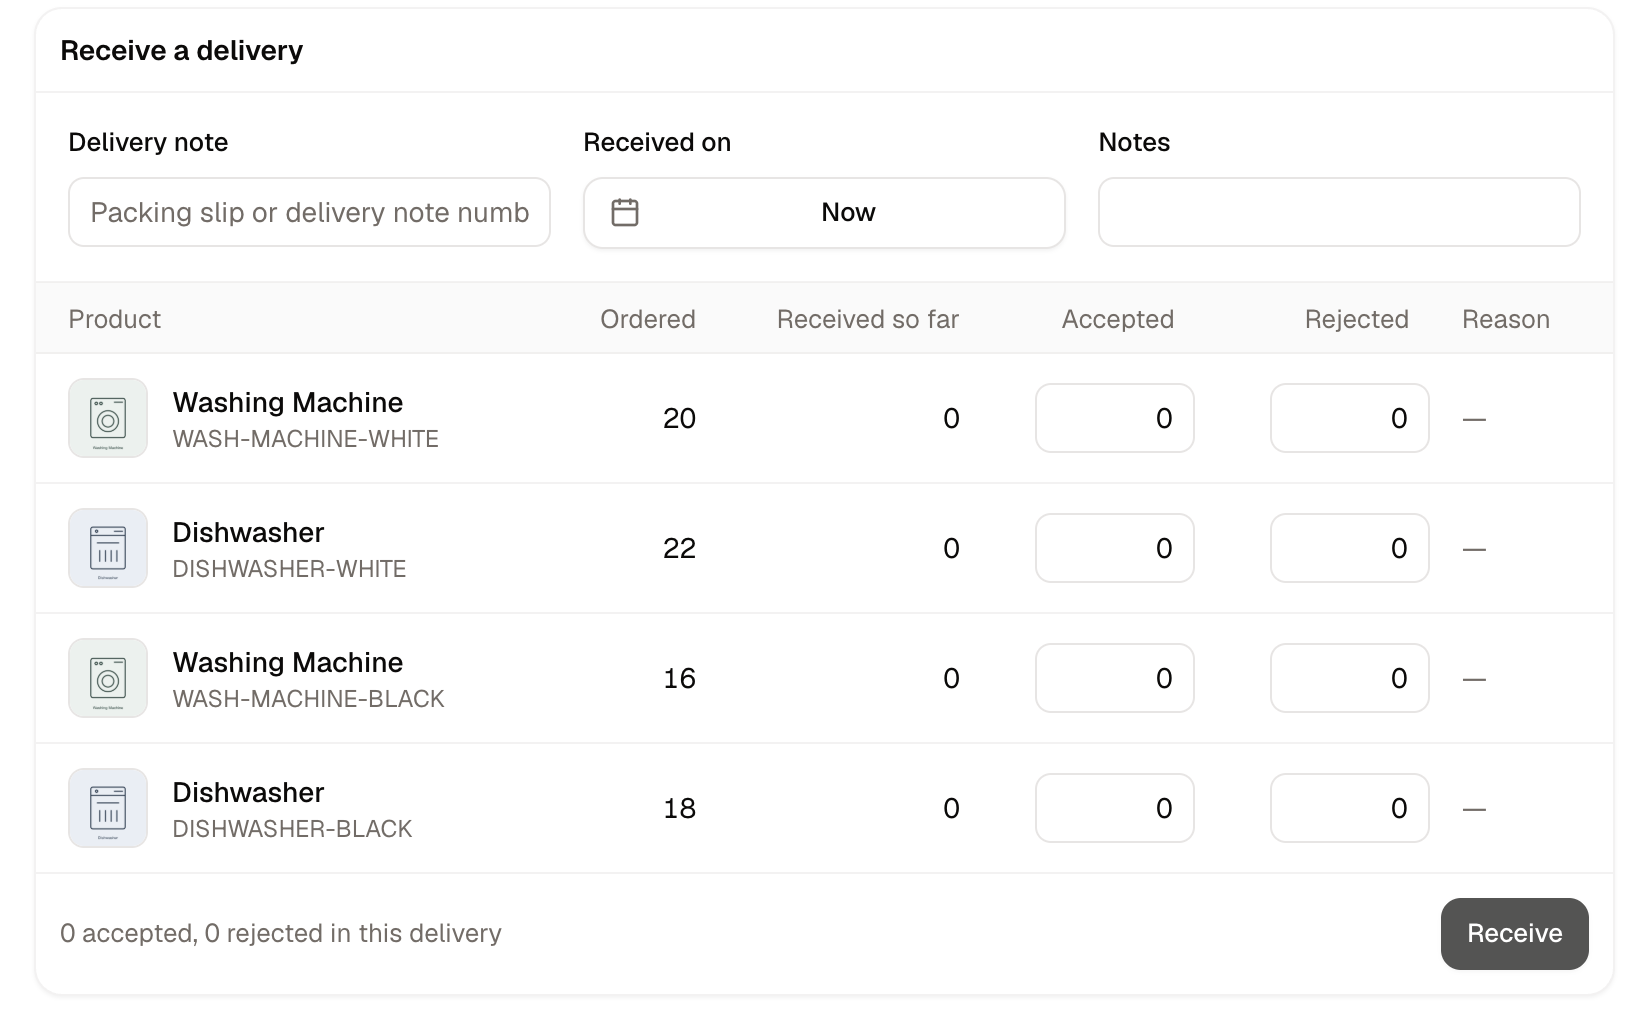
- Open the order. Each line shows what was ordered and how much is still outstanding.
- Set Received on, which defaults to now.
- Enter the Delivery note, meaning the packing slip or delivery note number that came with the goods.
- Add any Notes about the state the delivery arrived in.
- Work down the lines and record how many units you accepted and how many you rejected.
- Click Receive to commit the delivery.
Receive is the button that commits what you have entered. Nothing is added to your stock until you click it.
Accepting and rejecting units
Each line is counted in two parts. Record how many units you accepted, meaning the ones going onto the shelf, and how many you rejected, meaning the ones you are refusing. Rejected units need a reason:- Damaged - The units arrived broken, crushed or otherwise unsaleable.
- Expired - The units are past their date and cannot be sold on.
- Wrong item - What turned up is not what you ordered.
- Other - Anything the first three do not cover. Use the notes to say what happened.
A rejection on a purchase order is a claim against your supplier, not a loss. The record of what you refused and why is what you need when asking for a credit or a replacement, so it is worth being specific in the notes.
Receiving in batches
You do not have to receive a whole order at once. If a supplier ships across several days or several pallets, record what has arrived and click Receive. Spree logs that as its own delivery and moves the order to Partially received, leaving the rest outstanding. Each time more arrives, enter the next batch’s quantities against the lines and click Receive again. Every batch is recorded separately, so an order that arrived in three shipments has three deliveries against it and the history shows exactly what came when.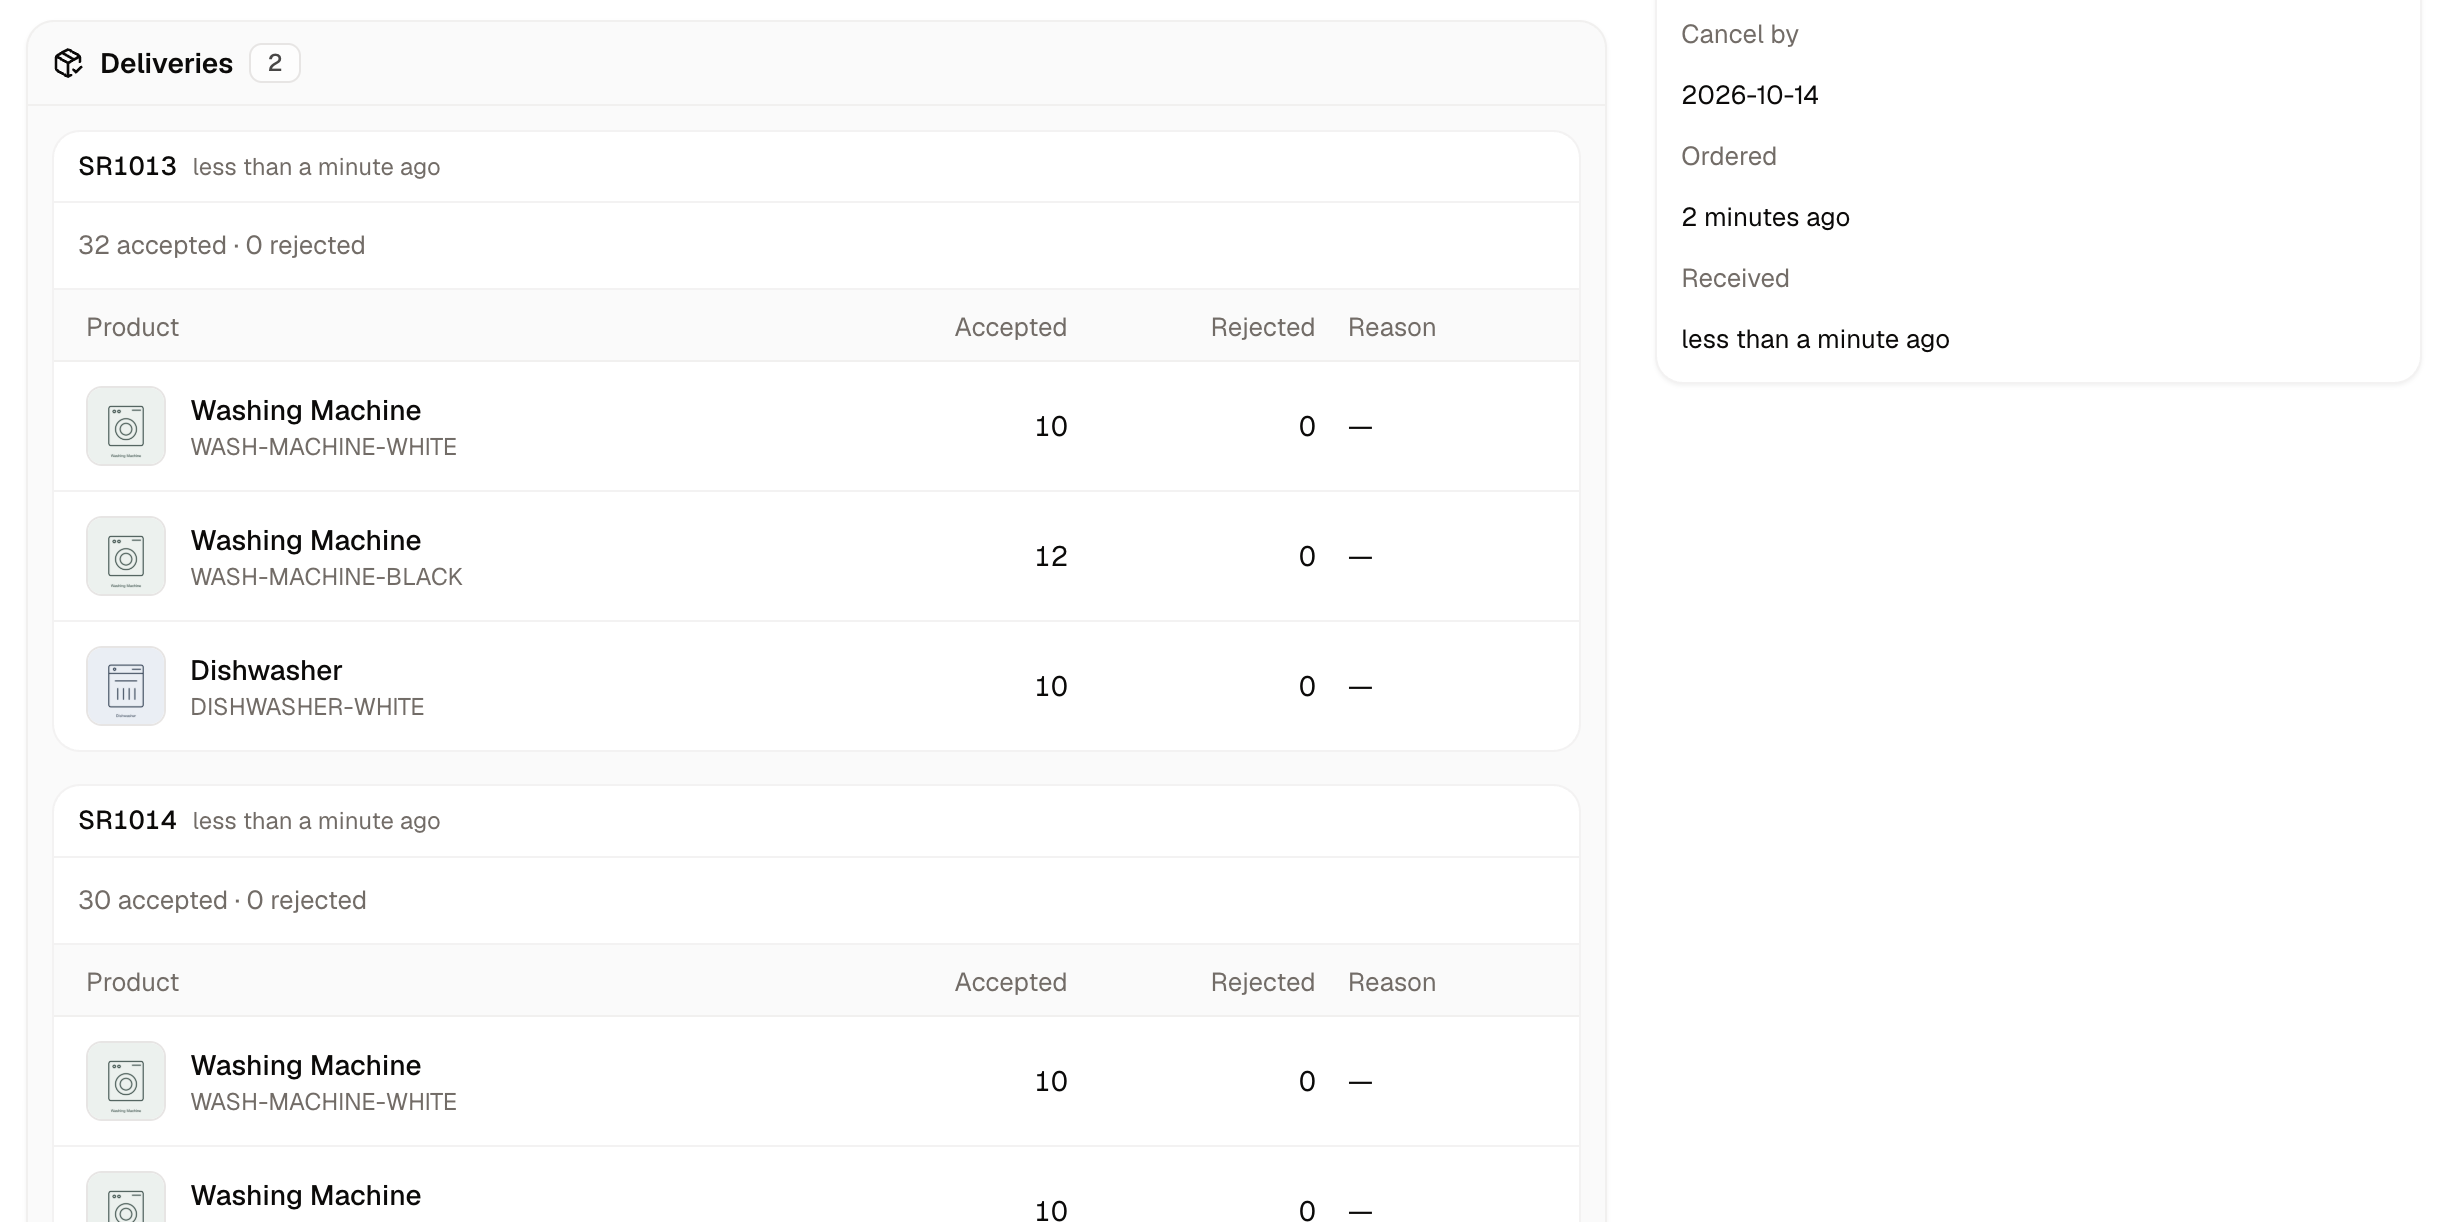
Stock movements
At the bottom of every order, Stock movements for this order lists each change the order has made to your stock figures, in the order they happened.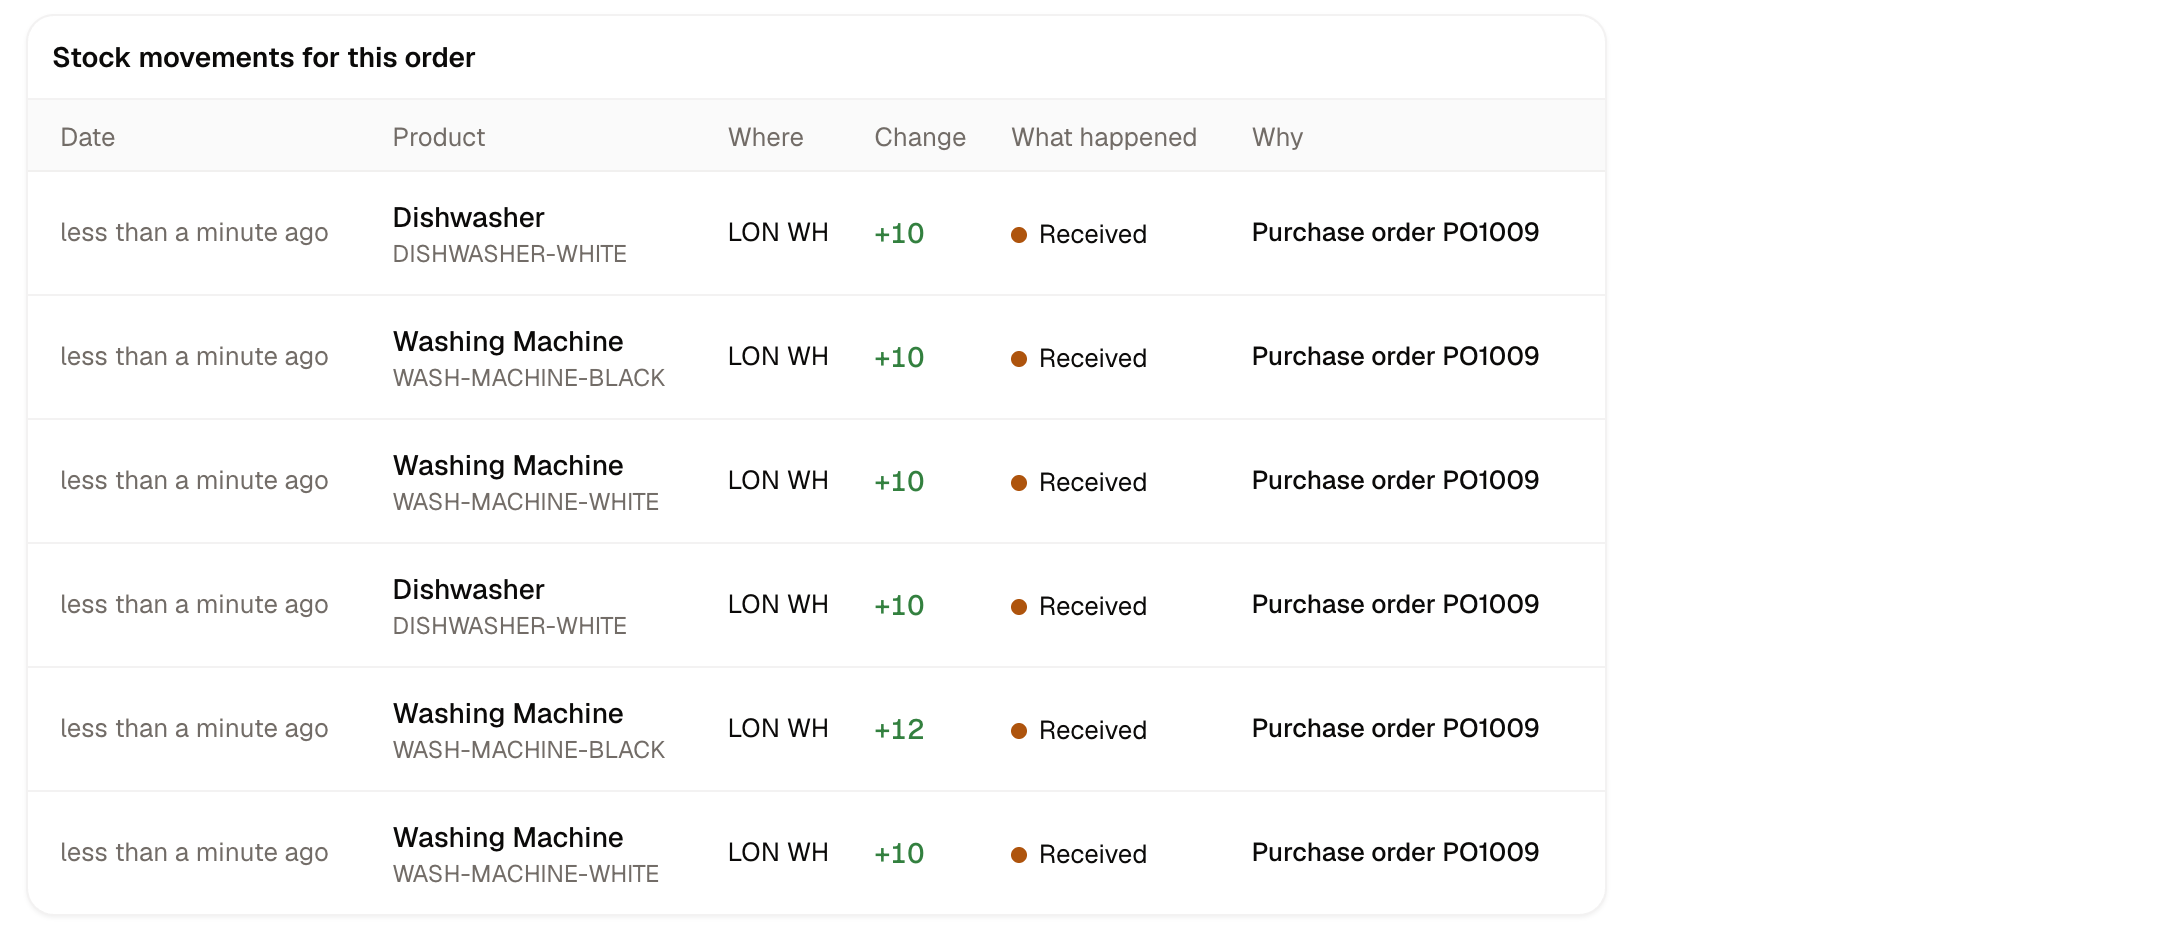
How to Close an Order Short
Sometimes a supplier will not send the rest. Click Close short and give a reason. What arrived stays on the shelf, the units still owed are written off, and the order is marked received, so your inventory figures stop promising stock that is not coming.How to Cancel a Purchase Order
Cancel order calls off whatever is still outstanding. Units already received stay on the shelf, and only the outstanding balance stops counting as incoming.Importing and Exporting
Purchase orders can be imported and exported, using their respective buttons in the top right corner of the screen. Export produces a CSV of the purchase orders currently shown in your list, with one row for each product on an order. The order’s number, supplier, destination and dates repeat on every row. Import works the same way in reverse, and is the quicker route when you are raising a large order or bringing existing orders across from another system. Rows sharing a reference become a single draft order, naming the supplier, warehouse and SKU by name.Imported names must match records that already exist. A supplier name that does not match what’s in the system fails that row.
Further Reading
- Suppliers - The suppliers you order from
- Inventory - Where received stock lands
- Stock Transfers - Moving stock you already own