> ## Documentation Index
> Fetch the complete documentation index at: https://spreecommerce.org/docs/llms.txt
> Use this file to discover all available pages before exploring further.
# Returns Processing
> Learn how to process returns in Spree Commerce.
Spree supports native returns processing, giving you full control over how refunds, exchanges, and restocking are handled directly from the admin dashboard. The workflow is designed to be flexible, with clear steps for managing each stage of the return process.
This guide walks you through the full lifecycle of a return: from authorization, to customer return, to final reimbursement.
## 1) Create a Return Authorization (RA)
Returns are initiated from the order, not from the Returns tab, so navigate to the Orders tab and open the relevant order.
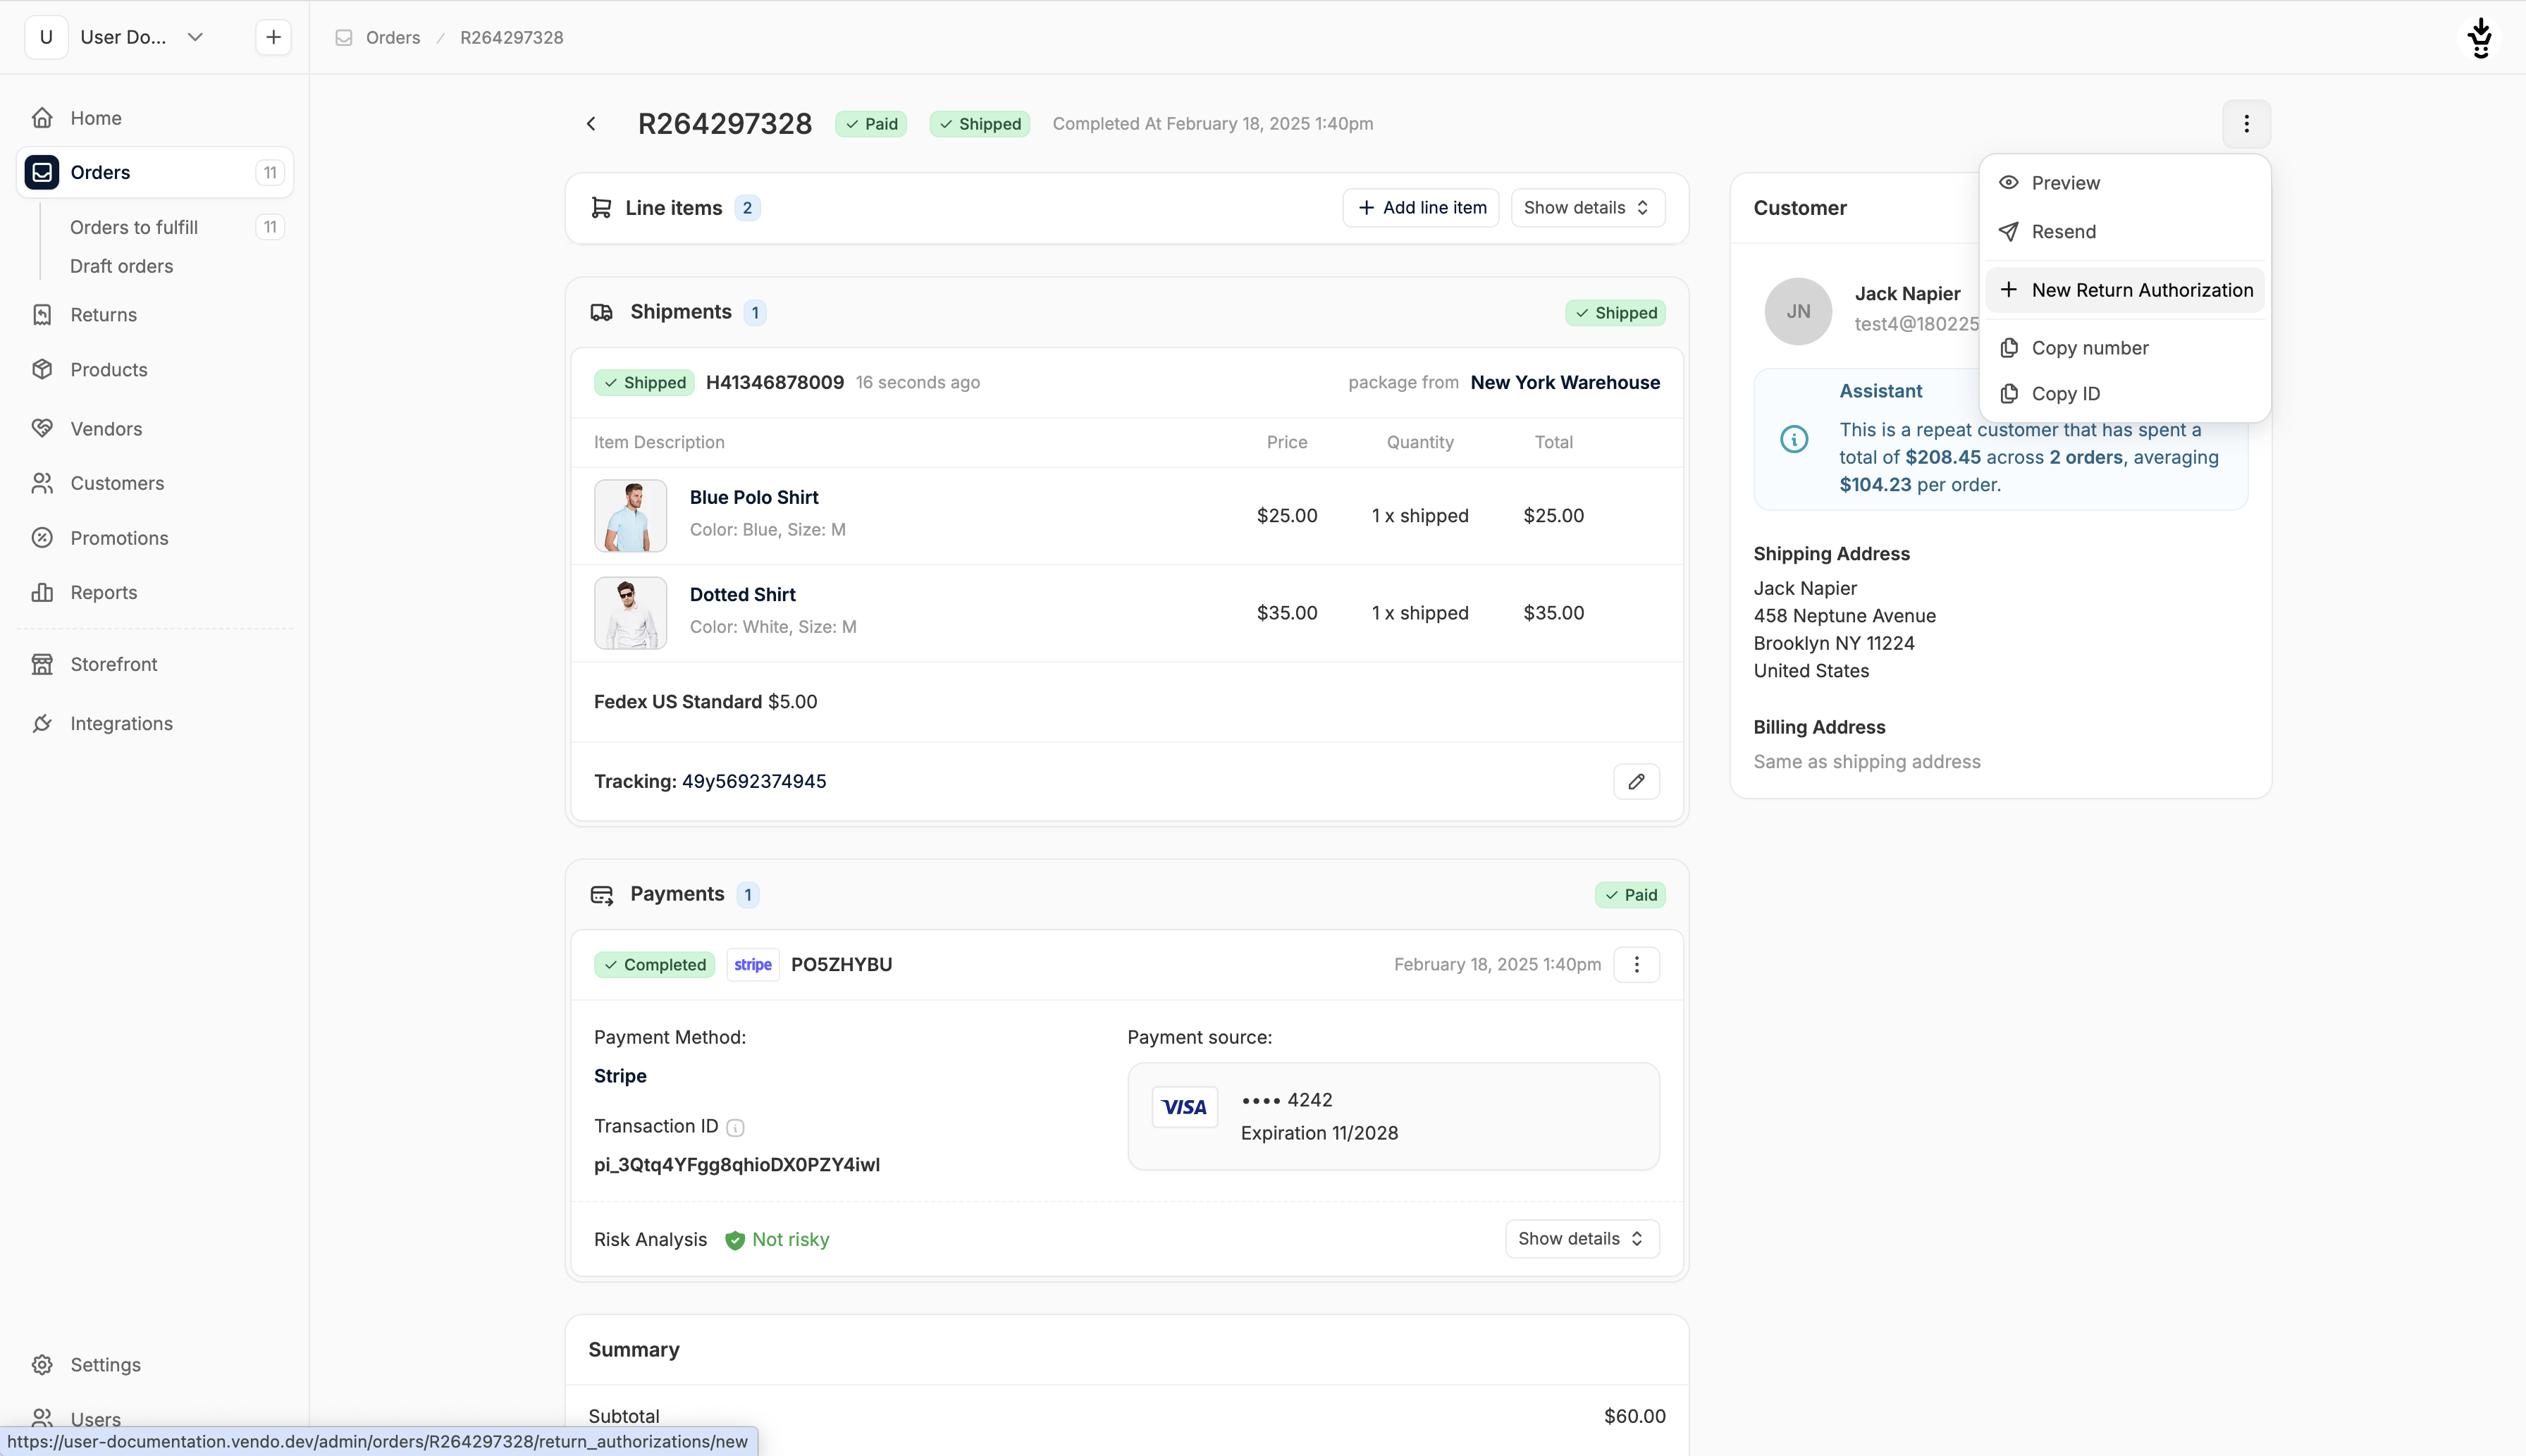 Alternatively, find the customer in the Customers tab and access their order from there.
Click the three-dot menu in the top-right corner and select **New Return Authorization**.
Alternatively, find the customer in the Customers tab and access their order from there.
Click the three-dot menu in the top-right corner and select **New Return Authorization**.
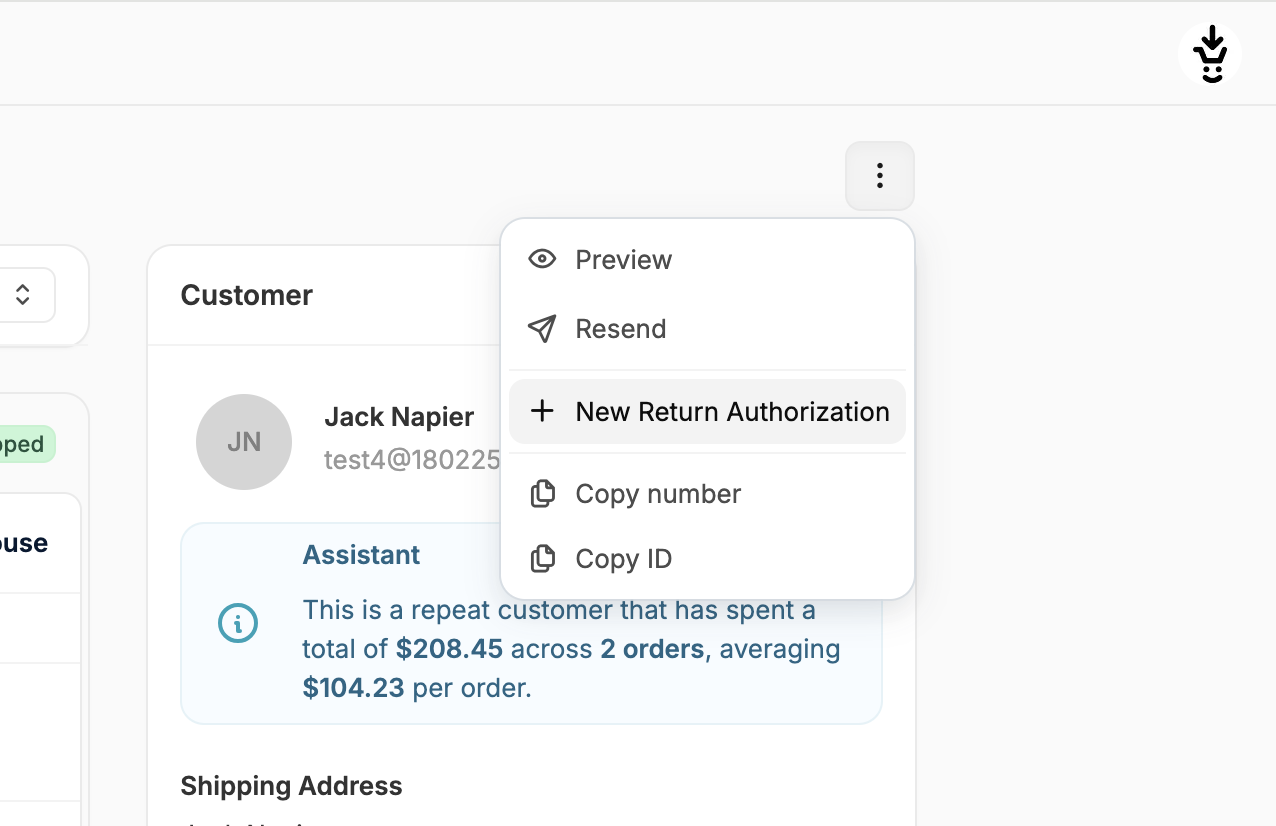 This will open the Return Authorization form.
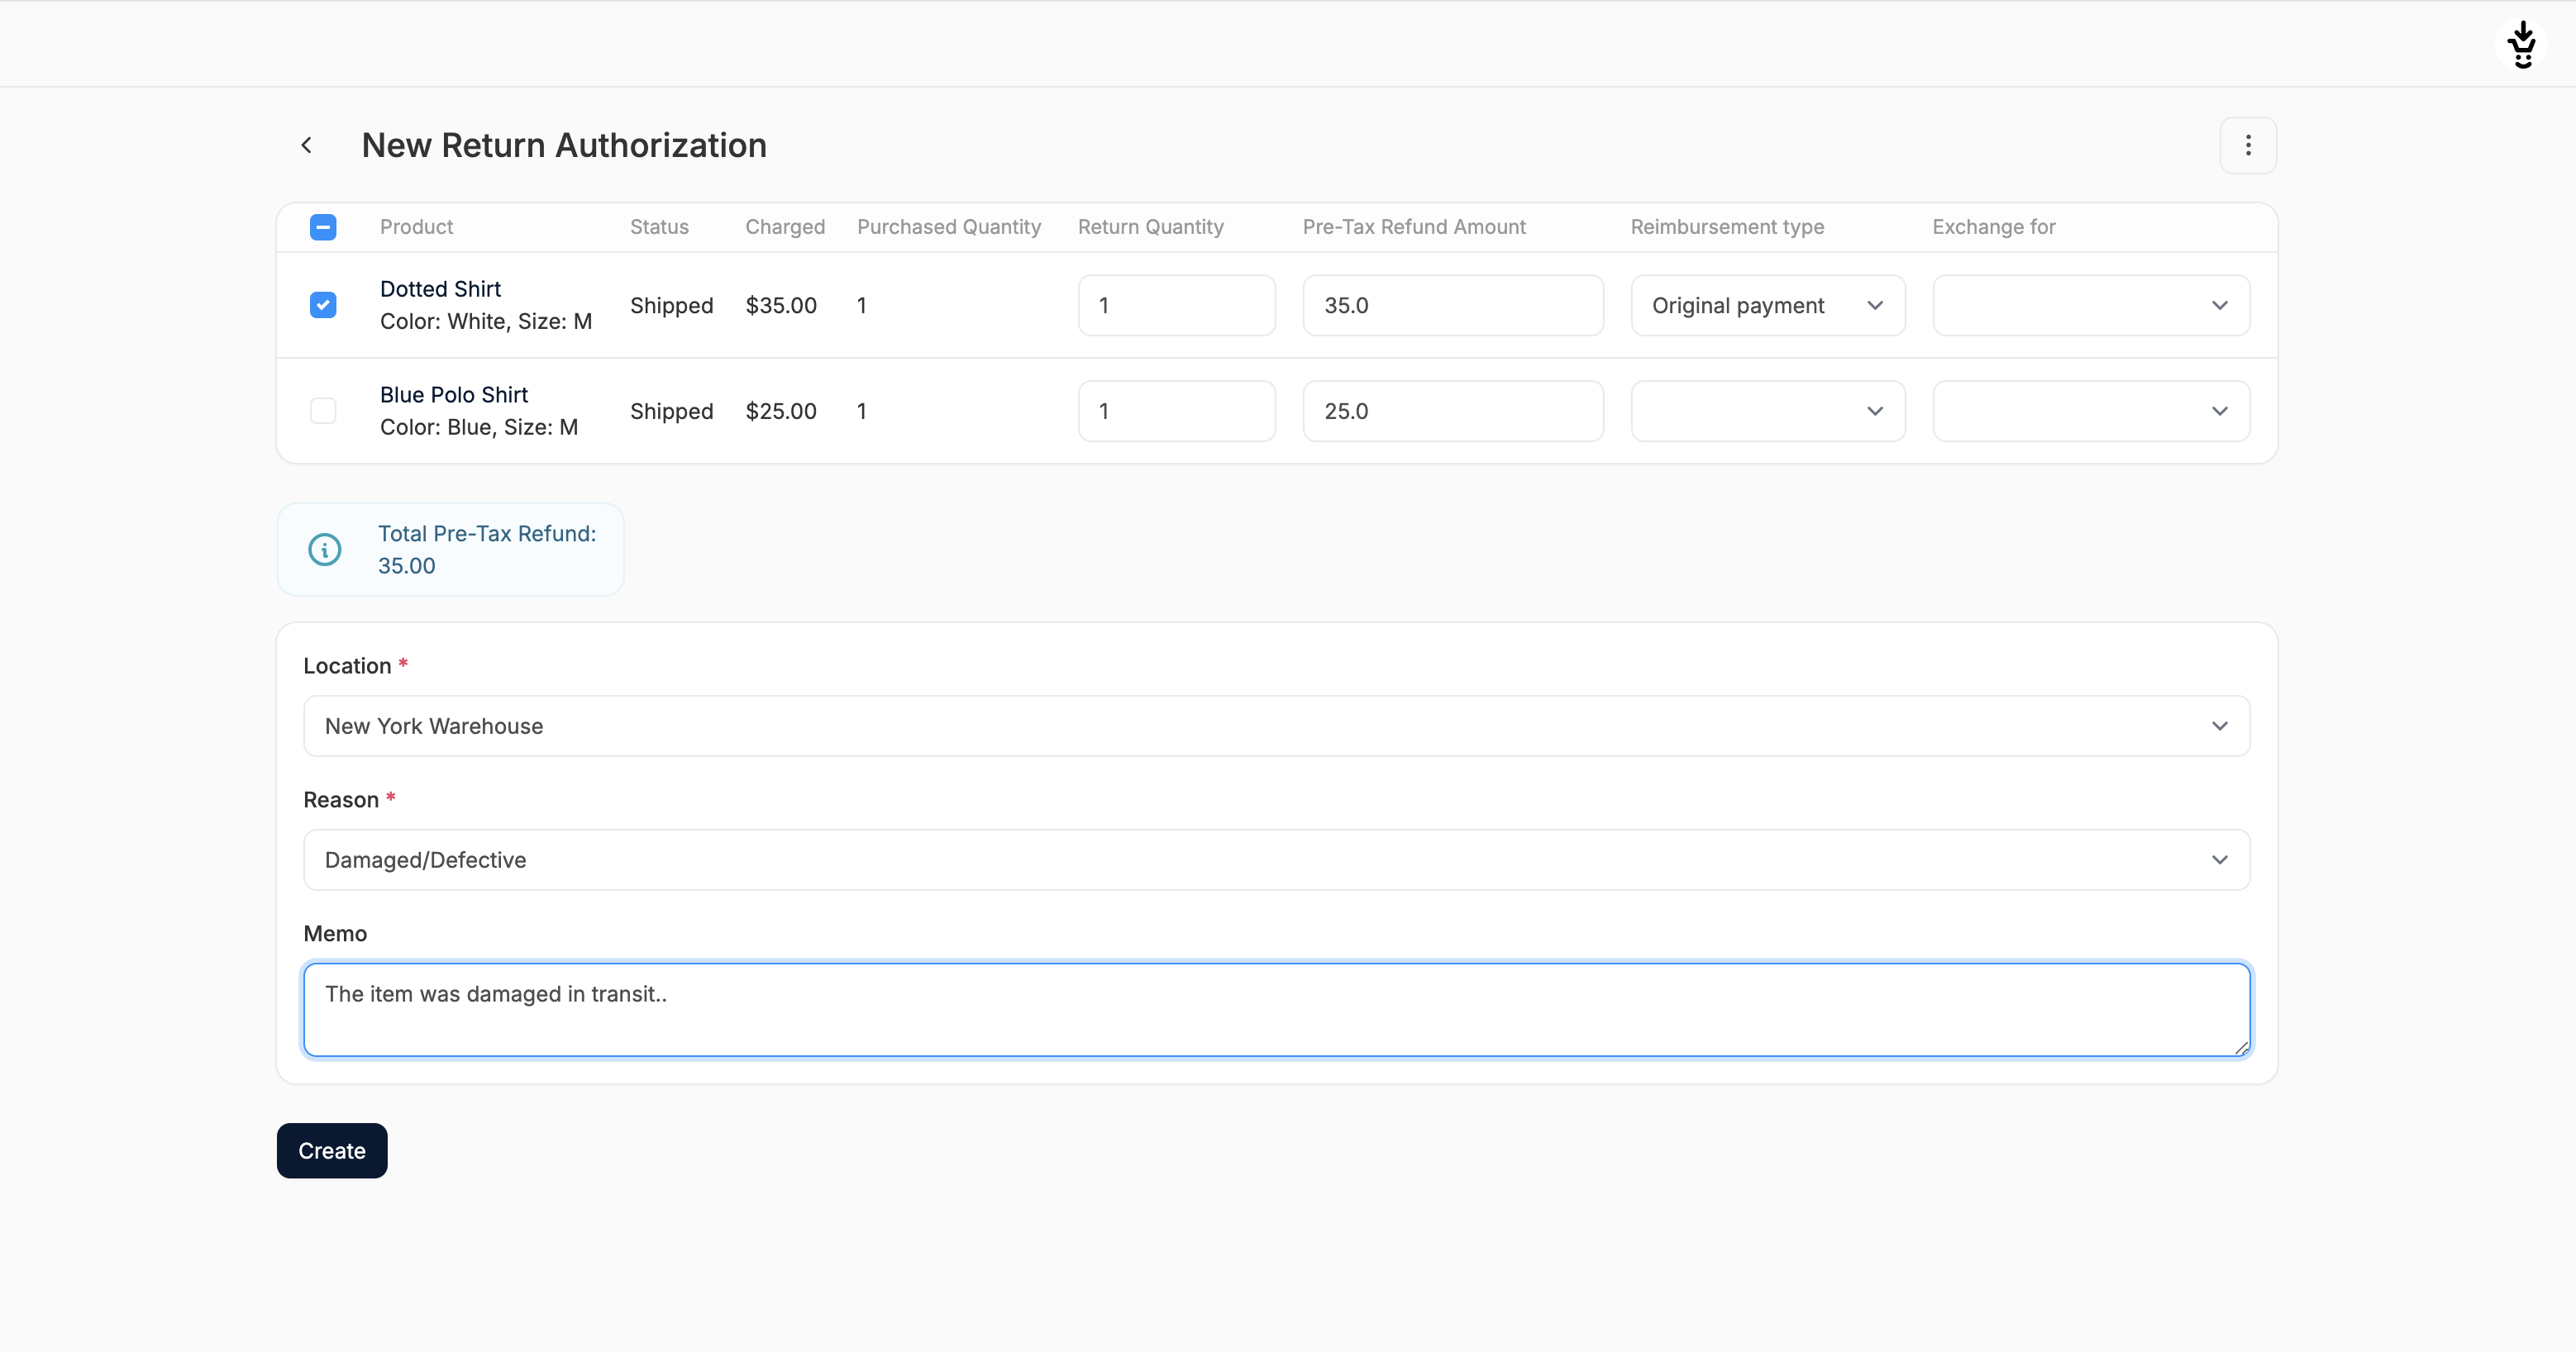 Here you’ll see a table of line items from the order. For each item, configure the following:
* **Include in RA**: check the box to include this item in the return
* **Product**: name and variant (read-only)
* **Status**: shipment status (e.g., "shipped", read-only)
* **Charged**: amount originally charged to the customer
* **Return Quantity**: set how many units should be returned (0 if not returning)
* **Pre-tax Refund Amount**: amount to be refunded per item
* **Reimbursement Type**: choose from: Exchange, Store Credit, Credit, Original Payment
* **Exchange for**: if Exchange is selected, choose the replacement variant from the dropdown
Below the table, you’ll see a dynamic refund summary showing the Total Pre-Tax Refund amount (e.g., \$35.00).
At the bottom of the form complete the additional fields:
* **Location**: stock location the item should be returned to (required)
* **Reason**: select an RMA reason (required)
* **Memo**: optional internal note
Click **Create** to finalize the Return Authorization.
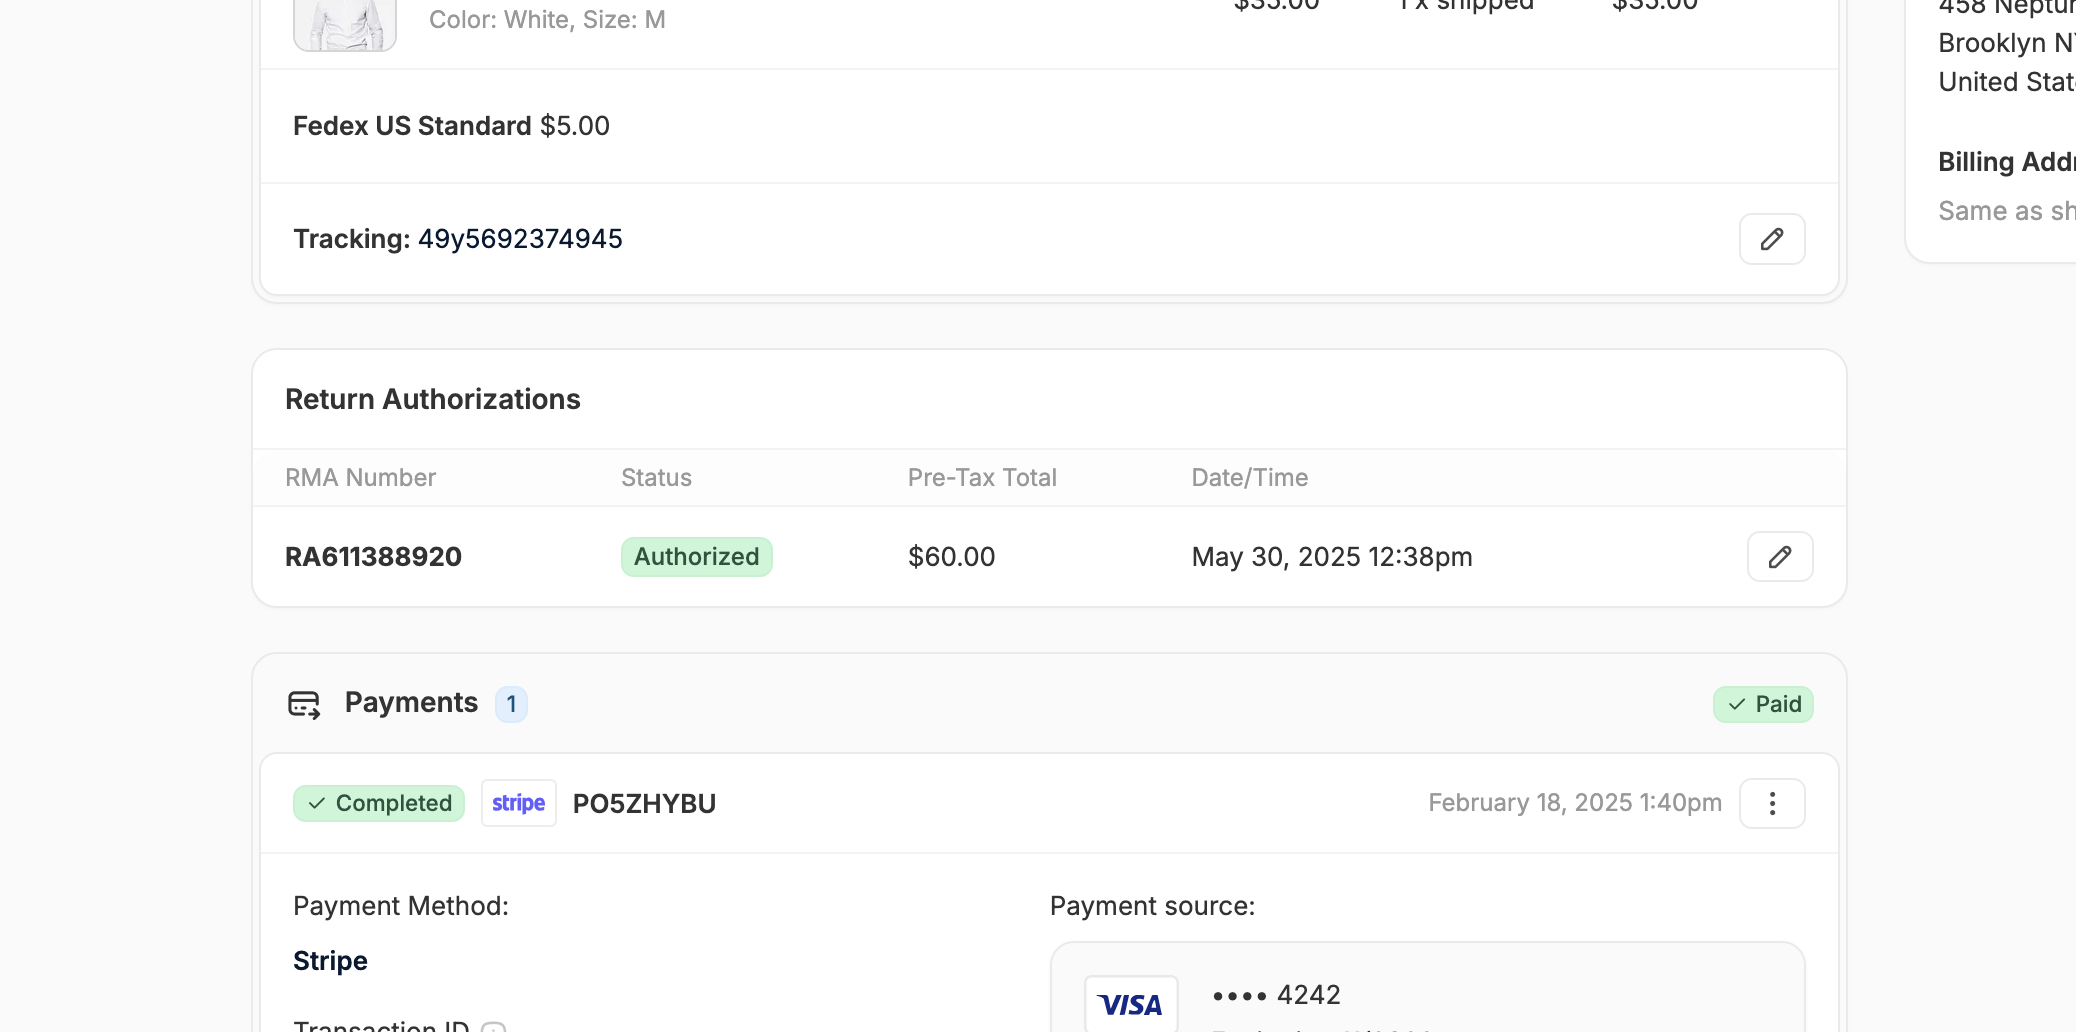
You’ll be redirected back to the order overview, where a Return Authorizations section will now appear under the Shipments section. You can edit the RA at any time.
Here you’ll see a table of line items from the order. For each item, configure the following:
* **Include in RA**: check the box to include this item in the return
* **Product**: name and variant (read-only)
* **Status**: shipment status (e.g., "shipped", read-only)
* **Charged**: amount originally charged to the customer
* **Return Quantity**: set how many units should be returned (0 if not returning)
* **Pre-tax Refund Amount**: amount to be refunded per item
* **Reimbursement Type**: choose from: Exchange, Store Credit, Credit, Original Payment
* **Exchange for**: if Exchange is selected, choose the replacement variant from the dropdown
Below the table, you’ll see a dynamic refund summary showing the Total Pre-Tax Refund amount (e.g., \$35.00).
At the bottom of the form complete the additional fields:
* **Location**: stock location the item should be returned to (required)
* **Reason**: select an RMA reason (required)
* **Memo**: optional internal note
Click **Create** to finalize the Return Authorization.
You’ll be redirected back to the order overview, where a Return Authorizations section will now appear under the Shipments section. You can edit the RA at any time.
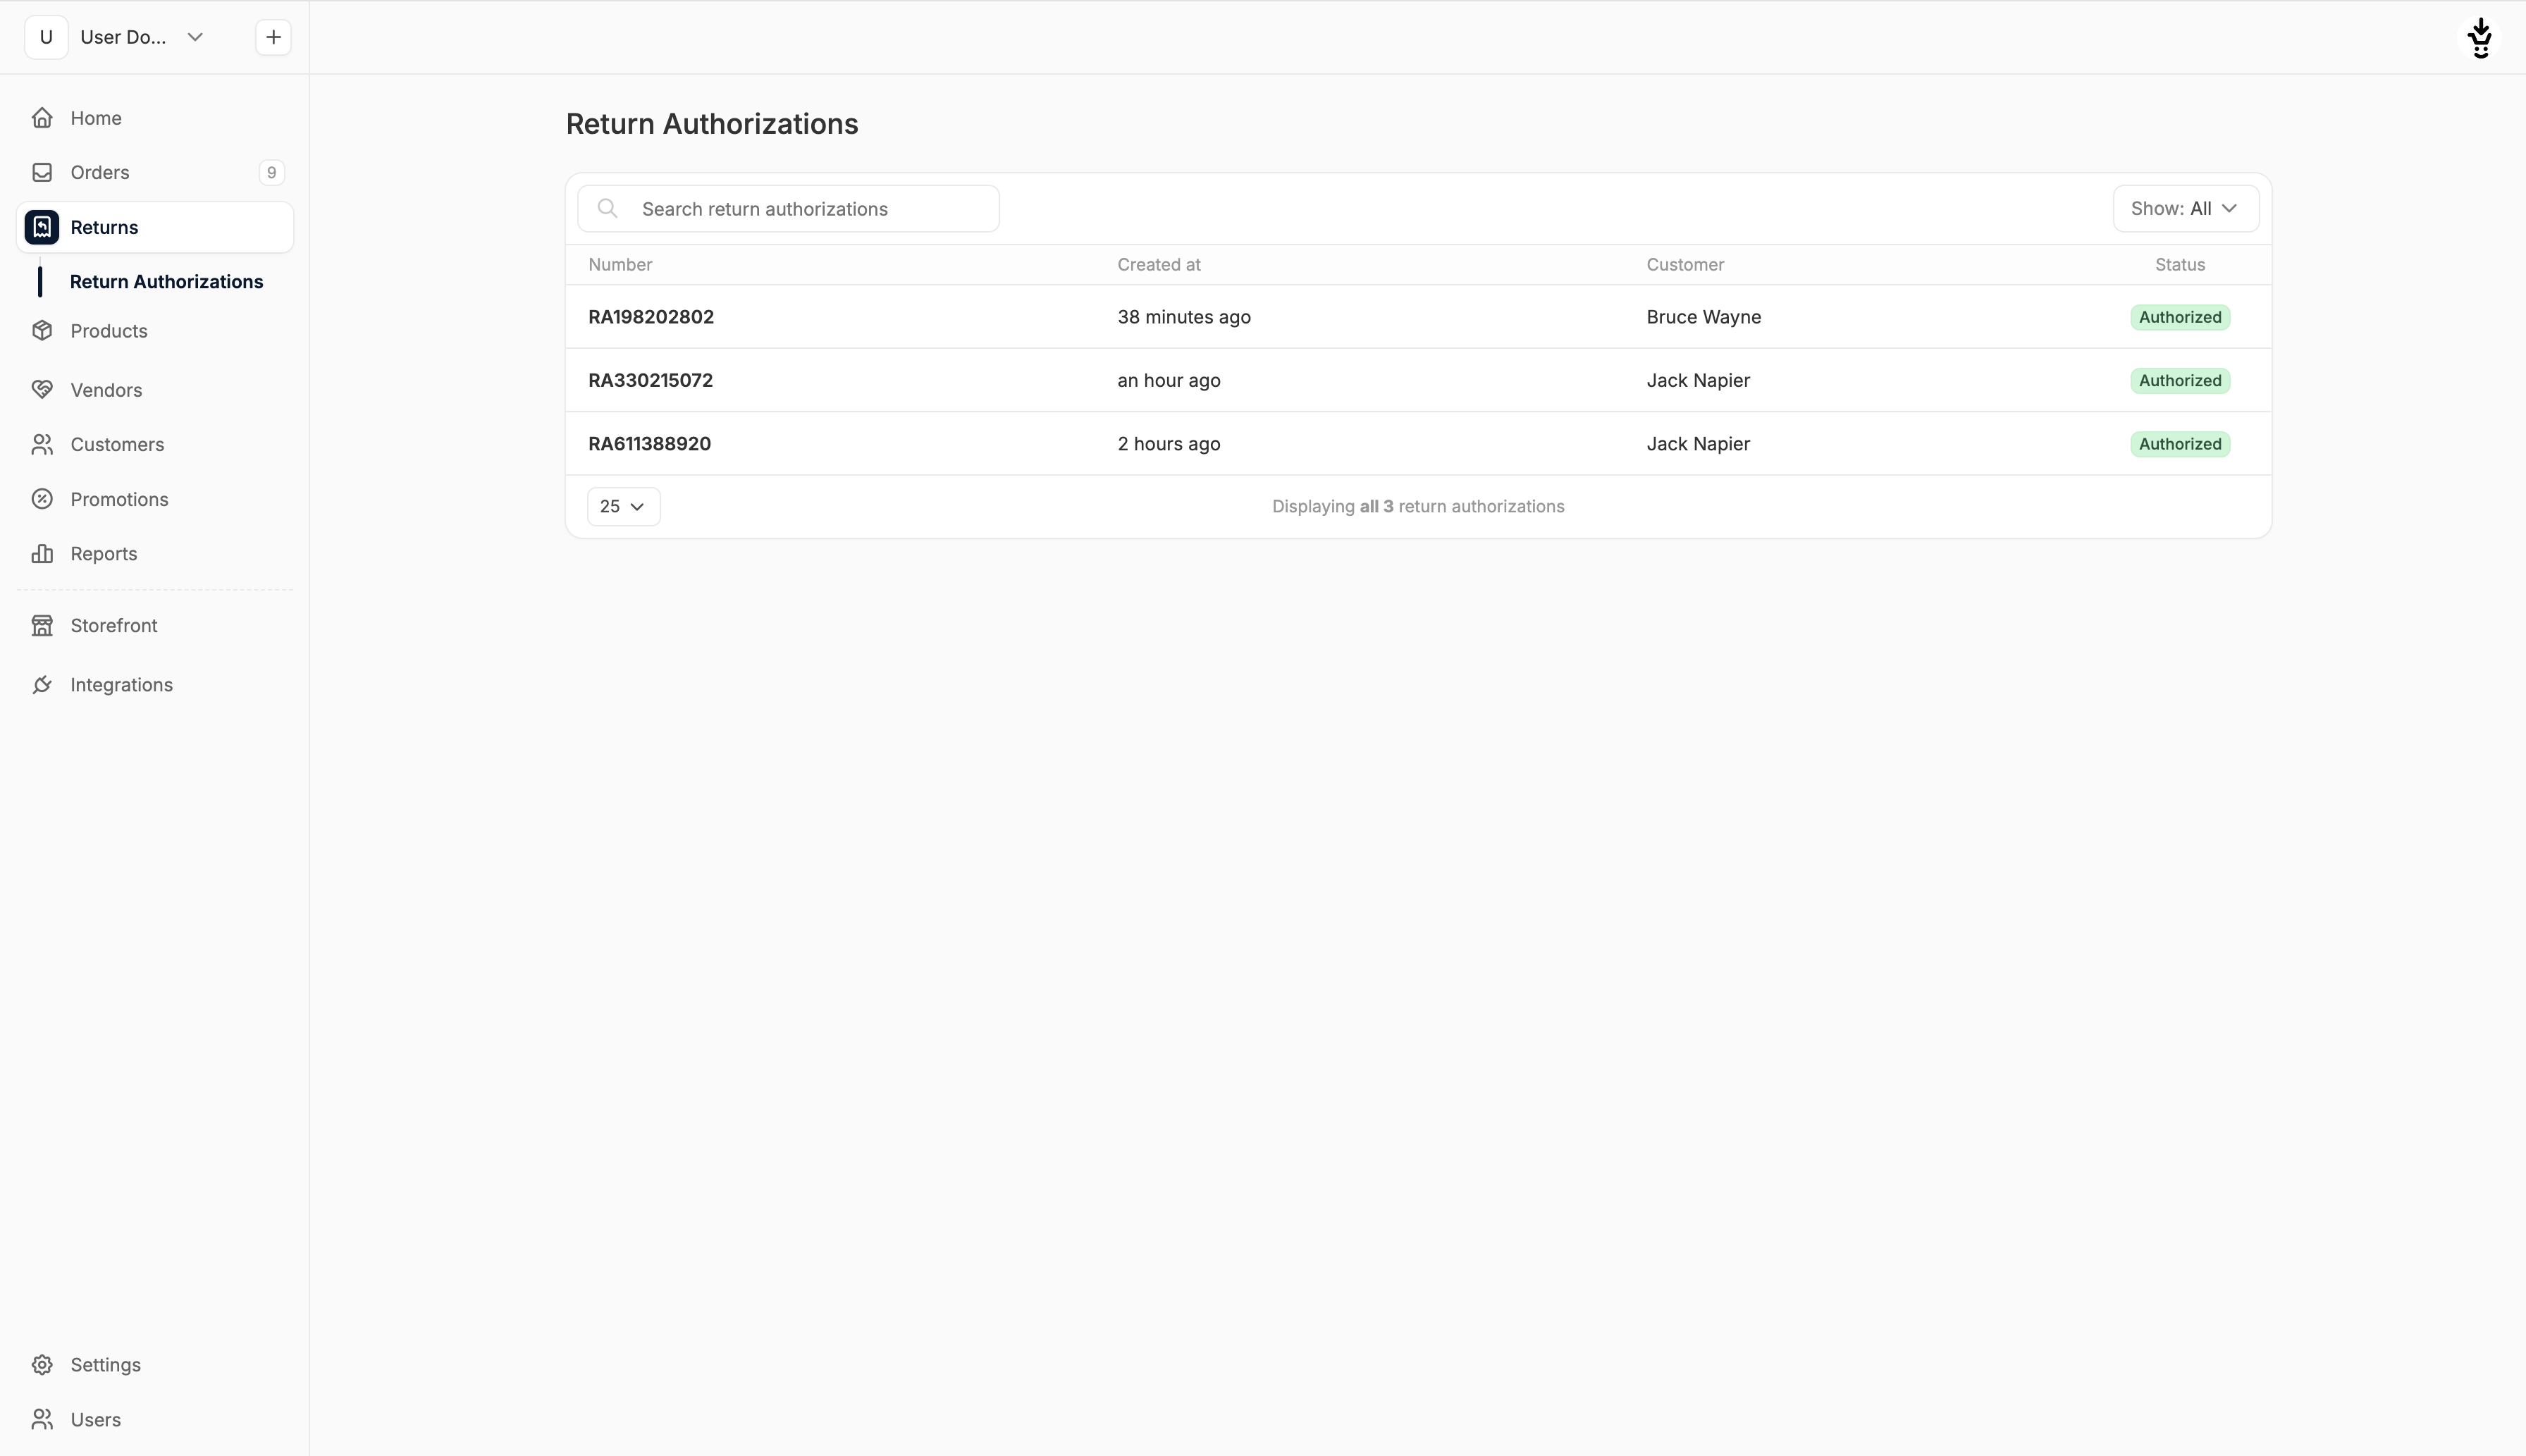
 The RA will also now be listed in the **Returns → Return Authorizations** tab.
 ## 2) Create a Customer Return
With an RA in place, you're ready to log the return of the physical item.
From the same order overview page, click the three-dot menu again and select **New Customer Return**.
## 2) Create a Customer Return
With an RA in place, you're ready to log the return of the physical item.
From the same order overview page, click the three-dot menu again and select **New Customer Return**.
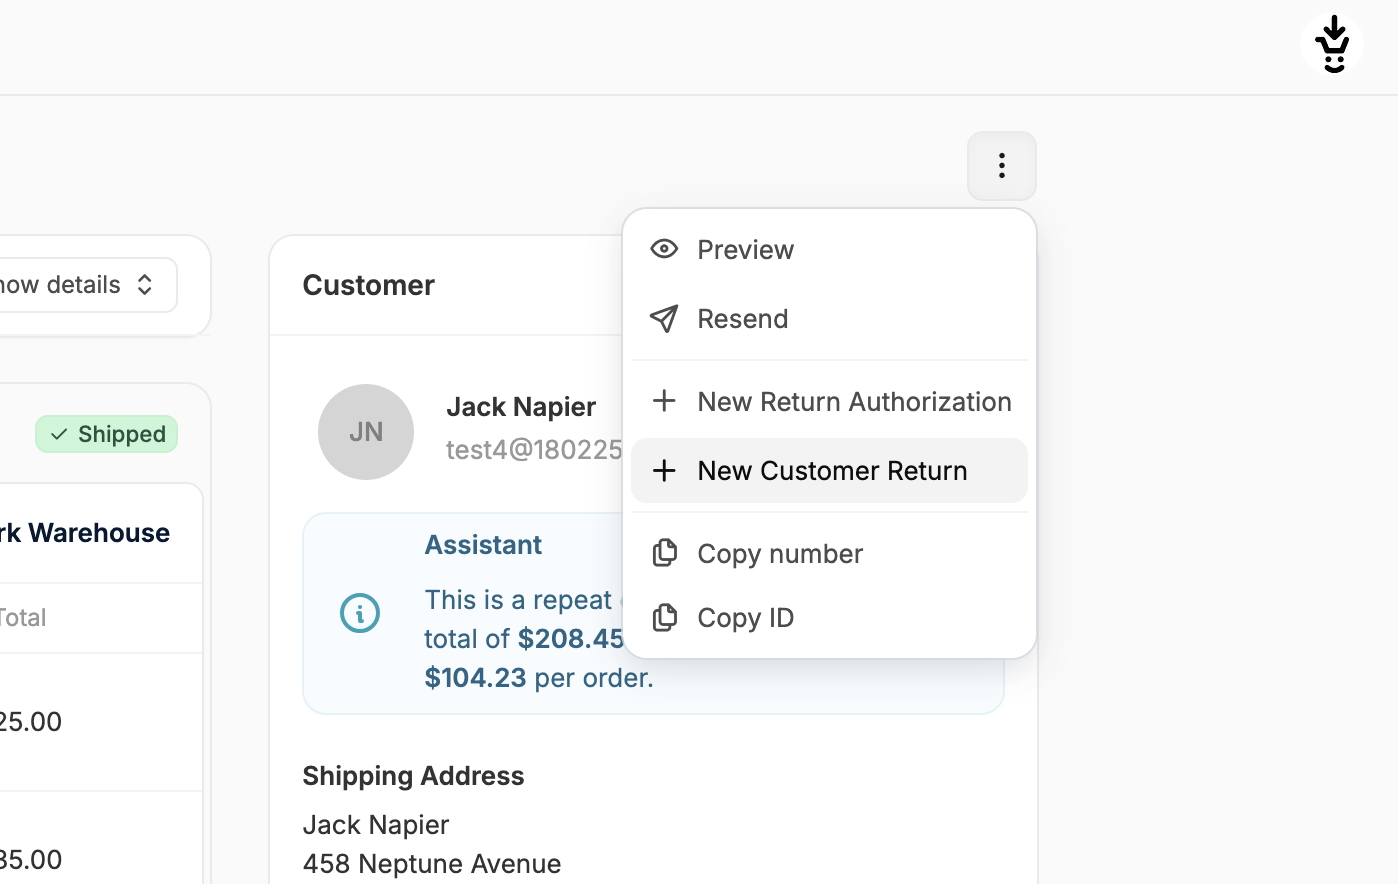 This will open the Customer Return form.
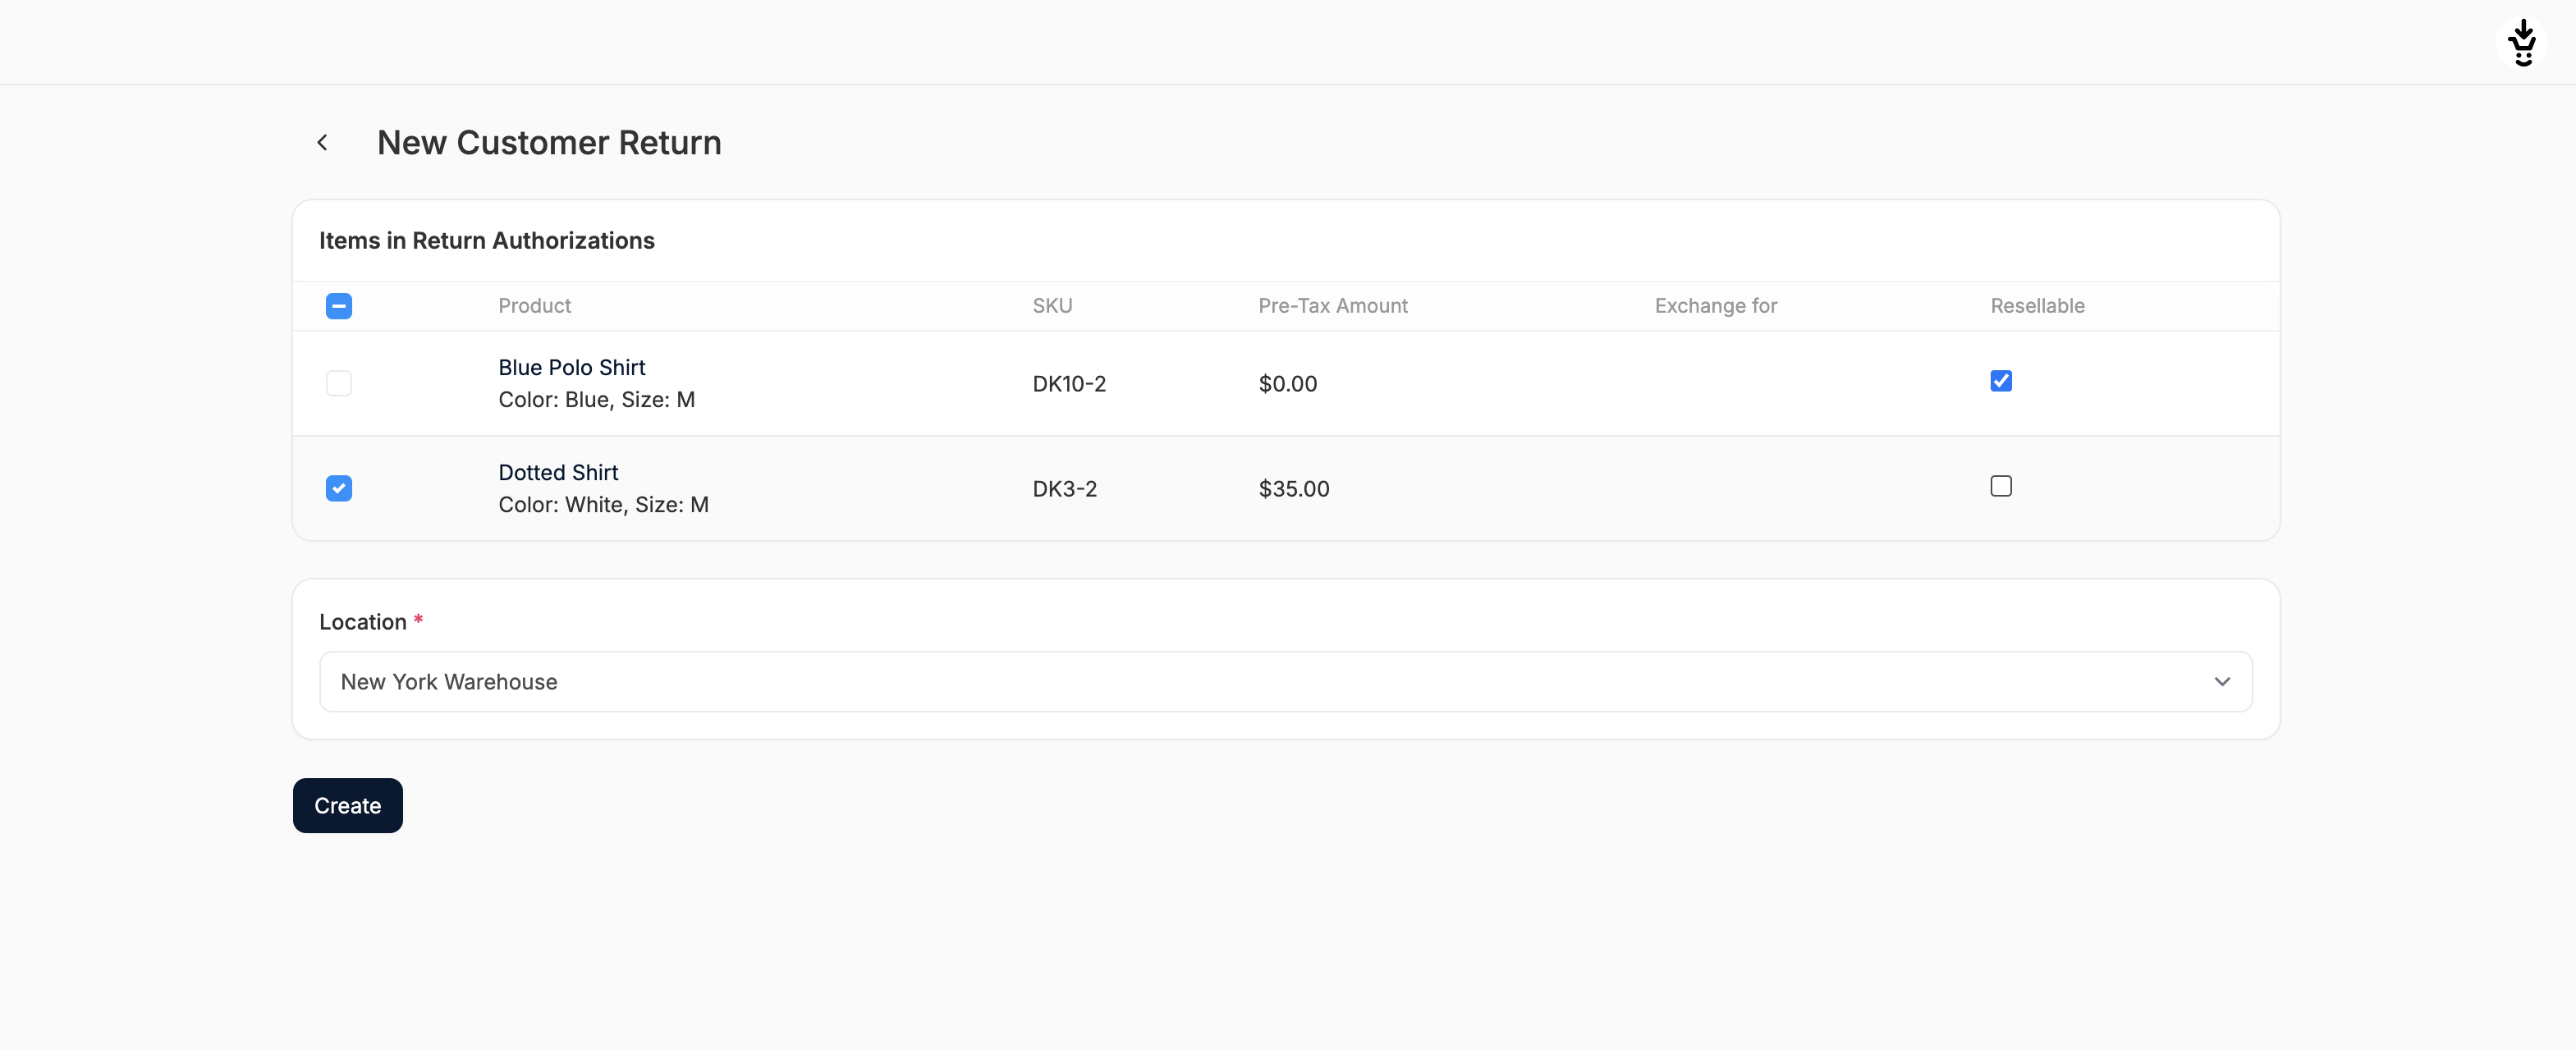 The form lists each item from the order. For each item, configure:
* **Include in return**: check if the item has been returned
* **Product**: name and variant (read-only)
* **SKU**: stock keeping unit (read-only)
* **Pre-tax Amount**: non-zero if part of the RA, 0 if not included (read-only)
* **Exchange for**: variant selected for exchange (if applicable) (read-only)
* **Resellable**: check if the item can be restocked; unchecked items won’t be returned to inventory
Below the table, select:
* **Location**: confirm the stock location the items are being returned to
Click **Create** to finalize the Customer Return.
You’ll then be returned to the order overview page again, and a new Customer Returns section will appear above the Return Authorizations section.
The form lists each item from the order. For each item, configure:
* **Include in return**: check if the item has been returned
* **Product**: name and variant (read-only)
* **SKU**: stock keeping unit (read-only)
* **Pre-tax Amount**: non-zero if part of the RA, 0 if not included (read-only)
* **Exchange for**: variant selected for exchange (if applicable) (read-only)
* **Resellable**: check if the item can be restocked; unchecked items won’t be returned to inventory
Below the table, select:
* **Location**: confirm the stock location the items are being returned to
Click **Create** to finalize the Customer Return.
You’ll then be returned to the order overview page again, and a new Customer Returns section will appear above the Return Authorizations section.
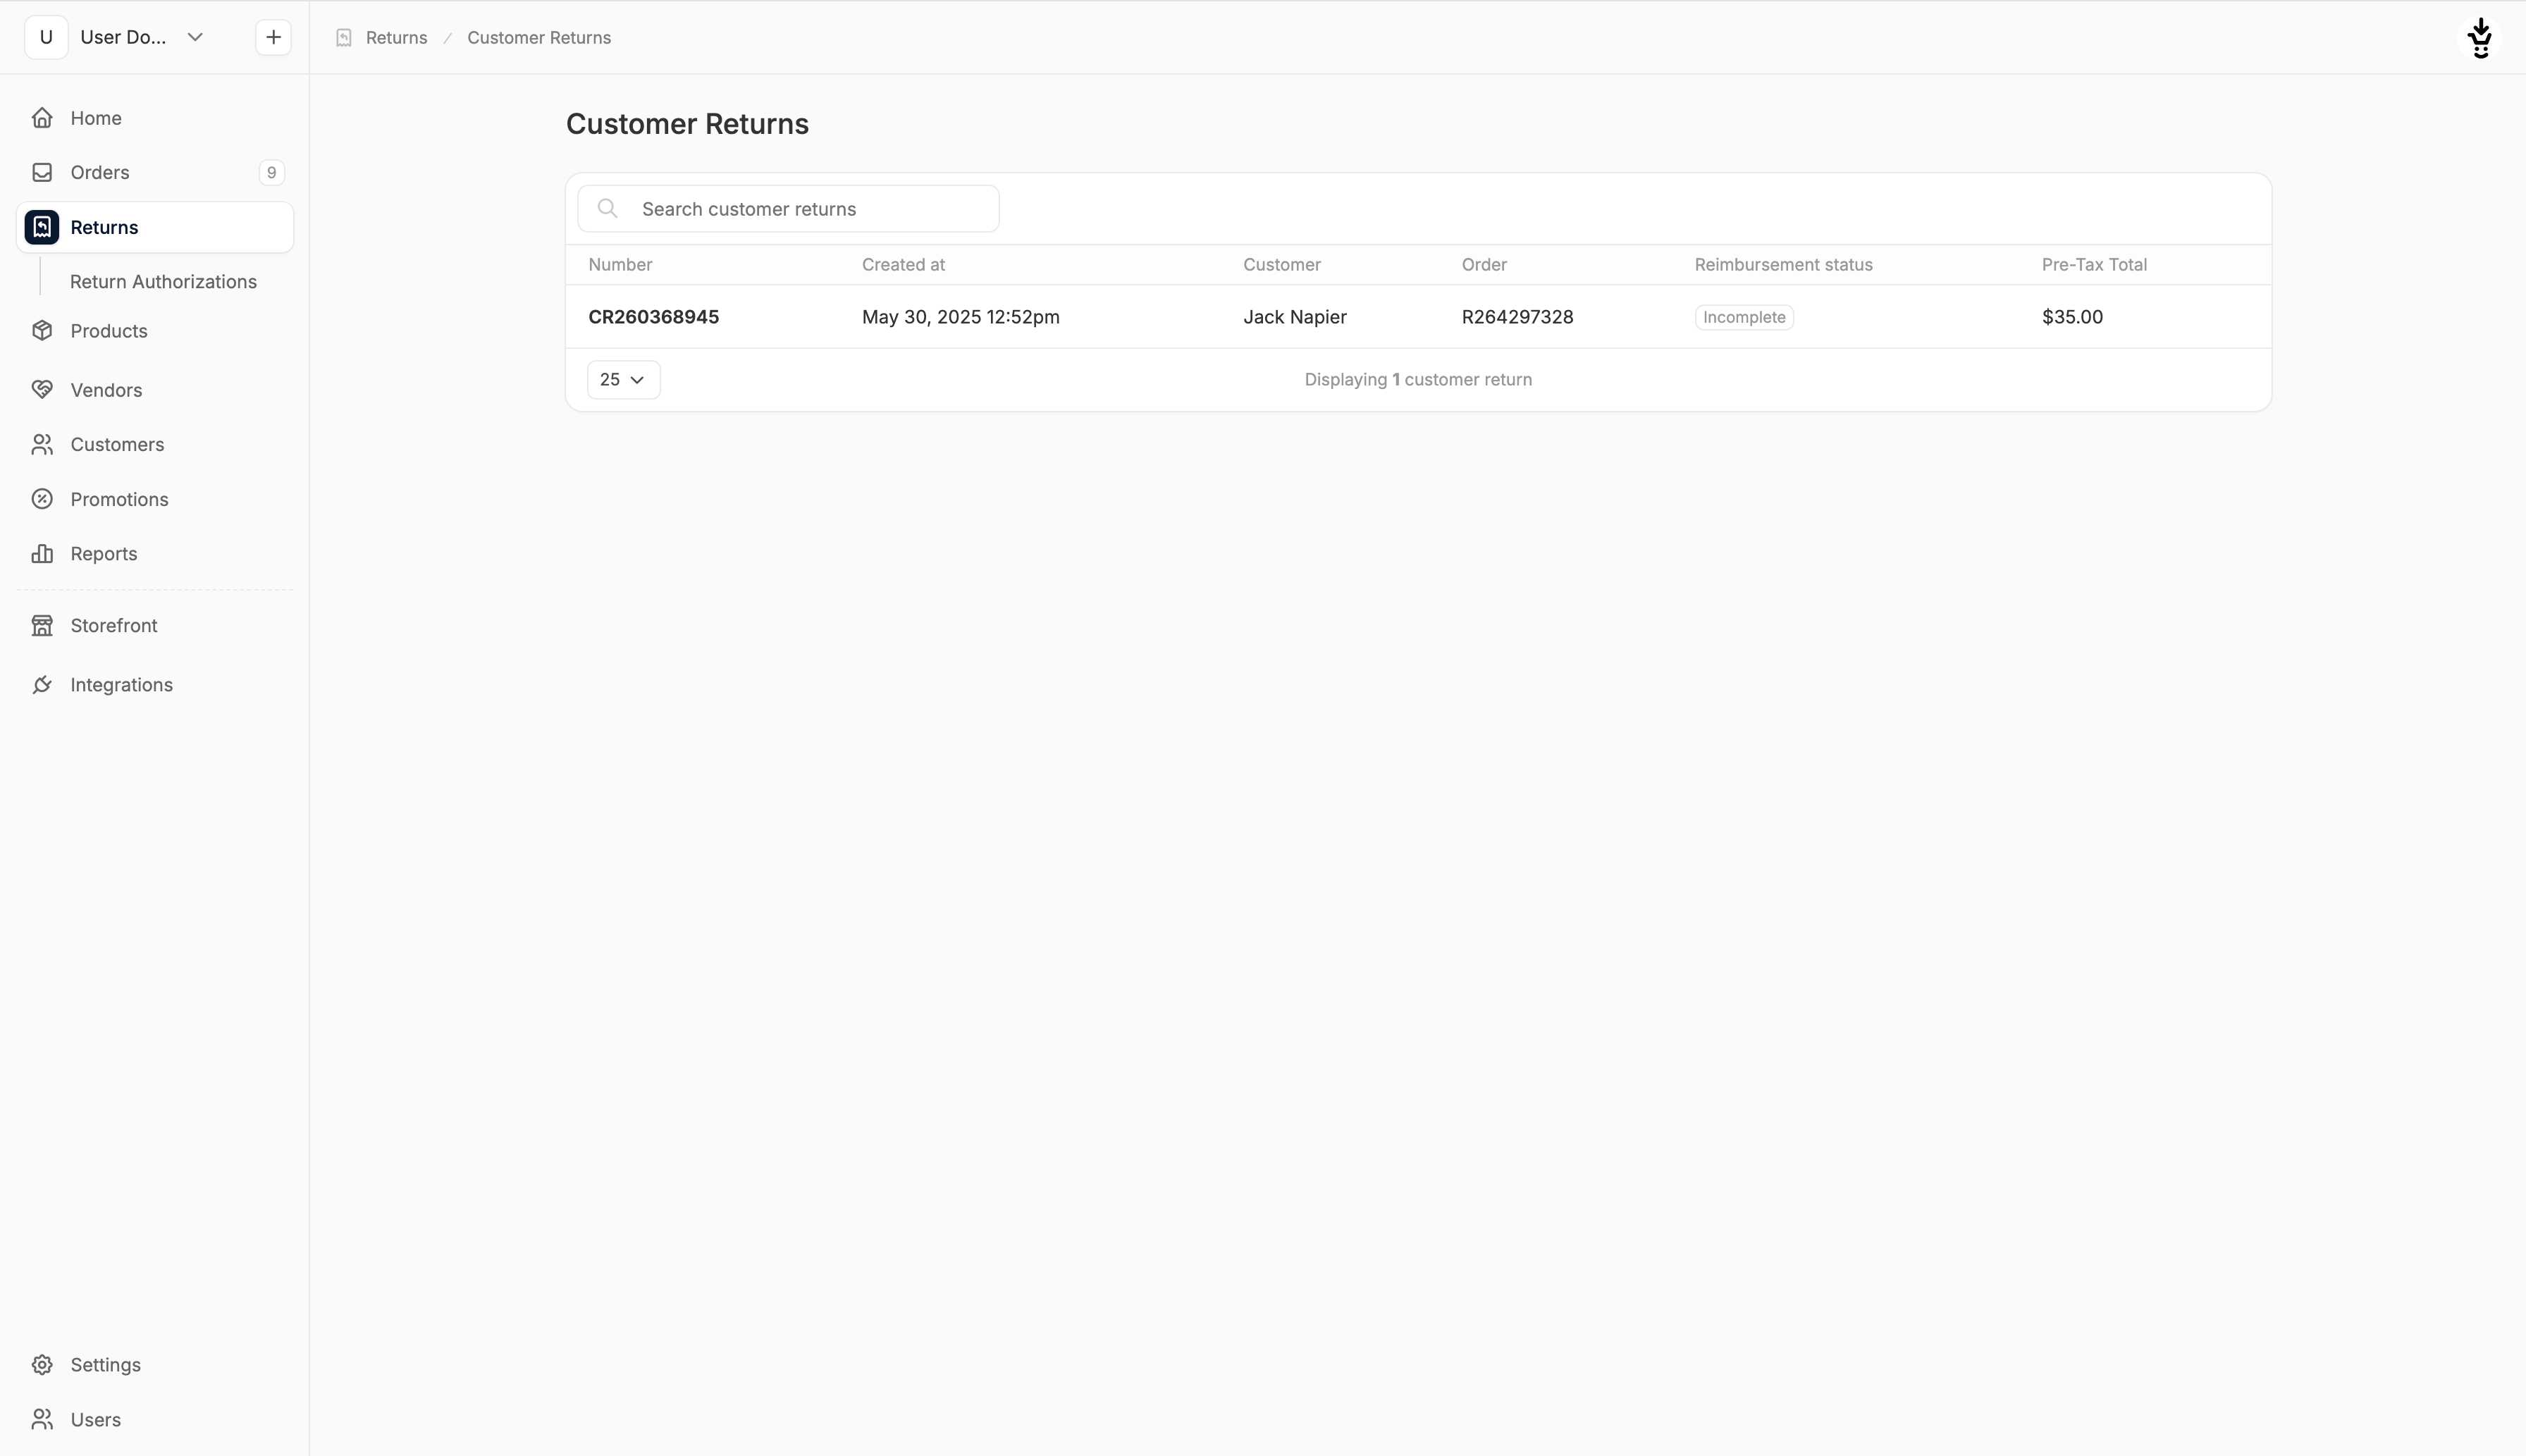
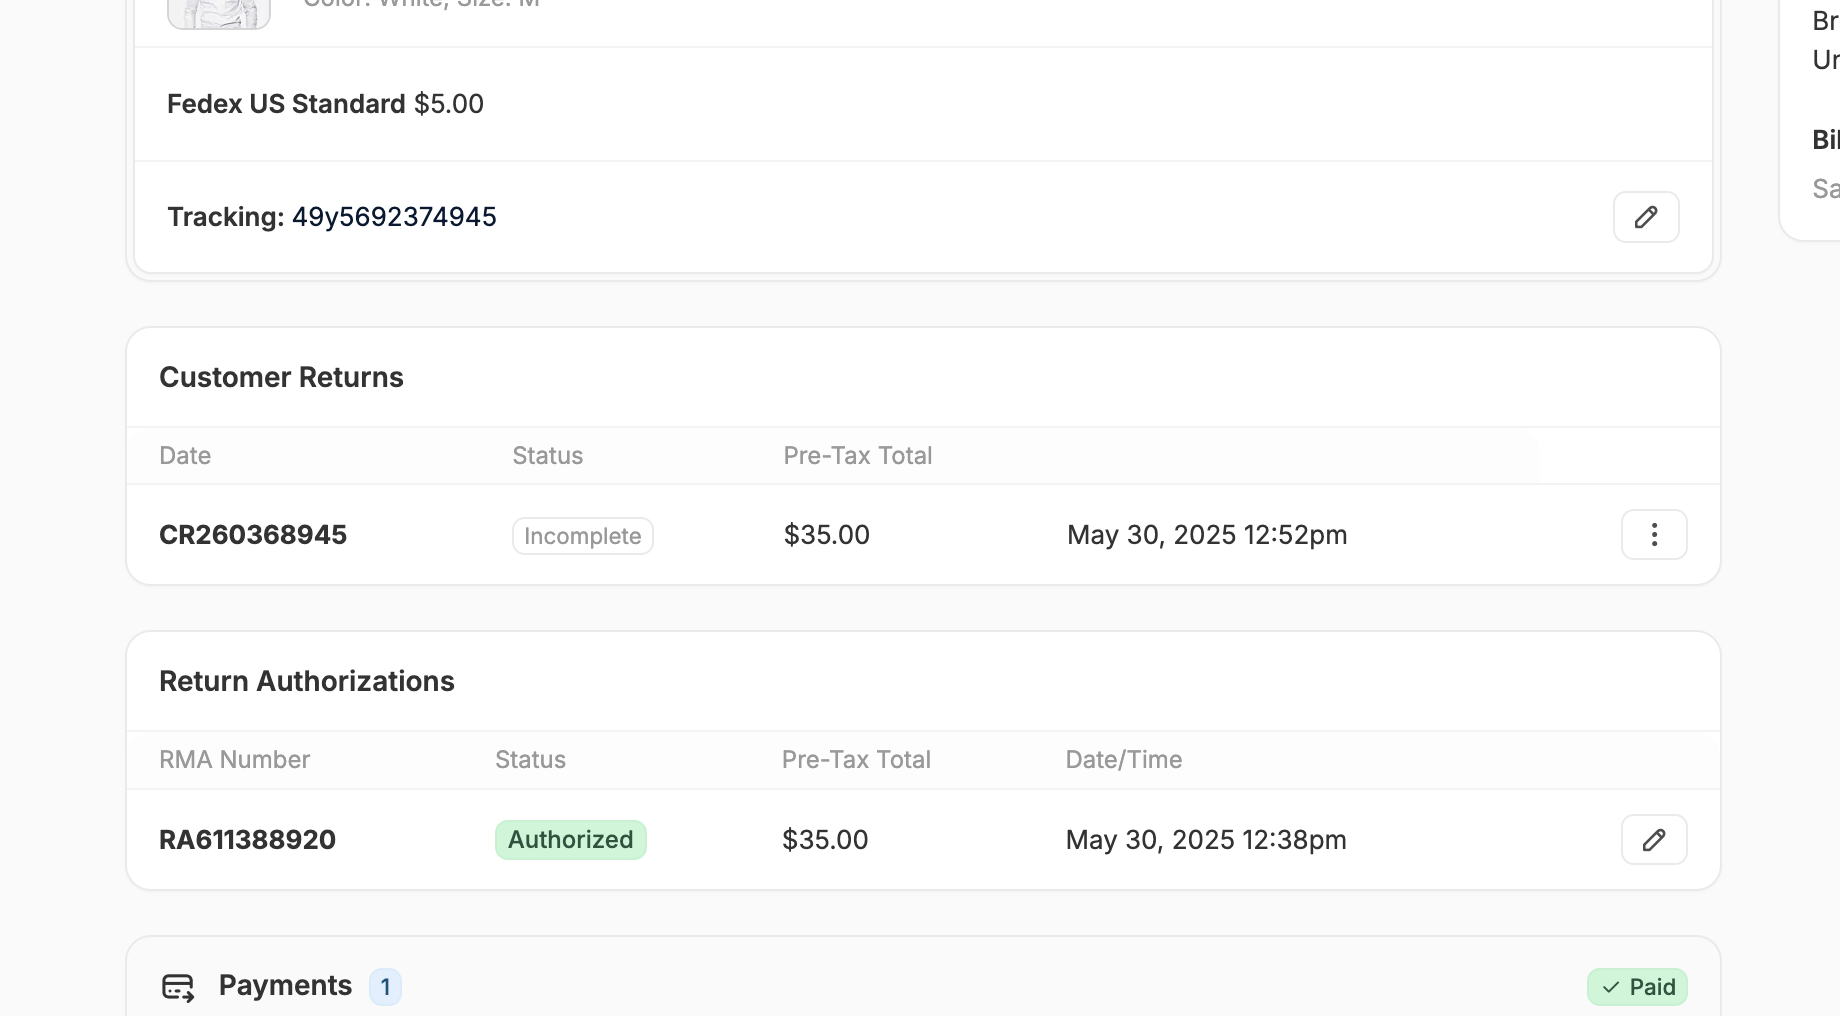 The return will also now be visible in the Returns tab and can be edited from either location.
 ## 3) Reimburse the Customer
Once a customer return has been logged, you can process the refund or exchange.
In the Customer Returns section, click the three-dot menu and select **Create Reimbursement**.
## 3) Reimburse the Customer
Once a customer return has been logged, you can process the refund or exchange.
In the Customer Returns section, click the three-dot menu and select **Create Reimbursement**.
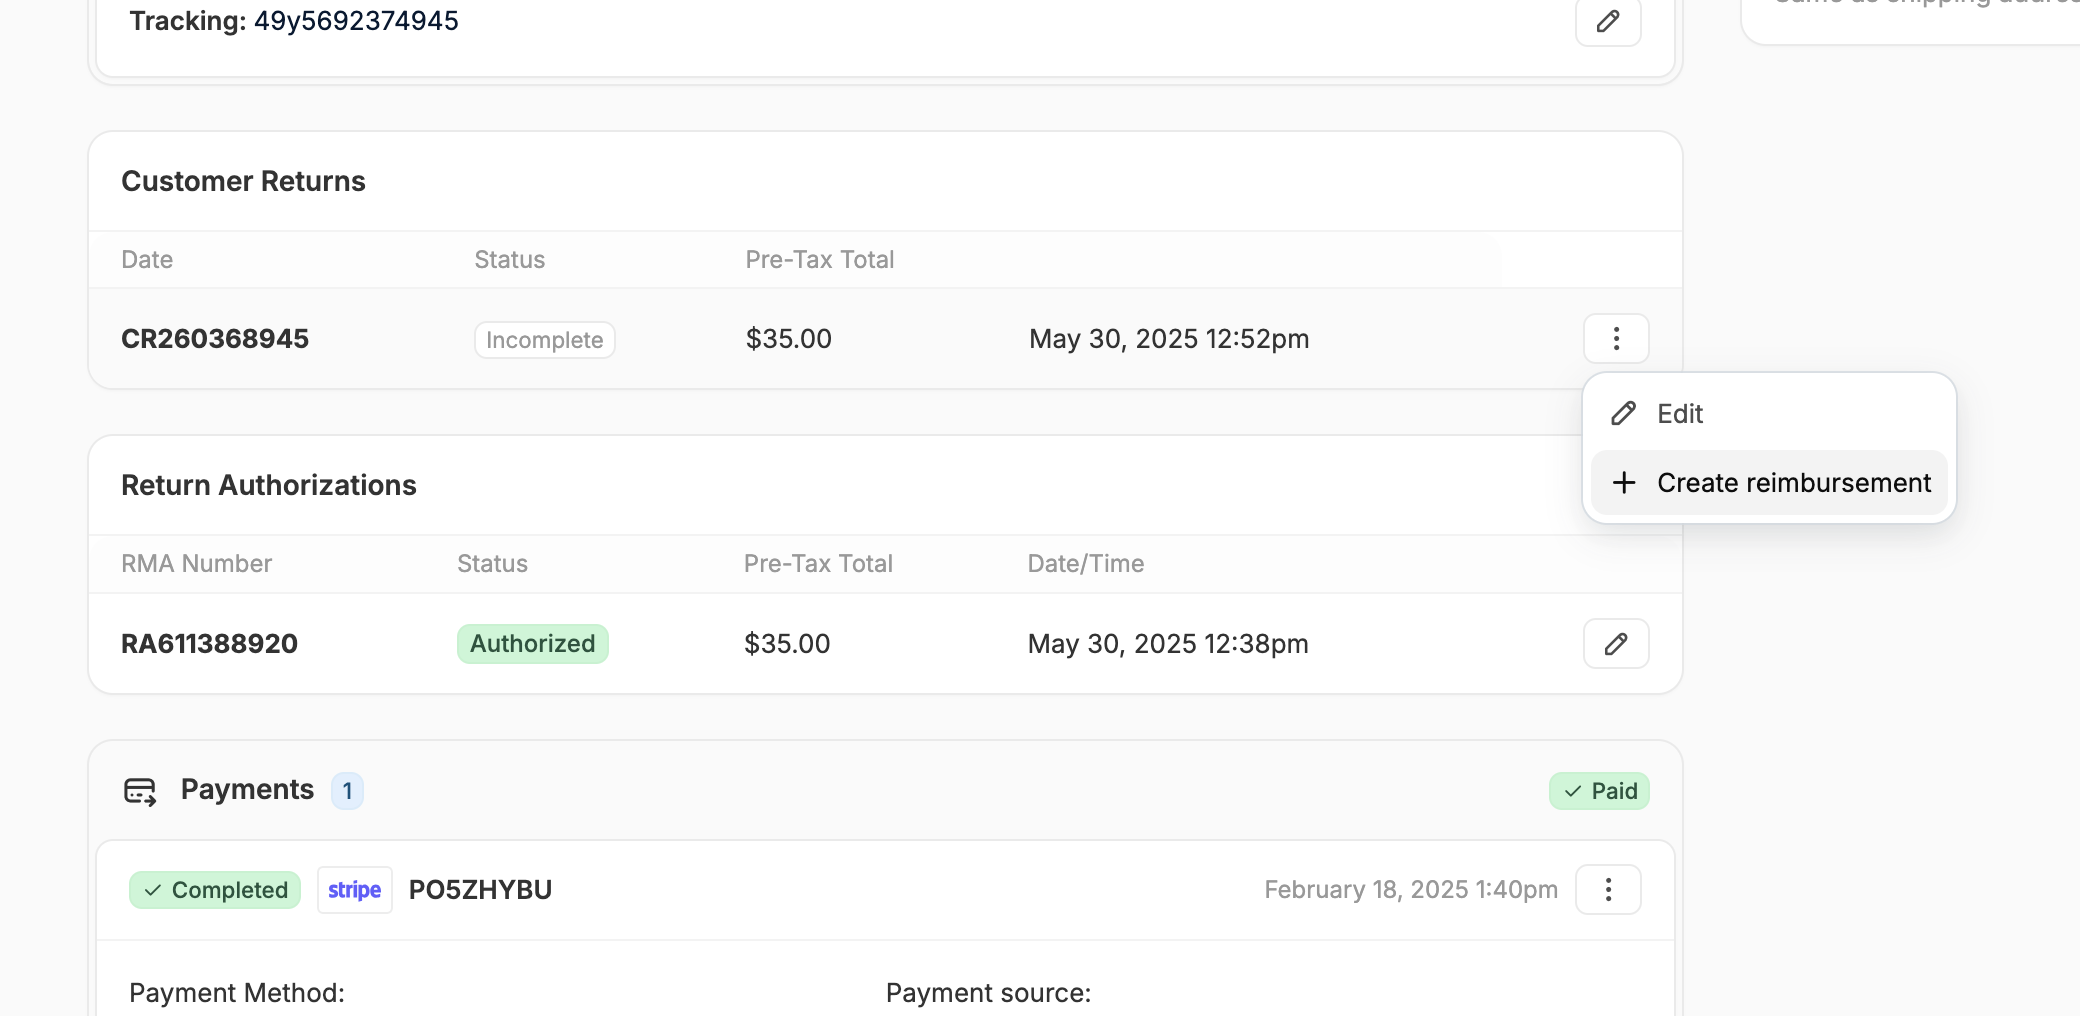 This will create the reimbursement immediately and redirect you to the reimbursement form.
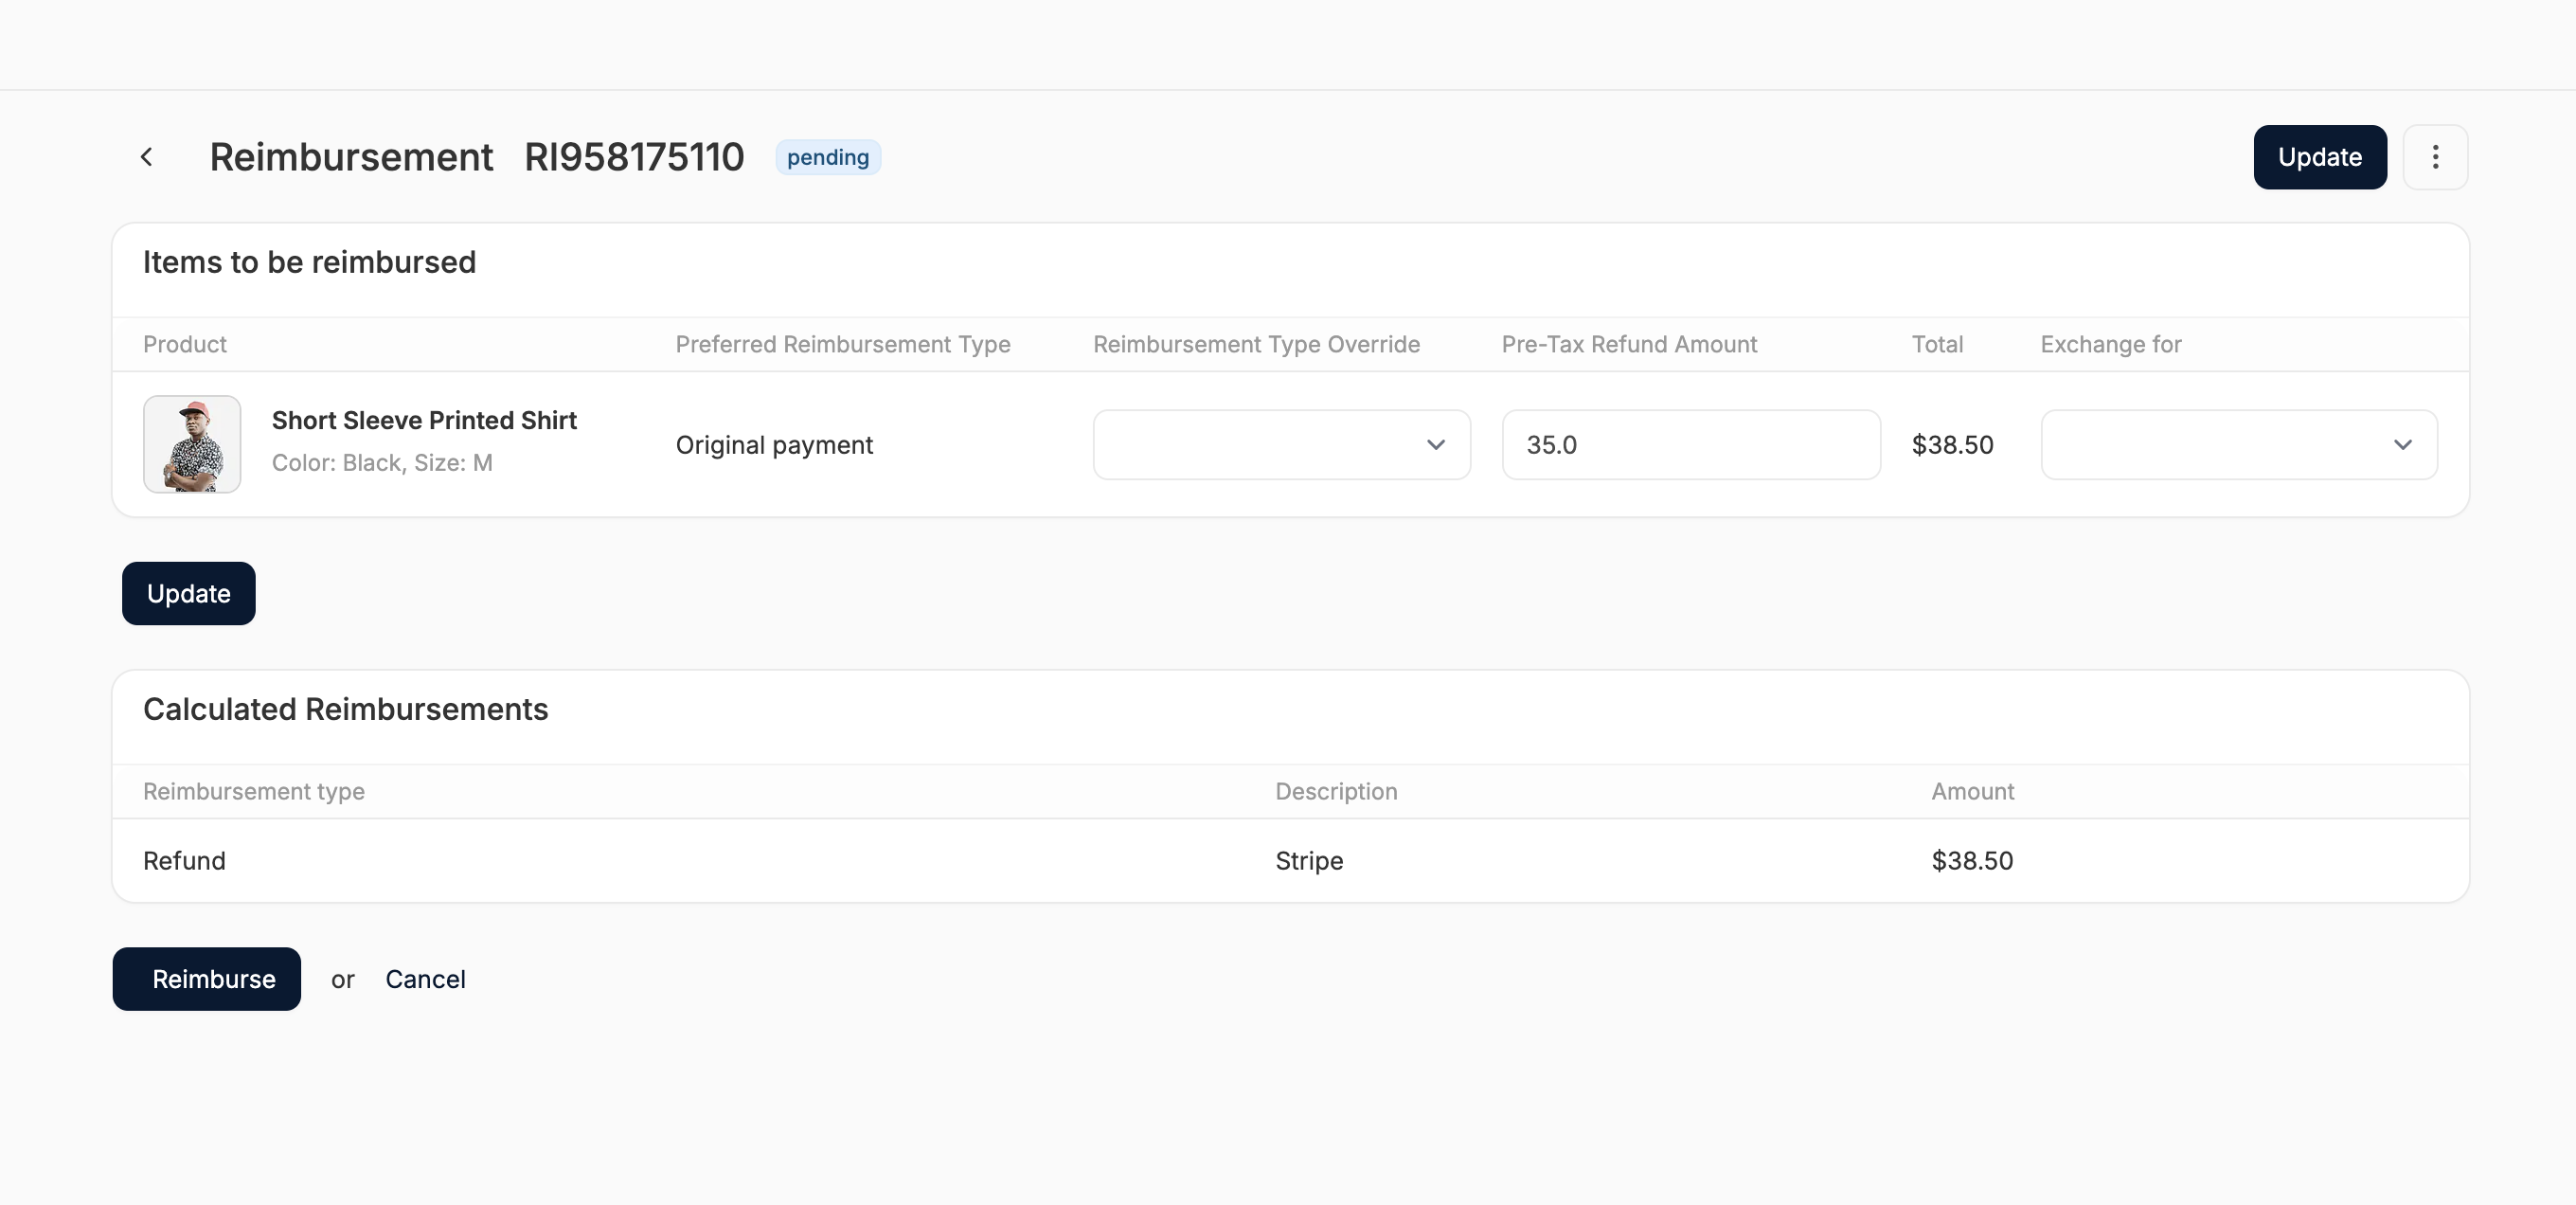 Here you can review the items to be reimbursed, and override the reimbursement type or the exchange variant if necessary (e.g., reimburse with store credits instead of the original payment).
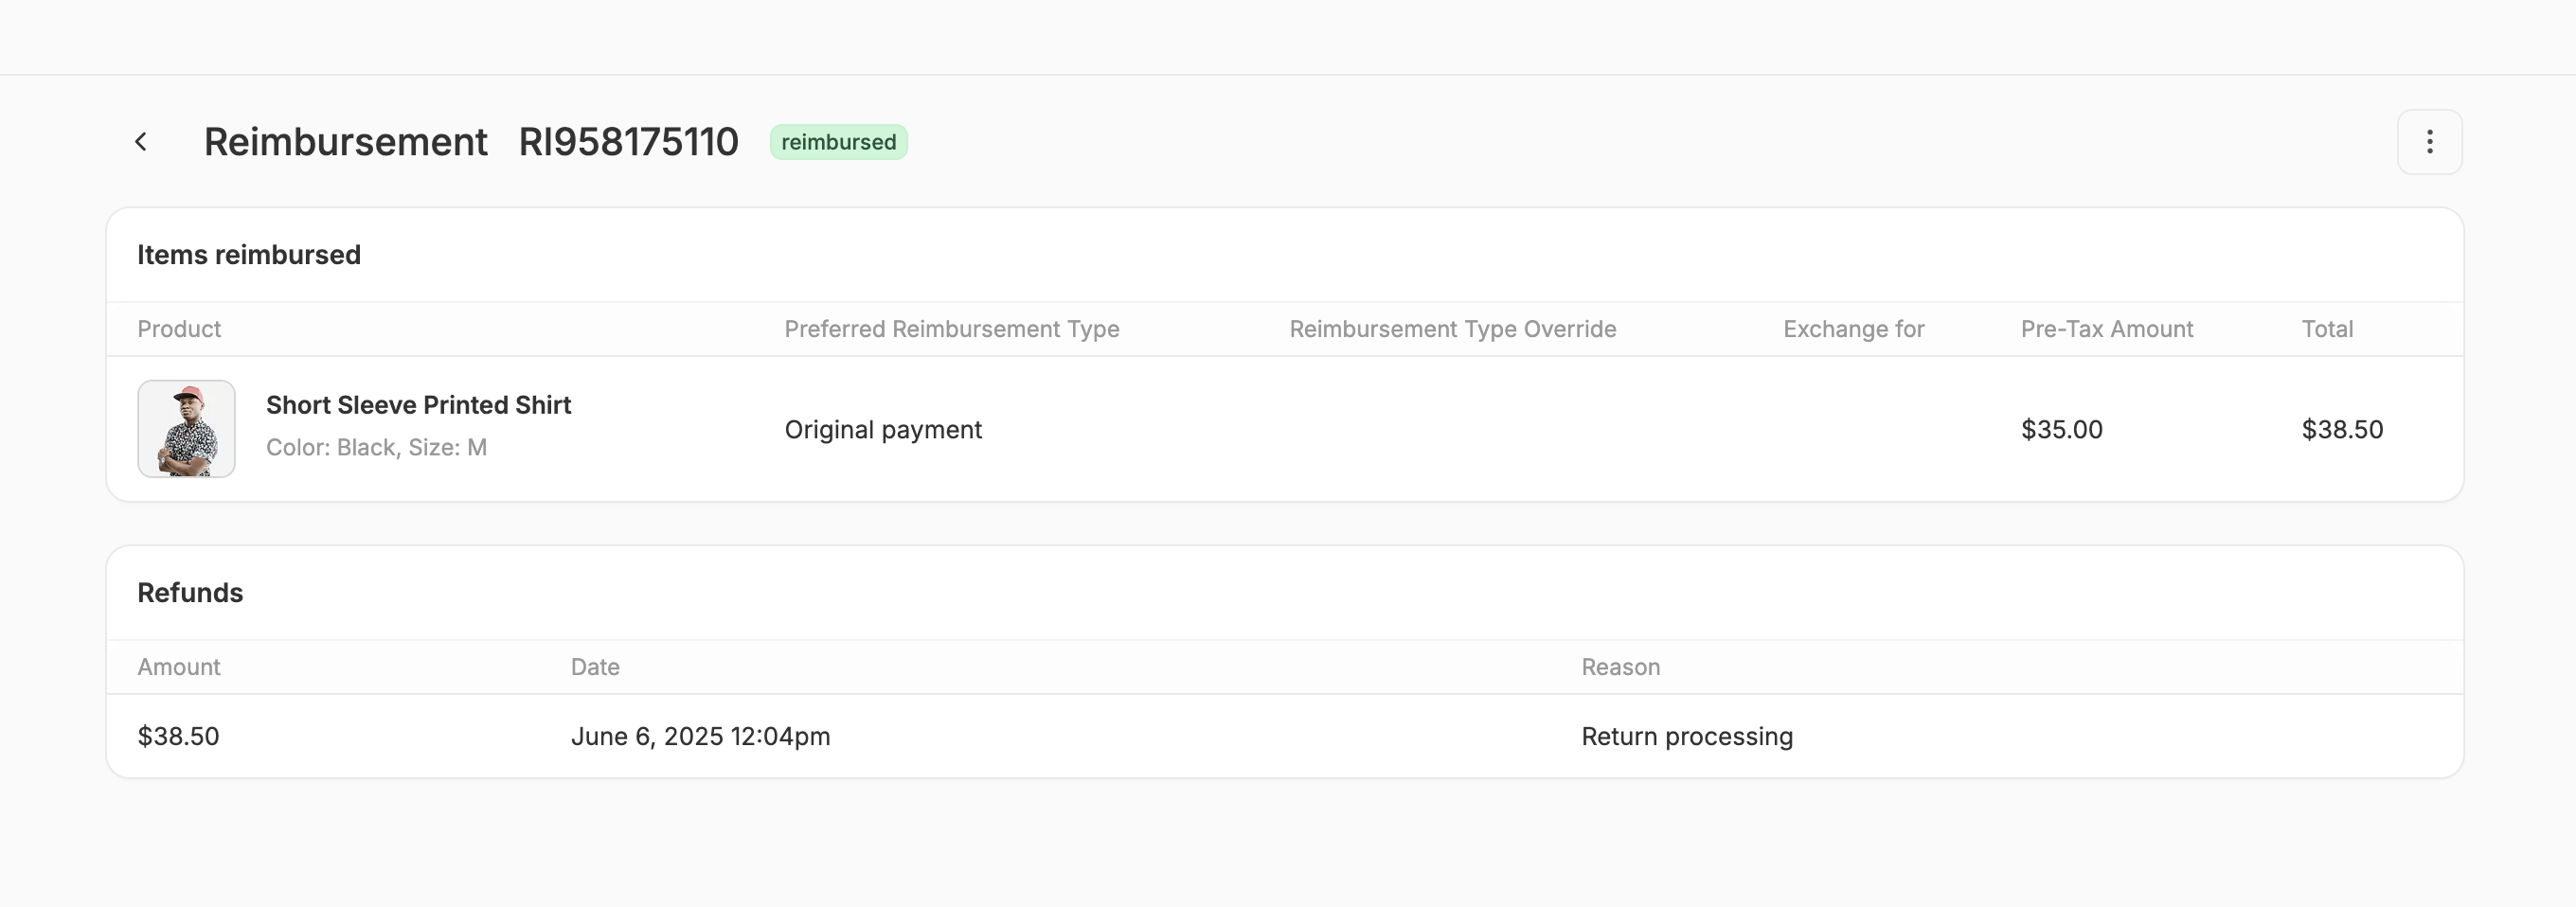
Click **Reimburse** to finalize the return process:
* If it’s a refund, the customer will be reimbursed via the selected method.
* If it’s an exchange, a new shipment will be created on the order and can be fulfilled like any other shipment.
Here you can review the items to be reimbursed, and override the reimbursement type or the exchange variant if necessary (e.g., reimburse with store credits instead of the original payment).
Click **Reimburse** to finalize the return process:
* If it’s a refund, the customer will be reimbursed via the selected method.
* If it’s an exchange, a new shipment will be created on the order and can be fulfilled like any other shipment.
 ### Alternative Method
If you’d like to review the Customer Return before reimbursing the customer, you can instead select **Edit** from the three-dot menu, or just click on the Customer Return itself.
This will redirect you to a Customer Return summary that includes a Reimbursements section.
### Alternative Method
If you’d like to review the Customer Return before reimbursing the customer, you can instead select **Edit** from the three-dot menu, or just click on the Customer Return itself.
This will redirect you to a Customer Return summary that includes a Reimbursements section.
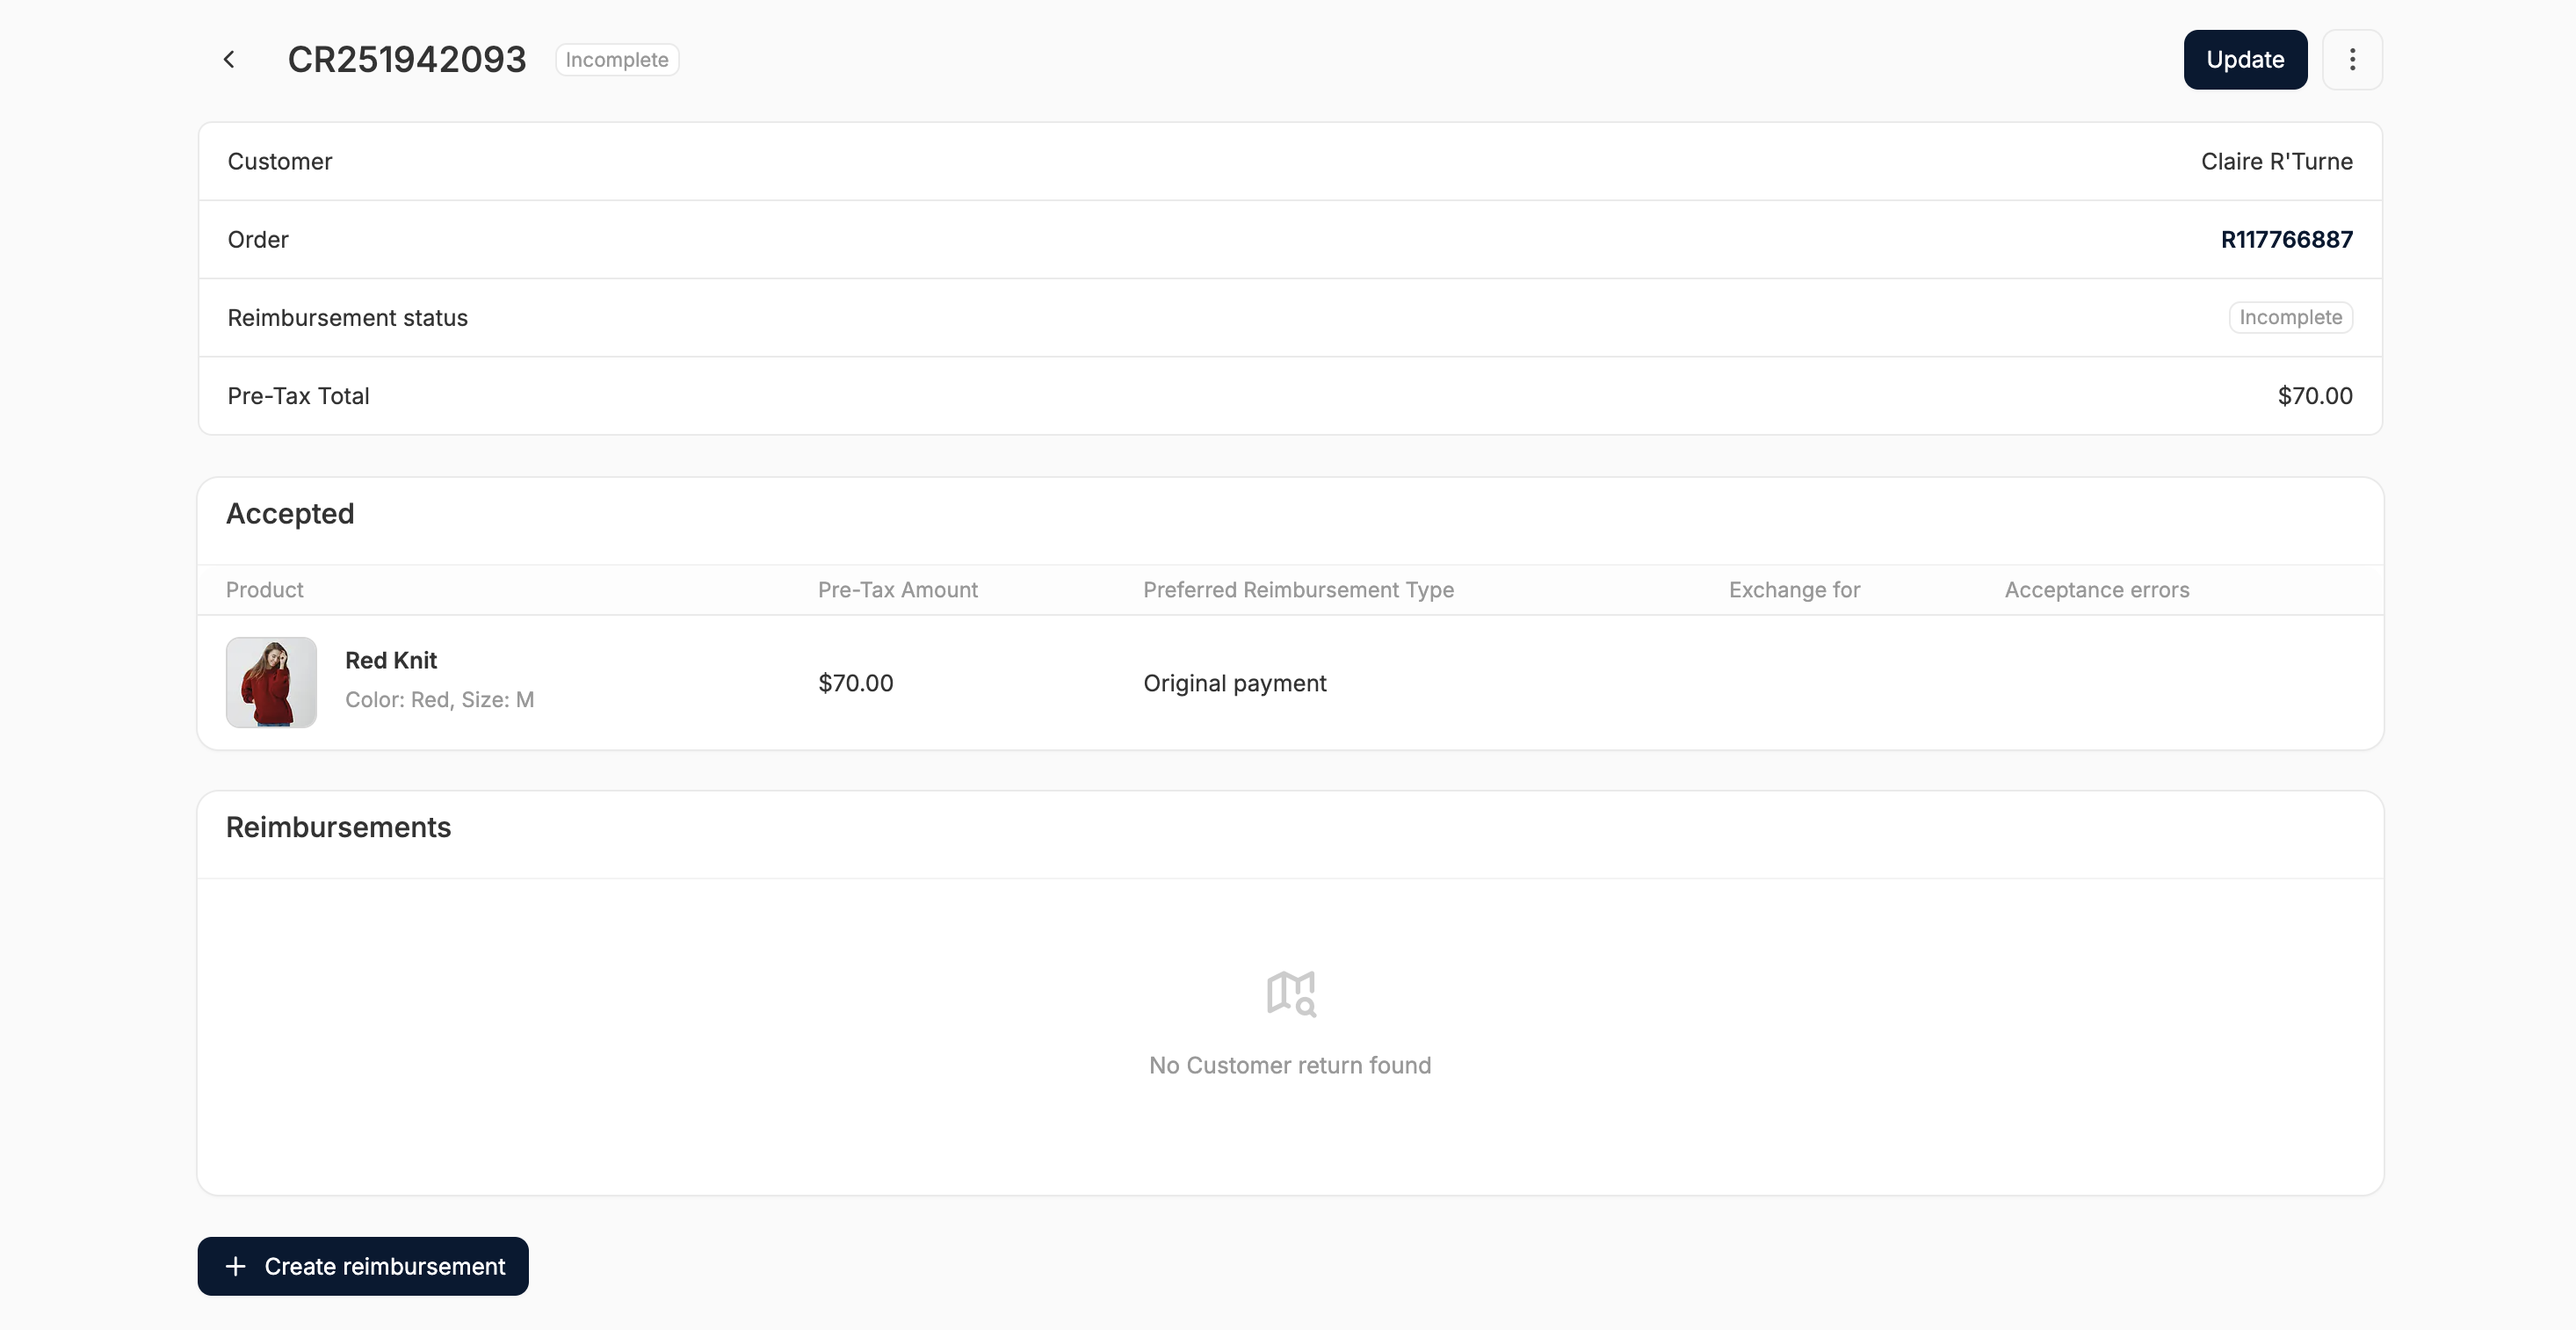 This form displays:
* Customer name
* Order number
* Reimbursement status
* Pre-tax total
* Line item details:
* Product
* Amount
* Reimbursement Type
* Exchange For
* Acceptance Errors
At the bottom of the page you’ll find the **Reimbursements** section.
Simply click **Create Reimbursement** and follow the steps outlined previously.
This form displays:
* Customer name
* Order number
* Reimbursement status
* Pre-tax total
* Line item details:
* Product
* Amount
* Reimbursement Type
* Exchange For
* Acceptance Errors
At the bottom of the page you’ll find the **Reimbursements** section.
Simply click **Create Reimbursement** and follow the steps outlined previously.